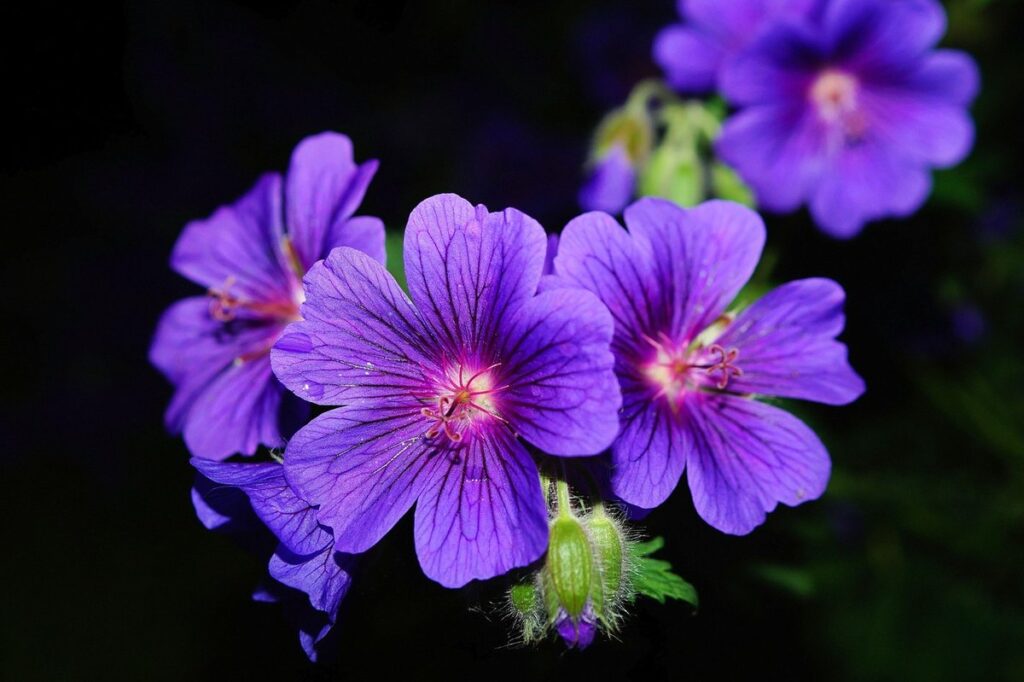
Geraniums are one of those beautiful flowering plants that can add a pop of color to any garden or indoor space, but did you know that you can easily propagate them from cuttings? If you’re looking to increase your plant collection and share rare varieties with friends, then this is the perfect technique for you. With a little patience and the right tips, you’ll be enjoying more geraniums in no time. This article will walk you through the step-by-step process of propagating geranium from cuttings, including how to select healthy cuttings, apply rooting hormone, and provide the best care after propagation. We’ll cover everything you need to know to successfully multiply your favorite geranium varieties and start enjoying more vibrant blooms.
Benefits of Propagation
By taking cuttings from existing geranium plants, you can enjoy a virtually endless supply of vibrant blooms without needing to purchase more expensive seeds. We’ll explore the benefits of this propagation method in greater detail here.
Why Choose Cuttings?
Propagating geranium through cuttings is an attractive option for many growers, and for good reason. Not only is it a cost-effective method, but it also offers the added benefit of speed. Unlike seed propagation, which can take weeks or even months to produce results, cuttings allow you to quickly multiply your favorite varieties.
One major advantage of using cuttings is that they ensure genetic identity. When you propagate from seeds, there’s always a risk that the resulting plants may not retain the exact characteristics of the parent plant. With cuttings, however, you can be confident that the new plants will have the same traits as the mother plant, including its unique color, shape, and fragrance.
In terms of cost-effectiveness, cuttings are also a winner. Seeds can be expensive, especially if you’re looking for specific varieties or high-quality seed stock. Cuttings, on the other hand, are often free or low-cost, depending on how you obtain them. Plus, they allow you to quickly scale up your geranium production, which can lead to significant savings over time.
Understanding Plant Parentage
When selecting cuttings for propagation, it’s essential to consider the parent plant’s characteristics. This might seem like a no-brainer, but it’s surprising how often gardeners overlook this crucial step. By choosing cuttings with desirable traits, you can increase the chances of successfully propagating healthy and thriving plants.
For instance, if you’re aiming for a particular flower color or pattern, pick cuttings from parent plants that exhibit those characteristics. Research has shown that cuttings taken from parent plants with desirable traits have a higher success rate in propagation. This is because they possess the genetic makeup to express those traits themselves.
To get started, observe your existing geranium plants and note their strengths and weaknesses. Identify which ones produce the most vibrant flowers, or have particularly robust growth habits. Use these observations to inform your selection of cuttings for propagation. Remember that it’s not just about aesthetics; a parent plant’s overall health and vigor also play a significant role in determining the success of your propagated plants.
Environmental Factors
When propagating geranium cuttings, environmental factors play a crucial role in determining the success rate. Temperature is one of the most significant factors to consider. Geraniums prefer warm temperatures between 65-75°F (18-24°C) for optimal rooting. If the temperature drops below 55°F (13°C), the cutting’s ability to root will be significantly reduced.
Humidity is another essential factor in geranium propagation. Cuttings thrive in humid environments, typically above 50%. You can cover the pot with a clear plastic bag or cloche to maintain high humidity levels and promote rooting.
Lighting also affects the success of geranium cutting propagation. While geraniums prefer bright, indirect light, direct sunlight can cause the leaves to become scorched and hinder rooting. Place the cuttings near an east- or west-facing window for optimal results.
In terms of specific conditions, a propagation room with controlled temperature (around 70°F or 21°C) and humidity levels (60-70%) will provide ideal conditions for geranium cutting propagation. If you’re propagating indoors, ensure good air circulation around the cuttings to prevent fungal diseases.
Preparing the Cutting Material
Now that you have some healthy geranium cuttings, it’s time to prepare them for rooting. In this next step, we’ll cover how to properly trim and process your cuttings.
Choosing Healthy Cuttings
When selecting cuttings from mature geranium plants for propagation, it’s essential to choose stems with optimal quality and size. Look for sturdy stems with at least two sets of leaves, as this will ensure the cutting has enough energy to develop roots.
Avoid taking cuttings from weak or spindly growth, as these may not have the necessary reserves to survive and thrive. Instead, opt for robust, healthy-looking stems with a diameter of around 1-2 cm (0.5-1 in). This size range will give you the best chance of success.
Check the stem’s nodes, as well, where leaves meet the stem. Choose cuttings with nodes that are relatively close together, ideally within an inch or so apart. This proximity allows for more efficient water and nutrient transfer between nodes, promoting healthy root development. It’s also crucial to select cuttings from areas of the plant that receive ample light, as this will encourage vigorous growth and minimize the risk of disease or pests. By carefully selecting your cutting material, you’ll set yourself up for a higher success rate when propagating geraniums from stem cuttings.
Removing Lower Leaves
When removing lower leaves from your cutting material, it’s essential to do so carefully and with intention. This process not only helps prevent waterlogged stems but also promotes healthy rooting.
To begin, gently grasp the cutting between your thumb and index finger, just above where you plan to remove the lower leaves. Inspect the stem for any weak or damaged areas, making a note of which leaves are directly attached to these spots. It’s crucial to remove the entire leaf at its base, as only trimming off the leaf tip can lead to further issues.
As a general rule, aim to leave about 2-3 inches of bare stem between each set of nodes (the points where leaves meet the stem). This allows for optimal water absorption and encourages root growth. To avoid harming the node itself, use a clean, sharp pair of scissors or pruning shears to make a slight notch in the leaf’s base before gently twisting it counterclockwise to release.
Remember that some lower leaves may be more securely attached than others. Take your time, working patiently to remove each one without causing unnecessary damage to the stem or node.
Rooting Hormone Application
Rooting hormone is a game-changer for geranium cuttings. It’s a powdered or liquid substance that contains auxins, which are plant growth regulators that stimulate root development. By applying rooting hormone to the cutting, you can significantly increase its chances of successful propagation.
When choosing a rooting hormone, look for one that contains indole-3-butyric acid (IBA) or naphthaleneacetic acid (NAA). These auxins are specifically designed to promote root growth in cuttings. Dip the stem end of your geranium cutting into the powder or liquid according to the manufacturer’s instructions. For most rooting hormones, a gentle dusting or dip is all you need.
Some gardeners swear by soaking their cuttings in a solution of 1-2 teaspoons of rooting hormone per liter of water for 10-15 minutes before planting. This can help to ensure that the roots have time to develop before the cutting is transplanted into soil. Experiment with different application methods and concentrations to find what works best for you and your geranium cuttings.
Propagation Techniques
To propagate geraniums from cuttings, you’ll want to focus on rooting techniques that promote healthy growth and successful plant establishment. We’ll cover the methods inside!
Water Rooting Method
Water is an excellent medium for rooting geranium cuttings, and it’s surprisingly simple to do. To start with water rooting method, you’ll need a glass of clean water and a few healthy geranium stems from which you’ve taken cuttings.
First, prepare the cutting by removing lower leaves down to about two nodes to prevent bacterial growth in the water. Dip the base of the stem into some root hormone powder or liquid (this will increase your chances of successful rooting). Then gently place the cutting into a glass of fresh water, ensuring that at least two nodes are submerged.
Now comes the waiting game – monitor the water level and top it up as needed to keep the nodes covered. You’ll start to see roots developing within 7-14 days. Be patient and make sure the water is changed every week or so to prevent bacterial growth. Once roots have developed, you can transfer the cutting into a pot filled with well-draining soil, taking care not to damage those fragile new roots. Keep the newly potted geranium in a bright spot but protected from direct sunlight until it’s fully established – and congratulations, you’ve successfully propagated your geranium plant using the water rooting method!
Soil Propagation Method
Planting geranium cuttings directly into soil can be a bit more challenging than using a propagation tray, but with the right techniques and precautions, you can achieve high success rates. To start, prepare a potting mix specifically designed for seed starting or propagation. Moisten the mix gently but thoroughly to prevent compacting it.
Insert the cutting about 1-2 inches deep into the soil, making sure not to compress the mix further. Firm the soil around the cutting by gentle tamping with your fingers, taking care not to damage any delicate roots that may have formed.
Overwatering is a common issue when planting cuttings directly into soil. To avoid this, check the moisture level of the potting mix regularly and ensure it’s only moist but not waterlogged. A well-draining potting mix can help prevent root rot caused by excessive moisture. Keep the cutting in bright, indirect light until roots develop.
Monitor your cutting closely for signs of growth, such as leaf development or stem elongation, which typically occurs within 2-3 weeks after planting. Water sparingly but thoroughly during this time to encourage healthy root establishment.
Alternative Methods (e.g., Hydroponics)
When it comes to propagating geranium cuttings, you may want to consider alternative methods that can offer advantages over traditional techniques. One such method is hydroponics, which involves growing plants in a nutrient-rich solution rather than soil.
Hydroponics allows for precise control over the nutrients and water levels, making it an ideal choice for sensitive species like geraniums. This method also enables faster growth rates and increased yields, as the roots are able to absorb nutrients more efficiently. However, hydroponic systems can be costly and require regular maintenance.
Another alternative method is aeroponics, which is similar to hydroponics but uses a fine mist of water and nutrients instead of a full solution. This method is also known for its efficiency and faster growth rates, making it suitable for commercial growers or those looking to propagate large quantities of geraniums.
In terms of equipment costs, aeroponics can be more expensive than traditional propagation methods, but the initial investment can pay off in the long run with increased yields and reduced water consumption.
Post-Propagation Care
Now that you’ve successfully rooted your geranium cutting, it’s time to learn how to care for your new plant during its crucial post-propagation phase. Proper care will ensure a strong and healthy geranium grows from your cuttings.
Providing Optimal Conditions
After propagating geranium cuttings, it’s crucial to provide them with optimal conditions for successful establishment. The right light spectrum, temperature, and watering schedule will make all the difference in their growth.
When it comes to lighting, newly propagated geraniums require bright, indirect light. Placing them near an east- or west-facing window is ideal, as direct sunlight can cause burning. Aim for 12-14 hours of supplemental lighting if you’re growing indoors, especially during the winter months when natural light may be scarce.
Temperature control is also vital. Geranium cuttings thrive in temperatures between 65°F to 75°F (18°C to 24°C), which is slightly cooler than mature plants prefer. Avoid placing them near heating vents or radiators, as this can cause stress and inhibit growth.
Watering schedules should be more frequent for newly propagated geraniums, typically every 2-3 days during the first few weeks. However, avoid overwatering, as this can lead to root rot and other issues. Monitor the soil moisture by sticking your finger into it; if it feels dry, it’s time to water.
Remember that these conditions may vary depending on the specific geranium variety and climate you’re growing in. Keep a close eye on your plants’ response and adjust their environment accordingly for optimal results.
Transplanting and Pruning
Transplanting and pruning are crucial steps in maintaining the health and promoting healthy growth of your geranium cuttings. After propagation, geraniums need to be transplanted into individual pots or directly into a garden bed to continue their development.
When transplanting, handle the roots gently to avoid causing damage, which can lead to root rot and other issues. Water well before and after transplanting to minimize shock. A general rule of thumb is to wait at least two weeks for the roots to establish themselves in the new potting mix before watering sparingly.
Pruning is another essential aspect of post-propagation care. Regular pruning helps control the plant’s shape, promotes bushy growth, and encourages blooming. Remove any weak or damaged stems, allowing healthy branches to take over. This process also stimulates root development, which improves overall plant resilience. To achieve maximum results, prune your geraniums once every four to six weeks during their active growing seasons.
By implementing these transplanting and pruning techniques correctly, you can ensure a strong foundation for your newly propagated geranium cuttings.
Common Issues and Troubleshooting
As you begin to care for your newly propagated geranium cuttings, you may encounter some common issues that can impact their health and growth. One of the most significant challenges is root rot, which can be caused by overwatering or poor drainage. To prevent this, make sure the potting mix is well-draining and avoid getting water on the leaves or crown of the plant.
Another issue you may face is slow growth or lack of new leaves. This could be due to inadequate light, nutrient deficiencies, or root bound conditions. Check if your cuttings are receiving sufficient light (at least 4-6 hours direct sunlight) and consider repotting them in fresh potting mix with added fertilizers.
If you notice yellowing or droopy leaves, it’s likely a sign of underwatering or temperature fluctuations. Ensure the soil is consistently moist but not waterlogged, and maintain a comfortable temperature range between 65°F to 75°F (18°C to 24°C).
Monitor your cuttings regularly for these issues, and take corrective actions promptly to prevent further damage. By being aware of these common problems, you’ll be better equipped to provide the right care for your geranium cuttings to thrive.
Tips and Variations
Take your geranium propagation skills to the next level by learning our top tips for successful cuttings, as well as creative ways to mix things up.
Propagating Rare or Unusual Varieties
Propagating rare or unusual geranium varieties can be a thrilling experience for enthusiasts. These plants often possess unique characteristics that set them apart from their more common counterparts, making them highly sought after by collectors and hobbyists. However, propagating these varieties can be challenging due to their specific requirements.
One key consideration when propagating rare geraniums is understanding their growth habits and light requirements. For instance, some species may require bright indirect light, while others thrive in partial shade. Researching the specific needs of your plant is crucial for successful propagation.
Another challenge lies in obtaining the necessary cuttings or materials. Rare varieties often have limited availability, making it essential to explore alternative sources such as online forums, nurseries, or fellow growers. When collecting cuttings, be sure to choose healthy stems with at least two sets of leaves and a node for optimal rooting success.
Keep in mind that some rare geraniums may be more sensitive to temperature fluctuations, humidity levels, or even fertilization. Be prepared to adjust your propagation technique accordingly, and don’t hesitate to seek advice from experienced growers if needed.
Hybridization and Experimentation
Geranium from cuttings can be taken to new and exciting levels through hybridization and experimentation. One of the most intriguing aspects of working with geranium is the possibility of creating unique hybrids by combining different species or cultivars.
To experiment with hybridization, start by selecting two parent plants that complement each other in terms of growth habits, foliage, or flower color. Take stem cuttings from both plants, allowing them to root and establish themselves separately before merging them into a single pot. This process can lead to exciting results, such as new combinations of colors, scents, or plant shapes.
Some examples of successful hybrids include ‘Plum Dandy’, a cross between Zonal Geranium and Regal Geranium, which boasts vibrant pink flowers with deep red centers. Another example is the hybrid ‘Moulin Rouge’, created by combining a Pelargonium graveolens with a Pelargonium peltatum. The possibilities are endless when it comes to experimenting with different cutting techniques and plant combinations.
Record-Keeping for Repeat Success
Tracking your propagation results is crucial to refining your techniques and achieving consistent success rates with geranium cuttings. It’s not just about tossing a few cuttings into some water or soil and hoping for the best – it’s about experimentation, data collection, and continuous improvement.
As you experiment with different propagation methods, rooting hormones, lighting conditions, and temperature settings, keep a dedicated log or spreadsheet to record your findings. Note down the variables you’re testing, the number of cuttings used, and the outcomes in terms of success rates (how many rooted successfully) and failure rates (how many did not).
For example, let’s say you’ve tried rooting 20 geranium cuttings using a standard rooting hormone, but only 10% have taken root. You might hypothesize that the rooting hormone is not strong enough or that the light conditions are inadequate for optimal growth. By tracking your results, you can refine your approach and try new variables in subsequent experiments.
Regularly reviewing your propagation logs will help identify patterns and trends. Are certain propagation methods consistently yielding better results? Do specific lighting conditions seem to make a difference? With this data, you’ll be able to fine-tune your techniques and develop a proprietary set of best practices for geranium propagation from cuttings.
Frequently Asked Questions
Can I propagate any type of geranium from cuttings?
Yes, most geranium varieties can be propagated through cuttings, but some may be more challenging than others. It’s essential to research the specific propagation requirements for your desired variety and choose a method that suits their needs.
How do I know if my cuttings have rooted successfully?
Check for roots by gently tugging on the cutting. If it resists being pulled out of the soil, it’s likely rooted. You can also inspect the cutting for new growth or white root hairs, which indicate successful rooting.
Can I use a combination of both water and soil propagation methods?
Yes, you can experiment with combining both methods to increase your chances of success. Some growers find that using water for initial root development followed by transfer to soil promotes healthier roots and better establishment in the long run.
How often should I water my propagated geraniums during the first few weeks after transplanting?
Keep the soil consistently moist but not waterlogged, especially during the first few weeks after transplanting. Aim to provide about 1-2 inches of water per week, either from rainfall or supplemental irrigation, depending on your climate and environment.
What are some common mistakes to avoid when propagating geraniums from cuttings?
Some common pitfalls include over-handling the cuttings, using too much rooting hormone, and inadequate light or temperature conditions. Be sure to monitor your plants closely and adjust your care routine as needed to prevent these issues and ensure successful propagation.