Propagating Fittonia can be a game-changer for plant enthusiasts. Not only does it allow you to multiply your favorite species, but it also helps to ensure their continued health and vitality. However, propagation can be intimidating if you’re new to it – especially when working with delicate plants like Fittonia. The good news is that with the right techniques and a bit of know-how, anyone can master the art of propagating Fittonia. In this article, we’ll break down the basics of water rooting and potting mix preparation, providing you with everything you need to succeed. Whether you’re looking to share plants with friends or simply want to expand your own collection, our expert tips will have you propagating like a pro in no time!
Understanding Fittonia Basics
To get started, let’s first cover some essential basics of Fittonia plants, including their unique characteristics and growth habits. This foundation will help you better understand the propagation process that follows.
What is Fittonia?
Fittonia is a popular choice for indoor plants due to its striking appearance and low-maintenance requirements. Native to the tropical regions of Central and South America, it thrives in humid environments with partial shade. Its botanical name, Fittonia (genus) and Veitchii or Argenta (species), indicates its classification within the Acanthaceae family.
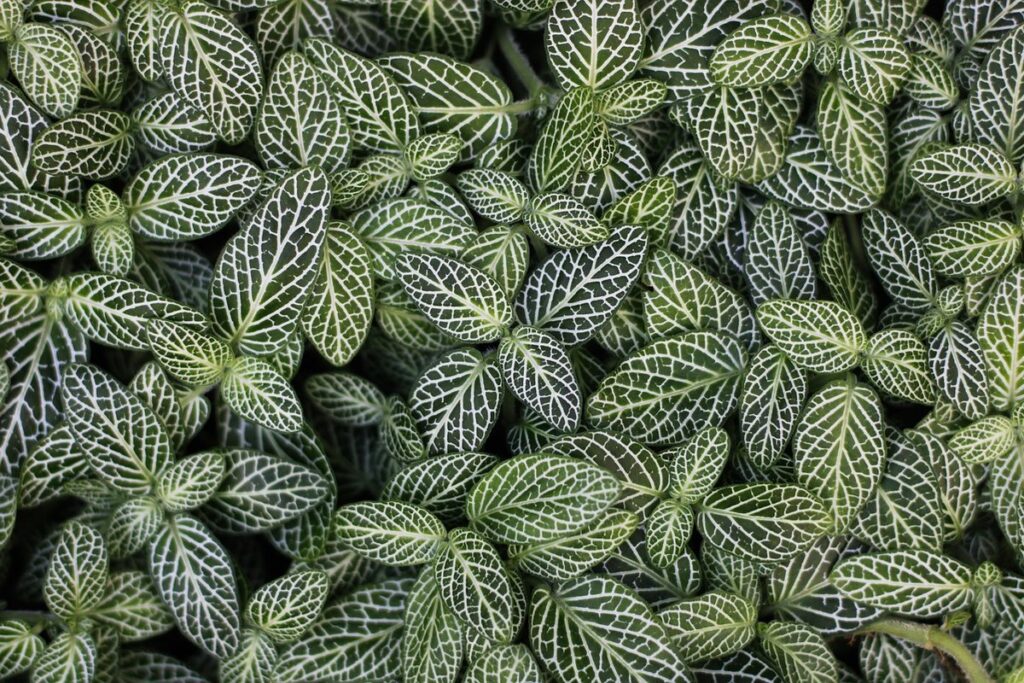
The unique feature that sets Fittonia apart is its beautiful foliage, characterized by patterns ranging from solid colors to intricate veining. This plant’s adaptability makes it an ideal choice for indoor spaces with varying humidity levels. In fact, a study on houseplants found that Fittonia can tolerate temperatures between 65-75°F (18-24°C) and maintain optimal growth in environments with moderate humidity.
When selecting a fittonia variety for propagation, consider the desired foliage pattern or color to ensure you’re working with a healthy plant. With proper care, your fittonia can become a stunning addition to any indoor space, providing a touch of tropical charm without requiring excessive maintenance.
Fittonia Uses and Benefits
Fittonia is more than just a beautiful indoor plant; it’s also a wonderful addition to any space. Not only does it purify the air we breathe, but it’s also incredibly low maintenance, making it perfect for busy individuals or those new to plant parenthood. Its compact size and stunning leaves make it an aesthetic appeal that can elevate any room.
One of the most significant benefits of having Fittonia as an indoor plant is its ability to purify the air we breathe. According to a study by NASA, certain species of Fittonia are capable of removing up to 90% of airborne pollutants in just one hour. This makes it an excellent choice for those who suffer from allergies or respiratory issues.
In terms of health benefits, Fittonia has been shown to have a calming effect on individuals, reducing stress and anxiety levels. The plant’s soothing presence can also promote better sleep quality and improve overall mental well-being.
Choosing Healthy Plants for Propagation
When it comes to propagating Fittonia, selecting healthy plants is crucial for success. In this section, we’ll explore how to choose the best leaves and stems to propagate your new plants.
Selecting the Right Fittonia Variety
When selecting the right variety of Fittonia for propagation, there are several factors to consider. Leaf color is one of the most noticeable characteristics that can greatly affect the overall appearance of your plant. For example, some popular varieties like ‘Alba’ and ‘Albomaculata’ have striking white or silver markings on their leaves, while others like ‘Red Emerald’ and ‘Tricolor’ feature vibrant green or red hues.
Another crucial factor to consider is leaf size. Some Fittonia varieties, such as the compact ‘Mini Alba’, are perfect for small spaces or containers, while larger varieties like ‘Tricolor’ can thrive in bigger pots. Think about your available space and choose a variety that fits your needs.
Additionally, consider the growth habits of different Fittonia varieties. Some plants tend to grow more upright, while others trail down. If you want a plant that will cascade over the edge of a container, look for varieties like ‘Mini Alba’ or ‘Red Emerald’. With so many factors to consider, it’s essential to research and carefully choose a variety that suits your lifestyle and preferences.
When selecting a Fittonia variety, also think about its growth rate. Some plants mature quickly, while others take longer to reach their full potential. Knowing how fast your plant will grow can help you plan for future maintenance and pruning tasks.
Inspecting Plant Health Before Propagation
When inspecting a plant before attempting propagation, it’s essential to look out for signs of pests, diseases, and nutrient deficiencies that could hinder its chances of success. Start by gently removing the potting mix from the roots to examine them thoroughly. Check for any visible signs of pests like mealybugs, spider mites, or scale insects, which can be especially prevalent in Fittonia plants. If you notice any, treat the plant with insecticidal soap or neem oil before attempting propagation.
Next, inspect the leaves and stems for any signs of disease, such as yellowing or browning leaves, black spots, or a soft, mushy texture. These could be indicative of root rot, leaf spot, or other fungal diseases. Also, check if the plant is receiving adequate nutrients; look for signs like pale or wilted leaves, which may suggest a lack of essential micronutrients.
Make sure to examine the roots themselves, as nutrient deficiencies can often manifest here first. If you notice any signs of pests or disease, it’s best to start with a fresh, healthy cutting from another plant to increase the chances of successful propagation.
Preparing Plants for Propagation
Before we dive into the propagation process, it’s essential to prepare your Fittonia plants properly to ensure successful cuttings and healthy new growth. This involves a few simple steps.
Pre-Propagation Care
Before you start propagating your fittonia plants, it’s essential to give them some TLC to ensure they’re healthy and ready for the next step. This pre-propagation care is crucial for promoting vigorous growth and increasing the chances of successful propagation.
Firstly, inspect your plant and remove any dead or dying leaves or stems. This will prevent the spread of disease and encourage new growth. Next, prune your fittonia to maintain its shape and promote bushy growth. Cut back overgrown tips by about one-third to half, making sure not to damage any nodes (the joints where leaves meet the stem). This will also help you identify areas with high bud activity.
Repotting is another critical aspect of pre-propagation care. Fittonia plants prefer well-draining potting mix and a slightly acidic pH (around 5.5-6.0). If your plant is root-bound or showing signs of nutrient deficiency, repot it in a slightly larger container with fresh potting mix. Water thoroughly after repotting to settle the roots.
Lastly, provide optimal growing conditions for your fittonia. Ensure it receives bright, indirect light but not direct sunlight, which can cause leaf scorch. Maintain a consistent temperature between 65-75°F (18-24°C), and keep the humidity level around 50-60%. With proper care, your fittonia will be ready to propagate in no time!
Taking Cuttings or Seeds
Taking cuttings is one of the most common methods for propagating Fittonia. You’ll need a few materials to get started: a healthy Fittonia plant, some rooting hormone powder or liquid, a sharp, sterile knife or pruning tool, and a pot filled with well-draining seed starting mix.
Cut a section of stem about 4-6 inches long from the mother plant, making sure each node (where a leaf meets the stem) has at least two sets of leaves. Remove lower leaves to prevent them from getting wet and causing rot during the rooting process. Dip the cut end into the rooting hormone powder or liquid, following the product’s instructions for application.
For sowing seeds, prepare a seed starting tray with cell packs filled with moistened seed starting mix. Plant several Fittonia seeds about 1/4 inch deep in each cell. Cover the seeds lightly and water gently but thoroughly. Maintain high humidity and provide bright, indirect light until germination occurs (usually within 7-10 days).
Propagation Techniques: In-Depth Guide
Now that you’ve learned the basics of propagating Fittonia, let’s dive into the different techniques for successfully multiplying these lovely plants. We’ll cover in-depth methods to multiply your Fittonia collection quickly and easily.
Water Rooting Method
To propagate Fittonia using the water rooting method, start by preparing a healthy stem cutting from your mother plant. Take a section with at least two nodes, as this will increase the chances of successful propagation. Remove lower leaves to prevent them from rotting and decrease the risk of bacterial growth.
Place the cut end of the stem into a glass or jar filled with distilled water, making sure that the node is submerged. This is where roots are likely to develop. Change the water every 2-3 days to maintain its purity and encourage root growth.
Keep the container in a bright, indirectly lit spot, but avoid direct sunlight which can cause algae growth. Roots should start developing within 1-3 weeks, after which you can transfer them into a pot filled with well-draining soil. Be patient as this method may take longer than others. With proper care and attention, your new Fittonia plant will thrive.
Potting Mix and Soil Preparation
When it comes to propagating Fittonia, choosing the right potting mix and soil is crucial for healthy root development and successful establishment of new plants. A well-draining potting mix specifically designed for tropical plants like Fittonia will help prevent waterlogged soil, which can lead to root rot.
Look for a mix that contains ingredients such as peat moss, perlite, or vermiculite, which provide excellent drainage while retaining moisture. You can also create your own potting mix by combining 2-3 parts of a general-purpose potting soil with one part of perlite or sand. This will ensure good air circulation around the roots and prevent water from accumulating.
It’s equally important to avoid using regular garden soil, as it can compact and hinder root growth. If you’re repurposing an existing mix, make sure to sterilize it by baking it in a preheated oven at 200°F (90°C) for 30 minutes to kill any potential pests or diseases.
When preparing your potting mix, be gentle not to compact the soil, as this can lead to poor drainage and root damage. Use a soft-bristled brush or a fork to gently aerate the mixture before planting your propagated Fittonia cuttings.
Post-Propagation Care and Maintenance
Now that you’ve successfully propagated your Fittonia, it’s time to focus on providing the right care for your new plants to ensure they thrive in their pots. Proper aftercare is crucial at this stage.
Environmental Conditions
Fittonia is a delicate plant that requires specific environmental conditions to thrive after propagation. When it comes to lighting, fittonia prefers bright, indirect light but can tolerate low light conditions. However, placing it directly under harsh sunlight may cause scorching of the leaves. To strike a balance, you can place the propagated cutting near an east- or west-facing window.
Temperature is another critical factor in post-propagation care. Fittonia thrives in temperatures between 65°F to 75°F (18°C to 24°C), which is similar to most indoor environments. Avoid placing it near heating vents or drafty areas, as this can cause stress and damage the plant. Maintain a consistent temperature to ensure healthy growth.
Humidity levels also play a crucial role in fittonia care. As a tropical plant, it prefers high humidity but can adapt to average home conditions. To maintain optimal humidity, you can place the pot on a tray filled with water and pebbles or use a humidifier nearby. This will help prevent dryness and promote healthy growth.
Fertilization and Pruning Techniques
As your newly propagated Fittonia begins to grow and mature, it’s essential to provide optimal care through fertilization and pruning techniques. Fertilizing your young plant regularly will promote healthy growth, lush foliage, and vibrant colors.
You can start by using a balanced, water-soluble fertilizer (20-20-20) at half the recommended strength. For example, if the instructions call for 1 tablespoon of fertilizer per gallon of water, use only half that amount to avoid burning your plant’s roots. Dilute the fertilizer in a separate container before applying it to the soil around your Fittonia.
As your plant matures (typically within 3-6 months), you can gradually increase the strength of the fertilizer or switch to a bloom-booster formula to encourage flowering. Be cautious not to over-fertilize, as this can damage your plant’s roots and lead to nutrient deficiencies.
When it comes to pruning, remove any dead, damaged, or discolored leaves to maintain your Fittonia’s appearance and prevent disease from spreading. Pinch off the tips of new growths to encourage branching and a fuller plant shape. For more mature plants, you can prune back leggy stems by about one-third to maintain a bushy habit and promote air circulation around the leaves.
Troubleshooting Common Issues
Don’t worry if you encounter problems during the propagation process, we’ve got you covered! This section tackles common issues that might arise when trying to multiply Fittonia.
Common Pests and Diseases
As you propagate Fittonia, it’s essential to be aware of potential pests and diseases that can affect these delicate plants. One common pest is mealybugs, which thrive in humid environments and feed on plant sap. To prevent infestations, ensure good air circulation around your propagated plants, and avoid overwatering. If you do encounter mealybugs, treat the affected areas with neem oil or insecticidal soap.
Root rot is another concern for Fittonia, often caused by excessive moisture. Check the roots regularly for signs of decay, such as softening or yellowing. To prevent root rot, repot your propagated plants in well-draining potting mix and avoid getting water on the leaves or crown. Regularly inspect your plants for diseases like leaf spot, which can be identified by black or brown spots on the leaves.
Prevention is key: maintain a clean environment, disinfect tools, and separate infected plants to prevent the spread of disease. By being vigilant about pests and diseases, you can enjoy healthy, thriving Fittonia plants with minimal maintenance.
Nutrient Deficiencies
When propagating Fittonia, it’s not uncommon for new plants to develop nutrient deficiencies. These can manifest as yellowing leaves, stunted growth, or a decrease in leaf color intensity. The most common nutrient deficiencies in propagated plants are Nitrogen (N), Phosphorus (P), and Potassium (K).
Identifying the issue is key to correcting it. A lack of N will cause older leaves to turn yellow, while P deficiency results in weak stems and small roots. On the other hand, a K deficiency leads to leaf scorching and browning around the edges.
To correct these deficiencies, you can either fertilize your plants with a balanced fertilizer or repot them in fresh potting mix. For example, if your Fittonia is showing signs of a P deficiency, apply a high-phosphorus fertilizer during the spring and summer months when it’s actively growing.
Conclusion: Successful Fittonia Propagation
Now that you’ve successfully propagated your Fittonia plant, it’s essential to maintain a healthy environment for the new plants. Place them in bright, indirect light, and keep the soil consistently moist but not waterlogged. Remember, overwatering is one of the most common mistakes when propagating houseplants. You can also fertilize your newly propagated plants with a balanced fertilizer at half the recommended strength to promote healthy growth.
By following these steps and tips, you’ll be able to propagate Fittonia with ease. With patience and practice, you’ll soon have a collection of beautiful, leafy plants that bring joy and beauty to any room. If you’re new to plant propagation, don’t be discouraged if some of your cuttings don’t take root immediately – it’s all part of the learning process, and with time, you’ll become more confident in your abilities.
Frequently Asked Questions
What if I’m still unsure about the best method for water rooting my Fittonia cuttings?
Yes, it’s normal to feel uncertain when trying a new propagation technique. Start by practicing on a small group of plants and experiment with different conditions to find what works best for you. Keep in mind that patience is key – successful water rooting can take some trial and error.
Can I use a regular potting mix instead of a specialized one designed for Fittonia?
No, it’s highly recommended to use a well-draining potting mix specifically formulated for tropical plants like Fittonia. Regular potting mixes may not provide the necessary aeration or pH balance for optimal growth and health.
How often should I fertilize my newly propagated Fittonia plants?
Fertilize your newly propagated Fittonia plants sparingly, ideally once a month during the growing season (spring-fall). Use a balanced, water-soluble fertilizer to promote healthy growth without over-fertilizing. Reduce or skip fertilization altogether in winter months when the plant is dormant.
What are some common mistakes to avoid when taking cuttings from my Fittonia plants?
Some common pitfalls include over-handling the cuttings, allowing them to dry out, and not providing sufficient humidity during the propagation process. To minimize these risks, handle the cuttings gently, keep them consistently moist, and maintain a humid environment.
Can I propagate Fittonia using seeds instead of taking cuttings?
Yes, but this method is generally more challenging and time-consuming than water rooting or potting mix methods. Seeds may take several weeks to germinate, and seedlings can be prone to weak growth and low viability. Nevertheless, experienced growers often find that propagating from seeds allows for greater genetic diversity in their Fittonia collections.