Starting fig cuttings can be a bit intimidating if you’re new to propagating plants, but with the right techniques and tools, you’ll be well on your way to growing a thriving new tree. Many fig enthusiasts love sharing their favorite varieties through cuttings, allowing others to enjoy these delicious and versatile trees in their own gardens. But before you start rooting around for the perfect cutting, it’s essential to understand how to select healthy parent plants and prepare your tools properly.
In this article, we’ll walk you through a step-by-step guide on starting fig cuttings successfully. We’ll cover everything from choosing the right parent plant to aftercare techniques that will give your new tree the best chance of thriving. By following these simple tips and tricks, you’ll be able to propagate your favorite varieties with confidence.
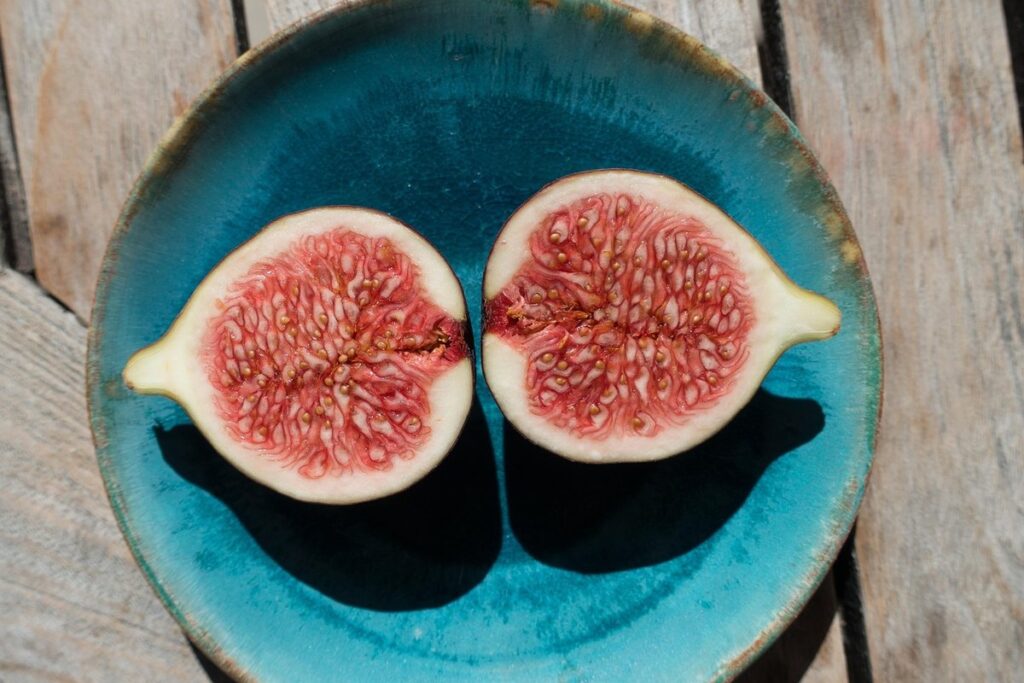
Choosing the Right Figs
When starting fig cuttings, selecting the right varieties is crucial for success. In this next step, we’ll walk you through choosing the perfect fig tree for your garden or indoor space.
Selecting Healthy Parent Plants
When selecting healthy parent plants for fig cutting propagation, it’s crucial to identify those with optimal characteristics. A healthy fig tree should display vibrant green leaves, a robust stem, and a well-balanced branch structure. Look for trees with at least three sets of leaves, as this indicates they are mature enough for propagation.
To ensure you’re choosing the right parent plant, inspect its root system. Healthy roots should be thick, extensive, and slightly woody. Avoid plants with weak or sparse roots, as these can indicate a stressed tree that’s more susceptible to disease.
Some common issues to look out for in parent plants include signs of pests, such as aphids, whiteflies, or mealybugs, which can weaken the tree and reduce its chances of success through propagation. Also, be cautious of trees with fungal infections like root rot or leaf spot, which can spread quickly to new cuttings.
By carefully selecting healthy parent plants, you’ll significantly increase your chances of successful fig cutting propagation.
Identifying the Best Time for Cuttings
When it comes to taking cuttings from fig plants, timing is crucial. You want to take them during the right season, when the plant is dormant, and not when it’s actively growing. This might sound simple, but it can be a bit tricky, especially if you’re new to gardening.
In most regions, the best time to take cuttings from fig plants is in late winter or early spring, just before the new growth begins. This is usually around February or March in the Northern Hemisphere. At this stage, the plant is dormant, and the branches are still somewhat flexible, making it easier to remove cuttings.
Another factor to consider is climate. If you live in a warm and humid region, such as California or Florida, you can take cuttings year-round. However, if you’re in an area with harsh winters, like the Northeast or UK, it’s best to wait until spring when the threat of frost has passed.
When taking cuttings from fig plants that are not dormant, look for branches with new growth. Cut off these sections about 6-8 inches below a node (where a branch meets a stem), making sure each cutting has at least two sets of leaves. This will give your newly propagated fig plant the best chance to thrive.
Preparing the Cutting Tools and Area
Before you start rooting those fig cuttings, make sure your tools and workspace are clean and ready for action to prevent any potential problems. Let’s get started by prepping everything!
Gathering Essential Equipment
To take and root fig cuttings successfully, you’ll need some essential equipment. Let’s start with the basics: pruning shears, also known as secateurs. These are a must-have for cutting healthy stems from your mature fig tree. Make sure to choose a pair that feels comfortable in your hands and has clean, sharp blades.
Next up is rooting hormone powder or liquid. This will help stimulate root growth on your cuttings, increasing the chances of successful establishment. When selecting a rooting hormone product, look for one specifically designed for fruiting plants like figs.
In addition to pruning shears and rooting hormone, you’ll also need some pots with good drainage holes. These are necessary for growing your cuttings until they’re strong enough to be transferred to the outdoors or into larger containers. You can use small pots or cell trays – whichever suits your space and setup.
It’s also a good idea to have some general gardening supplies on hand, such as propagation mats (for maintaining humidity levels) and a watering can with a fine spray nozzle (to avoid washing away delicate roots).
Setting Up a Clean and Sterile Workspace
When it comes to starting fig cuttings, maintaining a clean and sterile workspace is crucial to prevent contamination and ensure successful propagation. A dirty or cluttered area can harbor bacteria, fungi, and other microorganisms that can easily spread to the cuttings and cause rot or infection.
Before beginning, take a few minutes to set up your workspace properly. Clear any debris, dust, or residue from surfaces, and disinfect them with a 10% bleach solution. This will help create an environment conducive to healthy growth.
When handling cuttings, use clean, sharp tools to minimize the risk of transferring bacteria. Wash your hands thoroughly before starting work, and consider wearing gloves to prevent oils from your skin coming into contact with the cuttings.
To maintain sterility throughout the process, keep a dedicated tray or container for each step – one for preparing the cuttings, another for rooting, and so on. This will help contain any potential contaminants and make cleanup easier in the long run.
Taking Fig Cuttings
To successfully propagate fig trees, you’ll want to focus on taking healthy cuttings from mature parent plants. Let’s dive into the process of collecting and preparing these vital cuttings.
Selecting and Cutting Stems
When it comes to taking successful fig cuttings, selecting and cutting the right stems is crucial. Look for stems with a diameter of around 1/4 inch (6-8 mm), as these will have a higher chance of rooting successfully. Thicker stems can be too hardwoody, making them difficult to root, while thinner ones may not provide enough material for healthy growth.
Choose stems with a smooth, even texture and a vibrant green color. Avoid any sections that appear woody or discolored, as these may not produce roots well. You should also select stems from areas of the parent plant where new growth is actively occurring, such as near the tips of branches or along newer shoots.
When cutting your stem, aim for a 3- to 4-inch (7.5-10 cm) section with at least two sets of leaves. Cut just above a leaf node using a clean and sharp tool, making sure not to crush the stem’s bark. This will help minimize damage to the plant tissue and encourage healthy root development.
Removing Leaves and Preparing the Stem
When it comes time to prepare your fig cutting for rooting, removing leaves and trimming the stem is an essential step. Hold the cutting by the node (where a leaf meets the stem) and gently grasp the leaf near its base. Twist and pull downwards to remove the leaf, taking care not to damage the node. Repeat this process for each leaf, leaving only two or three nodes exposed.
Next, use a clean, sharp knife or pruning tool to trim the cutting to the correct length. Figs typically root best when cuttings are around 10-15cm (4-6 inches) long. Cut just above a node, making sure the cutting has at least one node below the new cut end. This will give you the best chance of successful rooting.
Now that your cutting is trimmed, inspect it for any signs of damage or blemishes. Gently wipe the stem with a soft cloth to remove any dirt or debris. You’re now ready to prepare the cutting for its next step in the process: dipping it in rooting hormone.
Rooting Fig Cuttings
Rooting fig cuttings can be a bit tricky, but don’t worry, we’ll walk you through the simple steps to successfully propagate new trees from cuttings. This method is perfect for gardeners who want to multiply their favorite varieties.
Using Rooting Hormone
Using rooting hormone can be a game-changer when it comes to propagating fig cuttings. This miracle worker helps stimulate root growth, increasing the chances of successful propagation. But what exactly is rooting hormone, and how do you use it correctly?
Rooting hormone, also known as auxin, is a plant growth regulator that contains synthetic auxins or natural auxins like indole-3-butyric acid (IBA). These substances help to promote cell division and root growth in cuttings. When applied correctly, rooting hormone can significantly improve the success rate of fig cutting propagation.
To use rooting hormone effectively, dip the lower 1-2 inches of each fig cutting into a powder or liquid rooting hormone, following the manufacturer’s instructions for application rates. For most products, this involves dipping the cutting in for about 10 seconds to allow the hormone to take effect. It’s essential to be gentle when handling the cuttings to avoid damaging the delicate tissues.
Applying rooting hormone is especially helpful when propagating hardwood fig cuttings during the winter months or from less vigorous varieties. By providing a boost to the natural growth processes, you can enjoy higher success rates and more consistent results in your fig cutting propagation endeavors.
Watering and Providing Humidity
Providing adequate water and humidity is crucial for promoting root development and successful establishment of fig cuttings. This is especially true in the initial stages of rooting, when the cutting’s roots are still developing and its water requirements are higher.
To ensure proper hydration, keep the soil consistently moist but not waterlogged. Check the moisture level by sticking your finger into the soil up to the first knuckle; if it feels dry, it’s time to water. Water thoroughly until you see water coming out of the drainage holes, then wait a few hours before checking again.
Maintaining humidity also plays a significant role in promoting root development. To achieve optimal humidity levels, you can cover your propagation tray with a clear plastic bag or wrap it in a damp towel. This will create a microclimate that retains moisture and promotes healthy root growth. Aim for a humidity level of 60-80% to encourage robust root development.
Monitor your cuttings closely and adjust the water and humidity levels as needed. By providing the right conditions, you’ll be well on your way to successfully rooting your fig cuttings.
Aftercare and Transplanting
Now that you’ve successfully rooted your fig cutting, it’s time to focus on aftercare and transplanting techniques for a healthy and thriving plant. This next step is crucial for its continued growth.
Monitoring Cuttings for Signs of Root Development
Monitoring cuttings for signs of root growth is crucial for their survival. As you wait for roots to develop, inspect the cuttings every 3-4 days for any changes. Look for white, cottony roots emerging from the node – this is a clear sign that root development has begun.
To monitor your cuttings effectively, place them in a tray or container filled with water and situate it near an east-facing window to provide indirect light. Keep the water level topped up but avoid overwatering. As you inspect the cuttings, gently rotate each one to ensure all sides are receiving adequate light and water.
When you notice roots have reached about 1-2 inches in length (about 7-10 days), it’s time to transplant them into individual pots filled with a well-draining potting mix. Handle the cuttings carefully to avoid damaging any tender roots. Gently firm the soil around each cutting, making sure not to compact the soil too much. Water your newly potted cuttings thoroughly and reduce watering frequency as the plants settle in their new environment.
Acclimating New Plants to Outdoor Conditions
When you’ve finally got your new fig cutting settled into its container and is thriving indoors, it’s time to start thinking about moving it outdoors. This process of acclimating your plant to outdoor conditions can be a bit tricky, but with gradual exposure, you’ll minimize the risk of shock.
Begin by moving your plant to a shaded or partially shaded area for 7-10 days before gradually increasing its sun exposure over the next week or two. This will give it time to adjust to the intense sunlight and prevent scorching of the leaves. You can also start introducing gentle breezes to mimic outdoor conditions, but be cautious not to expose your plant to harsh winds that might cause damage.
As you increase the amount of direct sunlight, be sure to monitor your plant’s response closely. If it appears stressed or shows signs of burning, move it back to a shadier location for a day or two before continuing with the acclimation process. With patience and care, your fig cutting will soon thrive in its outdoor environment, producing fruit and growing strong and healthy.
Common Challenges and Troubleshooting
When you’re starting fig cuttings, things don’t always go as planned. This is where common challenges and potential problems come into play, along with expert troubleshooting tips to get you back on track.
Identifying and Resolving Root Rot
Root rot is one of the most common issues when starting fig cuttings. It can be caused by overwatering, poor drainage, or a combination of both. When root rot occurs, you’ll notice symptoms such as yellowing leaves, droopy branches, and soft stems that are easily damaged.
To identify root rot, gently remove the cutting from its container and inspect the roots. If they’re mushy, brown, or have an unpleasant odor, it’s likely a sign of root rot. To resolve this issue, start by repotting the cutting in fresh, well-draining soil. Reduce watering to allow the soil to dry slightly between waterings.
Monitor your cuttings closely for signs of recovery. You can also try pruning off any affected roots and treating the area with a fungicide specifically designed for root rot prevention. Keep in mind that severe cases may require more drastic measures, including discarding the cutting altogether and starting fresh.
Overcoming Transplant Shock
Minimizing transplant shock is crucial for newly rooted fig plants to establish themselves successfully. One of the primary reasons cuttings fail after rooting is transplant shock. This occurs when the plant’s roots are not yet developed enough to support the increase in water and nutrient uptake, leading to stress and potential death.
To minimize transplant shock, start by gradually acclimating your rooted cuttings to outdoor conditions. If you’re propagating indoors, begin by moving them outside to a shaded area for a few hours a day before gradually increasing exposure. This allows the plant’s roots to adapt slowly to the new environment.
Another key factor is handling and care during transplanting. Gently remove the plant from its pot, taking care not to disturb the delicate roots. Water thoroughly after repotting, but avoid overwatering which can exacerbate shock symptoms. Monitor your plant closely for signs of stress such as yellowing leaves or droopy stems.
Conclusion: Tips for Success
Now that you’ve successfully started your fig cuttings, it’s time to review what you’ve learned and get practical tips on how to ensure their continued health and growth. Let’s go over a few final considerations for success.
Recap of Key Takeaways
To ensure success with starting fig cuttings, it’s essential to recall some key takeaways from this step-by-step guide. When selecting parent plants, choose ones that have produced well and are free of pests or diseases. Look for signs of healthy growth, like vibrant leaves and sturdy branches.
When preparing cuttings, make sure they’re around 3-4 inches long with at least two nodes. Remove lower leaves to prevent them from rotting in water. Cut just above a node using clean, sharp tools to promote rooting.
Proper aftercare is also crucial for successful rooting. Place the cuttings in a propagation tray or container filled with a well-draining mix. Water gently but thoroughly and provide bright, indirect light. Keep the soil consistently moist but not waterlogged. It may take several weeks for roots to develop, so be patient and monitor your cuttings regularly.
By following these best practices, you can increase your chances of successfully starting fig cuttings and growing new plants.
Encouragement to Try Fig Cutting Propagation at Home
Now that you’ve completed the step-by-step guide on starting fig cuttings, it’s time to put your new skills into practice. I encourage you to try fig cutting propagation at home, and with confidence, knowing you have a solid understanding of the process.
Not only is propagating fig cuttings from home cost-effective, but it also allows you to create multiple plants from a single stem, making it a great way to share your favorite varieties with friends and family. Plus, by doing so, you’ll be able to enjoy fresh, healthy figs right in your own backyard.
To get started, choose a healthy stem with at least two nodes (the point where the leaf meets the stem) and remove any lower leaves that would be submerged in water or soil. This will help prevent the risk of rot and ensure successful propagation. Once you’ve prepared your cutting, place it in a glass of water or directly into well-draining potting mix, providing the right conditions for growth to occur.
Remember, every small step counts, and with patience and care, you’ll be enjoying homegrown figs in no time.
Frequently Asked Questions
What are the chances of success with rooting fig cuttings from non-flowering parent plants?
Success rates can be lower when using non-flowering parent plants, as they may not produce viable roots or shoots. However, it’s still possible to achieve a moderate success rate by following proper techniques and providing optimal growing conditions.
Can I propagate fig cuttings in areas with high humidity but no direct sunlight?
Yes, you can still propagate fig cuttings in areas with high humidity but limited direct sunlight. In fact, fig trees prefer bright, indirect light or filtered sunlight, making it ideal for propagation in areas with high humidity and moderate lighting conditions.
How long does it take for rooted fig cuttings to develop their first set of leaves?
After successful rooting, it typically takes 6-12 weeks for the new tree to develop its first set of leaves. Keep in mind that this timeframe may vary depending on factors such as temperature, watering schedule, and overall growing conditions.
What’s the best method for handling and storing cuttings between propagation sessions?
To minimize damage and contamination, it’s essential to handle cuttings gently and store them in a clean, dry container or plastic bag. Keep the cut end moist by wrapping it with a damp cloth or paper towel, and keep the container away from direct sunlight.
Can I propagate fig cuttings during the winter months when temperatures are consistently below 50°F (10°C)?
While you can still attempt to propagate fig cuttings in cooler temperatures, success rates may be lower due to slowed growth and potential root rot. It’s recommended to delay propagation until spring or summer when temperatures are above 60°F (15°C) for optimal results.