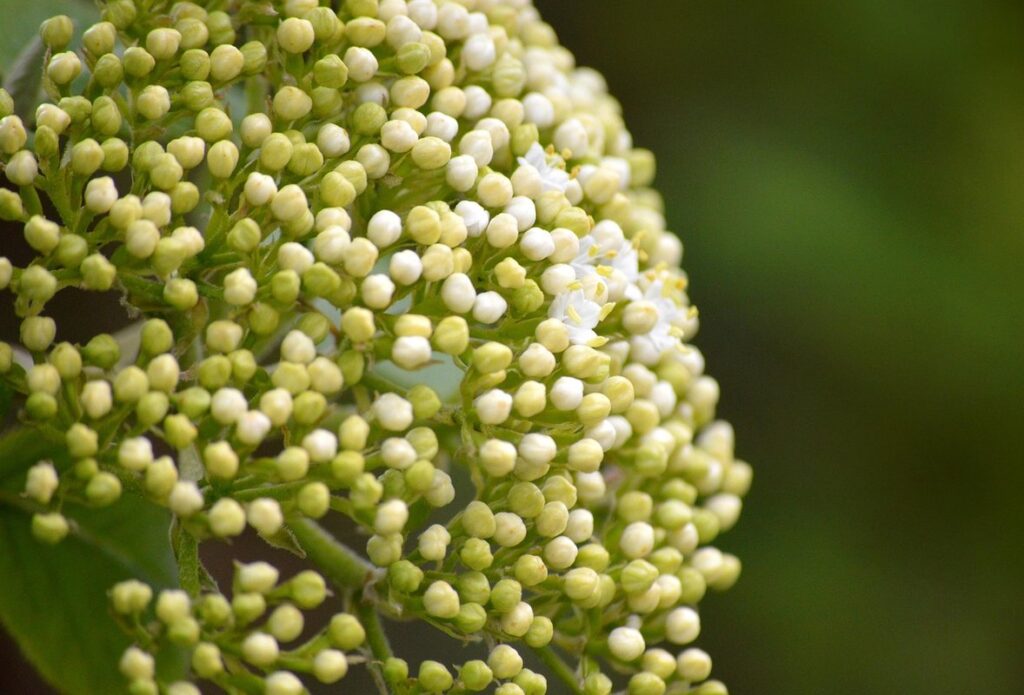
Elderberry plants are a treasure for gardeners and herbal enthusiasts alike, but did you know that propagating them can be just as rewarding? Whether you’re looking to multiply your favorite variety or share some with friends, learning how to propagate elderberry plants is a valuable skill. With their beautiful flowers, medicinal properties, and delicious berries, it’s no wonder these plants have gained popularity in recent years.
In this article, we’ll dive into the world of propagating elderberry plants using three different methods: stem cuttings, layering, and division. We’ll explore how to prepare your parent stock, when to use rooting hormone for optimal success, and what to expect from post-propagation care. By the end of this guide, you’ll be equipped with the knowledge to successfully propagate your own elderberry plants, expanding their benefits to your garden and beyond. Let’s get started!
Understanding Elderberry Plant Propagation
To successfully propagate elderberry plants, you’ll want to understand how they can be grown from cuttings, seeds, and other methods. Let’s dive into the details of each method in more depth.
Why Propagate Elderberry Plants
When it comes to propagating elderberry plants, you might wonder why this process is so essential. Propagating these beautiful plants not only increases plant diversity but also offers a cost-effective solution for gardeners and growers alike.
In horticulture, propagation plays a vital role in preserving plant species and promoting sustainability. By multiplying existing plants through various methods like stem cuttings or layering, you can ensure the continued availability of your favorite elderberry varieties without relying on commercial sources. This approach also enables you to share knowledge and plant material with fellow gardeners, fostering a sense of community within the horticultural world.
Furthermore, propagating elderberry plants allows you to reduce costs associated with purchasing new plants or seeds from nurseries or online retailers. By creating multiple clones from a single parent plant, you can save money while still enjoying the benefits of having a diverse and thriving collection of elderberries in your garden. This cost-effective approach is particularly beneficial for large-scale growers or commercial operations looking to establish or expand their elderberry plantations.
Methods of Propagation Overview
Elderberry plants can be propagated through various methods, each with its own set of advantages and challenges. One popular method is stem cuttings, which involve taking a section of the plant’s stem and rooting it to create a new plant. This method is relatively easy to do and requires minimal equipment, but the success rate can be affected by factors such as the time of year and the health of the parent plant.
Another method is layering, where a portion of the stem is buried in soil while still attached to the mother plant. This allows the new roots to form while the section remains connected to the original plant. Layering is a more labor-intensive process but offers higher success rates compared to stem cuttings.
Division is yet another method used for elderberry propagation, where the entire root system of the mature plant is divided and replanted. While this method can be effective in multiplying plants quickly, it requires care when separating the roots to avoid damaging them. When choosing a propagation method, consider factors like time constraints, equipment availability, and personal preference.
Preparing for Propagation
Before you start taking cuttings, it’s essential to prepare your equipment and workspace to ensure a successful propagation process. This includes cleaning and sterilizing tools to prevent contamination.
Choosing Healthy Parent Stock
When selecting healthy parent stock for propagation, it’s essential to choose plants that are robust and disease-resistant. This will ensure that your propagated cuttings have the best possible chance of thriving. To make an informed decision, inspect the parent plant carefully, looking for signs of vigor such as a full canopy, sturdy stems, and plenty of new growth.
Consider the plant’s overall appearance, too – is it healthy and vibrant, or does it appear stressed or weakened? Look for any visible symptoms of disease, pests, or nutrient deficiencies. For elderberry plants specifically, be on the lookout for signs of powdery mildew or leaf spot, which can spread quickly through a garden.
When evaluating parent stock, also consider factors like climate and soil suitability. If you live in an area with poor soil quality or harsh winters, choose a parent plant that is adapted to these conditions. This will help your propagated cuttings establish more easily and reduce the risk of disease or failure.
Ultimately, selecting healthy parent stock sets the stage for successful propagation. By choosing robust, disease-resistant plants, you’ll be well on your way to growing thriving, productive elderberry bushes.
Tools and Materials Needed
To successfully propagate elderberry plants, you’ll need to gather some essential tools and materials. Start by collecting pruning shears specifically designed for cutting woody stems, as they will help prevent crushing the delicate tissues of the plant. A rooting hormone powder or liquid is also crucial, as it promotes root growth and increases the chances of successful propagation.
You’ll also require a clean and sterile workspace to prepare your cuttings. This can be achieved by using a disinfectant solution to wipe down any surfaces that will come into contact with the plant material. Next, gather small pots or containers filled with a well-draining potting mix specifically designed for rooting cuttings. Make sure the pots have drainage holes in the bottom to prevent waterlogged soil.
Some additional materials you’ll need include a sharpie or marker for labeling your cuttings, and a propagation tray or cloche to maintain high humidity levels during the rooting process. Having these tools and materials on hand will ensure that you’re well-prepared to tackle the next steps in propagating elderberry plants.
Stem Cutting Propagation
To successfully propagate elderberry plants using stem cuttings, you’ll need to learn how to properly prepare and care for your cuttings in a controlled environment. This involves specific steps to achieve optimal results.
Taking Stem Cuttings
Taking stem cuttings from mature elderberry plants is an effective way to propagate new plants. The best time for taking cuttings is during the dormant season, typically in late winter or early spring, when the plant is not actively growing. This allows the cutting to root more easily and reduces the risk of disease.
To take a stem cutting, select a healthy, vigorous stem with plenty of nodes (the small joints where leaves meet the stem). Cut the stem just above a node using a clean, sharp knife or pruning tool, making sure each cut is about 1-2 inches long. Remove lower leaves, leaving only two or three sets of leaves at the top of the cutting.
It’s essential to take cuttings from mature plants, as they tend to have more stored energy and produce more vigorous root growth. Use this method to propagate multiple elderberry plants at once, ensuring a steady supply of new plants for your garden or to share with friends.
Rooting Hormone and Planting Medium
When it comes to propagating elderberry plants through stem cutting, using the right rooting hormone and planting medium can significantly increase the chances of successful rooting. A rooting hormone is a substance that encourages root growth on cuttings, promoting establishment and reducing transplant shock.
There are several types of rooting hormones available, including powder, liquid, and gel forms. Some popular options include Dip ‘N Grow, Rootone, and Clonex. When choosing a rooting hormone, look for products containing auxins, such as indole-3-butyric acid (IBA) or napthaleneacetic acid (NAA). These plant growth regulators stimulate cell division and root development.
For planting medium, opt for well-draining potting mixes specifically designed for propagation. Avoid using regular garden soil, as it can compact and prevent roots from growing. Instead, choose a mix with a high peat moss or coconut coir content to retain moisture while allowing excess water to drain away. This will give your cuttings the best chance of establishing themselves in their new environment.
Layering Propagation
When it comes to propagating elderberry plants, layering is a reliable and low-maintenance method that’s perfect for beginners. We’ll walk you through the step-by-step process of successful layering propagation.
Types of Layering Methods
When it comes to layering propagation for elderberry plants, there are three primary methods: simple, compound, and tip-layering. Each method has its own set of advantages and challenges that you should be aware of before getting started.
Simple layering is a straightforward process where a stem or branch is bent down towards the ground and secured with a weight or stake. This allows the stem to take root without removing it from the parent plant, making it an ideal method for propagation. One advantage of simple layering is that it’s relatively quick and easy to do, with roots developing within 2-3 months.
Compound layering, on the other hand, involves bending a section of stem down towards the ground and then securing the tip with a short stake. This allows for multiple layers of roots to develop over time, increasing the chances of successful propagation. However, this method can be more challenging than simple layering due to the need for precise timing.
Tip-layering is a more delicate process that involves bending a small section of stem (typically around 10-15 cm) down towards the ground and securing it with a weight or stake. This method allows you to propagate individual tips from the parent plant, creating new plants quickly. One advantage of tip-layering is that it’s relatively low-maintenance and can be done at almost any time of year. However, it requires careful handling to avoid damaging the delicate stems.
Creating a Support System
When it comes to layering elderberry plants, having a sturdy support system is crucial for successful propagation. A well-designed trellis or stake will help you gently bend the stems without causing damage, allowing the new roots to develop properly.
You can use a trellis made of wood, metal, or even recycled plastic to provide the necessary support. Bury it in the ground near the parent plant, making sure it’s secure and won’t topple over due to strong winds. Alternatively, you can use stakes with twine or wire to gently bend the stems.
To avoid damaging the delicate stems, make sure to handle them carefully. Gently tie the stems to the trellis or stake using soft ties, such as cotton rope or wire. Don’t pull too tight, as this may cause bruising or even breakage. It’s also essential to water the plant regularly while it’s being trained on the support system, keeping the soil consistently moist but not waterlogged.
With a solid support system in place, you can focus on nurturing your new layering plants and enjoy their beautiful growth over time.
Division Propagation
Division propagation involves separating established elderberry plants into multiple sections, allowing you to multiply your stock and share with friends. This method is ideal for mature plants with a well-developed root system.
When to Divide Mature Plants
When to divide mature elderberry plants is crucial for their overall health and productivity. Typically, it’s recommended to divide these plants every 3-5 years. This frequency allows for rejuvenation and replenishes the plant’s energy reserves. Division also stimulates increased root growth, promoting healthy establishment of new growth.
One significant benefit of dividing mature elderberry plants is the removal of dead or dying wood. As the plant ages, it naturally sheds old branches to make way for new ones. However, this process can be accelerated by manually removing sections with visible signs of decay. This renewal not only encourages vigorous growth but also enhances the plant’s resistance to diseases.
To ensure a successful division, choose a time when the plant is dormant or actively growing. Dig carefully around the base, taking care not to damage any nearby roots. Gently tease apart the separated sections, and replant them in well-draining soil with adequate moisture levels. Keep in mind that newly divided elderberry plants may require protection from extreme weather conditions for their first growing season.
Keep in mind that regular division is a simple yet effective technique for maintaining healthy and thriving mature elderberry plants.
Digging and Separating Roots
When it comes to dividing mature elderberry plants, digging up the entire root system can be a delicate process. It’s essential to handle the roots carefully to minimize damage and promote healthy growth of the new divisions.
Start by digging around the plant, using a shovel or garden fork to loosen the soil without causing too much disruption to the roots. Once you’ve exposed most of the root system, gently rock the plant back and forth to break up any remaining clods of earth attached to the roots.
Use your hands or a soft-bristled brush to separate the individual roots, working from the outside in. Be careful not to tear or damage the fragile roots, as this can lead to poor establishment of the new divisions. If you encounter thick or tangled roots, use a sterile tool to carefully tease them apart without causing further damage.
Keep the separated roots moist by covering them with damp burlap or a plastic bag.
Post-Propagation Care
Now that you’ve successfully propagated your elderberry plants, it’s time to focus on their care and development during the crucial early stages of growth. Proper post-propagation care will ensure a strong foundation for a healthy and thriving plant.
Providing Optimal Growing Conditions
Providing optimal growing conditions for newly propagated elderberry plants is crucial for their survival and healthy growth. When it comes to sunlight, elderberries prefer full sun to partial shade. However, younger plants may benefit from some afternoon shade to prevent scorching. Aim to provide at least 6 hours of direct sunlight per day.
Water requirements are also essential. Elderberries thrive in moist soil but can be susceptible to root rot if the soil is too waterlogged. Water your newly propagated elderberry plants regularly, but make sure not to overwater. A good rule of thumb is to provide about 1 inch of water per week, either from rainfall or irrigation.
Fertilization is another critical aspect of post-propagation care. Feed your elderberries with a balanced fertilizer (10-10-10 NPK) during the growing season (spring and summer). However, avoid fertilizing in the fall, as this can encourage new growth that may not have time to harden off before winter.
Keep in mind that young plants are more delicate than mature ones. They require careful attention to their environment to prevent damage or stress.
Monitoring for Pests and Diseases
As you care for your newly propagated elderberry plants, it’s essential to monitor them regularly for signs of pests and diseases. Elderberry plants are susceptible to various issues that can quickly spread and cause harm if left unchecked.
Common pests like aphids, whiteflies, and spider mites can feed on the sap of your elderberry plants, stunting their growth and potentially killing them. To identify these pests, look for yellowing or curled leaves, sticky honeydew droplets, or fine webbing on the undersides of leaves. If you catch an infestation early, try spraying your plants with a strong jet of water to dislodge the pests.
Powdery mildew is another common disease that affects elderberry plants, causing a white, powdery coating to form on leaves and stems. To manage this issue, remove any infected areas and treat your plants with a fungicide specifically designed for powdery mildew. Regularly inspecting your plants, keeping the area around them clean, and maintaining good air circulation can also help prevent infestations from occurring in the first place.
By staying vigilant and taking prompt action when you spot any issues, you can keep your elderberry plants healthy and thriving.
Troubleshooting Common Issues
You’ve successfully propagated your elderberry plant, but now you’re encountering some unexpected problems? This section will help you troubleshoot common issues and get back on track.
Identifying Rooting Problems
When it comes to propagating elderberry plants, rooting problems can be frustrating and time-consuming. Weak root growth or failure to root altogether are common issues that can arise during the propagation process. But don’t worry, these problems often have straightforward solutions.
One possible cause of weak root growth is inadequate water levels in the rooting medium. If the soil is too dry, the cutting may not receive enough moisture to stimulate root development. To combat this issue, ensure you maintain consistent watering schedules and monitor the moisture levels closely. A general rule of thumb is to keep the soil moist but not waterlogged.
Another common culprit behind rooting problems is ethylene sensitivity. Elderberry plants can be sensitive to high levels of ethylene gas, which can inhibit root growth. To mitigate this issue, use a propagation medium specifically designed for low-ethylene applications or take steps to minimize exposure by using sealed containers.
Monitor your cuttings regularly and address any potential issues promptly to prevent further problems.
Overcoming Environmental Challenges
Overcoming environmental challenges is one of the most critical aspects of propagating elderberry plants. Extreme temperatures, water scarcity, and unpredictable weather conditions can all impact the success of your propagation efforts. To overcome these challenges, you need to adapt your methods to suit different climates.
In regions with extreme heat or cold, it’s essential to provide shade for your cuttings during the hottest part of the day. This can be achieved by covering them with a frost blanket or a tarp. In areas with frost, bring potted cuttings indoors before the first frost and keep them in a bright location until they’re established.
If you’re propagating elderberry plants in an area with limited water resources, make sure to choose varieties that are drought-tolerant. Cuttings from these plants will have a better chance of survival during times of scarcity. Water your cuttings regularly, but avoid overwatering which can be detrimental to the roots.
To propagate elderberry plants in different climates, you need to understand the specific requirements of each region. For example, in tropical climates, it’s essential to provide adequate shade and ventilation to prevent fungal diseases that thrive in warm and humid conditions. In contrast, in arid regions, water conservation is crucial, and you may need to use specialized irrigation systems.
Some elderberry varieties are more adaptable to changing environmental conditions than others. Research and choose varieties that have been bred for specific climates or growing conditions. This will increase the chances of success when propagating elderberry plants in challenging environments.
In summary, understanding your local climate and adapting your propagation methods accordingly is crucial for overcoming environmental challenges when propagating elderberry plants. By choosing drought-tolerant varieties, providing shade and adequate water, and using specialized irrigation systems when necessary, you can successfully propagate elderberry plants even in harsh conditions.
Frequently Asked Questions
Can I propagate elderberry plants year-round, or are there specific seasons for successful propagation?
While it’s technically possible to propagate elderberry plants at any time of the year, the best results come from propagating during the spring and early summer when the parent plant is actively growing. This ensures that the cuttings or divisions have a good chance of rooting before the heat of summer sets in.
How long does it take for propagated elderberry plants to mature and produce berries?
The time frame for maturity varies depending on factors like climate, soil quality, and care. Generally, you can expect elderberry plants propagated through stem cuttings or layering to start producing berries within 1-2 years after propagation. Division-propagated plants may take slightly longer.
What are some common mistakes to avoid when taking stem cuttings, and how do I prevent them?
Avoid cutting too much of the parent plant’s stem, as this can weaken it. Make clean cuts just above a node (where a leaf meets the stem), and remove lower leaves to minimize water loss. Also, be gentle when handling the cuttings to avoid damaging the delicate tissue.
Can I propagate elderberry plants from seeds, or is that not recommended?
While it’s technically possible to grow elderberry plants from seed, this method can be unpredictable and often results in inferior plant quality. Seeds may not produce plants with the same desirable traits as the parent plant, making propagation methods like stem cuttings or division more reliable for preserving the plant’s characteristics.
How do I store propagated elderberry plants during winter to ensure they survive until spring?
After propagating, keep newly rooted plants in a protected location with consistent temperatures around 40°F (4°C). Avoid exposing them to extreme cold or frost. Water sparingly, as overwatering can lead to root rot. By the time spring arrives, your propagated elderberry plants should be ready for transplantation into their permanent garden locations.