Are you tired of your beautiful blooms fading away too soon? You’re not alone. Most gardeners want their flowers to keep blooming all season long, adding color and vibrancy to their outdoor spaces. One simple yet effective technique can help you achieve just that: deadheading. Deadheading involves removing spent flower heads from plants to encourage new blooms and prevent seed production. By doing so, you’ll not only extend the flowering season but also boost your plant’s overall health and visual appeal. In this article, we’ll delve into the art of deadheading, providing expert tips and techniques on how to keep your flowers looking their absolute best. From basic principles to practical advice, we’ve got everything you need to know about prolonging bloom with deadheading.
Understanding Deadheading
Now that we’ve covered why deadheading is so important, let’s dive into what it means and how to properly remove spent blooms to encourage new growth.
What is Deadheading?
Deadheading is the simple yet effective practice of removing spent flowers from your garden to encourage new blooms and keep your plants looking their best. But what does it really mean to deadhead? In essence, deadheading is a way to trick your plants into focusing energy on producing more flowers instead of seed production.
The purpose of deadheading is to promote continued blooming and prevent the plant from putting its energy into producing seeds. When flowers fade, they often drop their petals and begin the process of seed formation. By removing these spent blooms, you’re essentially telling the plant to direct its energy towards producing new flowers rather than seeds.
This practice has numerous benefits for your garden. For one, it keeps your plants looking vibrant and healthy throughout the growing season. Additionally, deadheading can lead to a longer blooming period, allowing you to enjoy your favorite flowers for an extended time. With regular deadheading, you’ll be amazed at how quickly your garden transforms into a colorful haven of blooms.
When to Deadhead
Deadheading is an art that requires timing to maximize its benefits. The optimal time to deadhead different types of flowers varies depending on their growth cycle and blooming habits.
For example, when dealing with flowers like marigolds, zinnias, and cosmos, it’s best to deadhead them after they’ve finished blooming. This is because these annuals have a tendency to set seeds as soon as they finish flowering, which can divert energy away from producing new blooms. By removing the spent flowers, you’ll encourage your plants to focus on producing more buds.
On the other hand, perennials like roses, daylilies, and coneflowers should be deadheaded during blooming, when the individual flower has reached its peak. This is usually when the petals are fully open, but before they start to fade. Deadheading during this stage will stimulate the plant to produce more flowers and promote a longer blooming period.
Some plants, like snapdragons, geraniums, and petunias, benefit from being deadheaded before they bloom. This is because these plants often produce multiple buds along their stems, and removing the top flower will encourage side shoots to grow, leading to an increased number of blooms.
Tools and Equipment Needed
Before you start deadheading, it’s essential to have the right tools and equipment on hand. You’ll want to begin with a good pair of pruning shears specifically designed for cutting flowers. These should be sharp enough to make clean cuts without crushing the stems, which can cause damage and lead to further decay.
In addition to your pruning shears, consider investing in some gardening gloves to protect your hands from thorns and other plant debris. A clean work surface is also crucial when deadheading – a flat tray or plate will allow you to neatly collect any cut flowers and dispose of them easily.
It’s worth noting that using the right equipment can make all the difference in successfully prolonging bloom. A dull pair of pruning shears, for example, can damage plant tissue and even spread disease. And while it may be tempting to use household scissors or knives, these are not suitable for cutting live plants and can cause harm to both you and your garden.
By investing in the right tools and equipment, you’ll set yourself up for success when deadheading – ensuring that your flowers bloom beautifully all season long!
Benefits of Deadheading
By removing spent blooms, you’ll not only maintain your garden’s visual appeal but also encourage healthy plant growth and a longer blooming period. Let’s explore these benefits in more detail.
Increased Bloom Rate
When you deadhead flowers regularly, one of the most significant benefits is an increased bloom rate. This is because removing spent blooms sends a signal to the plant that it needs to produce more flowers to replace them. As a result, many plants will respond by producing new buds and blooms at an accelerated rate.
Some flower varieties are particularly responsive to deadheading and will thrive when this technique is applied consistently. For example, Cosmos, Zinnias, and Marigolds are all known to produce multiple waves of blooms throughout the growing season if deadheaded regularly. In contrast, plants like Petunias and Salvias tend to focus their energy on producing larger, more elaborate blooms rather than multiple smaller ones.
To take advantage of this benefit in your garden, make sure to deadhead spent flowers as soon as they fade. This will give your plants the best chance to respond with increased bloom production. With a little practice, you’ll be enjoying an abundance of colorful blooms from your deadheaded flowers all season long.
Improved Plant Health
Deadheading is not only beneficial for prolonging flower bloom and maintaining a vibrant appearance but also has a profound impact on plant health. By removing spent blooms, you’re essentially giving your plants a chance to focus their energy on growth and development rather than seed production.
When deadheaded regularly, you’ll notice a reduction in the risk of disease and pests that often thrive on decaying flowers. For instance, many fungal diseases love moist, humid environments, which are created when spent blooms begin to rot. By removing these, you’re creating an environment less conducive to disease development.
Furthermore, regular deadheading encourages healthy growth by directing your plant’s energy towards producing new stems and leaves. This will also help promote better air circulation around the plant, making it even more difficult for diseases to take hold.
Remember to remove spent blooms just above a leaf node, allowing the plant to direct its energy into creating new flowers rather than seed production. With regular deadheading, you’ll be amazed at how your plants respond with improved overall growth and increased resistance to disease and pests.
Enhanced Visual Appeal
Deadheading not only extends the life of your flowers but also enhances the visual appeal of your garden or indoor space. A well-manicured garden is a feast for the eyes, and deadheading plays a significant role in maintaining its neat and tidy appearance.
Imagine walking into a lush garden filled with vibrant blooms that seem to stretch on forever. The carefully pruned stems create a sense of order and harmony, drawing the eye to the colorful flowers. This deliberate arrangement is the result of regular deadheading. By snipping off spent blooms, you encourage new growth, promoting a continuous display of color.
To achieve this effect, make it a habit to inspect your plants regularly for wilted or fading flowers. Remove them promptly, taking care not to damage nearby stems or buds. This simple yet effective technique will keep your garden looking its best throughout the growing season.
Techniques for Effective Deadheading
To ensure you’re deadheading like a pro, let’s dive into some practical techniques to help you remove spent blooms and encourage your flowers to bloom beautifully all season long.
Hand-Pruning vs. Machine Pruning
When it comes to deadheading flowers, you have two primary options: hand-pruning and machine pruning. While both methods can be effective, they have distinct advantages and disadvantages that are worth considering.
Hand-pruning is a more traditional approach that involves manually cutting off spent blooms using a pair of clean scissors or clippers. This method allows for precision and control, making it ideal for delicate or sensitive flowers that may be damaged by machine pruning. For example, if you’re working with roses or hydrangeas, hand-pruning is often the better choice to prevent bruising or tearing of petals.
Machine pruning, on the other hand, uses a power tool to remove spent blooms quickly and efficiently. This method is ideal for larger gardens or for plants that produce an abundance of flowers, such as zinnias or sunflowers. Machine pruning can be more time-consuming to set up, but it saves you time in the long run by allowing you to deadhead multiple plants simultaneously.
Ultimately, the choice between hand-pruning and machine pruning comes down to your personal preference and the specific needs of your garden.
Removing Seed Heads vs. Flower Stems
When it’s time to deadhead, you’re faced with two options: removing seed heads or flower stems. Each approach has its advantages and disadvantages that can impact the overall appearance and performance of your garden.
Removing seed heads is a popular method for prolonging bloom, as it encourages the plant to focus energy on producing new flowers rather than seeds. This technique works particularly well for annuals like marigolds and zinnias, which are bred specifically for their prolific blooming habits. By removing seed heads regularly, you can enjoy an extended period of blooms from these plants.
On the other hand, leaving flower stems intact allows them to produce seeds, which can be beneficial for perennials like roses and peonies. These plants often require a certain amount of seed production to thrive in subsequent years. However, removing individual spent flowers can still encourage new growth and prevent the plant from putting energy into seed development.
Ultimately, the decision to remove seed heads or flower stems comes down to your specific garden needs and preferences. By considering the type of plant, its blooming habits, and your desired outcome, you can make an informed choice that supports a vibrant, long-lasting display of flowers in your garden.
Timing Deadheading for Best Results
When it comes to deadheading for optimal results, timing is everything. To get the most out of this technique, you need to consider two key factors: weather conditions and plant growth stages.
In general, it’s best to deadhead in the morning, after the dew has dried but before the heat of the day sets in. This allows new blooms to develop without being scorched by intense sunlight. Avoid deadheading during periods of extreme heat or drought, as this can stress your plants further and reduce their ability to produce new flowers.
Another important consideration is plant growth stages. For example, if you’re growing annuals like marigolds or zinnias, it’s best to deadhead regularly throughout the growing season to encourage continuous blooming. On the other hand, perennials like peonies and roses typically only need a few rounds of deadheading before they finish their bloom cycle for the year.
To determine the optimal timing for deadheading your specific plants, observe their natural growth patterns and adjust accordingly.
Common Mistakes to Avoid When Deadheading
When deadheading, it’s easy to make mistakes that can actually do more harm than good. Let’s look at some common pitfalls to steer clear of for a healthier and longer-blooming garden.
Over-Deadheading
Deadheading is an essential practice for keeping your flowers blooming all season long. However, there’s a fine line between deadheading and over-deadheading. Removing too many spent blooms can have unintended consequences on your plants. When you take away too much of the flower head, you’re essentially removing part of the plant’s ability to produce energy.
This can lead to reduced plant growth and decreased flower production in the long run. Imagine cutting off a branch that has been producing flowers all season – it’s not just the spent blooms you’re removing, but also the stem and leaves that were supporting them. Over-deadheading can weaken the plant, making it more susceptible to disease and pests.
To avoid over-deadheading, try to focus on removing only the wilted or dead flowers, leaving some of the other blooms intact. This will allow your plants to continue producing energy and maintain their vigor. Remember, a balanced approach is key when it comes to deadheading – you want to encourage your plants to produce more flowers, not exhaust themselves by constantly removing them.
Under-Deadheading
Under-deadheading can have serious consequences on the health and appearance of your flowers. When spent blooms are left to accumulate on the plant, they create an ideal environment for disease and pests to thrive. This can lead to a range of problems, from mild issues like powdery mildew to more severe infestations like aphids or whiteflies.
As bacteria and fungi feed on the decaying flower parts, they release spores that can spread to other parts of the plant, causing widespread damage. Additionally, pests like beetles, slugs, and snails are drawn to the sweet nectar and moisture left behind by spent blooms, making them a welcome feast for these unwanted visitors.
To avoid this scenario, make it a habit to remove dead flowers regularly, ideally as soon as they start to wilt or drop their petals. This will not only prevent disease and pest issues but also promote healthy growth and encourage the plant to focus its energy on producing new blooms. By keeping your garden tidy and free of spent flowers, you’ll be able to enjoy a vibrant display of color for longer and reduce the risk of common flower-borne problems.
Incorrect Tool Use
When it comes to deadheading flowers, using the right tools can make all the difference. However, many gardeners unknowingly commit a common mistake that can lead to frustration and wasted effort: incorrect tool use.
For example, using pruning shears with dull blades can cause more harm than good. The rough cut can damage the stem, leading to an increased risk of disease and pest infestations. Similarly, using a hedge trimmer on delicate flowers like roses or peonies can be catastrophic. These tools are designed for thicker branches, not fragile stems.
Another common mistake is using the wrong type of snip for different flower types. For instance, using a curved snip for deadheading sunflowers may lead to crushed petals and uneven cuts. Instead, opt for a long-bladed snip that allows for clean, straight cuts. To avoid these mistakes, it’s essential to familiarize yourself with the specific needs of each flower type in your garden. Research the recommended tools and techniques for each plant, and invest in high-quality equipment to ensure a precise and gentle deadheading process.
Additional Tips and Tricks
Now that you’ve mastered the art of deadheading, it’s time to take your skills to the next level! We’ll share some expert tips and tricks for optimizing bloom in your garden.
Companion Planting
Companion planting is an often-overlooked technique that can significantly enhance the benefits of deadheading. By carefully selecting plants to grow alongside your flowering varieties, you can create a harmonious ecosystem that attracts beneficial insects and improves soil health. This, in turn, will promote healthy plant growth and encourage repeat blooming.
Consider incorporating marigolds near roses or tomatoes – these bright flowers repel nematodes and whiteflies, respectively, which can be detrimental to your plants’ well-being. Similarly, basil is a natural pest repellent that pairs beautifully with sunflowers, while nasturtiums attract aphid-eating lacewings and hoverflies.
To get the most out of companion planting, focus on pairing plants with different growth habits and bloom times. This ensures that there’s always something in bloom to draw pollinators, even when individual flowers are not in season. By combining deadheading with thoughtful plant selection, you’ll create a vibrant, thriving garden ecosystem that rewards your efforts with prolonged flower bloom and maximum visual appeal.
Fertilizing After Deadheading
When you’re deadheading, it’s also an excellent opportunity to give your plants some extra TLC. Fertilizing after deadheading can provide a boost to help promote more blooms and keep your garden looking its best.
The type of fertilizer you use is crucial. Look for a balanced, water-soluble fertilizer that contains the three essential macronutrients: nitrogen (N), phosphorus (P), and potassium (K). A 20-20-20 formula is an excellent starting point. You can also consider adding a bloom booster or flower-specific fertilizer that’s rich in phosphorus to encourage more blooms.
When applying fertilizer, follow these general guidelines:
* Use the recommended application rate on the label.
* Dilute the fertilizer according to the instructions to avoid burning your plants’ roots.
* Apply the fertilizer after deadheading, ideally when watering your plants. This way, you’ll minimize waste and ensure the nutrients are absorbed quickly.
Some plants, like roses and geraniums, require more frequent fertilization. For these types of plants, consider applying a fertilizer with a higher phosphorus content every 1-2 weeks during peak bloom periods.
Making Deadheading a Habit
To make deadheading a habit, start by incorporating it into your regular gardening routine. Set aside 15-30 minutes each week to inspect your flowers and remove spent blooms. You can also schedule deadheading alongside other tasks like watering or pruning.
Create a sense of ritual around deadheading by playing music or enjoying the outdoors while you work. This will make the task more enjoyable and increase the likelihood that you’ll stick with it. Consider turning deadheading into a social activity by inviting a friend over to help – not only will you be making progress on your flower care, but you’ll also have some quality time together.
To stay consistent, track your progress by taking before-and-after photos of your flowers or keeping a gardening journal to record the dates and types of blooms that respond well to deadheading. This will give you a sense of accomplishment and motivate you to continue making this crucial step in flower care a habit.
Frequently Asked Questions
Can I deadhead any type of flower, or are there exceptions?
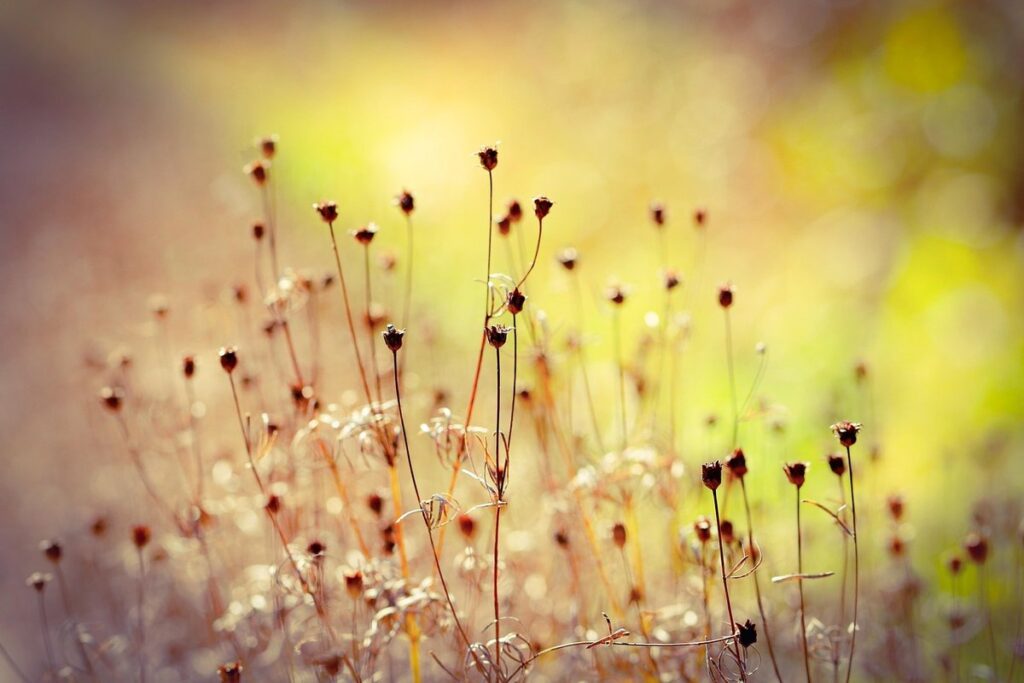
Not all flowers respond well to deadheading. Delphiniums, hyacinths, and gladiolus, for example, produce seed heads that are attractive and can be left on the plant. However, most annuals and perennials, including roses, daisies, and marigolds, benefit from regular deadheading.
How often should I deadhead my flowers to see the best results?
The frequency of deadheading depends on the type of flower and its growth habits. For many annuals and perennials, it’s recommended to remove spent blooms every few days or when they fade. This encourages continuous blooming and prevents seed production.
What’s the difference between removing seed heads and flower stems during deadheading?
Removing seed heads (the dried or brown flower stalk) can be beneficial for plants like coneflowers and black-eyed Susans, as it directs energy to new blooms. However, for flowers like roses and peonies, it’s better to remove only the spent bloom (flower stem), leaving the seed head intact.
Can deadheading affect my plant’s overall health or growth?
No, regular deadheading actually promotes healthy growth by directing the plant’s energy towards producing more flowers instead of seeds. This can lead to a more vigorous and robust plant over time. By removing spent blooms, you’re essentially encouraging your plant to focus on blooming rather than seed production.
What are some common mistakes I should avoid when deadheading my plants?
Some common pitfalls include over-deadheading (removing too many flowers at once), under-deadheading (not removing enough spent blooms), and using the wrong tools or equipment. Make sure to use clean, sharp pruning shears or scissors for best results.