Are you looking for a natural and sustainable way to protect your garden from pests, promote healthy plant growth, and even start seeds without chemicals? Processing beeswax can be a game-changer for gardeners interested in exploring eco-friendly alternatives. Beeswax, collected from honeybees’ hives, is a versatile wax that offers numerous benefits when used in gardening projects.
In this article, we’ll delve into the world of processing beeswax and show you how to collect, harvest, and refine it for your garden needs. We’ll explore its applications, such as creating natural pest control solutions, making seed starters, and even crafting plant labels. Whether you’re a seasoned gardener or just starting out, this guide will walk you through the process of working with beeswax and provide expert tips to get the most out of it.
Benefits and Uses of Beeswax in Gardening
As you work with beeswax for your garden projects, let’s explore the many benefits it offers, from seed starting to pest control.
Introduction to Beeswax Benefits
When it comes to gardening, many of us are on the lookout for natural and sustainable ways to improve our soil, control pests, and conserve water. That’s where beeswax comes in – a versatile and eco-friendly substance that offers a multitude of benefits for gardeners.
One of the primary advantages of using beeswax is its natural pest control properties. Beeswax contains fatty acids that repel certain insects, such as aphids and whiteflies, keeping them from damaging your plants. You can apply melted beeswax to affected areas or mix it with water to create a spray for foliar application.
Another benefit of using beeswax is its ability to improve soil structure and retain moisture. Beeswax helps to hold water in the soil, reducing the need for frequent watering and minimizing soil erosion. You can add melted beeswax to your potting mix or use it as a mulch to keep the soil consistently moist.
By incorporating beeswax into your gardening routine, you’ll be taking a crucial step towards creating a more sustainable and thriving garden ecosystem.
Beeswax Applications in Gardening
When it comes to beeswax applications in gardening, there are several uses that can benefit both plants and gardeners. One of the most popular uses is for seed starting. Beeswax can be mixed with water to create a natural seed starter solution that helps seeds germinate quickly and evenly. This is particularly useful for delicate or sensitive seeds that may struggle to sprout in traditional soil.
Another key use of beeswax in gardening is as a natural plant protectant. When applied to leaves or stems, beeswax creates an invisible barrier against pests and diseases, preventing damage and promoting healthy growth. For example, you can mix beeswax with neem oil to create a potent pest repellent that keeps aphids, whiteflies, and spider mites at bay.
Finally, beeswax can also be used to lubricate garden tools, reducing friction and wear on handles and joints. This helps extend the life of your tools and makes them easier to use over time. To do this, simply melt the beeswax in a double boiler or microwave-safe bowl, then brush it onto your tool handles. Allow the wax to cool and harden before using your tools as usual.
By incorporating beeswax into your gardening routine, you can enjoy healthier plants, reduced maintenance, and increased productivity – all while reducing your reliance on chemical pesticides and lubricants.
Collecting and Harvesting Beeswax
When it comes to collecting and harvesting beeswax, you’ll want to focus on gathering excess wax from your beehives, either through dedicated frames or natural cappings. This process will give you a solid starting point for further processing.
Identifying Pure Beeswax Sources
When it comes to finding high-quality beeswax for your gardening projects, you have several options to consider. One of the most reliable sources is local beekeepers. These individuals often harvest excess wax from their beehives and sell it directly to customers. By purchasing beeswax from a local source, you’re not only supporting your community but also ensuring that the wax has been handled with care and attention.
If you’re unable to find a local beekeeper or prefer a more convenient option, reputable suppliers are another excellent choice. These companies often source their beeswax from trusted local beekeepers or other reputable sources. Look for suppliers that provide detailed information about the origin of their beeswax, including where it was harvested and how it was processed.
When selecting a supplier, consider factors such as purity, melting point, and color consistency. High-quality beeswax should have a clear, golden hue and melt at around 180-190°F (82-88°C). Be wary of suppliers that offer unusually cheap prices or vague information about their products – these may be indicative of lower quality wax.
To ensure you’re getting the best possible product, ask questions like: What is the origin of your beeswax? How is it processed and purified? Can I visit your facility to see how you handle and store the wax?
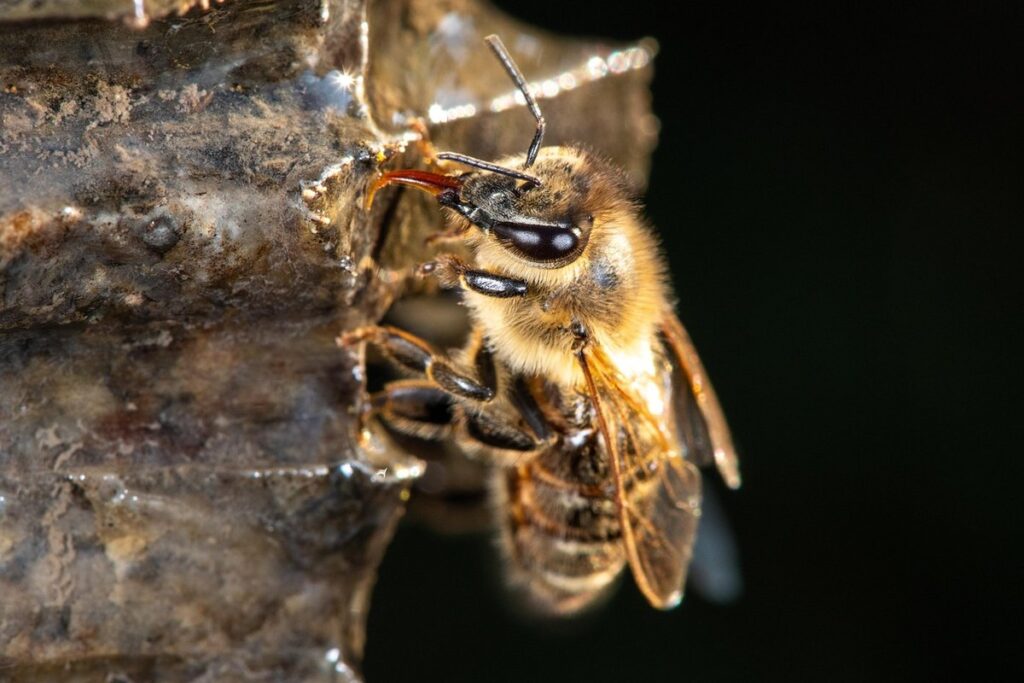
Extracting Beeswax from Honeycombs
Extracting beeswax from honeycombs is an essential step in collecting and harvesting this valuable wax. To do it safely and efficiently, follow these steps: First, make sure to wear protective gear such as gloves, a beekeeping suit, and a veil to avoid getting stung.
Next, carefully remove the honeycomb frames from the beehive, taking care not to damage them in the process. Then, use a heated knife or a scraper to gently loosen the beeswax from the combs. This will make it easier to remove the wax without crushing it.
Once you’ve removed as much of the wax as possible, place the frames in a warm water bath (around 100°F) for about an hour. The residual wax will melt and become pliable, making it simpler to scrape off any remaining wax. Be cautious not to burn yourself on hot equipment or scald your skin with hot water.
Processing Beeswax for Garden Use
When working with beeswax for your garden projects, it’s essential to know how to properly process and prepare it. This involves melting, straining, and tempering the wax to achieve a smooth, workable texture.
Melted vs. Unmelted Beeswax: Choosing the Right Form
When it comes to processing beeswax for garden use, one of the most important decisions you’ll make is whether to work with melted or unmelted beeswax. Both forms have their benefits, and choosing the right one will depend on your specific project and needs.
Working with melted beeswax can be a game-changer for some projects, such as creating wax wraps or polish for garden tools. The melted form allows for easy mixing and blending of ingredients, making it ideal for recipes that require precise ratios of waxes and additives. Melted beeswax also has a longer shelf life than unmelted beeswax, which can become brittle over time.
On the other hand, unmelted beeswax is often preferred for projects where texture and structure are important, such as making candles or ornaments. The unmelted form allows for more control over the final product’s appearance and can be easily molded into specific shapes. Unmelted beeswax also tends to retain its natural properties better than melted wax, which can become altered by heat.
Ultimately, the choice between melted and unmelted beeswax comes down to your project’s requirements. If you’re looking for ease of use and a longer shelf life, melted may be the way to go. But if you need more control over texture and structure, unmelted is the better option.
Filtering and Purifying Beeswax
When working with beeswax for garden projects, it’s essential to filter and purify it to ensure its quality and effectiveness. Beeswax can contain impurities like dirt, debris, and even small insects that can affect its performance and appearance.
Firstly, filtering the wax helps remove these impurities, which is crucial when using beeswax for garden applications such as plant markers or lubricating moving parts in your gardening equipment. To filter the wax, you can use a coffee filter or a piece of cheesecloth to strain it through. This simple process can make a significant difference in the quality of the final product.
Purifying the wax is also necessary to remove any contaminants that might affect its melting point or texture. You can do this by heating the wax and then allowing it to cool and solidify. Repeat this process several times until you notice an improvement in the wax’s clarity and smoothness. This process may seem time-consuming, but it’s a crucial step in ensuring your beeswax is suitable for garden use.
By filtering and purifying your beeswax, you’ll be able to create high-quality garden products that will last longer and perform better.
Working with Melted Beeswax
When working with melted beeswax, it’s essential to take precautions to avoid burns and splatters. This section will walk you through safe handling techniques and useful tips for a smooth process.
Preparing for Melting: Equipment and Safety
When working with melted beeswax, it’s essential to have the right equipment and take necessary safety precautions to ensure a smooth and safe process. First and foremost, you’ll need a heat-resistant container specifically designed for melting wax, such as a double boiler or a dedicated wax melter. These containers are made of materials like stainless steel or silicone that can withstand high temperatures without cracking or melting.
In addition to the right equipment, it’s crucial to wear protective gear when working with hot beeswax. A pair of heat-resistant gloves will prevent burns from accidental splashes or spills. You should also wear safety glasses to protect your eyes from any wax drips or splatters. It’s also a good idea to have a thermometer on hand to monitor the temperature of the melted wax, which is typically between 180°F and 200°F.
When working with hot equipment and materials, it’s easy to get distracted and lose focus. To avoid accidents, make sure you’re in a well-ventilated area, away from any flammable materials or surfaces that could be damaged by spills.
Creating Beeswax-Based Products for the Garden
Creating beeswax-based products for the garden is a wonderful way to reuse and repurpose this natural wax. One of the most exciting projects you can undertake is creating plant sealers using melted beeswax. These sealants help prevent water from entering the soil, reducing evaporation and minimizing root rot.
To make your own plant sealer, start by melting 1-2 tablespoons of beeswax in a double boiler or a microwave-safe bowl. Once fully liquefied, add 1-2 tablespoons of coconut oil and 1 teaspoon of neem oil (optional). Stir well to combine. Dip the leaves or stems of your plants into the melted mixture, coating them evenly.
You can also use this mixture as a root drench by pouring it directly onto the soil around the base of the plant. This helps protect the roots from moisture loss and promotes healthy growth. Experiment with different ratios of beeswax to oil to find the perfect balance for your garden needs.
Consider adding essential oils like lavender or tea tree to create pest-repellent blends. With a little creativity, you can repurpose melted beeswax into a variety of useful garden products that promote plant health and productivity.
Troubleshooting Common Issues
If you’re experiencing problems with melting, graininess, or uneven texture while processing beeswax for your garden projects, don’t worry – we’ve got solutions. This section will walk you through common issues and their fixes.
Identifying Contamination or Impurities
When processing beeswax for garden projects, it’s not uncommon to encounter contamination or impurities that can affect the quality and performance of the final product. Identifying these issues early on is crucial to ensuring that your finished products meet their intended purpose.
One common sign of contaminated or impure beeswax is a strong, unpleasant odor. If you notice a pungent smell when working with the wax, it may be due to contamination from mold, mildew, or other debris. To address this issue, carefully inspect the wax for any visible signs of contamination and consider re-melting or re-filtering it.
Another potential issue is the presence of debris such as dirt, dust, or insects. These impurities can compromise the texture and consistency of the wax, making it difficult to work with. To avoid this problem, ensure that your beeswax is properly filtered before processing. A simple coffee filter or cheesecloth can help remove unwanted particles.
Regularly inspecting your beeswax for signs of contamination and taking prompt action when issues arise will help you maintain high-quality products and avoid costly mistakes down the line.
Preventing Clogs and Other Processing Problems
When working with melted beeswax, it’s essential to maintain your equipment and take preventive measures to avoid common processing problems. One of the most significant issues you’ll encounter is clogging. This can happen when debris accumulates at the bottom of the melting pot or when residue builds up on the thermometer.
To prevent clogs, regularly clean your melting pot with warm soapy water, paying extra attention to the spout and any small crevices where wax can accumulate. Additionally, use a fine-mesh strainer to filter the melted wax before pouring it into molds. This simple step can save you from having to scrape out stuck wax later on.
Another common problem is inconsistent temperature readings. To ensure accurate temperature control, calibrate your thermometer regularly by checking its reading against a known-temperature reference point. You should also keep an eye on the temperature gradient in your melting pot – if it’s uneven, it can cause the wax to overheat or underheat.
Proper equipment maintenance and attention to detail are crucial for successful beeswax processing.
Conclusion and Future Projects
As you wrap up your bee-friendly project, let’s recap what you’ve learned and explore new ideas for future endeavors using your now-skilled hands.
Recap of Key Takeaways
In summary, processing beeswax for garden projects requires careful attention to detail and a thorough understanding of the steps involved. To recap, you’ll need to start by sourcing high-quality beeswax from local beekeepers or suppliers, ensuring it’s free from contaminants and impurities.
Next, you’ll need to melt the wax using a double boiler or a dedicated wax melter, being mindful of temperature control and monitoring to prevent overheating. Once melted, filter the wax through cheesecloth or a fine-mesh sieve to remove any remaining debris.
When shaping your beeswax creations, keep in mind that it can be quite sticky when first removed from the mold – patience is key as you allow it to cool and harden. For added durability, consider combining beeswax with other natural ingredients like jojoba oil or soy wax.
Some key considerations include: storing processed beeswax in airtight containers to prevent oxidation; using protective gear when working with hot equipment; and experimenting with different molds and shapes to achieve the desired form. By following these guidelines and tips, you’ll be well on your way to creating beautiful and functional garden projects with ease.
Expanding Your Beeswax Knowledge: Tips and Resources
Now that you’ve processed your first batch of beeswax, it’s time to take your skills to the next level. Expanding your knowledge and exploring new techniques can help you create even more innovative garden projects. Start by delving into online forums and communities dedicated to natural building and permaculture.
For instance, check out websites like Permies or Natural Building Network, where you can connect with other enthusiasts and learn from their experiences. Online courses and tutorials on beeswax processing are also a great resource for further learning. Platforms like Udemy and Skillshare often feature courses on sustainable living and natural building techniques that include beeswax working.
To get hands-on practice, consider joining local workshops or online classes focused on natural wax processing. These sessions will give you the opportunity to learn from experienced instructors and gain practical skills. Don’t forget to explore books and videos by experts in the field of natural building and permaculture – they often share valuable insights and tips that can help take your beeswax projects to new heights.
Experimenting with different recipes and techniques is also key to mastering the art of beeswax processing. Feel free to try out new ideas, even if it means making a few mistakes along the way. With patience and persistence, you’ll soon become a skilled beeswax craftsman, capable of creating unique garden projects that showcase your creativity and skills.
Frequently Asked Questions
What if I’m not sure what type of beeswax I have? How do I identify its quality?
Identifying the quality of your beeswax is crucial for ensuring it’s suitable for gardening projects. To determine the purity and quality, check for any signs of contamination or impurities. Look for a clear, pale-yellow color with no visible particles. Beeswax typically has a pleasant, sweet odor. If you’re still unsure, consider consulting with a beekeeping expert or conducting further research on beeswax identification.
Can I use beeswax straight from the honeycomb without processing it first?
No, using raw beeswax straight from the honeycomb is not recommended for gardening projects. Beeswax needs to be processed and refined to remove impurities, wax debris, and other contaminants that can affect its performance. Processing beeswax involves melting, filtering, and purifying it to create a clean, usable product.
How do I prevent clogs when working with melted beeswax?
Preventing clogs is an essential consideration when working with melted beeswax. To avoid this issue, ensure your equipment and workspace are well-maintained, and the beeswax is properly filtered before melting. Also, use a thermometer to monitor the temperature of the melted wax, as excessive heat can cause it to thicken and clog.
Can I add essential oils to my beeswax products for extra pest control?
Yes, adding essential oils to your beeswax products can enhance their natural pest control properties. Certain essential oils, such as peppermint or lemongrass, have been shown to repel pests like aphids and whiteflies. However, be sure to use only high-quality, pure essential oils that are suitable for gardening applications.
How do I store my processed beeswax for future use in garden projects?
Proper storage of your processed beeswax is crucial to maintain its quality and effectiveness. Store the beeswax in a cool, dry place away from direct sunlight. Airtight containers or plastic bags can help prevent oxidation and contamination. Label the containers with their contents, date, and any relevant notes for future reference. This will ensure your beeswax remains usable for future garden projects.