Drying flowers is an art that can bring a touch of elegance and sophistication to any room, but it requires some know-how. Preserving delicate blooms without losing their beauty or texture can be challenging, which is why many flower enthusiasts turn to silica sand as a tried-and-true method for drying flowers. With the right technique, you can enjoy your favorite flowers year-round, even when they’re out of season. In this comprehensive guide, we’ll walk you through the benefits and process of drying flowers with silica sand. You’ll learn how to properly prepare your flowers, mix the right ratio of silica sand, and what to expect from the drying process. Whether you’re a seasoned florist or a DIY enthusiast, this article will equip you with the knowledge to successfully dry flowers and preserve their natural beauty for years to come.
Introduction
To successfully dry flowers with silica sand, it’s essential to understand the basic process and materials needed, which we’ll cover in more detail below. Let’s get started!
Benefits of Drying with Silica Sand
When you choose to dry flowers with silica sand, you’re not only preserving their delicate beauty but also unlocking a world of aesthetic possibilities. One of the primary benefits of using silica sand is its exceptional preservation properties. By completely dehydrating the flowers through silica’s desiccant action, you can prevent moisture-related damage and decay that often plagues dried arrangements.
Silica sand also elevates the visual appeal of your dried blooms. The gentle, even drying process helps maintain their original shape and texture, allowing for stunning floral arrangements that retain a natural elegance. Moreover, silica-dried flowers take on an ethereal quality, giving them an otherworldly appearance that’s both captivating and timeless.
The aesthetic benefits of using silica sand extend beyond individual blooms too – it allows you to create cohesive, long-lasting displays that add a touch of rustic charm or vintage flair to any space. Whether you’re crafting delicate bouquets for weddings or experimenting with show-stopping centerpieces, the advantages of drying flowers with silica sand are undeniable: it’s an approach that will leave your creations looking vibrant and undiminished for years to come.
Essential Materials and Equipment Needed
To begin drying flowers with silica sand, you’ll need to gather some essential materials and equipment. The first item on this list is silica sand itself, which can be found at most craft stores or online. It’s crucial to choose a high-quality silica sand that’s specifically designed for preserving flowers.
In addition to the silica sand, you’ll also need a drying rack to hold your flower arrangements in place while they dry. You can purchase a dedicated drying rack or repurpose an old picture frame or wire mesh screen. Make sure it’s clean and free of any debris before use.
You’ll also need a container with good airflow to store the silica sand, as well as a tray or plate for holding your dried flowers once they’re ready. Other optional items that can be helpful include a hygrometer to monitor humidity levels and a fan to circulate air around your drying setup. Be sure to keep all of these materials within easy reach, as you’ll likely be working with them frequently throughout the drying process.
Preparing the Flowers
Now that you’ve selected and prepared your flowers, it’s time to get them ready for drying by cleaning them thoroughly and trimming any excess foliage. Remove any damaged petals or stems to promote even drying.
Choosing the Right Flower Types
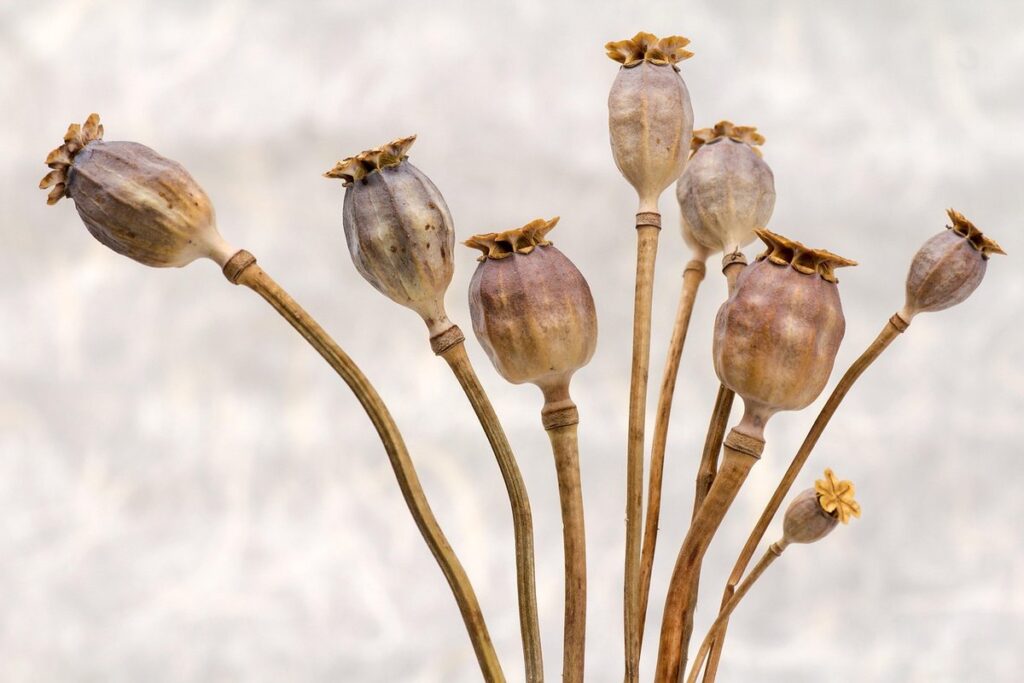
When it comes to drying flowers with silica sand, not all types of flowers are created equal. Some hold their shape and delicate petals remarkably well, making them perfect candidates for this method. On the other hand, some may not fare as well.
For optimal results, choose flowers that have sturdy stems and a compact flower head. Roses, carnations, and chrysanthemums fit the bill. These types of flowers retain their shape beautifully when dried with silica sand. Delicate petals like those found in roses and peonies also benefit from this method, as it helps to preserve their texture.
Avoid using fragile or wispy flowers like baby’s breath or Queen Anne’s lace, as they tend to lose their structure and become brittle during the drying process. Similarly, flowers with soft or thin petals, such as orchids or freesia, may not hold up well to silica sand drying.
When selecting flowers for drying with silica sand, consider the size of the blooms as well. Larger flowers like sunflowers and dahlias can be more challenging to dry evenly, so it’s best to use them in smaller quantities or combine them with smaller flowers for a balanced arrangement.
Cleaning and Preparing the Flowers
Before you can dry your flowers with silica sand, they need to be clean and free of excess moisture. Remove any excess foliage from the stems, as this will help prevent mold growth during the drying process. Gently brush off any visible debris or dust from the petals using a soft-bristled brush or a small, dry paintbrush.
Next, inspect each flower for any signs of pests or diseases. If you find any affected areas, carefully trim them away to prevent the problem from spreading to other parts of the flower. To remove excess moisture, gently pat the flowers with a clean cloth or paper towel, being careful not to damage the delicate petals.
It’s essential to dry your flowers in a well-ventilated area, but before that, make sure they’re completely dry. You can speed up the process by placing them between two sheets of blotting paper or newspaper, allowing excess moisture to evaporate more quickly. Once your flowers are ready for drying with silica sand, you’ll be able to preserve their natural beauty and extend their lifespan.
The Drying Process
Now that you’ve prepared your flowers for silica gel drying, it’s time to walk them through the crucial drying process, which we’ll break down step by step. This section will guide you through each essential stage.
Applying Silica Sand to the Flowers
When applying silica sand to the flowers, it’s essential to do so evenly and thoroughly to ensure proper coverage. Start by gently placing a handful of silica sand into a container, then dip the stems of your flowers into the sand, making sure they’re fully submerged. To prevent clumping, you can also sprinkle a small amount of silica sand directly onto the petals or leaves of the flower.
As you apply the silica sand, use your fingers to gently spread it evenly throughout the arrangement. This will help prevent any areas from becoming too dense with sand. You want to maintain an even balance between the flowers and the silica sand to promote optimal drying.
To achieve a uniform coverage, consider dividing the flowers into sections or groups, then applying the silica sand in a consistent manner across each area. This technique ensures that all parts of the flowers receive adequate moisture control, which is crucial for successful drying. By taking your time and being mindful of even application, you’ll be able to dry your flowers with silica sand effectively.
Monitoring and Maintaining Humidity Levels
Monitoring and maintaining optimal humidity levels is crucial during the drying process to prevent mold growth, preserve color intensity, and achieve even drying. Silica sand, being a natural desiccant, can only work effectively when the surrounding environment is not too humid.
To monitor moisture levels, you’ll want to keep an eye on temperature and humidity gauges placed near the silica bed or in close proximity to your drying flowers. A hygrometer will help you maintain optimal conditions between 35-45% relative humidity (RH). For every degree of temperature increase, the humidity level should decrease by approximately 5%.
To prevent moisture buildup and promote efficient drying, ensure good air circulation around the silica bed and flowers. You can do this by using a fan or placing the setup near an open window. Avoid covering your drying flowers with plastic or cloth, as this can trap excess moisture.
Regular checks on temperature and humidity levels will help you make adjustments as needed to maintain optimal conditions for successful flower drying.
Post-Drying Care
Now that you’ve dried your flowers, it’s time to bring out their full beauty by following these simple steps for post-drying care. We’ll walk you through the next steps.
Storing Dried Flowers with Silica Sand
When it’s time to store your dried flowers preserved with silica sand, it’s essential to choose a storage method that protects their delicate petals and maintains their beauty. One popular option is storing them in containers filled with silica gel.
To begin, select airtight containers specifically designed for storing dried flowers. Glass jars or plastic containers with tight-fitting lids work well. Avoid using cardboard or paper boxes as they can harbor moisture and cause the silica sand to become damp.
Place the dried flowers inside the container, making sure they’re not touching each other to prevent breakage. Then, add a layer of silica gel on top of the flowers. This will help absorb any remaining moisture and keep your blooms fresh for longer.
Store the containers in a cool, dry place, away from direct sunlight. Basements or closets with consistent temperatures between 50°F to 70°F (10°C to 21°C) are ideal locations. By following these steps, you’ll be able to preserve your dried flowers and enjoy them for years to come.
Using Dried Flowers in Crafts and Decorations
Now that you’ve successfully dried your flowers using silica sand, it’s time to get creative with them. One of the best parts about preserving flowers this way is that they remain supple and flexible, making them perfect for a variety of crafts and decorations.
You can use your beautifully preserved blooms in traditional arrangements, but also experiment with more unique projects like wreaths, garlands, and centerpieces. Consider using wire or floral foam to create three-dimensional designs that showcase your flowers’ intricate details. For example, you could create a stunning summer wreath by arranging dried peonies and hydrangeas on a wire base.
To add an extra touch of elegance, try pairing your preserved flowers with greenery like eucalyptus or ferns. This combination works beautifully in vases, containers, or even as a decorative accent for a wall hanging. You can also use the dried flowers to create beautiful potpourri blends that fill the air with sweet scents and add a pop of color to any room.
When it comes to incorporating your preserved blooms into your decor, don’t be afraid to think outside the box. Use them as a base for a DIY photo display or as a decorative topping for cakes and cupcakes. With a little imagination, the possibilities are endless!
Tips and Variations
Now that you’ve successfully dried your flowers with silica sand, let’s explore some creative ways to use them and experiment with different techniques.
Experimenting with Different Silica Sand Ratios
Experimenting with Different Silica Sand Ratios is key to achieving optimal drying results for various types of flowers. Each bloom has its unique characteristics, moisture content, and density, making it essential to find the right balance of silica sand to support their preservation.
When experimenting with different ratios, start by observing how the flower responds to different amounts of silica sand. For instance, delicate petals may require a higher ratio of sand to prevent them from becoming misshapen or discolored. On the other hand, robust blooms like peonies might benefit from a lower ratio to allow for more even drying.
Begin with a standard ratio of 1 part silica sand to 2 parts flower, and adjust as needed. Keep in mind that over-saturation can lead to mold growth, while under-saturation may cause the flowers to dry unevenly or become brittle. To avoid this, gently mix the silica sand into the container, ensuring even coverage.
By monitoring your flowers’ response to different ratios, you’ll develop a sense of what works best for each type and create stunning dried arrangements that retain their natural beauty.
Combining Silica Sand with Other Preservation Methods
While silica sand is an excellent drying agent on its own, you may find that combining it with other preservation methods yields even better results. One popular method to combine with silica sand is air-drying. This involves allowing the flowers to dry naturally over time, either by hanging them upside down or placing them in a warm, dry environment.
To use both silica sand and air-drying together, first allow your flowers to dry slightly using the air-drying method. Once they’re about 75% dry, fill a container with silica sand and gently place the partially dried flowers inside. Seal the container and let it sit for a few more days or weeks, allowing the silica sand to absorb any remaining moisture.
Another method you can combine with silica sand is glycerin preservation. Glycerin helps retain the natural color and texture of the flowers by absorbing excess moisture. To use this method in conjunction with silica sand, first treat your flowers with a glycerin-based solution to lock in their moisture content. Then, fill a container with silica sand and gently place the treated flowers inside.
Using multiple preservation methods can help you achieve stunning results that last for years to come.
Troubleshooting Common Issues
If you’re encountering problems while drying flowers with silica sand, don’t worry – we’ve got you covered with some troubleshooting tips to get your blooms back on track.
Identifying and Resolving Clumping and Adhesion
Clumping and adhesion are common issues that can arise when drying flowers with silica sand. Clumping occurs when the silica particles stick together, creating clumps of sand that adhere to the flower petals. Adhesion happens when the silica sand becomes stuck to the petals, making it difficult to remove.
To identify clumping, check for uneven or lumpy patches on the surface of the flowers. If you notice this issue, try gently separating the clumps using a soft-bristled brush or your fingers. This may help break apart any stuck particles and restore an even layer of silica sand.
Adhesion can be identified by inspecting the flower petals for signs of sand sticking to them. To prevent adhesion in the first place, make sure to coat the flowers evenly with a thin layer of silica sand. You can also try misting the silica sand lightly before adding it to the container, as this will help reduce static cling.
If adhesion has already occurred, you can try soaking the affected area in water for several minutes. This may loosen the sand’s grip on the petals and make removal easier. Be cautious not to submerge the entire flower, as excess moisture can cause damage or mold growth.
To prevent clumping and adhesion altogether, maintain a consistent temperature and humidity level during the drying process. Avoid overcrowding your containers, as this can lead to uneven drying and an increased likelihood of these issues occurring.
Frequently Asked Questions
Can I use silica sand to dry flowers that are already wilted or past their prime?
Yes, you can still use silica sand to dry flowers that have started to wilt or have passed their prime. However, the quality of the dried flowers may not be as high as those dried at peak freshness. It’s essential to clean and prepare the flowers thoroughly before applying silica sand to ensure the best results.
How do I prevent clumping when mixing silica sand with water?
To avoid clumping when mixing silica sand with water, it’s crucial to use a precise ratio (as mentioned in the article) and mix well. You can also add a small amount of glycerin or borax to help prevent clumping. Additionally, ensure the mixture is evenly distributed among the flowers.
What if I notice mold or mildew on my dried flowers after applying silica sand?
Mold and mildew growth can occur when there’s excess moisture trapped in the silica sand. Regularly check your drying setup for proper airflow and humidity levels (below 60%). If you notice any signs of mold, remove the affected areas immediately and dry them separately to prevent further contamination.
Can I use silica sand to dry delicate flowers like orchids or freesia?
Silica sand can be used to dry delicate flowers like orchids or freesia. However, it’s crucial to handle these flowers with extra care during the drying process. You may need to adjust the ratio of silica sand and water or add additional steps for gentle air circulation.
How long does the drying process typically take using silica sand?
The drying time using silica sand can vary depending on factors like flower type, size, and ambient conditions (temperature and humidity). Generally, it takes anywhere from 2-6 weeks to fully dry flowers with silica sand. Monitor your setup regularly to ensure optimal drying results.