Planting tomatoes from seeds can be a daunting task for many gardeners, but with the right guidance, anyone can grow a bountiful harvest. Whether you’re a seasoned gardener or just starting out, selecting the perfect tomato variety is crucial to ensure you get the desired flavor and texture in your final crop.
In this ultimate guide, we’ll walk you through every step of planting tomatoes from seeds, from preparing the soil to harvesting your ripe tomatoes. We’ll cover essential topics such as variety selection, seedling care, and soil preparation to give you a solid foundation for success. By following our expert tips and techniques, you’ll be able to grow juicy, flavorful tomatoes that will impress even the most discerning palates. Get ready to learn how to plant, grow, and harvest your very own delicious tomatoes from seeds!
Choosing the Right Variety
When it comes to planting tomatoes from seeds, selecting the right variety is crucial for success. In this next step, we’ll explore how to choose a tomato type that’s perfect for your climate and growing conditions.
Understanding Tomato Types
When it comes to planting tomatoes from seeds, understanding the different types can be overwhelming. But don’t worry, with this brief overview, you’ll be able to make informed decisions about which variety is best for you.
Let’s start with some of the most popular tomato types: cherry, beefsteak, and Roma. Cherry tomatoes are perfect for salads, snacking, or adding a burst of flavor to pasta dishes. They’re compact, producing small fruit on a bushy plant that grows up to 2-3 feet tall. Beefsteak tomatoes, on the other hand, are large and meaty, with a rich, full-bodied flavor. They require more space and support as they grow up to 6 feet tall.
Roma tomatoes are elongated, cylindrical fruits ideal for canning, sauces, or salsas. They’re also relatively low-maintenance and compact, growing up to 3-4 feet tall. Consider your cooking style, available space, and desired flavor profile when choosing a tomato variety. For example, if you love making homemade pasta sauce, Roma tomatoes are an excellent choice. If you prefer snacking on fresh tomatoes, cherry tomatoes are the way to go.
In addition to these three popular types, there are many other varieties to explore, including patio tomatoes, yellow tomatoes, and heirloom tomatoes. Each has its unique characteristics, so don’t be afraid to experiment and find your favorite.
Selecting a Suitable Variety for Your Climate
When selecting a tomato variety, it’s essential to consider the local climate and weather patterns in your area. This will help you choose a variety that thrives under the specific conditions of your region. Start by considering the temperature range in your area. Tomatoes are typically sensitive to extreme temperatures, so look for varieties that are bred for warm or cool climates.
Next, think about the amount of sunlight your garden receives. Some tomato varieties require full sun (at least 6 hours of direct sunlight), while others can tolerate partial shade. Make sure to choose a variety that matches your growing conditions. Moisture levels also play a crucial role in tomato growth. If your area experiences high humidity or frequent rainfall, look for varieties that are resistant to fungal diseases.
Consider the USDA Hardiness Zone Map to determine your region’s temperature and climate classification. This will help you narrow down your options and choose a variety that’s well-suited to your local conditions. For example, if you live in an area with short growing seasons or cold winters, look for varieties like ‘Early Girl’ or ‘Patio’, which mature quickly and are more resistant to frost.
Preparing the Soil and Seed Starting Mix
To successfully grow tomatoes from seeds, you’ll first need to prepare your soil and create a seed starting mix that provides the right conditions for germination. This section will walk you through these essential steps.
The Importance of Soil Quality
When starting tomato seeds indoors, it’s essential to focus on creating an optimal environment for germination and growth. This begins with selecting a high-quality soil or seed starting mix that provides the necessary nutrients and support for young roots.
A good seed starting mix is specifically designed to retain moisture while preventing waterlogged conditions, allowing tiny seedlings to absorb exactly what they need without drowning. Look for mixes that are free of fillers like perlite and vermiculite, which can inhibit root growth, and instead feature a balanced blend of organic matter, peat moss, or coconut coir.
Using low-quality or generic potting soil in place of a seed starting mix can result in poor germination rates, weak seedlings, and even plant death. Even if the seeds do manage to sprout, they may struggle to establish a robust root system due to the inadequate structure and nutrient content of the soil.
Creating a Seed Starting Mix from Scratch
Creating a custom seed starting mix from scratch can be a cost-effective and sustainable alternative to commercial mixes. To make one, you’ll need a few common household ingredients like peat moss, perlite, and vermiculite. These components will provide the necessary structure, drainage, and water retention for your seeds.
To start, combine 2-3 parts of peat moss with 1 part of perlite and 1 part of vermiculite. Peat moss is an excellent base ingredient as it retains moisture and suppresses weed growth. Perlite, on the other hand, will help with drainage and prevent waterlogged soil. Vermiculite adds further water retention properties and prevents temperature fluctuations.
Mix these ingredients together until they’re evenly combined. You can also add a small amount of compost or worm castings to provide essential nutrients for your seedlings. A general rule of thumb is to use 1-2% organic matter in the mix. This will give your seeds a head start on establishing a strong root system and promoting healthy growth.
Sowing Tomato Seeds
To get started, you’ll want to prepare a clean and warm space for sowing your tomato seeds, making sure they have enough room to grow. This is where precision matters!
The Best Time to Sow Tomatoes
When it comes to sowing tomato seeds, timing is everything. You want to give them a head start on the growing season, but not so early that they’re vulnerable to frost or other harsh weather conditions.
In general, it’s recommended to sow tomato seeds indoors 6-8 weeks before the last frost date in your area. This allows them to get a strong start and be ready to transplant outside when the weather warms up. For example, if your area typically has its last frost around May 15th, you should start sowing tomato seeds indoors around March 22nd.
However, if you live in an area with a long growing season or a warm climate, you can sow directly outdoors as soon as the soil is workable and the temperature is consistently above 55°F (13°C). In these regions, sowing tomato seeds in late winter or early spring works well. Just be sure to check the weather forecast regularly and have some frost protection measures in place if necessary.
Keep in mind that indoor sowing also allows for a greater degree of control over growing conditions, which can lead to healthier, more robust seedlings.
How to Sow Tomato Seeds Correctly
When sowing tomato seeds, it’s essential to get it right from the start. The depth and spacing of the seeds can significantly impact their growth and overall yield. To sow tomato seeds correctly, begin by filling a seed tray or small pots with a well-draining seed starting mix. Plant the seeds about ¼ inch deep, which is slightly deeper than the width of the seed itself.
Make sure to handle the seeds gently, as they are fragile at this stage. Space the seeds about 1-2 inches apart, depending on the variety and whether you’re using a single or double row system. Water the soil lightly but thoroughly after sowing, and then place the tray or pots in a warm location with temperatures around 70-80°F (21-27°C).
Avoid overwatering, as this can lead to fungal diseases that can be detrimental to young seedlings. Once the seeds have germinated and developed their first set of leaves, you can thin them out to about 12-18 inches apart, depending on the desired spacing for your mature tomato plants. This will give the remaining seedlings room to grow without overcrowding.
Seedling Care and Transplanting
Now that you’ve got your tomato seeds germinated, let’s move on to caring for those delicate seedlings and knowing when it’s time to transplant them safely outside.
Providing Adequate Light and Temperature
When starting tomato seeds indoors, providing adequate light and maintaining optimal temperatures is crucial for seedling health and development. Tomato seedlings need bright, direct light to photosynthesize and grow strong stems, but they’re sensitive to extreme temperatures.
Keep the seedlings in a spot with indirect sunlight or under grow lights, aiming for 12-14 hours of light per day. The ideal temperature range for tomato seedlings is between 70°F to 80°F (21°C to 27°C). Avoid placing them near drafty windows, radiators, or air conditioning vents.
Aim for a balance between providing warmth and preventing scorching heat. For example, a south-facing window with a sheer curtain can provide gentle warmth while filtering harsh sunlight. Monitor the temperature closely, especially during extreme weather conditions, to ensure it stays within the optimal range. A thermometer is an essential tool in seedling care – use it to keep tabs on the temperature and adjust accordingly. With proper light and temperature management, your tomato seedlings will thrive and be ready for transplanting into larger containers or directly into the garden.
Hardening Off and Transplanting Outdoor Tomatoes
When transplanting seedlings outdoors, it’s essential to harden them off first. This process allows the plants to gradually adapt to outdoor conditions, reducing shock and promoting healthy growth.
Start by moving your seedlings from a bright indoor location to a shaded outdoor area for 1-2 hours a day. Gradually increase their exposure over the next week or two, bringing them out into direct sunlight for longer periods each day. This acclimation process helps prevent damage from sudden changes in light and temperature.
Monitor your seedlings closely during this time, keeping an eye on signs of stress such as yellowing leaves or droopy stems. If you notice any issues, slow down the hardening off process to give them more time to adjust. Water thoroughly before transplanting and avoid exposing them to extreme temperatures or wind.
By following these simple steps, you’ll be able to harden off your seedlings successfully and set them up for success in their new outdoor home. Remember to handle them carefully during transplanting to prevent further shock, and enjoy the satisfaction of watching your tomatoes thrive in their final location.
Pest Management and Common Issues
As you start enjoying your homegrown tomatoes, we’ll tackle some common issues that can arise: pests and diseases. Learn how to prevent and manage these problems effectively.
Identifying Common Tomato Pests and Diseases
When planting tomatoes from seeds, it’s essential to be aware of common pests and diseases that can affect your plants. Hornworms are one of the most destructive tomato pests, feeding on leaves and fruits, causing significant damage. These large green caterpillars can be found on the underside of leaves or on stems, and their presence is often accompanied by the presence of ants, which feed on the hornworm’s droppings.
Aphids, another common pest, suck sap from tomato plants, weakening them and making them susceptible to disease. Inspect your plants regularly for white, cottony patches or a sticky substance called honeydew, both of which are indicative of aphid infestations.
Diseases like blight, fungal infections, and root rot can also impact tomato health. Fungal diseases thrive in humid environments and are often spread by overhead watering. To prevent the spread of disease, ensure good air circulation around your plants and use drip irrigation instead of sprinklers. Regularly inspect your plants for signs of disease, such as yellowing leaves or black spots on fruits, and remove any affected areas to prevent further damage.
Common fungal diseases that affect tomatoes include early blight, septoria leaf spot, and late blight. Early blight causes small dark spots to appear on lower leaves, while septoria leaf spot results in yellowish lesions with darker borders.
Organic Solutions for Managing Pests and Diseases
When it comes to growing tomatoes from seeds, managing pests and diseases is a crucial aspect of maintaining a healthy crop. Organic solutions are not only effective but also environmentally friendly. One popular method for controlling pests is using neem oil. This natural extract from the neem tree has potent insecticidal properties that can help control aphids, whiteflies, and spider mites.
To make your own garlic spray, mix crushed garlic with water and let it sit for 24 hours. Strain the mixture and use it as a foliar spray to repel pests. You can also try using diatomaceous earth, a natural powder that dehydrates insects and kills them. Another effective organic solution is introducing beneficial insects like ladybugs and lacewings, which prey on common tomato pests.
For diseases, maintain good air circulation around your plants and remove any infected leaves to prevent the spread of disease. Copper-based fungicides are also an option, but they should be used with caution as they can harm beneficial microorganisms in the soil. Regularly inspecting your plants for signs of pests or diseases will help you catch issues early on and take corrective action before they become severe.
Harvesting and Enjoying Your Homegrown Tomatoes
Now that your tomatoes are ripe and ready, let’s dive into the fun part: harvesting and enjoying the fruits of your labor! We’ll cover how to pick, store, and showcase your delicious homegrown tomatoes.
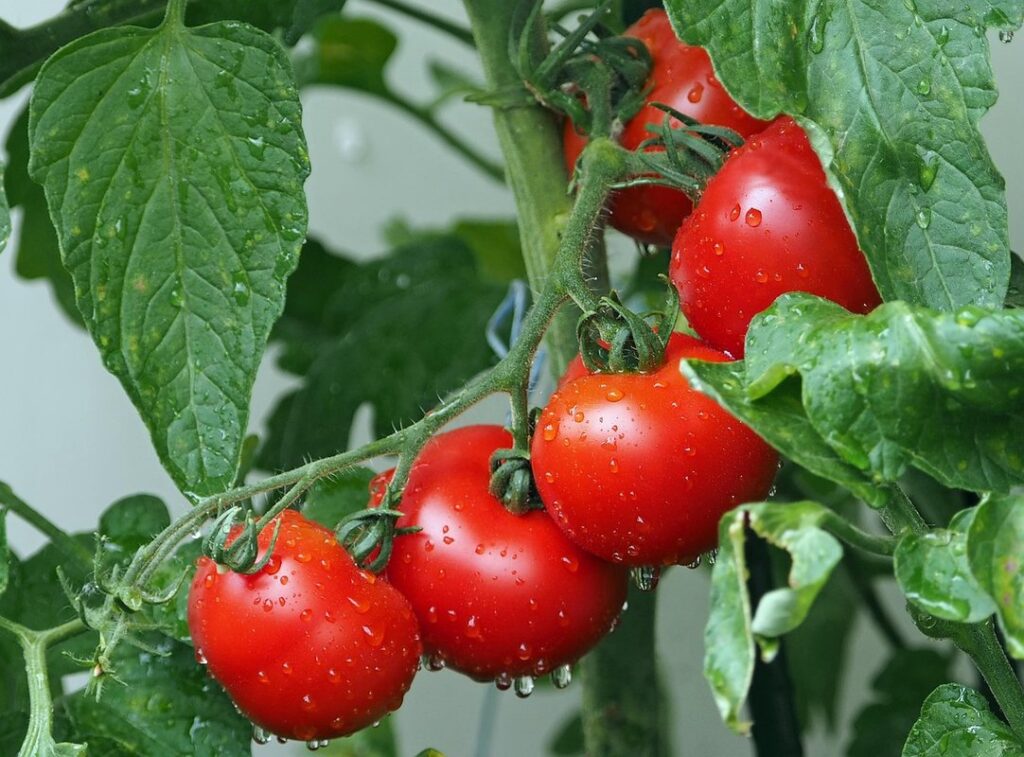
Determining When to Harvest Tomatoes
Determining when to harvest tomatoes can be a bit tricky, but with a few simple checks, you’ll know exactly when they’re ripe and ready. Start by checking the color of the tomato – it should have achieved its full ripeness color, which is usually red for most varieties, but can also be yellow, orange, green, or even purple depending on the type. However, don’t rely solely on color as some tomatoes will start to turn color before they’re fully ripe.
Next, check the texture of the tomato by gently tugging on it – a ripe tomato should come off the plant easily and should feel slightly soft to the touch, but still firm enough not to be squishy. Avoid squeezing the tomato too hard, as this can damage the fruit and cause spoilage.
The best way to determine ripeness is through taste, but you’ll want to wait until they’re fully ripe for optimal flavor. Check the skin of the tomato by gently rubbing it with your thumb – a ripe tomato should have smooth skin without any wrinkles or soft spots.
Tips for Preserving Freshly Harvested Tomatoes
Now that you’ve successfully harvested your homegrown tomatoes, it’s time to enjoy them throughout the year. One of the most satisfying ways to preserve freshly harvested tomatoes is through canning. This method involves heating the tomatoes with a small amount of acidity, such as lemon juice or vinegar, to create a vacuum-sealed jar that can be stored for up to a year.
To get started with canning, make sure you have the necessary equipment, including a large pot, jars, lids, and a utensil for removing air bubbles. Follow safe canning practices by sterilizing your equipment and jars in boiling water before filling them with the tomato mixture. For example, a basic recipe involves packing raw tomatoes into hot, sterilized jars, adding a tablespoon of lemon juice per pint, and processing them in a boiling water bath for 20-30 minutes.
Other preservation methods include freezing and dehydrating. When freezing, it’s essential to blanch your tomatoes in boiling water for 10-15 seconds before cooling them down to stop the cooking process. This helps preserve their texture and flavor. Dehydrating removes excess moisture from the tomatoes, making them a great addition to soups or stews during the winter months.
It’s also worth noting that you can use a combination of these methods to create a delicious and long-lasting tomato product. For instance, canning cherry tomatoes and then freezing or dehydrating them will give you a perfect blend of flavors and textures to enjoy throughout the year.
Frequently Asked Questions
Can I plant tomato seeds directly outdoors, or do they need to be started indoors?
While it’s technically possible to plant tomato seeds directly outdoors, it’s generally more successful to start them indoors 6-8 weeks before the last frost date in your area. This allows you to get a head start on the growing season and gives seedlings a chance to develop strong root systems before being transplanted outside.
How do I know if my tomato seeds are too old or will still produce a healthy crop?
The viability of tomato seeds can decrease over time, but many heirloom varieties can remain viable for 5-7 years. If you’re unsure about the age of your seeds, try conducting a simple germination test by placing 10-20 seeds on a damp paper towel. If fewer than half germinate within 7-10 days, it’s likely that the seeds have lost their potency.
What are some common mistakes to avoid when transplanting seedlings into larger containers?
When transplanting tomato seedlings, avoid disturbing the roots as much as possible and make sure not to compact the soil around them. Water the seedling thoroughly after transplanting and provide adequate support for the stem as it grows. This will help reduce shock and ensure a smooth transition.
How often should I water my newly planted tomato seedlings?
Newly planted tomato seedlings require consistent moisture, especially during their first few weeks of growth. Aim to provide about 1-2 inches of water per week, either from rainfall or irrigation. Water gently but thoroughly, avoiding overhead watering which can lead to fungal diseases.
Can I grow multiple varieties of tomatoes together in the same bed, or will they compete for resources?
While it’s technically possible to grow multiple tomato varieties together, it’s generally more successful to separate them by at least 3-4 feet. This allows each plant to receive adequate sunlight and nutrients without competing with its neighbors.