Planting roses can be a daunting task, especially for beginners. With so many varieties to choose from, it’s easy to feel overwhelmed by the possibilities. But with a little guidance, you can successfully plant and care for your own beautiful roses. Whether you’re looking to add a romantic touch to your garden or simply enjoy a stunning display of color, growing roses is a great way to bring beauty and life to your outdoor space. In this article, we’ll take you through the process of planting roses, from selecting the right variety for your climate and soil type to common challenges that may arise and tips for extending the bloom period. We’ll cover everything you need to know to grow healthy, thriving roses and enjoy their beauty all season long.
Choosing the Right Rose Variety
With so many beautiful rose varieties out there, choosing the right one for your garden can be overwhelming. We’ll break down the factors to consider when selecting a perfect rose for your needs and climate.
Understanding Rose Types
When it comes to choosing the right rose variety for your garden, understanding the different types of roses is crucial. There are over 150 species of roses, each with its unique characteristics, growth habits, and care requirements.
Hybrid teas are one of the most popular types of roses, known for their large, repeat-flowering blooms and long stems. They require full sun to partial shade and regular watering, making them ideal for well-drained soils. Floribundas, on the other hand, produce clusters of smaller blooms and are more compact in size. They thrive in full sun and well-drained soil, but require less maintenance than hybrid teas.
Climbing roses are perfect for trellises or arches, producing long canes that can be trained to grow upwards. Ramblers and shrub roses are also great options for gardeners who want a more low-maintenance option. When selecting a rose variety, consider factors like bloom time, growth habit, and disease resistance to ensure you choose the right rose for your climate and garden conditions.
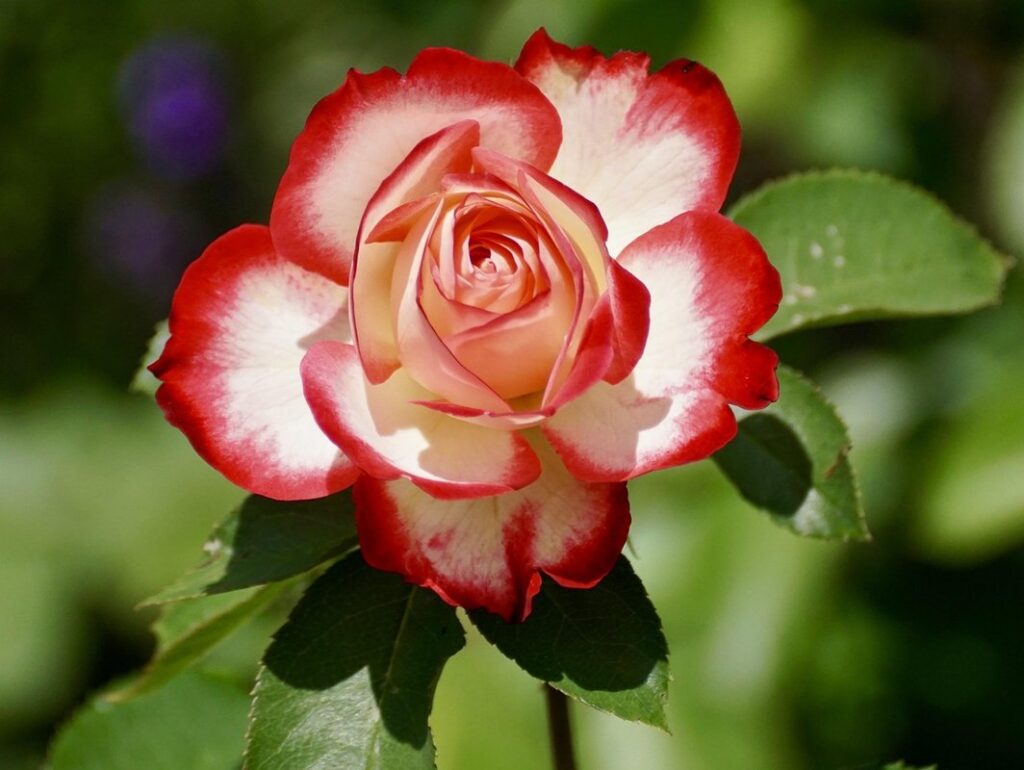
Some popular varieties of roses include ‘Peace’ and ‘Double Delight’, which produce fragrant blooms in shades of pink and white. ‘Climbing Iceberg’ is another popular choice, with its delicate white blooms and vigorous growth habit. By understanding the unique characteristics of each type of rose, you can choose the perfect variety for your garden and enjoy beautiful blooms all season long.
Selecting Roses for Your Climate
When selecting roses for your garden, it’s essential to consider the local climate and region. This will ensure that you choose varieties that thrive in your specific environment. The first step is to understand your hardiness zone, which indicates the average annual extreme minimum temperature.
In the United States, the USDA Hardiness Zone Map divides the country into 11 zones, each representing a 10-degree Fahrenheit difference from the previous one. Knowing your zone will help you narrow down rose varieties that are tolerant of your area’s lowest temperatures. For example, if you’re in Zone 5, you’ll want to focus on hybrid teas and floribundas, which are generally more resistant to cold.
Other environmental factors, such as wind exposure, soil quality, and moisture levels, also impact rose growth. Be sure to research the specific needs of your chosen varieties to ensure they’ll perform well in your garden. By selecting roses that suit your climate and region, you’ll set them up for success and enjoy a beautiful, thriving bloom all season long.
Preparing the Soil
Before you start planting those beautiful roses, it’s essential to prepare your soil for optimal growth and health. We’ll walk you through the steps to create a rose-friendly environment.
Testing and Amending Your Soil
Before planting your roses, it’s essential to test and amend your soil. This step may seem time-consuming, but it will ensure that your roses receive the right nutrients for optimal growth. To collect a soil sample, dig a small hole about 8-10 inches deep in an area where you plan to plant your rose bush. Use a shovel or trowel to scoop up a handful of soil from the bottom of the hole and mix it with a smaller amount of soil from the top layer. This will give you a representative sample of your soil.
A soil test report will typically include pH levels, nutrient content, and other factors that affect plant growth. Look for the following key points in your report: pH level (ideal range is 6.0-7.0 for roses), nitrogen, phosphorus, potassium, and other micronutrients. If your soil is lacking in any of these areas, you can amend it with organic matter like compost or manure. For example, if your soil test shows low levels of potassium, you can add a balanced fertilizer to correct this imbalance.
Adding Organic Matter and Fertilizers
When preparing your rose bed for planting, adding organic matter and fertilizers is crucial to provide essential nutrients and improve soil structure. Organic matter such as compost, manure, and well-rotted farmyard manure can enhance the soil’s fertility by releasing nutrients slowly, thus preventing any sudden spikes in nutrient levels that might harm your roses.
There are two primary types of fertilizers: chemical and natural. Chemical fertilizers contain synthetic chemicals that release nutrients quickly but may burn plant roots if overused. Natural fertilizers, on the other hand, promote healthy microbial activity, improve soil’s water-holding capacity, and provide long-term fertility benefits. For example, fish emulsion, bone meal, and alfalfa meal are popular natural fertilizer options for roses.
When applying organic matter or fertilizers to your rose bed, remember to follow recommended application rates to avoid over-fertilizing, which can lead to weak growth, poor blooms, and even plant death. A good rule of thumb is to mix 2-3 inches of compost into the top 6-8 inches of soil before planting.
Planting Roses
To ensure a successful rose planting experience, let’s dive into the specifics of preparing your soil and choosing the perfect spot for these beautiful flowers.
Digging the Perfect Hole
When digging the perfect hole for your rose plant, it’s essential to consider two crucial factors: depth and width. A general rule of thumb is to dig a hole that’s about 12-18 inches deep, depending on the type of rose you’re planting. For example, hybrid teas typically require deeper holes due to their larger root systems.
The hole should also be about 2-3 times wider than the rose plant’s root ball. This allows for proper soil drainage and aeration, which is vital for healthy root growth. As for what not to include in the planting hole, it’s essential to avoid using garden waste, weeds, or diseased plants that can harbor pests and diseases.
Additionally, refrain from digging too close to any underground utilities or pipes, as this can cause damage to your home’s infrastructure. To ensure a precise dig, use a measuring tape or gardening tool to mark the hole’s dimensions before breaking ground.
Planting Techniques
When it’s time to plant your rose bush, proper technique is key to ensuring a healthy and thriving plant. Begin by carefully removing the rose from its container and gently washing away any excess soil from the roots. Next, prepare a hole that’s about 18-24 inches deep and twice as wide as the root ball. This will give the roots enough room to grow.
Now it’s time to add some organic matter to the soil mix around the roots. A combination of compost and well-draining potting mix is ideal. Fill in the sides of the hole, making sure not to compact the soil too much. You want the roots to have a chance to breathe and expand freely.
To secure your rose bush, use stakes or ties to prevent it from toppling over in the wind. Drive stakes gently into the ground on either side of the plant, about 12 inches deep. Tie the stem loosely with soft material like twine or wire, making sure not to constrict the growth of the plant.
Caring for Newly Planted Roses
After planting your roses, it’s essential to provide them with the right care to establish a strong foundation for healthy growth. In this next step, we’ll cover how to keep your newly planted roses thriving.
Watering and Mulching
Watering and mulching are two essential practices that play critical roles in the initial survival and long-term health of newly planted roses. A consistent watering schedule helps ensure that the roots receive adequate moisture to establish a strong foundation, while mulch provides protection from extreme temperatures, retains soil moisture, and suppresses weeds.
To create an effective watering schedule, start by checking the soil daily during the first few weeks after planting. Water your roses when the top 2-3 inches of soil feel dry to the touch. Avoid overwatering, which can lead to root rot and other problems. Aim for about 1 inch of water per week, either from rain or irrigation.
When it comes to mulching, choose a material that will retain moisture but not suffocate your roses’ roots. Organic options like wood chips, bark, or straw are excellent choices. Avoid using weeds, as they can spread and compete with your roses for resources. Apply 2-3 inches of mulch around the base of your plants, keeping it a few inches away from the stems to prevent rot.
Pruning and Training
Pruning and training your newly planted rose bushes is an essential part of their growth and development. Pruning helps control the shape, size, and flowering habit of your roses, while training ensures they grow into a sturdy and balanced structure.
When to Prune: The ideal time for pruning newly planted rose bushes depends on their type and the climate you’re in. For most hybrid tea, floribunda, and grandiflora roses, it’s best to prune them in late winter or early spring, about 6-8 weeks before new growth begins. This allows the plant to focus its energy on producing new growth rather than trying to recover from pruning.
How Much to Remove: When pruning your rose bush, remember that less is more. Remove only what’s necessary – dead, diseased, or damaged wood – and cut back canes by about one-third to encourage new growth. Cut at a 45-degree angle, just above a bud eye (the small swelling from which a new branch grows), to promote healthy growth.
Some rose varieties, like climbing roses and ramblers, require more extensive pruning to maintain their structure.
Common Challenges and Solutions
When planting roses, you may encounter some unexpected obstacles that can impact their health and beauty. Let’s tackle these common challenges and explore solutions to ensure a thriving rose garden.
Dealing with Pests and Diseases
Roses are beautiful and fragrant additions to any garden, but like all living things, they can be susceptible to pests and diseases. Identifying the issue early on is crucial to preventing further damage.
One of the most common pests that target roses are aphids and whiteflies. Aphids are small, soft-bodied insects that feed on plant sap, causing curled or distorted leaves. Whiteflies, on the other hand, are tiny flying insects that also feed on sap, leaving behind a sticky substance called honeydew. To control these pests, use neem oil or insecticidal soap to kill them on contact. For severe infestations, introduce beneficial insects like ladybugs or lacewings, which prey on aphids and whiteflies.
Diseases like black spot and powdery mildew are also common in roses. Black spot appears as dark spots on the leaves, while powdery mildew looks like a white, powdery coating on the leaves and stems. To prevent these diseases, ensure good air circulation around your rose plants, water them in the morning to allow excess moisture to evaporate during the day, and remove any infected leaves or debris.
For natural control methods, consider using copper-based fungicides or sulfur-based products that won’t harm beneficial insects like bees and butterflies.
Addressing Soil Problems
When planting roses, it’s essential to address common soil problems that can hinder their growth. One of the most significant issues is soil compaction, which can prevent roots from expanding properly and lead to poor drainage. To improve drainage, you can add organic matter like compost or well-rotted manure to the soil. This will not only enhance aeration but also provide essential nutrients for healthy root development.
Another common problem is nutrient deficiencies, particularly phosphorus, potassium, and magnesium. Regular soil testing can help identify these deficiencies. Based on the test results, you can adjust your fertilization schedule accordingly. For example, if your soil lacks phosphorus, you may need to apply a balanced fertilizer in early spring or fall.
It’s also crucial to note that roses prefer slightly acidic to neutral soil pH (6.0-7.0). If your soil is too alkaline or acidic, it can impact nutrient availability and plant growth. By taking proactive steps to address these issues, you’ll be well on your way to creating a healthy environment for your roses to thrive in.
Tips for Long-Term Success
To ensure your beautiful roses continue thriving, here are some valuable tips on how to maintain them over time and prevent common issues that can arise.
Monitoring Progress and Adjusting Care
Monitoring progress and adjusting care are crucial aspects of long-term rose success. As your plants grow and mature, they’ll require adjustments to their care routine to optimize health and blooms. One common sign of stress is yellowing leaves, which can indicate over-watering or nutrient deficiencies.
To address these issues, regularly inspect your roses for signs of distress. Check the soil moisture by sticking your finger into the soil up to the first knuckle – if it’s dry, it’s time to water. Be cautious not to overwater, as this can lead to root rot and other problems.
As you observe your plants’ growth patterns, adjust your pruning practices accordingly. Remove dead or diseased wood in the spring, and shape the plant to encourage healthy growth. If you notice a lack of blooms, consider adjusting your fertilization schedule – roses benefit from regular feeding during the growing season.
Extending the Bloom Period
Extending the bloom period of your roses is crucial to maximizing their beauty and lifespan. One simple yet effective technique is deadheading, which involves removing spent blooms to encourage new growth and prevent seed production. This process not only prolongs the blooming season but also helps maintain the plant’s appearance.
Another strategy for extending the bloom period is staking, especially for tall or delicate varieties that may require support to prevent damage from wind or rain. By providing a trellis or stake, you can keep your roses upright and promote healthy growth.
To create a succession of blooms throughout the growing season, consider planting multiple rose varieties with staggered blooming periods. For example, choose one variety that blooms in spring, another that blooms in mid-summer, and a third that blooms in fall. This will ensure continuous color and interest in your garden from April to October.
Additionally, consider dividing and replanting mature roses every 3-4 years to maintain their vigor and promote new growth.
Frequently Asked Questions
Can I plant roses in containers if I don’t have a garden bed?
Yes, you can definitely plant roses in containers! This is a great option for small spaces or areas with poor soil. Just make sure the container is at least 12-18 inches deep and has good drainage holes to prevent waterlogged soil.
How often should I water newly planted roses, especially during hot weather?
Newly planted roses need consistent moisture, especially in their first year of growth. Water them deeply once or twice a week, depending on weather conditions. Aim for about 1-2 inches of water per week, either from rain or irrigation.
What’s the best way to protect my rose bushes from extreme temperatures and frost?
To protect your rose bushes from extreme temperatures and frost, mulch around the base to retain moisture and regulate soil temperature. You can also use row covers or frost blankets to shield plants from harsh weather conditions. For more severe cases, bring potted roses indoors or move them to a protected location.
How do I identify common pests like aphids, whiteflies, and spider mites on my rose bushes?
Common pests like aphids, whiteflies, and spider mites can be identified by their visible presence on the plants. Check for yellowing leaves, sticky substance on stems or leaves (aphid honeydew), flying insects around flowers, or fine webbing on leaves. Inspect your plants regularly to catch infestations early.
Can I plant roses at any time of the year, or are there specific seasons better suited for planting?
While rose planting can be done year-round in warmer climates, spring (March-May) and fall (September-November) are generally considered ideal times for planting roses. These seasons offer mild temperatures, adequate moisture, and reduced stress on newly planted roots.