Mint is one of those magical plants that can instantly elevate any dish from bland to grand. Whether you’re a seasoned gardener or just starting out, learning how to grow and care for mint plants is an essential skill to have in your toolkit. With its numerous varieties to choose from, each with its unique flavor profile and aroma, selecting the right type of mint for your needs can be a bit overwhelming.
In this article, we’ll walk you through the process of planting mint, including tips on choosing the perfect variety, preparing the soil, and troubleshooting common issues that may arise. We’ll also share expert advice on how to harvest and preserve fresh mint, so you can enjoy its flavor and fragrance all year round. By the end of this article, you’ll be well-equipped to grow your own delicious and fragrant mint at home.
Choosing the Right Mint Variety
When it comes to planting mint, you’ll want to choose a variety that’s well-suited for your climate and desired use. Let’s take a closer look at some popular options.
Understanding Different Types of Mint
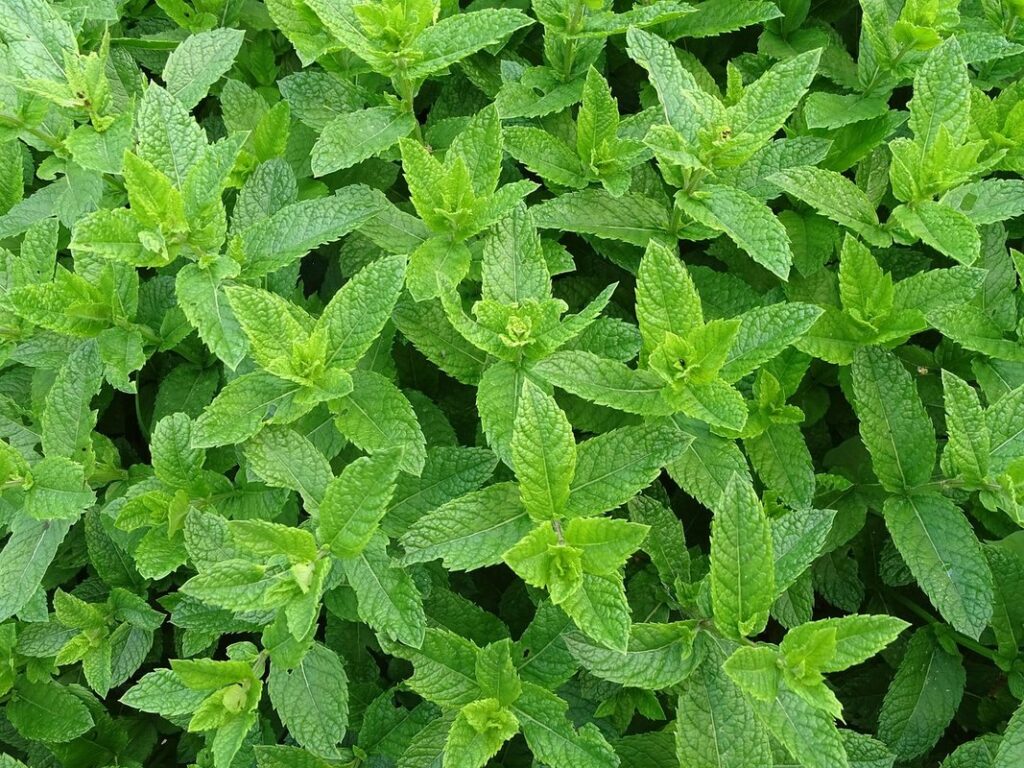
When it comes to mint plants, you’ll find that there are numerous varieties to choose from. One of the most common types is peppermint (Mentha piperita), known for its strong fragrance and ability to grow quite aggressively. Its leaves have a distinctive red veins pattern and can reach lengths of up to 3 inches.
Spearmint (Mentha spicata) is another popular variety, often used in cooking and herbal teas due to its milder flavor compared to peppermint. It has a slightly more delicate growth habit and produces smaller leaves with green or purple undertones.
If you’re looking for a unique twist on mint flavors, consider growing chocolate mint (Mentha x piperita f. citrata ‘Chocolate’). As its name suggests, this variety emits a distinctively sweet and rich aroma reminiscent of chocolate. Be aware that it can grow quite vigorously, so be prepared to provide regular pruning.
For those who prefer a more compact growth habit, consider dwarf varieties like ‘Corsican Mint’ (Mentha requienii) or ‘Apple Mint’ (Mentha suaveolens). These options are perfect for small gardens or containers.
Selecting a Suitable Mint Variety for Your Climate
When selecting a mint variety for your garden, it’s essential to consider your climate and region. This will ensure that your mint plants thrive and continue to grow year after year.
To determine the best mint variety for your area, consult the hardiness zone map. Mint is typically hardy in zones 3-9, but some varieties are more tolerant of cold temperatures than others. For example, ‘Spearmint’ and ‘Apple Mint’ are relatively hardy and can tolerate light frosts, while ‘Chocolate Mint’ and ‘Peanut Mint’ are more sensitive to temperature fluctuations.
Additionally, consider the amount of sunlight your garden receives. Some mint varieties require full sun (at least 6 hours of direct sunlight) to produce optimal growth, while others prefer partial shade. For instance, ‘Lemon Mint’ does well in partial shade and is perfect for a north-facing garden bed.
Finally, take into account the soil conditions in your garden. Mint prefers moist, fertile soil with good drainage. Avoid planting mint in areas where water tends to collect or in dry, sandy soil that may require frequent watering. By considering these factors, you can choose a mint variety that will flourish in your specific climate and region.
Preparing the Soil for Mint Planting
Before planting mint, it’s essential to prepare the soil by loosening and aerating it, making sure it drains well and is free from any debris. This simple step will ensure your mint thrives.
Testing and Amending the Soil
Before planting mint, it’s essential to test your soil pH and nutrient levels. Mint prefers slightly acidic to neutral soil with a pH between 6.0 and 7.0. If your soil pH is too high or too low, it can affect the plant’s growth and flavor.
To test your soil pH, you can purchase a DIY soil testing kit at most gardening stores. These kits usually involve mixing a small sample of soil with a solution to determine its acidity level. You can also send a sample to a lab for more accurate results. According to the USDA, a pH between 6.1 and 7.3 is ideal for mint growth.
If your test reveals nutrient deficiencies or an unfavorable pH, it’s time to amend the soil. Start by adding organic matter such as compost or well-rotted manure to improve drainage and fertility. For example, if your soil lacks nitrogen, add a balanced fertilizer like fish emulsion or blood meal according to the manufacturer’s instructions.
Creating a Mint-Friendly Environment
To create an ideal environment for mint to thrive, you’ll want to provide it with the right conditions for growth. First and foremost, mint loves sunlight – at least 4-6 hours of direct sunlight per day is recommended. If you’re planting in a shaded area, be aware that your mint may not grow as robustly.
Watering requirements are also crucial; mint prefers moist soil but can be susceptible to root rot if the waterlogged. Aim for consistent moisture levels by watering about once or twice a week, depending on your climate and soil type. Make sure the soil drains well to prevent excess water from accumulating.
Proper air circulation is also essential for healthy mint growth. Planting in an open area with good airflow will help prevent fungal diseases that can spread quickly in dense plantings. To promote healthy growth, prune your mint regularly to encourage new stem production and maintain a balanced shape. This simple pruning routine will not only keep your mint looking tidy but also ensure it receives the air circulation it needs to stay disease-free and thrive.
Planting Mint from Seed or Cuttings
You can plant mint from both seeds and cuttings, but knowing which method is best for you will ensure your herb thrives in your garden. Let’s explore each option in more detail.
Sowing Mint Seeds
Sowing mint seeds can be a bit more finicky than planting cuttings, but with the right conditions and techniques, you’ll be enjoying fresh mint leaves in no time. To start, choose a pot or a section of your garden with well-draining soil and plenty of sunlight – mint loves bright spots, so aim for at least four hours of direct sunlight per day.
When sowing seeds indoors, sow them 1/8 inch deep and 2-3 inches apart in seed starting mix. Keep the soil consistently moist but not waterlogged, as this can lead to rot. Germination rates are typically around 7-10 days, so be patient and keep the soil warm (around 70-80°F) until sprouts emerge.
Direct sowing in the garden is also an option, but make sure the soil has warmed up to at least 55°F first. Sow seeds 1/8 inch deep and 12-18 inches apart, as mint can quickly spread out of control if not contained. Thin seedlings to 6-8 inches apart once they’re established to prevent overcrowding and promote healthy growth.
With a little TLC, your mint seeds will germinate and thrive in no time – happy growing!
Propagating Mint with Cuttings
Propagating mint with cuttings is a fantastic way to multiply your favorite herb without having to start from seed. It’s also a great method for sharing mint plants with friends and family. To get started, gather some healthy stems from your mature mint plant, making sure they’re not too woody or brittle.
Prepare the cutting material by trimming off any lower leaves that would be submerged in water or soil, leaving only the top two to three sets of leaves. This helps prevent rot and promotes rooting. Fill a small pot or container with a well-draining rooting medium, such as perlite or vermiculite, and moisten it thoroughly.
Plant your cuttings about an inch deep, burying the leaves up to the node (where the leaf meets the stem). Keep the soil consistently moist but not waterlogged, and provide indirect light. After 7-10 days, you should start to see roots developing, and within a few weeks, new growth will emerge. With proper care, your mint cuttings will be ready to transfer to individual pots or directly into your garden in no time.
Caring for Your Mint Plant
To keep your mint plant thriving, it needs regular care and attention. In this section, we’ll cover essential tips on watering, pruning, and fertilizing to maintain a healthy mint plant.
Watering and Humidity Requirements
Watering and humidity levels play a crucial role in mint plant care. Consistent moisture is vital to prevent leaves from turning yellow and promote healthy growth. Over-watering can lead to root rot, while under-watering causes the leaves to wilt.
To water your mint plant effectively, check the soil daily by inserting your finger into the top 1-2 inches of soil. If it feels dry, it’s time for a drink. Water thoroughly until you see moisture seeping from the drainage holes. However, avoid getting water on the leaves to prevent fungal diseases. Instead, direct the flow towards the base of the plant.
Maintaining optimal humidity is also essential. Mint thrives in humid environments, typically above 50%. To replicate this at home, group your mint plants together or use a humidifier nearby. You can also place the pot on a tray filled with water and pebbles to increase the surrounding moisture levels without over-watering.
Keep in mind that these requirements vary depending on the environment and season. Monitor your plant’s response and adjust accordingly to ensure it remains healthy and thriving.
Fertilizing and Pruning Your Mint
Fertilizing and pruning your mint plant is essential to promote healthy growth, prevent overgrowth, and encourage leaf production. Fertilizers provide essential nutrients that help your mint thrive. Use a balanced fertilizer (10-10-10 NPK) once a month during the growing season, or as recommended on the product label. However, be cautious not to over-fertilize, as this can harm your plant.
Pruning is another crucial aspect of maintaining your mint plant. Regular pruning prevents overgrowth and encourages bushy growth by controlling stem length. Pinch off flower buds to direct energy towards leaf production and prevent seed formation. Use scissors or pinch off individual stems at the node (where a leaf meets the stem) for a neater appearance.
By regularly fertilizing and pruning your mint, you’ll be rewarded with a robust, fragrant plant that’s less prone to disease and pests. To take it a step further, prune your mint every 2-3 weeks during peak growing season (spring-fall) to maintain its desired shape and encourage new growth.
Troubleshooting Common Mint Issues
Don’t worry if things don’t go as planned when growing mint – we’ve got you covered! This section tackles common issues that may arise and provides solutions to get your mint garden back on track.
Identifying and Addressing Pests and Diseases
When it comes to growing mint, pest and disease issues can be a common problem. Let’s take a closer look at some of the most prevalent ones you might encounter.
Aphids and spider mites are two of the most common pests that affect mint plants. Aphids are small, soft-bodied insects that feed on plant sap, causing curled or distorted leaves. To control aphid infestations, spray your mint plants with a mixture of water and mild dish soap. For severe cases, introduce natural predators like ladybugs or lacewings.
Spider mites, on the other hand, spin fine webs on the undersides of leaves. They can be controlled by spraying the plant with neem oil or horticultural oil. Regularly inspecting your plants for signs of pests will help you catch problems early on.
As for diseases, powdery mildew and root rot are two common issues that can affect mint plants. Powdery mildew appears as a white, powdery coating on leaves, while root rot causes the stems to turn black and soft. To prevent these diseases, make sure your soil drains well and keep your mint plants in areas with good air circulation. If you do notice any signs of disease, remove infected leaves or stems immediately to prevent the problem from spreading.
Resolving Soil-Related Issues
Identifying and addressing soil-related issues is crucial to ensure the optimal growth of your mint plants. Poor soil quality can lead to nutrient deficiencies, pH imbalances, or even root damage. To diagnose these problems, inspect your soil regularly for signs of wear and tear.
Start by checking the color and texture of the soil. If it’s too compacted or waterlogged, drainage issues may be at play. On the other hand, if it appears dry and cracked, you might need to focus on improving its moisture retention properties.
Nutrient deficiencies can also cause problems. For instance, a lack of nitrogen can lead to weak growth and yellowing leaves. Similarly, inadequate potassium levels can result in stunted roots. To address these issues, consider adding organic matter like compost or well-rotted manure to the soil. This will not only replenish nutrients but also improve its structure.
It’s equally important to maintain a balanced pH level between 6.0 and 7.0. You can use a soil testing kit to determine your soil’s pH and adjust it as needed with lime or sulfur. By resolving these issues, you’ll be well on your way to creating an environment that will allow your mint plants to thrive.
Harvesting and Preserving Mint
Now that you have a thriving mint plant, it’s time to harvest and preserve its leaves for future use. This section will guide you through the process of harvesting at the right time and storing your fresh mint correctly.
Timing the Harvest for Optimal Flavor and Aroma
When it comes to harvesting mint leaves for optimal flavor and aroma, timing is everything. As you’ve likely noticed, mature mint plants can grow quite tall and robust, producing an abundance of fresh foliage throughout the growing season.
To ensure maximum flavor and aroma, harvest your mint leaves at the peak of their potency. Typically, this occurs when the plant has reached about 6-8 inches in height and is producing plenty of new growth. You’ll know it’s ready to be harvested when you notice a slight increase in fragrance and oil production, which can be detected by simply touching or rubbing the leaves.
Avoid harvesting mint during extreme weather conditions, such as intense heatwaves or prolonged periods of drought, as this can cause stress to the plant and lead to a loss of flavor and aroma. Also, take note that certain varieties like peppermint and spearmint are more sensitive to temperature fluctuations than others. Harvest them in the cooler morning hours when possible for the best results.
As you begin to harvest your mint regularly, make sure to cut back the stems by about one-third to encourage new growth and prevent the plant from becoming leggy. This will also promote root development and help maintain the plant’s overall health. By timing your harvest correctly and following these simple tips, you’ll be able to enjoy an abundance of fresh, flavorful mint leaves throughout the growing season.
Drying, Freezing, and Other Preservation Methods
When you’ve harvested and cleaned your fresh mint, it’s time to preserve it for year-round use. One of the most popular methods is air-drying, which involves tying the stems together and hanging them upside down in a warm, dry place. This method is ideal for preserving small quantities of mint.
You can also freeze fresh mint leaves by chopping them finely and placing them in an airtight container or freezer bag. Frozen mint is perfect for adding to drinks and desserts. To make mint tea, simply steep the dried or frozen leaves in hot water, then strain and enjoy. Alternatively, you can make a batch of mint syrup by infusing fresh mint leaves in sugar and water.
Consider making a large batch of mint syrup during peak harvest season – it’s perfect for using throughout the year as a topping for ice cream or cocktails. To dry your mint, simply tie the stems together and hang them upside down in a warm, dry place, such as an attic or cupboard. Alternatively, you can use a food dehydrator to speed up the process.
By preserving your fresh mint through one of these methods, you’ll be able to enjoy its flavor all year round.
Frequently Asked Questions
Can I grow mint indoors if I don’t have an outdoor garden space?
Yes, you can definitely grow mint indoors, but keep in mind that it requires plenty of light to thrive. Choose a bright and sunny spot near a window or consider using grow lights to supplement natural light. This way, you can enjoy fresh mint year-round, even without an outdoor garden.
How often should I water my mint plant, especially during hot summer months?
Mint prefers moist soil, but it’s not fond of overwatering. Water your mint plant regularly, making sure the top inch of soil feels dry to the touch. During hot summer months, you may need to water more frequently, but avoid getting water on the leaves to prevent fungal diseases.
Can I propagate mint using only one stem or node?
Yes, you can propagate mint using a single stem or node. In fact, this is a great way to share mint with friends or multiply your favorite variety. Cut a healthy stem with at least two sets of leaves, remove lower leaves, and plant the cutting in well-draining soil. Keep the soil consistently moist until roots develop.
How do I prevent mint from taking over my garden?
Mint can be quite aggressive, but there are ways to contain it. Plant mint in a container or hanging basket with good drainage, as this will limit its ability to spread. You can also prune your mint regularly to encourage bushy growth and prevent it from becoming too invasive.
Can I use dried or frozen mint instead of fresh for cooking?
Yes, you can use dried or frozen mint as a substitute for fresh, but keep in mind that the flavor and aroma may be slightly different. Dried mint is great for teas and baked goods, while frozen mint works well in soups and sauces. Always store dry or frozen mint in airtight containers to preserve its flavor and aroma.