Lavender is one of those flowers that evoke feelings of calmness and serenity, and with good reason. Not only do they produce gorgeous purple blooms, but lavender plants are also incredibly versatile and easy to grow in your garden or even indoors. If you’re new to planting lavender, don’t worry – it’s easier than you think! With the right care and attention, you can enjoy a bountiful harvest of fresh lavender flowers, perfect for potpourri, crafts, and even cooking.
In this comprehensive guide, we’ll walk you through everything you need to know to plant, care for, and harvest your very own lavender plants. From preparing the soil and managing pests to harvesting at the right time, we’ve got you covered. Whether you’re a seasoned gardener or just starting out, this article is packed with expert tips and tricks to help you get the most out of your lavender plants.
Choosing the Right Variety
When it comes to selecting lavender varieties, there are many factors to consider, including climate, soil type, and intended use of the plants. This can help you make an informed decision.
Understanding Lavender Types
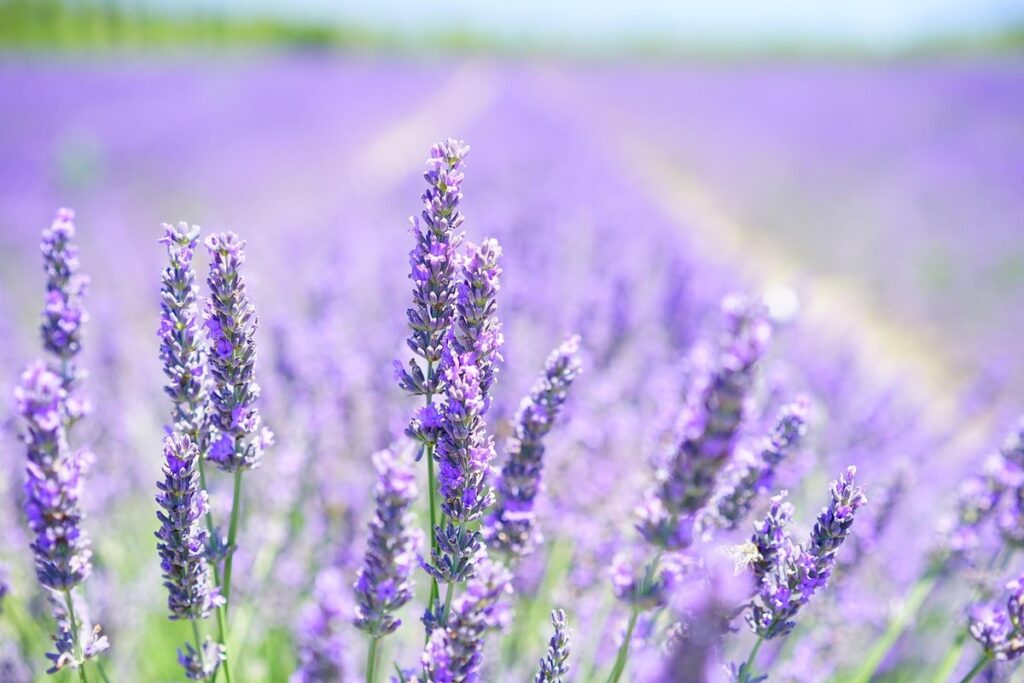
When it comes to planting lavender, understanding the different types is crucial for success. There are several varieties of lavender plants, each with its own unique characteristics and growth habits.
English Lavender (Lavandula angustifolia) is a popular choice for its compact growth and small purple flowers. It’s an excellent option for borders or containers and can tolerate cooler temperatures. On the other hand, French Lavender (Lavandula stoechas) boasts larger flowers and a more vigorous growth habit, making it perfect for hedges or mass plantings.
Spanish Lavender (Lavandula stoechas subsp. pedunculata), also known as Butterfly Lavender, has delicate pink flowers that attract pollinators and butterflies. It’s an ideal choice for rock gardens or areas with poor soil. Additionally, Sweet Lavender (Lavandula latifolia) is a fragrant variety with long stems and larger blooms.
When selecting a lavender type, consider factors such as climate, available space, and desired appearance. Some varieties can be more sensitive to heat or humidity, while others may require regular pruning. By choosing the right type for your garden conditions, you’ll enjoy beautiful blooms and fragrance all season long.
Factors to Consider for Selection
When selecting a lavender variety, several key factors come into play. Climate is one of the most critical considerations. Lavender plants can thrive in a range of temperatures, but some varieties are more tolerant than others to heat, cold, or drought. For example, ‘Hidcote’ and ‘Munstead’ are good choices for cooler climates with moderate winters, while ‘Grosso’ and ‘Phenomenal’ perform well in warmer conditions.
Soil type is also an essential factor. Lavender plants prefer well-draining soil that’s rich in organic matter. If your soil is heavy clay or prone to waterlogging, consider a variety like ‘Lena’ or ‘Stoechas’, which are more adaptable to challenging soils.
Lastly, the intended use of the lavender plant – whether for ornamental purposes, culinary use, or medicinal benefits – can influence your choice of variety. For example, ‘English Lavender’ (Lavandula angustifolia) is often used in potpourri and crafts, while ‘Sweet Lavender’ (Lavandula latifolia) is prized for its culinary and medicinal properties.
Ultimately, choosing the right lavender variety involves considering your specific climate, soil type, and intended use. Research different varieties to find one that suits your needs and provides optimal results.
Preparing the Soil
Before you start planting, it’s essential to prepare your soil for lavender by loosening and aerating the ground to create a well-draining environment. This simple step will ensure a healthy foundation for your new blooms.
Lavender’s Soil Requirements
When it comes to growing lavender, soil conditions play a crucial role in determining its success. Lavender prefers well-draining soil that is rich in organic matter but poor in nutrients. The ideal pH level for lavender growth is between 6.0 and 7.0, making it slightly acidic to neutral.
To achieve this balance, you can amend your soil with compost or well-rotted manure. Add a layer of mulch, such as wood chips or gravel, to improve drainage and prevent waterlogged conditions. Avoid using heavy clay or sandy soils, as they can retain too much moisture or dry out quickly.
In terms of nutrient needs, lavender doesn’t require high levels of nitrogen. Instead, focus on providing it with moderate amounts of phosphorus and potassium. A balanced fertilizer applied in early spring will suffice. Be cautious not to over-fertilize, as this can lead to weak growth and reduced fragrance.
When assessing your soil’s drainage, look for signs like water puddling or slow water absorption. If you notice these symptoms, consider installing a French drain or adjusting the slope of your garden bed.
Amending Your Soil for Optimal Growth
When planting lavender, it’s essential to create an environment that suits its needs. Lavender prefers well-draining soil with a pH between 6.0 and 7.0. If your existing soil doesn’t meet these conditions, you’ll need to amend it.
To do this, start by testing the pH level of your soil using a DIY kit or sending a sample to a lab for analysis. Based on the results, add lime to raise the pH or sulfur to lower it. For instance, if your soil has a high acidity level (low pH), mix in 1-2 cups of lime per 10 square feet of garden bed.
In addition to adjusting the pH, consider adding organic matter like compost or well-rotted manure to improve drainage and fertility. A balanced fertilizer with a ratio of 10-10-10 (nitrogen-phosphorus-potassium) can also promote healthy growth. Mulch around the plants to retain moisture and suppress weeds, using materials like wood chips, bark, or gravel that won’t compact.
Remember, it’s better to create a new bed specifically for lavender rather than trying to amend existing soil. This will give you more control over the growing conditions and ensure your lavender plants thrive.
Planting Lavender: A Step-by-Step Guide
To successfully plant lavender, it’s essential to follow a few simple steps that will ensure your new plants thrive in their environment. Let’s dive into the step-by-step guide for planting lavender.
Digging the Perfect Hole
When it comes to planting lavender, choosing the right location and digging the perfect hole is crucial for its health and longevity. The first step is to select a spot that provides well-draining soil and full sun to partial shade. Lavender doesn’t like wet feet, so make sure the area isn’t prone to waterlogging.
To dig the perfect hole, you’ll want to consider the mature size of your lavender plant. A general rule of thumb is to dig a hole that’s 1-2 times wider and just as deep as the root ball of the plant. This will give the roots room to spread out and establish themselves in the soil.
For example, if you’re planting a compact English lavender variety, you can dig a hole about 12-18 inches wide and 12-18 inches deep. However, if you’re planting a larger Mediterranean lavender variety, you may need to dig a hole that’s 24-36 inches wide and 24-36 inches deep.
Remember to loosen the soil at the bottom of the hole with a fork to create a comfortable bed for the roots to settle into. This will help your lavender plant establish itself quickly and thrive in its new home.
Planting the Lavender Stem
Now that you’ve prepared a suitable location for your lavender plant, it’s time to carefully remove it from its container and inspect the roots. Gently grasp the plant at the base of the stem, taking care not to touch or damage the roots. Slowly rotate the pot while pulling the plant out, working your way around the edges until it’s free.
Inspect the roots for any signs of circling, tangling, or root bound conditions. If you find that the roots have become too dense and are growing in a circular pattern, gently tease them apart with your fingers to encourage new growth. Remove any dead or damaged roots to prevent decay from affecting the rest of the plant.
When planting the lavender stem, make sure it’s at the same depth as it was in its container. This is crucial, as lavender prefers well-draining soil and can be susceptible to root rot if the crown is buried too deeply. Gently place the plant into the hole, spreading out the roots evenly before filling with soil.
Post-Planting Care and Maintenance
After planting your beautiful lavender, it’s essential to provide regular care to ensure it thrives. This next step will guide you through post-planting maintenance tips for optimal growth.
Watering Requirements
When it comes to watering newly planted lavender, it’s essential to get it right from the start. Lavender needs consistent moisture during its first year of growth, so water it regularly, especially during hot and dry weather. Aim to provide about 1-2 inches of water per week, either through rainfall or irrigation. You can check the soil moisture by inserting your finger into the soil up to the knuckle; if the soil feels dry, it’s time to water.
As the plants mature, they’ll become more drought-tolerant and require less frequent watering. After about a year, you can start reducing the frequency of watering to once every 7-10 days during hot weather. To ensure your lavender plant doesn’t develop root rot, make sure not to overwater it. Avoid getting water on the leaves or crown of the plant, as this can lead to fungal diseases. Instead, water at the base of the plant, allowing the soil to absorb the moisture slowly. By following these watering guidelines, you’ll be giving your lavender plant the best chance to thrive and produce fragrant flowers year after year.
Mulching and Pruning Tips
When it comes to post-planting care and maintenance for lavender plants, mulching and pruning are crucial steps to ensure their healthy growth and longevity. Mulching around your lavender plants will help retain moisture in the soil, reducing the need for frequent watering. This is especially important during hot summer months when lavender can be susceptible to drying out. Organic mulch options like wood chips or bark work well, but avoid using too much as it can cause the soil to become waterlogged.
To prune your lavender plants effectively, focus on promoting a bushy shape and encouraging new growth. Cut back flower stems after they’ve finished blooming, leaving about an inch of stem intact to encourage branching. Remove any dead or damaged wood, taking care not to cut too far into the plant’s interior where new growth is emerging. Prune back woody branches by one-third in late winter or early spring, and trim off any leggy stems to maintain a compact shape. Regular pruning will also help control lavender’s natural tendency to become leggy over time.
Pest and Disease Management
To keep your lavender plants thriving, it’s essential to be aware of potential pests and diseases that can affect them, and know how to manage these issues effectively. We’ll cover common problems and their solutions below.
Common Pests Affecting Lavender
Lavender plants are susceptible to several pests that can cause damage and reduce their fragrance. Slugs, for instance, are nocturnal creatures that feed on the leaves and flowers of lavender, leaving behind a trail of slime. To control slugs, you can try using copper tape around your planters, as they don’t like to cross over metal surfaces. Another option is to use beer traps or crushed eggshells in the soil.
Aphids are another common pest that targets lavender, often appearing on the stems and leaves. These tiny insects feed on sap, causing curled or distorted leaves. To get rid of aphids, you can spray your plants with a mixture of soap and water or introduce beneficial insects like ladybugs, which prey on aphid populations.
Spider mites are another pest to watch out for, particularly in dry conditions. They’re tiny, spider-like creatures that feed on plant sap, causing yellowing leaves. To control spider mite populations, ensure your plants receive adequate moisture, and consider using neem oil or insecticidal soap to deter them. Regularly inspecting your plants and taking prompt action can help prevent infestations from getting out of hand.
Recognizing and Treating Diseases in Lavender
Lavender is generally a hardy plant, but like all plants, it can be susceptible to diseases that can cause significant damage if left unchecked. One of the most common diseases affecting lavender is root rot, which occurs when the roots are consistently waterlogged or exposed to poor drainage. This often leads to yellowing leaves and stunted growth.
To identify root rot in your lavender plant, look for soft, mushy stems and a foul odor emanating from the soil. If you suspect root rot, carefully remove the plant from its pot and inspect the roots. Cut back any affected areas, making sure to sanitize your tools between cuts.
Another common issue is leaf spot, which appears as small, discolored spots on the leaves. Fungal diseases like botrytis or anthracnose often cause this condition. To prevent fungal diseases, ensure good air circulation around your plants and avoid overwatering. If you notice any signs of disease, treat with a fungicide specifically designed for lavender.
Remember to inspect your plants regularly during wet weather conditions when diseases are more likely to spread. By being proactive in monitoring and addressing potential issues, you can keep your lavender healthy and thriving all season long.
Harvesting and Preserving Lavender
Now that you’ve grown your own lavender, it’s time to reap the rewards by harvesting its fragrant blooms and learning how to preserve them for years to come. We’ll guide you through the process step-by-step.
When to Harvest Lavender Buds
When it comes to harvesting lavender buds for their fragrance and medicinal properties, timing is everything. Typically, the best time to harvest lavender buds is when they are fully formed but still young and plump, usually around 6-8 weeks after blooming has started.
This period is often referred to as “peak” or “prime” harvesting time. During this stage, the buds contain the highest concentration of oils and essential compounds that give lavender its distinctive fragrance and medicinal properties. To check if your lavender plants are ready for harvesting, gently grasp a stem between your thumb and index finger and twist it slightly. If the buds come off easily, they’re likely ripe.
For maximum potency and aroma, harvest your lavender buds in the morning after the dew has dried but before the heat of the day sets in. This ensures that the plant’s natural oils are most concentrated and will retain their fragrance longer during drying and storage processes.
Methods for Preserving Lavender
Now that you’ve harvested your beautiful lavender flowers, it’s time to preserve them for enjoyment throughout the year. There are several methods to dry, freeze, or transform your freshly picked blooms into delightful products like tea, oil, and more.
Drying is a simple and effective way to preserve lavender. You can air-dry bunches of fresh lavender by tying them in small bunches and hanging them upside down in a warm, dry place. This method takes around 2-3 weeks, depending on the humidity and temperature. Alternatively, you can speed up the process using a food dehydrator or your oven on its lowest temperature setting (150°F/65°C). Once dried, store the buds in airtight containers to maintain their fragrance and color.
Freezing is another great option, especially if you want to retain the delicate flavor and aroma of fresh lavender. Simply pick off the buds and place them in an airtight container or freezer bag, making sure to press out as much air as possible before sealing. Frozen lavender is perfect for adding to desserts, drinks, or potpourri.
To make lavender tea, simply steep 1 tablespoon of dried or frozen buds in 8 ounces of boiling water for 5-7 minutes. Strain and enjoy! You can also infuse the flowers into oil by placing them in a clean glass jar and covering them with olive or jojoba oil. Store the mixture in a cool, dark place for 2-3 weeks, shaking the jar daily, before straining and using as a fragrant oil for skin care or aromatherapy.
Remember to always label your preserved lavender products clearly so you can identify them later. With these methods, you’ll be able to enjoy the beauty and fragrance of your lavender plants throughout the year, even when they’re not in bloom.
Frequently Asked Questions
Can I grow lavender indoors if I don’t have a garden?
Yes, you can definitely grow lavender indoors, but make sure to choose a variety that is compact or dwarf, such as ‘Hidcote’ or ‘Munstead’. Provide plenty of sunlight and well-draining potting mix for the best results.
What are some common pests that affect lavender plants, and how do I prevent them?
Some common pests affecting lavender include aphids, whiteflies, and spider mites. To prevent infestations, ensure good air circulation around your plants, use physical barriers like fine mesh to cover pots, and spray with neem oil or insecticidal soap as a last resort.
How long does it take for lavender plants to mature after planting?
The time it takes for lavender plants to mature can vary depending on factors such as climate, soil quality, and the specific variety. On average, you can expect lavender to start producing flowers within 6-12 months of planting, but full maturity may take a year or more.
Can I propagate lavender from cuttings, and if so, how do I do it?
Yes, you can propagate lavender from stem cuttings. Take 3-4 inch stem cuttings in the spring or summer, remove lower leaves, and plant them in well-draining soil with rooting hormone. Water thoroughly and keep the soil moist until roots develop.
How often should I harvest my lavender flowers to encourage continuous blooming?
To promote continuous blooming, you can harvest your lavender flowers once they have fully bloomed and are dry to the touch. Remove any spent flowers, but avoid cutting back more than one-third of the foliage at a time. This will help maintain the plant’s health and vigor.