Are you ready to discover the sweetness of growing your own honeyberries? These delicious shrubs are becoming increasingly popular for their unique flavor and numerous health benefits. But where do you start when it comes to planting and caring for honeyberry bushes in your garden? With so many varieties to choose from, selecting the right one can be overwhelming.
In this comprehensive guide, we’ll walk you through everything you need to know about growing and harvesting honeyberries. From choosing the perfect variety to tips on pruning and pest management, we’ve got you covered. Whether you’re a seasoned gardener or just starting out, our expert advice will help you get the most out of your honeyberry plants. By the end of this article, you’ll be well on your way to enjoying fresh, homegrown honeyberries right in your own garden!
Choosing the Right Variety
When it comes to planting honeyberries, selecting the right variety for your climate and preferences can make all the difference. With so many options available, how do you choose?
Section Overview
When it comes to planting honeyberries in your garden, selecting the right variety is crucial for optimal growth and flavor. With numerous types of honeyberries available, each with its unique characteristics, growth habits, and uses, choosing the perfect one can be overwhelming.
Honeyberry varieties range from compact shrubs suitable for small gardens to larger bushes ideal for commercial production. Some popular varieties include ‘Tundra’, ‘Boreal Beauty’, and ‘Nordic Blue’. These varieties offer different flavor profiles, with some being sweeter and others more tart.
When selecting a honeyberry variety, consider the climate and soil conditions in your garden. For example, if you live in an area with cold winters, look for varieties that are resistant to frost and can thrive in cooler temperatures. Additionally, think about how you plan to use your honeyberries – will they be primarily for eating fresh, or do you want to use them for jam-making and other preservation methods? By considering these factors, you’ll be able to select a variety that meets your needs and provides the best results.
Native vs. Introduced Varieties
When it comes to choosing the right honeyberry variety for your garden, one of the most important decisions you’ll make is whether to plant native or introduced varieties. Both types have their advantages and disadvantages, which we’ll explore below.
Native honeyberry varieties are those that have been grown in a specific region for centuries and have adapted to its local climate and soil conditions. These plants tend to be hardier and more resistant to pests and diseases, making them a great choice for gardeners who want a low-maintenance option. For example, the ‘Tundra’ honeyberry is a native variety that thrives in the cold climates of Northern Europe and North America. It’s known for its ability to tolerate extreme temperatures and produce high-quality fruit.
Introduced varieties, on the other hand, are those that have been developed elsewhere and introduced to new regions. These plants may offer improved characteristics such as larger fruit size or increased yields, but they can be more susceptible to local pests and diseases. If you live in an area with a specific climate or soil type that’s different from where the variety was developed, it’s essential to choose a plant that’s been bred for your region.
When selecting between native and introduced varieties, consider factors such as your local climate, soil conditions, and pest management strategies. For example, if you live in an area with high temperatures and dry soil, a native variety like ‘Tundra’ might be a better choice than an introduced variety from a cooler climate.
Recommended Honeyberry Cultivars for Small Gardens
When it comes to growing honeyberries in small gardens, selecting the right cultivar is crucial for success. With many varieties available, it can be overwhelming to choose just a few that will thrive in your specific climate and soil conditions.
Some popular and productive honeyberry cultivars suitable for small gardens include ‘Tukwilla’, ‘Blue Boy’, and ‘White Fuseau’. These compact shrubs are perfect for spaces with limited room, producing high yields of delicious berries. ‘Tukwilla’ is a particularly great choice, as it requires minimal maintenance and can tolerate drought.
For those looking to grow honeyberries in containers, ‘Blue Velvet’ is an excellent option. This variety produces beautiful blue berries and has a more compact growth habit, making it ideal for smaller spaces or patio gardens. When selecting cultivars, be sure to consider factors such as chill hours (required winter cold period), disease resistance, and fruit flavor.
In addition to these popular varieties, you may also want to explore other options like ‘Autumn Bliss’, ‘Red Pearl’, and ‘Sakura’. Be sure to check the specific growing requirements for each variety to ensure they will thrive in your unique garden conditions. By choosing the right honeyberry cultivar for your small garden, you’ll be well on your way to enjoying a bountiful harvest of these delicious berries.
Preparing the Soil and Climate
Before planting your honeyberries, it’s essential to prepare the soil and climate to create an optimal environment for these delicate bushes. Let’s dive into the specifics of getting your garden ready.
Understanding Honeyberry Requirements
When it comes to growing honeyberries in your garden, understanding their specific needs is crucial for success. One of the most important factors to consider is soil pH. Honeyberries prefer a slightly acidic to neutral soil pH, ranging from 5.5 to 7.0. If your soil is too alkaline, you may need to amend it with elemental sulfur or peat moss to bring it within the acceptable range.
Another crucial factor is moisture levels. Honeyberries require consistent moisture, especially when they’re producing fruit. Aim for about an inch of water per week, either through rainfall or irrigation. It’s also essential to ensure good drainage, as honeyberries are susceptible to root rot if the soil is too wet.
In terms of sunlight, honeyberries prefer full sun to partial shade. A location that receives at least six hours of direct sunlight per day will provide optimal growing conditions. Be mindful of wind direction and plant your honeyberry bush in a spot that protects it from harsh winds, which can cause damage to the delicate flowers and fruit.
To check your soil pH, you can purchase a DIY testing kit or send a sample to a laboratory for analysis. Once you’ve determined your soil’s pH level, take steps to adjust it if necessary. For example, if your soil is too alkaline, you can mix in some elemental sulfur according to the manufacturer’s instructions.
By understanding and addressing these specific needs, you’ll be well on your way to growing healthy and productive honeyberry bushes in your garden.
Assessing Your Garden’s Microclimate
When planting honeyberries in your garden, it’s essential to understand and assess its microclimate. This is crucial because honeyberries are sensitive to extreme temperature fluctuations, wind patterns, and potential frost risks. To begin assessing your garden’s microclimate, start by observing the surrounding environment. Take note of any nearby buildings, trees, or other features that may impact the temperature and wind in your garden.
Check for temperature fluctuations by recording the minimum and maximum temperatures during different seasons. This will help you understand how cold or hot your garden gets. Next, observe wind patterns to see if there are areas with more wind protection or exposure. This is particularly important for honeyberries as they can be sensitive to strong winds.
Consider potential frost risks by checking the elevation and proximity to nearby water sources. Honeyberries prefer a relatively cool climate, but sudden frosts can still damage the plants. Understanding your garden’s microclimate will enable you to choose the best location for planting and take necessary precautions to protect your honeyberry bushes.
Creating a Suitable Soil Environment
When planting honeyberries, creating a suitable soil environment is crucial for their optimal growth and fruit production. A well-draining soil mix with a pH between 5.5 and 6.5 will promote healthy root development and minimize the risk of nutrient deficiencies.
To assess your garden’s soil conditions, it’s essential to perform a simple pH test using a DIY kit or send a sample to a lab for analysis. Based on the results, you may need to amend the soil with organic matter like compost or well-rotted manure. This will not only adjust the pH but also improve the overall structure and fertility of the soil.
In addition to adjusting the soil’s chemical composition, it’s equally important to consider its physical characteristics. Honeyberries prefer a slightly sloping area that allows excess water to drain away, reducing the risk of root rot and other diseases. By creating a well-draining environment with adequate sunlight and air circulation, you’ll be providing your honeyberry plants with the ideal conditions for thriving growth and fruit production.
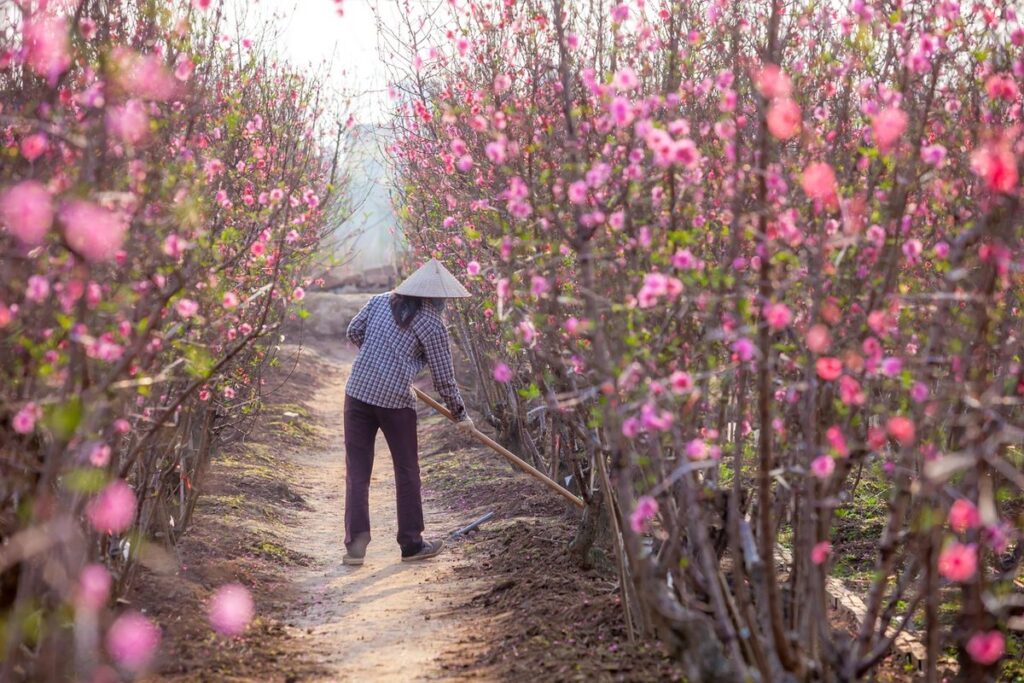
Planting Honeyberry Bushes
Now that you’ve selected your honeyberry bushes, let’s get them planted! This next step is crucial to their establishment and future success in your garden.
Section Overview
When planting honeyberry bushes in your garden, it’s essential to consider the right location and preparation to ensure their optimal growth. Start by choosing a spot that receives full sun to partial shade, as honeyberries prefer well-drained soil and a slightly acidic pH between 5.5 and 6.5.
Before digging, inspect the site for any underground utilities or obstructions. Also, consider the mature size of your honeyberry bushes – typically around 3-4 feet tall and wide. This will help you determine the best spacing to prevent overcrowding and allow for easy maintenance.
Prepare the soil by loosening it to a depth of about 12 inches. Add a mix of compost or well-rotted manure to improve drainage and fertility. If your soil is heavy clay or sandy, amend it with organic matter to create a balanced composition. Spacing honeyberry bushes 3-4 feet apart will give them room to spread their canes and produce an abundance of fruit. By following these steps, you’ll be well on your way to creating the perfect environment for your honeyberry bushes to thrive.
Digging the Right Hole: Depth and Diameter Considerations
When planting honeyberry bushes, it’s essential to dig the right-sized hole and at the correct depth to ensure optimal growth and stability. A general rule of thumb is to dig a hole that’s about 2-3 times as wide and just as deep as the root ball of the bush.
For example, if your honeyberry bush has a root ball that’s about 12 inches in diameter, you’ll want to dig a hole that’s around 24-36 inches wide. As for depth, make sure the hole is at least 6-8 inches deeper than the root flare (where the trunk flares out from the roots). This will give the roots plenty of room to grow and establish themselves.
Remember, honeyberry bushes have a relatively shallow root system compared to other fruiting shrubs. They prefer well-draining soil and don’t like their roots sitting in waterlogged areas. So, make sure your hole is positioned in an area with good drainage to prevent root rot and other issues.
When digging the hole, also consider the mature size of the bush. Honeyberry bushes can grow quite large, so it’s essential to give them enough space to spread out without overcrowding nearby plants or structures.
Planting Techniques and Aftercare
When planting honeyberry bushes, it’s essential to get the technique right and provide proper aftercare. To begin with, choose a location that receives at least six hours of direct sunlight per day and has well-draining soil. Dig a hole that is twice as wide and just as deep as the root ball. Gently remove the plant from its container and place it in the hole, making sure the crown (where the stem meets the roots) is level with the surrounding soil.
As you backfill the hole, use your fingers or a fork to loosen any compacted soil around the roots. Water thoroughly after planting, and continue to keep the soil consistently moist during the first year. Aftercare involves regular watering, but also fertilizing once a year in early spring. A balanced fertilizer will promote healthy growth and fruiting. Prune your honeyberry bushes annually to maintain their shape and encourage new growth.
To avoid overwatering, check the moisture levels by sticking your finger into the soil up to the knuckle. If the soil feels dry, it’s time to water. Mulch around the base of the plants to retain moisture and suppress weeds. With proper care and attention, your honeyberry bushes will thrive and provide delicious fruit for years to come.
Caring for Honeyberry Bushes
To ensure your honeyberry bushes thrive, it’s essential to follow specific care instructions, which we’ll break down into manageable tips and tricks in this section. Proper care will reward you with a bountiful harvest of delicious fruit.
Fertilization and Pruning Needs
When it comes to fertilizing and pruning honeyberry bushes, timing is everything. Fertilization should be done annually, but there are specific times of the year when it’s most beneficial for the bush.
In early spring, before new growth begins, apply a balanced fertilizer (10-10-10 NPK) around the base of the bush. This will provide essential nutrients for new growth and fruit development. For mature bushes, you can also consider applying a fruit-tree specific fertilizer in late winter or early spring.
As for pruning, it’s crucial to maintain bush health and promote fruit production. Prune your honeyberry bush annually, removing any dead, diseased, or damaged branches. Cut back the tips of new growth by about one-third to encourage branching and more fruiting wood. Remove any weak or spindly growth to allow air circulation and prevent disease.
Pruning should be done in late winter or early spring, before new growth begins. This will also help control the size of the bush and promote a balanced structure.
Pest and Disease Management Strategies
Honeyberry bushes are susceptible to various pests and diseases that can significantly impact their health and productivity. One of the most common issues is powdery mildew, a fungal disease that causes white powdery patches on leaves and stems. To prevent this, ensure good air circulation by planting honeyberries at least 3-4 feet apart.
Another issue is spider mites, which can cause yellowing or bronzing of leaves due to their piercing-sucking mouthparts. Regularly inspect your plants for these pests, and treat them promptly with neem oil or insecticidal soap if necessary. To prevent infestations, keep the area around your honeyberries free from weeds that provide shelter for these mites.
Regularly inspecting your plants can also help identify issues early on. Look out for signs of aphids, such as curled or distorted leaves, and treat them promptly with horticultural oil or insecticidal soap. Keep in mind that using integrated pest management (IPM) strategies is crucial to maintaining a balanced ecosystem and reducing the risk of developing pesticide-resistant pests.
Maintain good gardening practices, like pruning dead wood and disposing of infested plant material, to prevent disease spread.
Mulching and Watering Tips
When it comes to caring for your honeyberry bushes, proper mulching and watering techniques are crucial to their health and productivity. A good rule of thumb is to maintain a 2-3 inch layer of organic mulch around the base of your plants, keeping it at least an inch away from the trunk. This not only helps retain moisture but also suppresses weeds that can compete for water and nutrients.
To determine if your honeyberry bushes need watering, check the soil moisture by inserting your finger into the ground up to the knuckle. If the soil feels dry, it’s time to water. Aim for about 1 inch of water per week, either from rainfall or irrigation. Be cautious not to overwater, as this can lead to root rot and other problems.
In hot summer months, you may need to water your honeyberry bushes more frequently, but avoid watering the leaves to prevent fungal diseases. Instead, focus on soaking the soil around the plants, allowing the roots to absorb the moisture they need.
Harvesting Honeyberries
Now that you’ve planted and cared for your honeyberry bushes, it’s time to harvest their delicious fruits at the peak of sweetness and flavor. Learn how to expertly pick and enjoy your honeyberries in this section.
Timing the Ripening Process
When it comes to harvesting honeyberries, timing is everything. You’ll know they’re ripe when you see a few subtle changes in their appearance and texture. One of the most noticeable signs is a slight change in color. Honeyberry fruits typically turn from a light green or yellow-green to a deeper purple or blue-purple hue as they ripen.
But don’t just rely on color alone – give them a gentle squeeze too! Ripe honeyberries will yield slightly to pressure but should still feel firm and springy, not soft or mushy. This is especially important if you’re new to growing honeyberries, as some varieties can be more delicate than others.
Another way to check for ripeness is by taste. Gently bite into a berry – if it’s sweet and juicy with a hint of tartness, it’s ready to eat! Some experienced gardeners also use the “sniff test” by gently sniffing the berries; they should have a sweet, floral aroma.
Keep in mind that honeyberries are usually ripe within 1-2 weeks after they’ve reached their full color. Harvest them as soon as possible to enjoy the best flavor and texture.
Handling and Storage Techniques
When harvesting honeyberries, it’s essential to handle them carefully to maintain their quality and extend shelf life. To do this, gently pluck the berries from the bush, taking care not to bruise or damage them. Avoid washing the berries immediately after harvest, as excess moisture can promote mold growth. Instead, clean them just before use or storage.
For short-term storage (up to 3 days), store honeyberries in a cool, dry place away from direct sunlight. A breathable container like a paper bag or mesh basket will allow for airflow and help prevent moisture buildup. For longer-term storage (up to 6 months), consider freezing the berries. Rinse them first, then pat dry with a clean towel before placing them in an airtight container or freezer bag.
When storing honeyberries, keep them away from strong-smelling foods, as they can absorb odors easily. Regularly check on stored berries for signs of spoilage, and use your senses to evaluate their freshness. If the berries are soft, mushy, or have visible mold, it’s best to discard them to ensure food safety.
To maximize shelf life, consider storing honeyberries at 0°F (-18°C) or below, which will slow down spoilage significantly.
Using Honeyberries in Recipes
Honeyberries are a versatile fruit that can be used in various recipes to add sweetness and flavor. When harvesting honeyberries from your garden, it’s essential to use them fresh or store them properly for later use.
When using honeyberries in recipes, consider their sweet-tart taste and delicate texture. They pair well with sweet ingredients like sugar, cream, and vanilla, but also complement savory flavors like lemon, ginger, and herbs. Try adding honeyberries to your favorite smoothie recipe for a boost of antioxidants and flavor.
In baked goods, honeyberries can be used as a substitute for blueberries or raspberries in muffins, cakes, and scones. Simply mix them into the batter with sugar and flour, then fold in other ingredients like nuts or chocolate chips. You can also make a honeyberry compote by cooking down fresh or frozen berries with a little sugar and water to create a sweet topping for yogurt, ice cream, or pancakes.
When using honeyberries in savory dishes, consider pairing them with citrus or herbs like mint, basil, or rosemary. They add a unique flavor dimension to salads, sauces, and marinades for meats or vegetables. Experiment with different combinations to find your favorite way to use honeyberries in the kitchen.
Common Issues and Troubleshooting
As you begin cultivating honeyberries, you may encounter some unexpected challenges. This section will guide you through common issues that may arise during planting and provide troubleshooting tips to keep your garden thriving.
Identifying Common Problems
When planting honeyberry in your garden, it’s not uncommon to encounter some common issues that can impact the health and productivity of your plants. One of the most critical problems is nutrient deficiencies. Honeyberry plants require a balanced diet of nutrients, including nitrogen, phosphorus, potassium, and micronutrients like iron and boron.
Pests are another common issue that can affect honeyberry plants. Aphids, spider mites, and whiteflies are some of the most common pests that can damage your plants. To prevent infestations, make sure to inspect your plants regularly, and use organic pest control methods whenever possible. For example, introducing beneficial insects like ladybugs or lacewings can help control aphid populations.
Diseases like powdery mildew, botrytis, and root rot are also common problems that can affect honeyberry plants. To prevent diseases, make sure to provide good air circulation around your plants, avoid overwatering, and use disease-resistant varieties whenever possible. Regularly inspecting your plants for signs of disease and taking prompt action is crucial to preventing the spread.
Regular monitoring and maintenance can help identify these issues early on, allowing you to take corrective action before they become severe problems.
Solutions for Common Issues
If you’re experiencing issues with your honeyberry plants, there are solutions to common problems that can help ensure their health and productivity. One common issue is poor pollination, which can lead to reduced yields. To address this, consider planting multiple varieties of honeyberries that bloom at different times to provide a longer pollination period.
Another problem may be pests or diseases affecting your plants. Honeyberry plants are susceptible to aphids, spider mites, and powdery mildew. To prevent infestations, maintain good garden hygiene by regularly inspecting your plants and removing any affected leaves or stems. Use organic pest control methods whenever possible, such as neem oil or insecticidal soap.
Additionally, honeyberry plants may require additional support to produce well. Install a trellis or stake near the base of each plant to provide structural support and promote healthy growth. This will help ensure your honeyberries receive adequate sunlight and air circulation, reducing the risk of disease.
Expanding Your Honeyberry Garden
Now that you have a thriving honeyberry patch, it’s time to think about expanding and making the most of your space. This is where we’ll share our top tips for successful garden expansion.
Section Overview
As you’ve grown accustomed to enjoying the sweet fruits of your labor, it’s only natural to want to expand your honeyberry garden. Not only will this provide you with a bountiful harvest, but it’ll also allow you to share these delicious berries with friends and family. In this final section, we’ll explore methods for propagating new bushes, container growing, and using cuttings.
To begin, consider the various ways to propagate new honeyberry bushes. You can use layering, where a stem is bent down and covered in soil, or take softwood cuttings from established plants during the spring or early summer months. This method has proven successful for many gardeners, with a propagation rate of up to 90%. For those who prefer a more hands-off approach, you can also use suckers – new growth that emerges from the base of the plant – to create new bushes.
When growing honeyberries in containers, choose a large pot (at least 24 inches deep) and use a well-draining mix. This will help prevent waterlogged soil and ensure your plants receive sufficient nutrients. Consider using a trellis or other support system to train the stems upwards, promoting healthy growth and maximizing space.
Cuttings can also be used to propagate honeyberries, either through in-vitro culture or tissue culture methods. These more advanced techniques require specialized equipment but offer higher success rates than traditional cutting methods.
Propagation Methods: Cuttings and Layering
When it comes to expanding your honeyberry garden, propagation methods like cuttings and layering are excellent options for creating new plants. These techniques allow you to replicate the characteristics of a mature honeyberry bush, including its flavor profile, yield, and resistance to diseases.
To propagate through cuttings, wait until early spring when new growth emerges from the tips of the branches. Cut 6-8 inch stem sections with at least two nodes (the joint where a leaf meets the stem) using sharp, clean pruning tools. Remove lower leaves, leaving only two sets of leaves at the top node. Dip the cut end in rooting hormone powder or liquid to enhance root development. Plant the cutting about 1-2 inches deep in well-draining soil, and keep it consistently moist but not waterlogged.
Layering is another effective method for propagating honeyberries. Identify a stem with long, flexible branches that can be bent to the ground without breaking. Dig a shallow trench, lay the branch in the trench, and secure it with rocks or ties. Leave the top section attached to the mother plant until roots have developed, then carefully cut the stem below the graft union and pot up the new rooted cutting.
Creating a Honeyberry Hedge or Screen
Creating a honeyberry hedge or screen is a fantastic way to add visual interest and structural beauty to your garden while also maximizing space. Not only do these edible hedges provide an attractive backdrop for other plants, but they also offer a bounty of delicious fruit.
To plant a honeyberry hedge or screen, start by selecting suitable varieties that are compact in growth habit, such as ‘Tundra’ or ‘Borealis’. Plant them 12-18 inches apart, depending on their mature spread. Dig a trench for each bush, about 6-8 inches deep and wide enough to accommodate the root system.
For optimal growth, ensure good air circulation by planting rows at least 3 feet apart. Regular pruning is essential to maintain shape and promote healthy growth. In late winter or early spring, cut back canes to about a foot from the ground, removing any dead or damaged wood. This will help control size and encourage new growth.
As your honeyberry hedge matures, it will provide a stunning backdrop for other plants, while also yielding an abundance of juicy fruit. Regular harvesting is key to maintaining its shape and promoting healthy growth.
Frequently Asked Questions
How soon can I expect to harvest honeyberries after planting?
Yes, with proper care and optimal growing conditions, you can start harvesting honeyberries within 2-3 years after planting. However, this timeline may vary depending on factors such as climate, soil quality, and the specific variety chosen.
Can I grow honeyberry bushes in containers or must they be planted directly in the ground?
Yes, honeyberry bushes can thrive in large containers, provided they receive adequate sunlight, water, and nutrients. Choose a container at least 3-4 feet deep to accommodate the shrub’s root system, and ensure it has proper drainage holes to prevent waterlogged soil.
What are some common pests or diseases that affect honeyberry plants, and how can I manage them?
Common issues include powdery mildew, aphids, and spider mites. To control these pests, practice integrated pest management (IPM) techniques such as pruning infested areas, using neem oil or insecticidal soap, and introducing beneficial insects like ladybugs or lacewings.
How do I determine the best time to prune my honeyberry bushes for optimal growth and fruit production?
Prune your honeyberry bushes in late winter or early spring before new growth begins. Remove any dead, diseased, or damaged branches, and thin out overcrowded areas to promote air circulation and sunlight penetration.
Can I propagate honeyberry bushes through division, and if so, what are the key considerations for successful propagation?
Yes, honeyberry bushes can be propagated through division in early spring or fall when the shrub is dormant. Dig up the entire root system carefully, separate individual plants, and replant them immediately to minimize stress and ensure healthy establishment.