Are you ready to fill your garden with the sweet scent of freesias? These delicate flowers are not only a delight to behold, but they’re also incredibly easy to plant and maintain. With their vibrant blooms and heady fragrance, it’s no wonder why freesias have become a favorite among gardeners of all levels.
But planting freesias like a pro requires more than just throwing some seeds in the ground. You need to know when to plant, how to prepare the soil, and what type of care will help your freesias thrive. In this comprehensive guide, we’ll walk you through every step of the process, from selecting the right variety to troubleshooting common issues that might arise. By the end of this article, you’ll be well on your way to growing beautiful, fragrant freesias in your own garden.
Choosing the Right Variety
When it comes to growing freesias, selecting the right variety is crucial for optimal performance and desired traits. Let’s explore the options and choose the perfect freesia for your garden.
Selecting Freesia Species
When it comes to selecting the perfect freesia species for your garden or indoor space, you’re spoiled for choice. With over 15 varieties to choose from, each with its unique characteristics and traits, it’s essential to pick one that suits your needs and preferences.
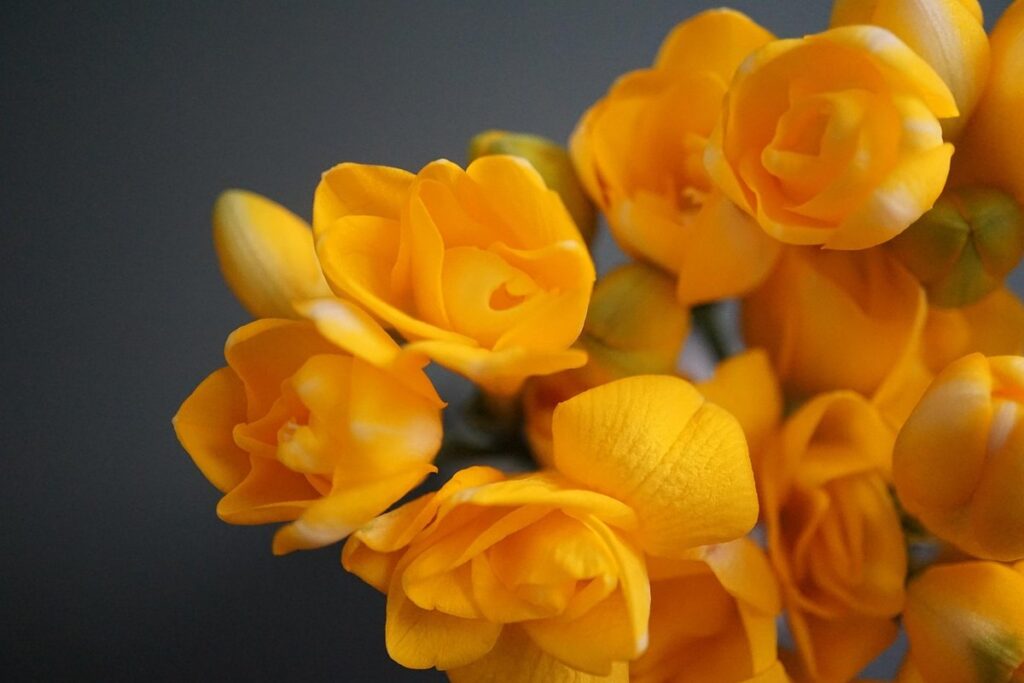
Let’s take a closer look at three popular species: F. alba, F. leichtlinii, and F. laxa. ‘F. alba’ is known for its delicate white blooms and sweet fragrance, making it an excellent choice for adding a touch of elegance to any space. On the other hand, F. leichtlinii boasts vibrant orange and red flowers, creating a bold statement in your garden or arrangement.
For those who prefer a more subtle look, F. laxa offers soft pastel hues and a delicate appearance. When selecting a freesia species, consider factors such as fragrance, bloom size, color palette, and hardiness zone. If you’re new to growing freesias, start with a variety that’s easy to care for and requires minimal maintenance.
Remember, each species has its own set of requirements, so be sure to research the specific needs of your chosen freesia to ensure it thrives under your care.
Considerations for Hybrid vs. Single Varieties
When it comes to choosing the right freesia variety, you’ll often come across two main options: hybrid and single varieties. While both have their benefits, they differ significantly in terms of appearance, growth habits, and maintenance requirements.
Hybrid freesias are bred for specific traits such as larger blooms, more intense fragrance, or unique flower colors. They tend to be more compact and produce more flowers per stem, making them ideal for cut flower arrangements. However, hybrid varieties can be less hardy than single varieties and may require more care. For example, they might need regular deadheading to encourage repeat blooming.
Single freesias, on the other hand, are often preferred by gardeners who value their natural growth patterns and simplicity. They tend to be taller and produce fewer flowers per stem but have a more robust root system, making them less prone to disease. When choosing between hybrid and single varieties, consider your specific needs and preferences. If you’re after a show-stopping display of blooms for a special occasion, a hybrid freesia might be the way to go. But if you prioritize low-maintenance and a more authentic gardening experience, a single variety could be a better fit.
Preparing the Soil
To ensure your freesias grow strong and healthy, let’s start by preparing their home in the garden – the soil. We’ll cover the essential steps to prepare a perfect bed for these lovely flowers.
Understanding Freesia Soil Requirements
When it comes to planting freesias, understanding their soil requirements is crucial for optimal growth and blooms. Freesias prefer well-draining soil with a slightly acidic pH between 6.0 and 7.0. If your soil is too alkaline, it can lead to nutrient deficiencies and reduced blooming.
In terms of texture, freesias thrive in light to medium soils that drain excess water quickly. Sandy loams or mixtures of peat moss and perlite work well for this purpose. Avoid heavy clay soils that retain too much moisture, as this can cause root rot and other problems.
Freesias require a balanced nutrient profile, with an emphasis on phosphorus and potassium. A general-purpose fertilizer applied at planting time will provide the necessary nutrients for initial growth. As the plants establish themselves, you can switch to a high-phosphorus fertilizer to promote blooming. Aim to fertilize lightly, as excessive nitrogen can lead to weak stem development and fewer flowers. With the right soil conditions in place, your freesias should thrive and produce an abundance of vibrant blooms.
How to Test Your Soil
Before planting freesias, it’s essential to test your soil to determine its current pH level and nutrient content. You can collect a sample from your garden bed by digging about 6-8 inches deep with a shovel, then mixing the top 2-3 inches of dirt together in a bucket or container. This will give you an accurate representation of your soil’s composition.
You’ll need to obtain a soil testing kit, which can be purchased at most gardening stores or online. These kits usually include pH test strips or a measuring device that will indicate the acidity or alkalinity level of your soil on a scale from 0-14. Most freesias prefer a slightly acidic to neutral soil pH, ranging from 6.0 to 7.0.
Some common signs of nutrient deficiencies in soil include yellowing leaves, stunted growth, and poor flower production. To test for nutrient content, you can use a DIY kit or send your sample to a laboratory for analysis. Based on the results, you can add organic amendments like compost or fertilizer to adjust the pH level and provide essential nutrients for healthy plant growth.
Planting Freesias
When it comes to planting freesias, timing is everything. Choose a spot that receives full sun to partial shade and has well-draining soil for optimal results.
When to Plant Freesias
When to Plant Freesias depends on your location and climate. If you live in a region with frost, it’s best to plant freesia bulbs in the fall, about 6-8 weeks before the first frost. This allows them to establish themselves before winter sets in.
In areas with mild winters, like Southern California or Florida, you can plant freesias during the spring or early summer. Freesias thrive in temperatures between 65°F and 75°F (18°C and 24°C), making them ideal for regions with a Mediterranean climate.
For those living in cooler climates, consider planting forced bulbs indoors to get a head start on the growing season. Plant the bulb in a pot filled with well-draining soil, water sparingly, and keep it cool until roots develop.
In areas prone to extreme heat or cold, such as deserts or northern states, plant freesias in containers that can be moved indoors during harsh weather conditions. This flexibility allows you to provide optimal growing conditions for your freesias.
Keep in mind that freesia bulbs need a period of dormancy after blooming, so avoid planting new bulbs immediately after the flowers have faded. Instead, wait until the foliage has died back and then replant or store the bulbs properly.
Planting Depth and Spacing
When planting freesia bulbs, it’s essential to consider both the depth and spacing of the bulbs for optimal growth and bloom. As a general rule, plant the bulbs 2-3 times deeper than the height of the bulb, usually around 6-8 inches deep in well-draining soil.
In terms of spacing, make sure to leave about 3-4 inches between each bulb. This allows the roots to expand and minimizes competition for water and nutrients. If you’re planting multiple rows, space them at least 12-18 inches apart to prevent overcrowding.
If you’re concerned about maximizing your freesia blooms, plant multiple bulbs in a cluster, but keep in mind that this can lead to reduced individual flower size. To avoid this, consider planting the bulbs in a staggered pattern rather than directly next to each other.
Remember to also water and fertilize your freesias according to their specific needs, which include well-draining soil, full sun to partial shade, and cool temperatures during the growing season. By following these guidelines, you’ll be well on your way to enjoying an abundance of beautiful freesia blooms in your garden or indoor space.
Care and Maintenance
To keep your freesia plants thriving, it’s essential to provide them with proper care and maintenance. This involves regular watering, fertilizing, and pruning to ensure optimal blooms.
Watering and Fertilization Tips
When it comes to watering and fertilizing freesias during the growing season, there are some key tips to keep in mind. First, let’s talk about watering. Freesias need consistent moisture, especially when they’re producing flowers. Water them once a week, or whenever the top inch of soil feels dry to the touch. However, be careful not to overwater, as this can lead to root rot.
As for fertilization, freesias require a balanced fertilizer that’s high in phosphorus. Phosphorus promotes blooming and root growth, which are essential for freesia production. A 10-20-10 NPK (nitrogen-phosphorus-potassium) ratio is ideal for freesias. You can apply this fertilizer once a month during the growing season.
Another important tip is to fertilize your freesias at different stages of growth. For example, you can start with a low dose of fertilizer when they’re young and gradually increase it as they mature. This will promote healthy growth and ensure that your freesias produce plenty of beautiful flowers.
Pest and Disease Control
When it comes to growing freesias, pest and disease control is crucial to ensure their optimal health. One common issue that affects these beautiful flowers is aphids. These tiny insects feed on the plant’s sap, causing curled or distorted leaves and stunted growth. To prevent infestations, keep your freesia plants away from areas where aphids are likely to be present, such as near weeds or other flowering plants.
If you notice any aphid activity, treat the plants with a gentle insecticidal soap solution. However, if left unchecked, aphids can lead to the spread of viruses like freesia mosaic virus and freesia streak virus. Regularly inspect your plants for signs of pests and address them promptly.
Diseases like powdery mildew and downy mildew also pose significant threats to freesias. These fungal infections thrive in humid environments and can be managed by providing good air circulation around the plants and removing any affected areas. In severe cases, fungicides may be necessary.
Tips for Forced Blooms
Forced blooming can be a delicate process, so here are some essential tips to help you coax those beautiful freesia blooms into flower. Follow these steps carefully for optimal results.
Understanding the Process of Forcing Freesias
Forcing freesias to bloom indoors during the off-season is a bit of an art, but with the right steps, you can enjoy these fragrant flowers year-round. First, select a variety that’s specifically bred for indoor forcing, as they tend to be more compact and bloom more reliably. Next, prepare the tubers by giving them a period of cold stratification – usually around 30-40 days at a consistent temperature between 35°F to 45°F (2°C to 7°C).
Once your tubers have had their chill time, it’s time to pot them up in a well-draining mix. Make sure the container has good drainage holes, as freesias don’t like wet feet! Water carefully and provide bright, indirect light – a south-facing windowsill is perfect.
After about 2-3 weeks, you should start to see the first signs of growth. Keep the soil consistently moist but not waterlogged, and fertilize lightly once or twice during the blooming period. With proper care, your freesias will burst into bloom in just a few months, filling your home with their sweet scent and delicate beauty.
Techniques for Inducing Bloom
Inducing blooms in freesias requires a delicate balance of conditions. To promote blooming, you’ll want to mimic the natural process by manipulating temperature, light, and cold stratification.
Cold stratification is an essential step for many flower bulbs, including freesias. Place them in the refrigerator (around 4-8°C or 40°F) for 30-60 days. This period allows the bulbs to break dormancy and initiate growth.
Light manipulation also plays a crucial role. Provide your freesia plants with bright, indirect light during the day, but avoid direct sunlight which can cause scorching. If you’re growing indoors, use grow lights to supplement natural light, especially in winter months when daylight hours are shorter.
Temperature control is vital for flower development. Keep the soil consistently moist and maintain a temperature range between 18-22°C (64-72°F) during the day, with slightly cooler temperatures at night. Avoid exposing your freesias to extreme temperatures below 10°C or above 25°C (50°F).
By carefully controlling these conditions, you’ll encourage your freesias to bloom, even out of season.
Common Challenges and Solutions
One of the most frustrating parts of growing freesias is dealing with common issues that can affect their health and beauty. Let’s dive into some solutions to these problems.
Overwatering or Underwatering Issues
When it comes to growing freesias, one of the most common challenges you’ll encounter is getting the watering right. Freesias are sensitive to both overwatering and underwatering, which can lead to a range of issues.
Overwatering symptoms often manifest as yellowing or softening of the leaves, followed by root rot if left unchecked. This occurs when water accumulates in the bulb, causing it to become waterlogged. To avoid this, ensure that your potting mix has good drainage and don’t let the soil remain saturated for extended periods.
Underwatering, on the other hand, can cause the blooms to drop prematurely, or fail to appear altogether. If you notice that your freesia stems are droopy, it’s likely due to a lack of moisture. To rectify this, increase the frequency of watering while also ensuring the potting mix isn’t too wet.
In both cases, adjust your watering schedule as needed. Check the soil by sticking your finger into the top inch – if it feels dry, it’s time for a drink. Water thoroughly until excess liquid starts to seep out of the drainage holes.
Pests and Diseases That Can Affect Freesias
Freesias are generally low-maintenance flowers, but they can be susceptible to certain pests and diseases. One of the most common issues is root rot, which can occur when the soil is too wet or if the plant is not receiving enough air circulation.
To prevent root rot, make sure to plant your freesia in a well-draining potting mix and water it carefully, avoiding overwatering. You should also ensure that the pot has good drainage holes to allow excess moisture to escape.
In addition to root rot, freesias can be affected by pests such as aphids, whiteflies, and spider mites. These tiny insects can cause damage to the plant’s leaves and flowers, and can also spread diseases like powdery mildew.
To control pest infestations, use neem oil or insecticidal soap on the affected areas. Regularly inspect your freesias for signs of pests or diseases, and take action quickly if you notice any issues.
Some common diseases that affect freesias include botrytis and grey mold. These can be caused by overwatering, poor air circulation, or high humidity. To prevent these diseases, make sure to provide good air circulation around your freesias and avoid getting water on the leaves or flowers.
Frequently Asked Questions
What are the ideal weather conditions for planting freesias?
Freesias thrive in full sun to partial shade, with temperatures between 65°F (18°C) and 75°F (24°C). Avoid planting in areas with frost or extreme heat. Make sure your soil has good drainage to prevent waterlogged conditions that can lead to root rot.
How often should I fertilize my freesias for optimal growth?
Fertilize your freesias once a month during the growing season using a balanced, water-soluble fertilizer (20-20-20). Dilute the fertilizer according to the manufacturer’s instructions to avoid burning the roots. You can also add a bloom booster in the spring to promote flowering.
Can I plant freesias indoors in pots or only outdoors?
You can grow freesias indoors in pots, but ensure the container is at least 6-8 inches deep and has good drainage holes. Use a well-draining potting mix and maintain temperatures between 60°F (15°C) and 70°F (21°C). Keep in mind that indoor plants may require more frequent watering.
How can I troubleshoot overwatering issues with my freesias?
If you notice droopy or yellowing leaves, it may be a sign of overwatering. Stop watering your freesias immediately and allow the soil to dry out slightly between waterings. Inspect your roots for signs of rot and trim them back if necessary.
Can I force freesias to bloom indoors by manipulating their light exposure?
Yes. To induce blooming, provide your freesias with 12-14 hours of direct sunlight per day or use grow lights to supplement natural light. Keep the temperature between 50°F (10°C) and 60°F (15°C), as cooler temperatures promote flowering. Reduce watering during this period to encourage root development.