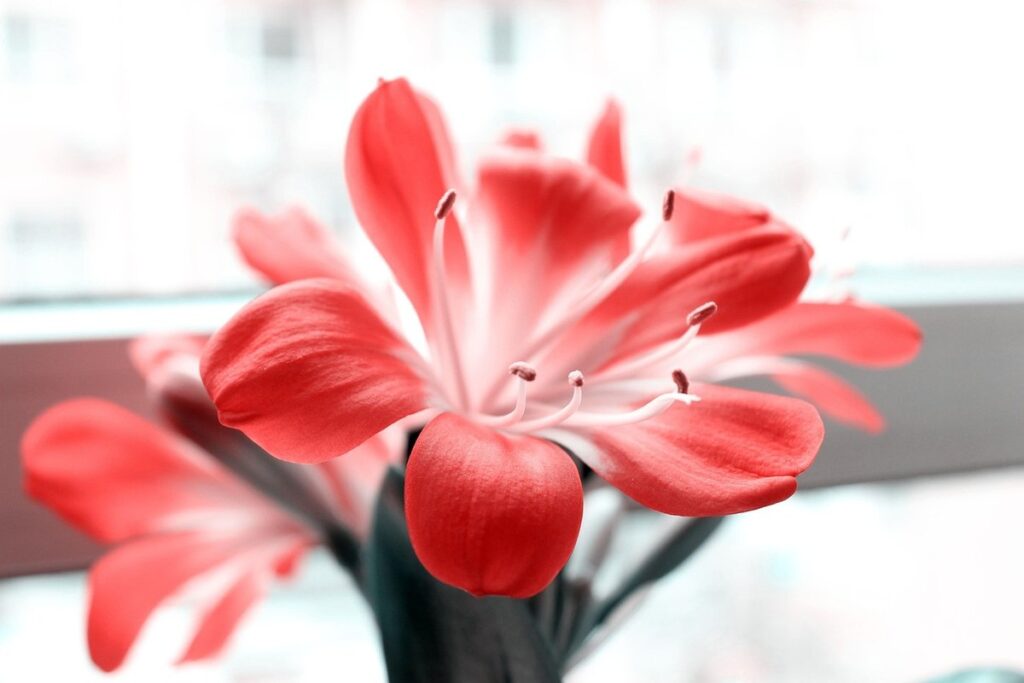
Are you ready to add some vibrant color and beauty to your garden with one of the most stunning plants around? Clivias are a favorite among plant enthusiasts, and for good reason – their striking blooms come in a wide range of colors and patterns. But before you can enjoy these gorgeous flowers, you need to learn how to plant them correctly. That’s where this guide comes in! We’ll walk you through choosing the perfect clivia variety for your garden, preparing the right soil conditions, and mastering the art of watering to ensure your plants thrive. Plus, we’ll cover some common problems that might arise, so you can avoid them altogether. Whether you’re a seasoned gardener or just starting out, this article will give you all the tips and tricks you need to successfully plant and care for clivias in your garden.
Choosing the Right Clivia Variety
When selecting a clivia for your garden, it’s essential to consider factors such as plant size, bloom frequency, and hardiness to ensure you choose one that thrives in your conditions. With so many varieties to choose from, this decision can be overwhelming.
Understanding Clivia Types
Clivias come in a range of sizes and growth habits, making them suitable for various gardens and spaces. There are three main types to consider: dwarf, miniature, and standard varieties.
Dwarf clivias are compact plants that grow between 10-20 inches tall and wide. They’re perfect for small containers or indoor spaces where sunlight is limited. These petite plants require less maintenance than their larger counterparts and produce fewer offsets. Their smaller size also means they need more frequent watering to prevent root bound conditions.
Miniature clivias, on the other hand, grow between 1-3 feet tall and wide. They’re ideal for shallow pots or planters where space is limited. Miniature varieties are relatively low-maintenance and require less pruning than standard clivias. However, they still need regular watering to prevent drought stress.
Standard clivias are the most common variety and can grow up to 3-4 feet tall and wide. They require well-draining soil and full sun to partial shade conditions. Standard clivias produce more offsets than dwarf or miniature varieties but also require more maintenance, including pruning and repotting every few years.
When selecting a clivia type, consider your available space, climate, and level of care. Dwarf and miniature varieties are great options for small gardens or indoor spaces, while standard clivias suit larger outdoor areas with suitable growing conditions.
Selecting a Suitable Location for Your Clivia
When selecting a suitable location for your clivia, it’s essential to consider the specific temperature and light requirements of your chosen variety. Some clivias thrive in full sun, while others prefer partial shade or even deep shade. For example, Clivia nobilis is typically grown in bright but indirect sunlight, whereas Clivia miniata can tolerate more direct sunlight.
To determine the optimal location for your clivia, check the plant tag or consult with a local nursery to confirm its specific needs. Make sure to also consider the temperature range in your area, as some clivias are sensitive to frost or extreme heat. Aim to provide a spot that offers consistent temperatures between 65°F and 85°F (18°C and 30°C), ideally with a slight drop in temperature at night.
In terms of light, east- or west-facing windows are ideal for most clivia varieties. Avoid placing your clivia near south-facing windows during peak summer months to prevent overheating. By providing the right temperature and light conditions, you’ll encourage healthy growth and flowering from your clivia.
Planting in Different Soil Types
When it comes to planting clivias, soil type can make all the difference. Different soils have varying levels of drainage, nutrient retention, and acidity, which can impact the health and growth of your clivia plant.
If you’re dealing with clay soil, it’s essential to mix in some organic matter like compost or well-rotted manure to improve its structure and drainage. Clay can be dense and waterlogged, but adding organic matter will help break down its particles and create a more hospitable environment for roots to grow. Aim to add about 20% of organic matter to your soil.
In sandy soils, on the other hand, you may need to add some organic matter or compost tea to retain moisture and nutrients. Sandy soils can dry out quickly, so it’s crucial to provide regular watering and fertilization to support healthy growth.
Loamy soils are generally well-suited for clivias, but even here, a little improvement never hurts. Mix in some perlite or vermiculite to improve drainage and reduce the risk of waterlogged soil.
For all soil types, it’s also essential to test your soil pH regularly, as most clivia varieties prefer slightly acidic to neutral soil (pH 6.0-7.0).
Preparing the Soil and Planting Site
Before you start planting your clivias, it’s essential to prepare the soil and choose a spot that provides the right conditions for these beautiful flowers. This is where we’ll cover the crucial steps to get everything just right.
Testing Your Soil pH and Nutrient Levels
Before planting your clivia, it’s essential to test your soil pH and nutrient levels. You might be wondering why this is crucial, but trust us, knowing what you’re working with will make all the difference in getting your clivias off to a healthy start.
Soil pH affects the availability of nutrients for your plants, so even if you’re using high-quality fertilizers, they won’t be effective if the soil’s pH is too low or high. For example, if your soil has a pH below 6.0, it can lead to nutrient deficiencies, stunted growth, and reduced flowering. On the other hand, a pH above 7.0 can cause iron and manganese deficiencies.
To test your soil pH, you can purchase a DIY kit at most gardening stores or take samples to a local nursery for analysis. A simple pH meter will give you an immediate reading, but it’s not always accurate. For more precise results, send a sample of your soil to a lab for testing.
Typical nutrient levels in good potting mix range from 10-20 ppm (parts per million) NPK (nitrogen-phosphorus-potassium). If your test shows low levels, you can amend the soil with organic matter like compost or manure. The ideal time to test and adjust is before planting, so be sure to schedule this step into your preparation process.
Creating a Well-Draining Potting Mix
When it comes to growing clivias in pots, creating a well-draining potting mix is crucial. Clivias don’t like wet feet, meaning they don’t appreciate sitting in waterlogged soil. To prevent root rot and other problems, you’ll want to create a potting mix that allows excess water to drain quickly.
To make your own well-draining potting mix, start by combining equal parts of three main ingredients: peat moss or coconut coir, perlite or vermiculite, and orchid bark. The peat moss or coconut coir will help retain moisture, while the perlite or vermiculite will provide excellent drainage. The orchid bark will add structure and prevent the mix from becoming too dense.
A good ratio to start with is 1 part of each ingredient. For example, if you’re using a large bag of peat moss, use half of it for this recipe. Mix all three ingredients together until they’re evenly combined, then sift the mixture to ensure there are no lumps or clods. This potting mix will allow excess water to drain quickly, making it perfect for growing clivias in pots.
Planting the Clivia at the Right Depth
When planting a clivia, it’s essential to get the depth just right. If you plant it too deeply, the soil may be washed into the crown of the bulb during watering, causing rot and potentially killing the plant. On the other hand, if it’s not planted deeply enough, it won’t have enough moisture retention and may dry out quickly.
As a general rule, the neck of the clivia bulb should be above the surface of the soil. This means that when you plant, the top third to half of the bulb should be visible. To achieve this, dig a hole about 2-3 times as wide and just as deep as the bulb itself. Place the bulb in the center of the hole, with its base (where the roots meet the crown) at soil level or slightly below.
Make sure not to add too much soil around the bulb, as this can cause it to rot. Leave about an inch or so between the top of the soil and the crown. This will give you enough room for watering without risking overwatering.
Watering and Care Techniques
To ensure your clivias thrive, let’s dive into the essential watering and care techniques that’ll keep these beautiful flowers blooming all year round. Proper care is key!
Establishing a Consistent Watering Schedule
When it comes to establishing a consistent watering schedule for your clivia, several factors come into play. One of the most significant considerations is your climate. If you live in a hot and dry region, your clivias will require more frequent watering than if you lived in a cooler and more humid area.
In general, clivias prefer well-draining soil that can help to prevent root rot. However, this means they also need regular watering to keep the soil consistently moist but not waterlogged. To establish a consistent schedule, start by observing your clivia’s behavior and adjusting accordingly. If you notice its leaves are droopy or wilted, it may be thirsty.
As a general rule of thumb, water your clivia when the top inch of soil feels dry to the touch. Water thoroughly until you see water coming out of the drainage holes in the pot, then let the pot drain completely before returning it to its saucer. Be sure to also take into account the time of year – during the spring and summer months, clivias require more moisture than they do during the fall and winter.
Fertilizing Your Clivia During Different Growth Stages
Fertilizing your clivia during different growth stages is crucial to ensure its optimal health and bloom. As a plant parent, you want to provide the right nutrients at the right time to promote healthy growth, encourage blooming, and prevent nutrient deficiencies.
During the spring and summer months when your clivia is actively growing, it requires more frequent fertilization. Use a balanced fertilizer (20-20-20) once a month, but avoid over-fertilizing as this can damage the plant’s roots. A good rule of thumb is to dilute the fertilizer to half the recommended strength.
In contrast, during the dormant winter months when growth slows down, you can skip fertilization altogether or use a fertilizer with higher phosphorus content (10-20-10) to promote root development. When selecting a fertilizer, look for products specifically formulated for tropical plants like clivias, as these will provide essential micronutrients.
Remember to also consider the potting mix and soil pH when choosing a fertilizer. Some fertilizers can alter the soil’s pH, so it’s essential to choose one that won’t disrupt the delicate balance of your plant’s ecosystem.
Pruning and Grooming for Optimal Growth
Pruning and grooming are essential steps in maintaining healthy clivia plants. By removing dead or damaged leaves, you encourage new growth, prevent disease from spreading, and promote a balanced appearance. To prune your clivia, start by carefully cutting off any brown or yellowing leaves with a sharp, sterile tool. Make clean cuts just above a leaf node, taking care not to tear the surrounding tissue.
It’s also crucial to remove any dead flower stalks after blooming has finished. Not only do these stalks detract from the plant’s appearance, but they can also harbor pests and diseases. To prevent this, snip off the spent flower stems at their base using scissors or pruning shears. For a more polished look, consider trimming back the longest leaves to maintain a uniform height.
Regular grooming will help keep your clivia looking its best. Remove any weak or spindly growth, as well as any leaves that are growing inwards towards the center of the plant. This not only maintains the plant’s overall shape but also allows for better air circulation and sunlight penetration. By incorporating these simple pruning and grooming techniques into your regular care routine, you’ll be rewarded with a vibrant, thriving clivia that blooms year after year.
Common Clivia Problems and Solutions
Don’t worry if you’re encountering some hiccups with your clivias – we’ve got you covered! This section tackles common issues and shares practical solutions to get your plants thriving again.
Identifying and Treating Pest Infestations
Clivias are generally pest-free plants, but they can still be susceptible to certain insects that can cause damage. Mealybugs and spider mites are two common pests you might encounter when caring for your clivia.
Mealybugs are small, white, cottony creatures that feed on the sap of your plant, causing wilting or stunted growth. To identify mealybugs, look for a white, powdery residue on the leaves and stems. If you suspect an infestation, isolate your plant immediately to prevent the pests from spreading.
To get rid of mealybugs, start by spraying your clivia with water to dislodge them. Then, mix a solution of 1 tablespoon of neem oil with 1 quart of water and spray it directly on the affected areas. Repeat this process every few days until the infestation is gone.
Spider mites are tiny, spider-like creatures that feed on the sap of your plant, causing yellowing or bronzing of the leaves. To identify spider mites, look for fine webbing on the underside of the leaves. If you suspect an infestation, spray your clivia with water and then treat it with a solution of 1 tablespoon of horticultural oil with 1 quart of water.
In both cases, make sure to monitor your plant regularly for signs of pests, and act quickly if you notice any issues. With prompt treatment, you can prevent pest infestations from causing damage to your clivia.
Recognizing and Addressing Nutrient Deficiencies
Clivias require essential nutrients to thrive, and nutrient deficiencies can manifest in various ways. To recognize these issues, observe your plant’s overall health, growth rate, and foliage color. Leaf yellowing, stunted growth, or pale new leaves are common signs of nutrient deficiencies.
Phosphorus deficiency often causes new growth to be purple or reddish due to the presence of anthocyanins. On the other hand, a potassium deficiency may lead to scorching on leaf tips. Nitrogen deficiencies typically result in weak, spindly growth and pale or yellow leaves.
To address these issues, you can use fertilizers specifically formulated for clivias. A balanced fertilizer (20-20-20) provides equal amounts of nitrogen, phosphorus, and potassium, while a bloom booster fertilizer offers more phosphorus to promote flowering.
It’s essential to choose the right type of fertilizer based on your plant’s specific needs. For example, an organic fertilizer like fish emulsion can provide a slow release of nutrients over time. Remember to follow the manufacturer’s instructions for application rates and timing. Regular fertilization will help prevent nutrient deficiencies and keep your clivia healthy.
Handling Diseases Affecting Clivias
Clivias can be prone to certain diseases that can affect their health and appearance. One of the most common issues is root rot, which occurs when the roots of the plant are exposed to too much moisture. This can happen if the soil is waterlogged or if the pot doesn’t have proper drainage holes. To prevent root rot, make sure to repot your clivia in well-draining soil and use a pot with good drainage.
Another common disease affecting clivias is leaf spot, caused by fungal infections that thrive in humid environments. Leaf spots appear as yellow or brown lesions on the leaves and can quickly spread if not treated. To prevent leaf spot, keep your clivia in a well-ventilated area with moderate humidity levels. If you notice any symptoms, treat with a fungicide specifically designed for indoor plants.
Regular monitoring of your clivia’s health is essential to catch these issues early. Check the soil moisture regularly and inspect the leaves for signs of disease. With proper care and attention, you can keep your clivias healthy and thriving.
Frequently Asked Questions
What’s the best time to plant clivias outdoors, considering their sensitive nature?
Clivias typically thrive when planted during the cooler seasons of spring or fall. These periods offer ideal conditions for establishment and growth, reducing stress on the plants. It’s essential to avoid planting in extreme heat or cold temperatures that can cause damage or shock.
Can I plant clivias directly into poor-quality soil, or do I need to create a well-draining potting mix?
While it’s technically possible to plant clivias in poor-quality soil, it’s highly recommended to create a well-draining potting mix specifically designed for clivias. This will help prevent root rot and other issues related to waterlogged conditions.
How often should I repot my mature clivia, considering their slow growth rate?
Mature clivias generally require repotting every 2-3 years, as they outgrow their containers. However, this can be adjusted based on the plant’s specific needs and your observation of its growth patterns.
Can I propagate clivias through leaf cuttings or division, and what are the success rates?
While it is possible to propagate clivias through division, leaf cuttings are not a recommended method due to their low success rate. Division is generally more reliable, but results may vary depending on factors like plant health and technique.
How long does it take for newly planted clivias to produce flowers, considering their initial growth phase?
Newly planted clivias typically require 1-3 years to establish a strong root system before producing flowers. Factors influencing this timeline include the specific variety, growing conditions, and care practices.