Are you ready to add some drama to your garden? Clematis is one of those flowering vines that can make any outdoor space look like a fairytale. With over 300 species, it’s easy to get overwhelmed when trying to choose the perfect variety for your yard. But don’t worry, with this comprehensive guide, we’ll walk you through everything you need to know about planting and caring for clematis.
We’ll start by covering how to select the right type of clematis for your climate and soil conditions. Then, we’ll dive into the nitty-gritty of preparing your planting site and giving those delicate roots the best chance to thrive. And because even the most seasoned gardeners can encounter issues, we’ll also cover some common problems and their solutions. Whether you’re a beginner or an expert, this guide will give you the confidence to bring these stunning flowers into your life.
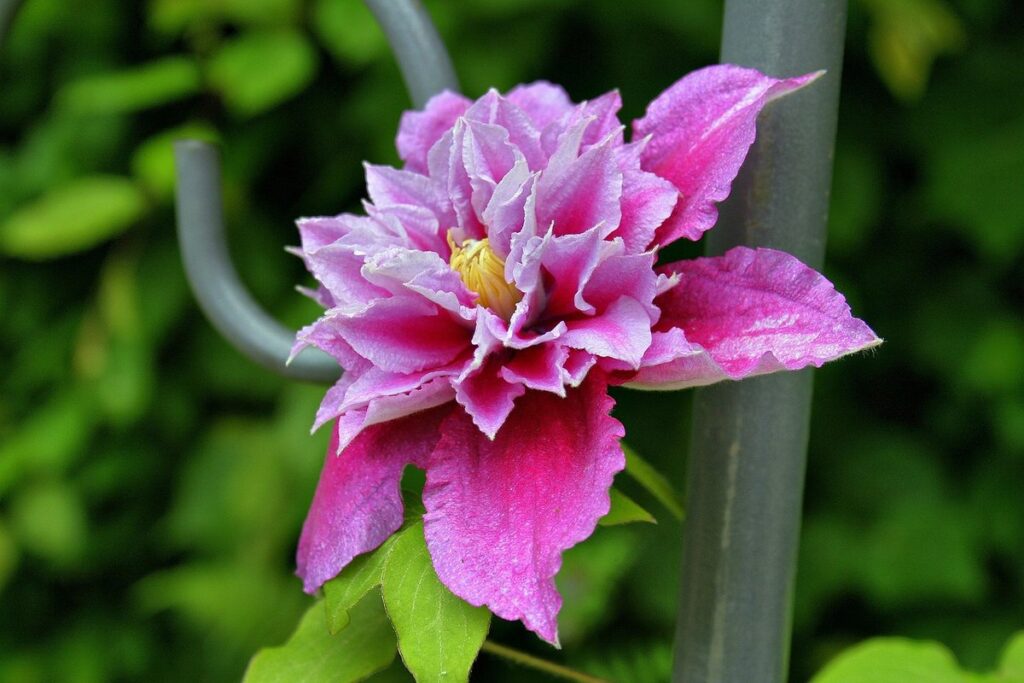
Choosing the Right Clematis Variety
When selecting a clematis, it’s essential to consider factors like bloom time, flower size, and growth habit to ensure you choose one that fits your garden’s needs. This variety will have a lasting impact on your landscape design.
Understanding Clematis Types
When it comes to choosing the right clematis variety for your garden, understanding the different types available is crucial. There are three main categories: vines, hybrids, and old garden varieties. Vines, such as Clematis montana and Clematis armandii, are perfect for training up trellises or arbors. They produce masses of small flowers and can thrive in shaded areas.
Hybrids, on the other hand, offer a wide range of colors, sizes, and flowering times. These varieties are often more compact than vines, making them ideal for smaller spaces. Popular hybrid clematis include Clematis ‘Crystal Fountain’ and Clematis ‘Pink Fantasy’. They tend to bloom for longer periods and can tolerate some shade.
Old garden varieties, such as Clematis alpina and Clematis tangutica, have been around for centuries and offer a unique charm. They often produce showy flowers in shades of pink, purple, or white. These varieties tend to be more delicate than hybrids and vines but are perfect for adding an antique touch to your garden.
When selecting a clematis type, consider the amount of sunlight your garden receives, as well as the mature size of the plant. This will ensure you choose a variety that thrives in its environment and meets your specific needs.
Researching Clematis Characteristics
When researching clematis characteristics, it’s essential to consider several factors to ensure compatibility with your garden conditions. First and foremost, think about bloom time – do you want a variety that blooms in the spring, summer, or both? Some clematis varieties, like Clematis montana, produce masses of small flowers in late winter to early spring, while others, such as Clematis heracleifolia, bloom in mid-summer. Consider what season you’d like to add some color and interest to your garden.
Next, think about color – do you prefer the classic purple, pink, or white blooms of most clematis varieties, or are you looking for something a bit more unique? Some newer varieties come in shades of blue, yellow, and even bi-colored. Consider the existing colors in your garden and how a new clematis variety will complement them.
In terms of size, some clematis varieties can grow quite large, up to 20 feet tall or wide, while others remain much smaller, around 3-5 feet. Make sure you have enough space for the mature plant to spread out. Finally, think about growth habits – do you prefer a compact, upright variety that won’t require staking, or one that’s more vigorous and may need support? Researching these factors will help you choose a clematis variety that thrives in your garden conditions.
Preparing the Planting Site
Before you start planting, it’s essential to prepare the site where your clematis will thrive, which involves choosing a location with suitable sunlight and soil conditions. This section walks you through those crucial steps.
Soil Preparation
When it comes to growing clematis, having well-draining soil is crucial. These beautiful flowering vines can thrive in a wide range of soils, but they’re not fans of waterlogged conditions that can lead to root rot and other problems. To ensure your clematis gets the right start, take some time to prepare your planting site’s soil.
First, test your soil pH levels to determine if any adjustments are needed. Clematis prefer slightly acidic to neutral soil, with a pH between 6.0 and 7.0. If your soil is too alkaline or acidic, add lime or peat moss accordingly to bring it into the optimal range.
Next, improve your soil’s structure by adding organic matter such as compost, well-rotted manure, or leaf mold. These materials will help to break up clay soils and retain moisture in sandy ones. Aim for a mix that includes at least 10% organic content. You can also incorporate perlite or vermiculite to improve drainage further if needed.
Remember, a well-draining soil structure is key to preventing waterlogged conditions and giving your clematis the best chance to thrive. By taking these simple steps, you’ll be setting yourself up for success when it comes to growing these stunning flowering vines.
Sunlight and Shading Considerations
When it comes to planting clematis, sunlight and shading considerations are crucial factors to ensure their optimal growth. Clematis requires at least 6 hours of direct sunlight per day, making a sunny location ideal for these beautiful flowers. However, even if you’ve chosen the right spot, potential shading issues can still arise.
Shading from nearby trees or structures can be a significant concern. If you notice your clematis plants are not receiving sufficient light, consider pruning nearby trees to allow more sunlight to filter through. Alternatively, you can also adjust their position within the garden bed to optimize their exposure to direct sunlight.
Another solution is to use solar-powered lights or string lights to supplement natural light during periods of partial shading. This can be especially helpful if you live in a region with frequent overcast skies or have limited access to pruning tools.
Keep in mind that clematis plants grown under intense shade may not bloom as profusely, so it’s essential to strike the right balance between sunlight and protection from extreme weather conditions. By being mindful of these factors, you can create an optimal environment for your clematis to thrive.
Planting Clematis: A Step-by-Step Guide
To get started, let’s walk through the essential steps of planting clematis correctly, from digging the hole to securing the vine in place. Follow along for a successful outcome!
Digging the Hole
When digging the hole for your clematis, it’s essential to get it just right. The ideal hole size and depth will depend on several factors, including the root system’s spread and soil conditions.
Clematis have a relatively extensive root system that spreads outwards from the base of the plant. A good rule of thumb is to dig a hole that’s about two to three times as wide as the clematis’ roots, which can extend up to 2-3 feet from the base of the plant. For example, if your clematis has a root system that spans about 18 inches wide, you’ll want to dig a hole that’s around 36-54 inches wide.
In terms of depth, make sure the hole is deep enough for the roots to grow comfortably. The crown (where the stem meets the roots) should be level with the surrounding soil, and the root flare (the area where the roots begin to flares out from the base of the plant) should be buried about 1-2 inches below the surface.
Keep in mind that if your soil is particularly dense or prone to waterlogging, you may need to dig a shallower hole to prevent root rot. Conversely, if your soil is well-draining and loose, you can dig a slightly deeper hole to accommodate the roots’ growth.
Handling the Roots
When removing clematis from its pot or container, take care to handle the roots gently to avoid damaging them. Start by loosening the soil around the plant with a fork or knife, working your way around the edges of the container. This will help release any binding roots and make it easier to remove the plant.
Next, carefully slide the plant out of its pot or container, taking care not to stretch or tear the stems or roots. If the plant is stuck, gently rock the pot back and forth while holding the plant upright to loosen it. Once free, inspect the roots for any damage or circling growth that may need to be trimmed.
If planting a bare-root clematis, handle the roots with care, keeping them moist but not waterlogged. Trim any damaged or weak roots, then spread the remaining roots out evenly around the planting hole, working in any rootgrow or similar product as recommended by the supplier.
Post-Planting Care and Maintenance
Now that your clematis is planted, it’s time to focus on its post-planting care. Regular watering, pruning, and fertilizing will help ensure a healthy and thriving plant all growing season long.
Watering and Mulching
Proper watering and mulching are crucial for clematis’ survival and optimal growth. Overwatering is one of the most common mistakes gardeners make when it comes to caring for their plants. Clematis prefer well-draining soil, so ensure that the pot or bed drains excess water efficiently. Water your clematis deeply but infrequently to encourage deep root growth, which will help the plant withstand droughts.
Mulching is another vital aspect of post-planting care. Organic mulch like wood chips, bark, or leaves retains moisture in the soil, suppresses weeds that compete with your clematis for nutrients and water, and regulates soil temperature. Mulching also helps to prevent damage from extreme temperatures. To apply a layer of mulch, spread 2-3 inches of it around the base of your plant, keeping it at least an inch away from the stem. Keep in mind that you’ll need to replenish mulch as it breaks down.
Remember that clematis have specific watering needs based on their growing location and climate. Be sure to observe your plant’s responses to changing weather conditions and adjust its care accordingly.
Fertilization and Pruning
Fertilizing your clematis in early spring is essential to provide it with the necessary nutrients for growth and blooming. Use a balanced fertilizer that contains nitrogen, phosphorus, and potassium (NPK) as these are the key elements required by clematis. A 10-10-10 NPK ratio is ideal, but you can also use a bloom booster or a fertilizer specifically formulated for flowering plants.
When fertilizing your clematis, make sure to follow these steps: Apply the fertilizer in early spring when new growth begins, and again after blooming has finished. Avoid over-fertilizing as this can damage the plant’s roots and lead to weak stems. You can also side-dress with a high-phosphorus fertilizer during the growing season to promote blooming.
Regular pruning is crucial for maintaining your clematis’ shape, promoting blooming, and controlling its growth. Prune your clematis in late winter or early spring by cutting back dead or damaged stems to about 12-18 inches from the ground. This will help prevent disease and encourage new growth. After blooming has finished, prune back spent flowers and trim back any overgrown stems to maintain shape.
Common Clematis Issues and Solutions
Even experienced gardeners can encounter problems when growing clematis, but don’t worry, we’ve got you covered. This section tackles common issues and shares practical solutions to get your plants thriving again.
Dealing with Pests and Diseases
When it comes to dealing with pests and diseases on your clematis plant, being proactive is key. Regular inspections can help you catch issues early on, making treatment more effective.
Common pests like aphids and whiteflies feed on the sap of your clematis, weakening its growth. To prevent infestations, use neem oil or insecticidal soap to repel these insects. For existing infestations, mix a solution of 1 tablespoon of dish soap with 1 quart of water and spray it directly on the affected areas.
Diseases such as powdery mildew and root rot can also cause significant damage. Powdery mildew appears as a white, powdery coating on leaves, while root rot causes the stems to turn brown and mushy. To prevent these diseases, ensure good air circulation around your clematis and water it in the morning so excess moisture has time to evaporate.
Regularly inspect your plant for signs of pests or disease, and take action promptly if you notice any issues.
Troubleshooting Plant Problems
When growing clematis, it’s not uncommon to encounter some challenges. Troubleshooting these issues can help you identify and resolve the problem, saving your plant from potential damage.
Uneven growth is a common concern for many gardeners. This could be due to inconsistent watering, inadequate light, or nutrient deficiencies. To address this issue, ensure that your clematis receives consistent moisture levels and maintain a balanced fertilizer schedule. Prune any dead or damaged stems during the dormant season, as this will promote healthy growth.
Leaf drop is another potential problem that can leave you scratching your head. This might be caused by over-watering, extreme temperatures, or pests like aphids or spider mites. Inspect your plant carefully for signs of infestation and treat accordingly. Adjust your watering schedule to prevent waterlogged soil and ensure that your clematis receives protection from frost.
A lack of blooms can be discouraging, but there are usually several reasons behind this issue. Fertilize your clematis regularly, as a lack of nutrients can impact flowering performance. Provide support for the plant’s stems, especially when it’s laden with flowers or growth. Also, ensure that you’re not pruning too aggressively during the growing season, as this will reduce blooming prospects in the next year.
If you’ve tried these steps and still experience issues, consult a local nursery expert or online gardening community for specific advice tailored to your climate and region.
Clematis in Winter: Protection and Care
Now that you’ve planted your clematis, it’s time to think about winter care to protect these beautiful blooms from harsh weather conditions and frost damage. This section will guide you through the process of preparing your clematis for winter.
Winter Mulching and Protection
As winter approaches, it’s essential to protect your clematis plant from extreme weather conditions that can damage its delicate stems and roots. Mulching is an effective way to safeguard your clematis from harsh winds, freezing temperatures, and snow. Apply a 2-3 inch layer of organic mulch, such as straw or bark chips, around the base of the plant, making sure to keep it away from the crown (where the stem meets the soil). This will help retain moisture, suppress weeds, and regulate soil temperature.
You can also use burlap wraps to protect your clematis stems. Cut the wrap into a long piece and wrap it around the stem, securing it with twine or wire. Leave enough room for the stem to grow, and make sure the wrap isn’t too tight, which can cause damage. For added protection, you can also cover the entire plant with a breathable cloth, such as an old sheet or a frost blanket.
Remember to remove any protective covering in late winter or early spring when new growth begins.
Dormancy and Pruning in Winter
As winter sets in, your clematis plant will begin to enter dormancy, a period of rest and rejuvenation that’s essential for its survival. During this time, the plant’s growth slows down, and it conserves energy by shutting down its metabolic processes. You might notice that the stems become brittle and start to die back, which is a natural process.
While your clematis is dormant, there are some pruning tasks you can perform to promote healthy growth come spring. Start by cutting back any dead or damaged stems to about 6-8 inches from the ground. This will help prevent the spread of disease and encourage new growth. Next, remove any weak or spindly growth, as these can be prone to breakage.
Now is also a good time to tidy up your clematis by removing any spent blooms and debris that may have accumulated around the base of the plant. By doing this, you’ll give your clematis a head start for the next growing season.
Frequently Asked Questions
What are some general tips for handling clematis roots during planting?
When handling delicate clematis roots, be gentle to avoid damaging them. If the roots are wrapped around each other, carefully untangle them before placing them in the hole. Also, consider soaking the roots in water for a few hours before planting to help rehydrate them.
Can I plant clematis at any time of year?
While spring and fall are ideal times for planting clematis due to mild temperatures, you can also plant in late winter or early summer in areas with a long growing season. However, avoid planting during extreme heat or cold snaps when the soil is frozen or waterlogged.
How do I protect my clematis from pests like aphids and slugs?
To safeguard your clematis against pests, use physical barriers like fine mesh or copper tape around the base of the plant to deter slugs. For aphid control, spray the leaves with a mild soap solution or neem oil during the growing season.
What’s the best way to train my clematis on a trellis?
When training your clematis up a trellis, provide support with stakes for the first year until the plant is established. Tie the stems loosely to the trellis using soft materials like twine or wire to avoid damaging the bark.
How do I know if my clematis needs more sunlight or partial shade?
If you’re unsure whether your clematis requires full sun, partial shade, or a mix of both, observe its natural growing habits. In general, varieties like Clematis montana and Clematis armandii prefer dappled shade, while hybrids like ‘Nelly Moser’ and ‘Crystal Fountain’ can thrive in full sun with some afternoon shading.