Are you eager to grow your own avocado tree from scratch? Planting avocado seeds in water is an exciting and rewarding experience, allowing you to nurture a healthy tree from a tiny seed. However, it can be intimidating for beginners, with many factors affecting success. Choosing the right avocado variety, preparing the seed correctly, and providing optimal care are crucial steps in the process.
In this article, we’ll guide you through the essential steps of planting avocado seeds in water, covering variety selection, seed preparation, and care tips for a thriving tree. From selecting the perfect seed to transplanting your young tree into soil, we’ve got you covered. By following our comprehensive guide, you’ll be well on your way to growing a healthy and productive avocado tree that will provide delicious fruit for years to come.
Choosing the Right Avocado Variety
When it comes time to harvest your homegrown avocados, you’ll want to choose a variety that suits your taste and growing conditions, which is why selecting the right type from the start is crucial.
Factors to Consider When Selecting an Avocado for Seed Propagation
When it comes to planting avocado seeds in water, selecting the right variety is crucial for success. One of the most critical factors to consider is the size and health of the seed itself. Not all avocados produce viable seeds, so it’s essential to choose a variety that does.
Look for avocados with large, healthy seeds, as they are more likely to germinate successfully. A general rule of thumb is to select avocados from trees that are at least 10 years old, as older trees tend to produce larger, more viable seeds. Some popular avocado varieties known for producing large seeds include Hass, Fuerte, and Bacon.
When selecting an avocado for seed propagation, also consider the tree’s growing conditions and climate. Avocado trees grown in warmer, drier climates often produce smaller seeds due to environmental stressors. In contrast, avocados from cooler, more humid regions tend to produce larger seeds.
By choosing a variety that produces large, healthy seeds, you’ll increase your chances of successful seed germination and give your new avocado tree the best possible start in life.
Understanding the Characteristics of Different Avocado Varieties
When planting avocado seeds in water, understanding the characteristics of different varieties can significantly impact the germination process. Some popular varieties like Hass, Fuerte, and Bacon have unique traits that can either make them easier or more challenging to grow from seed.
For instance, Hass avocados are known for their high success rate when grown from seed, with some growers achieving a 90% germination rate. This is likely due to the variety’s natural tolerance to drought and its ability to thrive in containers. On the other hand, Fuerte avocados tend to have lower germination rates, often requiring more precise water conditions to encourage root development.
When it comes to Bacon avocados, growers report varying success rates, but some attribute this variability to the variety’s sensitivity to temperature fluctuations during germination. To improve your chances of successful germination with these varieties, keep in mind that a consistent water level and proper lighting are crucial. By understanding the characteristics of different avocado varieties, you can tailor your care routine to best support the unique needs of each type.
Preparing the Avocado Seed for Planting
To get started, you’ll want to carefully wash and dry your avocado seed, removing any remaining pulp and skin to prevent mold from developing in the planting process. This is a crucial step before moving forward with planting.
Removing the Pit from the Avocado Fruit
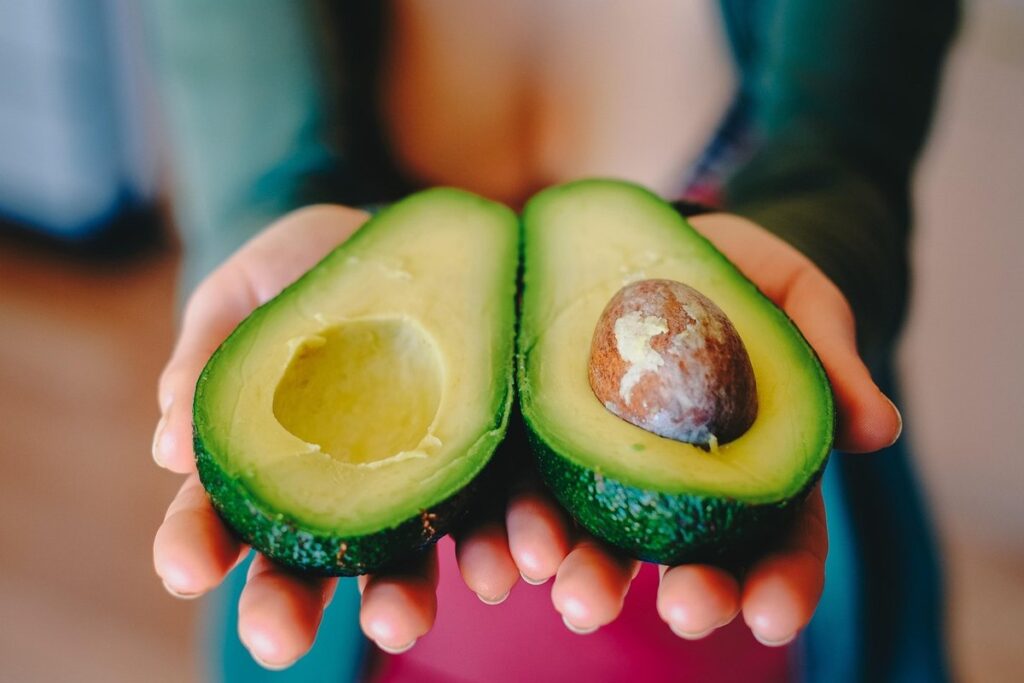
Removing the pit from an avocado fruit can be a bit tricky, but with the right approach, you’ll have it done in no time. First, cut the avocado in half lengthwise around the pit. Gently twist the two halves apart, being careful not to press down on the pit. You should see the pit easily come out of one of the halves.
To release the pit from the surrounding fruit, carefully tap the back of the avocado with a spoon or your fingers until it comes loose. This might take some patience and gentle coaxing. Hold the avocado half firmly but gently in one hand, and use a small knife to carefully pry the pit away from the surrounding flesh. It’s essential to handle the pit delicately at this stage to avoid bruising or damaging it.
Take your time when removing the pit, as this is a crucial step before planting the seed. If the pit doesn’t come out easily, don’t force it – you might end up breaking it. Once you’ve successfully removed the pit, rinse it under running water and let it air dry for a few hours before moving on to the next step in preparing your avocado seed for planting.
Sterilizing the Pit and Tools
Sterilizing the pit and tools is an essential step to prevent the spread of bacteria and fungi that can harm the seedling. When you’re working with avocado seeds, it’s easy for tiny microorganisms to get transferred from your hands to the seed or equipment. This can lead to root rot, fungal infections, or even death.
To properly clean the seed, start by washing it gently in warm water, making sure to remove any visible dirt or debris. Then, use a soft-bristled toothbrush to scrub away any stubborn bits that might be stuck on. After that, soak the seed in a mixture of 1 tablespoon of bleach per gallon of water for about 10-15 minutes. This will help kill off any lingering bacteria.
When it comes to your tools, make sure to wash them thoroughly with soap and warm water after each use. You can also sanitize them by soaking them in that same bleach solution as the seed. By taking these simple steps, you’ll be able to keep your avocado seedling healthy and thriving. Remember, prevention is key when it comes to preventing disease – so don’t skip this important step!
Planting the Avocado Seed in Water
To successfully plant an avocado seed in water, you’ll need a clear glass or jar, some water, and a few basic steps to follow carefully. Let’s dive into these easy-to-follow instructions.
Basic Materials Needed for the Germination Process
To successfully germinate an avocado seed in water, you’ll need to gather some basic materials. Start by selecting a clean glass or container that’s at least 6-8 inches deep. This will give the root system enough room to grow without becoming crowded. Next, fill the container with lukewarm water – around 75°F to 80°F (24°C to 27°C) is ideal.
You’ll also want to add a small amount of nutrient-rich water to the glass. A good option is to use a fertilizer specifically designed for seedlings or a homemade solution made from equal parts water and apple cider vinegar. This will provide essential nutrients to support the growth of your avocado seedling.
Avoid using tap water, as it may contain chemicals that can inhibit seed germination. Instead, opt for filtered or distilled water. Finally, make sure the container is placed in a bright, indirectly lit area – direct sunlight can cause the water to become too warm and promote bacterial growth.
The Proper Technique for Placing the Pit in Water
When placing the avocado pit in water, it’s essential to find the right balance between securing it and not burying it too deep. Start by filling a small cup or container with fresh, lukewarm water – cold water can cause the pit to rot, while hot water may shock the root system.
Gently place the avocado pit into the water, making sure the top of the pit is exposed about 1-2 inches above the surface. You want to avoid submerging the top completely, as this can lead to fungal growth and prevent proper rooting.
To secure the pit, you can use toothpicks or a small stick to hold it in place. Insert the toothpicks on either side of the pit, about an inch apart, making sure not to push them too far into the water. This will keep the pit stable without causing it to become waterlogged.
Monitor the pit closely and make adjustments as needed – if you find that the water level is dropping, add a small amount to maintain the desired depth. Keep in mind that avocado pits can float or sink depending on their density, so be patient and flexible with your setup.
Caring for the Avocado Seedling in Water
Once you’ve planted your avocado seed in water, it’s time to focus on providing the right conditions for it to thrive and grow. This section will walk you through the essential care tips for a healthy seedling.
Monitoring Water Levels and Nutrient Availability
Maintaining a stable water level is crucial during the germination process. Avocado seedlings are sensitive to drought and overwatering, which can lead to root rot and other problems. To monitor water levels effectively, check the water daily by gently inserting a finger into the container until it reaches the base of the stem. If the water level has dropped significantly, refill it with lukewarm water.
Nutrient availability is equally important during this stage. Avocado seedlings grown in water require a balanced fertilizer to promote healthy growth. You can use a general-purpose fertilizer or a liquid fertilizer specifically formulated for seedlings. Apply the fertilizer according to the manufacturer’s instructions and maintain a concentration of 20-25 parts per million (ppm) to avoid burning the roots.
Some common signs that your seedling needs more nutrients include pale or yellowish leaves, stunted growth, and reduced leaf development. Monitor these indicators closely and adjust your fertilization schedule accordingly. Keep in mind that overfertilizing can be just as detrimental as underfertilizing, so it’s essential to strike a balance between providing necessary nutrients and avoiding toxicity.
Addressing Common Issues: Rot, Mold, and Unhealthy Growth
When planting avocado seeds in water, it’s not uncommon to encounter some common issues that can affect the health of your seedling. One of the most frustrating problems you might face is rot and mold. This typically occurs when the water becomes too stagnant, or if you’re using tap water with high levels of chlorine.
To avoid this issue, make sure to change the water regularly, ideally every 1-2 weeks. You can also use a water filter or let it sit for 24 hours before using it to reduce chlorine content. Another way to prevent rot and mold is to keep your seedling in bright, indirect light but not direct sunlight.
Unhealthy growth is another potential problem you might encounter. This could manifest as uneven growth, yellowing leaves, or an excessive number of root hairs. To address this issue, ensure the water level remains below the node (where the leaf meets the stem), and provide your seedling with a balanced fertilization schedule.
Transplanting the Avocado Seedling into Soil
Now that your avocado seedling has a robust root system, it’s time to transplant it into a pot filled with nutrient-rich soil for optimal growth. This is where things get exciting!
Understanding When to Transfer the Seedling
When you start to notice significant growth and development of roots in the water, it’s likely that your avocado seedling is ready for transplanting. One of the most telling signs is the appearance of a taproot, which will eventually need space to stretch out and anchor itself in soil.
As your seedling grows taller, its stem should start to thicken and produce more leaves. This indicates a healthy development of chlorophyll, which enables it to photosynthesize effectively. At this stage, you’ll typically see between two to three sets of leaves unfolding from the central stem.
In terms of root growth, keep an eye out for the appearance of secondary roots emerging from the base of the seedling. These will eventually form a network that provides structural support and anchors the plant firmly in place. When your seedling has achieved this level of development, it’s ready to be transferred into a pot with soil.
Preparing a Potting Mix and Container for Transplantation
When transplanting your avocado seedling into soil, it’s essential to prepare a suitable potting mix and container. A good potting mix should have excellent drainage properties to prevent waterlogged soil, which can be detrimental to the young root system of your seedling.
Look for a well-draining potting mix that contains ingredients such as perlite or vermiculite. These additives will help to improve airflow and prevent moisture from accumulating in the soil. You can also create your own potting mix using a combination of peat moss, compost, and perlite.
When selecting a container, consider the size of your seedling’s roots. A general rule of thumb is to choose a pot that is at least 6-8 inches deep to accommodate the root system. Make sure the container has drainage holes in the bottom to prevent water from accumulating in the soil. Avoid using containers with narrow necks or tight-fitting lids, as these can restrict root growth and cause the seedling to become pot-bound.
Remember, a good potting mix and container will provide your avocado seedling with the right conditions for healthy growth and development.
Maintaining Healthy Avocado Tree Growth
To ensure your avocado tree thrives, it’s crucial to provide it with optimal care and attention as it grows from a sprout into a mature tree. This section covers essential tips for maintaining healthy growth.
Factors Influencing Tree Size, Shape, and Fruit Production
As you nurture your avocado seedling in water, it’s essential to consider the long-term factors that will influence its growth and productivity. Sunlight plays a critical role in shaping your tree’s size, shape, and ultimately, fruit production. Adequate sunlight exposure can reach up to 10-12 hours per day for optimal growth.
Watering habits also significantly impact tree health. Avocado trees prefer well-drained soil but require consistent moisture levels. Underwatering can cause stress, leading to smaller fruit sizes or reduced yields, while overwatering may lead to root rot and other issues. A balanced watering schedule is key.
Pruning is another crucial aspect of maintaining a healthy avocado tree. Regular pruning encourages bushy growth, promotes air circulation, and helps control pests and diseases. Fertilization also plays a vital role in nutrient uptake, particularly for nitrogen, phosphorus, and potassium. Aim to fertilize your tree during the growing season (spring-fall) with balanced, water-soluble fertilizers.
By considering these factors, you’ll be well on your way to cultivating a thriving avocado tree that produces an abundance of delicious fruit.
Tips on Pruning and Training the Young Avocado Tree
As your young avocado tree grows, pruning and training become crucial steps to promote optimal growth and prevent potential problems. Pruning helps maintain a healthy shape, encourages fruiting, and reduces the risk of disease and pests. The ideal time for pruning is during the dormant season, typically between late winter and early spring.
When it comes to training your young avocado tree, think of it as shaping its future structure. Start by removing any weak or damaged branches, cutting them back to about 6 inches from the trunk. Next, identify the central leader (the tallest branch) and remove any competing growth to direct energy towards a single stem. This will help create a balanced canopy and promote healthy fruiting.
To guide your avocado tree’s growth, you can also use stakes or trellises to provide support and keep it upright. This is especially helpful during the first few years of growth when the tree’s roots are still developing. By pruning and training your young avocado tree regularly, you’ll be rewarded with a healthy, productive tree that produces delicious fruit for years to come.
Troubleshooting Common Issues with Avocado Seedlings in Water
You’ve successfully germinated your avocado seedling in water, but now it’s facing some challenges? Let’s tackle common issues like slow growth, root rot, and more.
Identifying Problems Early On: Signs of Distress
As you care for your avocado seedling in water, it’s essential to be vigilant and catch potential problems before they escalate. One of the most common issues is yellowing leaves, which can be caused by a lack of light or an imbalance of nutrients. If your seedling is not receiving enough direct sunlight, it may develop pale or yellowish leaves. Conversely, if you’re over-fertilizing, it can also cause this problem.
Another issue you might encounter is stunted growth. This could be due to inadequate water temperature or a lack of essential nutrients. Avocado seeds prefer warm temperatures between 65-75°F (18-24°C), so ensure your seedling is not too cold or hot. Root rot is another common problem that can arise from overwatering, which allows the roots to become submerged in excess moisture. Check for soft, mushy stems or a foul odor emanating from the water as signs of root decay.
To address these issues, monitor your seedling regularly and adjust its care accordingly. For yellowing leaves, try adjusting the light source or reducing fertilization levels. If growth appears stunted, ensure the temperature is within the optimal range, and consider providing additional nutrients. Finally, inspect your seedling’s roots for signs of rot, and gently repot it in fresh water if necessary.
Effective Solutions for Overcoming Challenges in Avocado Cultivation
One of the most significant challenges avocado enthusiasts face is getting their seedlings to thrive. Many factors can hinder growth, from inadequate lighting to insufficient water levels. However, with the right approach, you can overcome these hurdles and cultivate a healthy avocado tree.
Firstly, ensure that your avocado seedling receives sufficient light. Place it near an east-facing window or use grow lights to provide 12-14 hours of indirect light daily. Avoid direct sunlight as it can cause scorching. Next, maintain optimal water levels by changing the water completely every 7-10 days. This prevents bacterial growth and root rot.
If your seedling is experiencing yellowing leaves or slow growth, it might be due to nutrient deficiencies. Feed it with a balanced fertilizer during the growing season (spring-fall). Prune any weak or damaged branches to promote healthy development.
By implementing these effective solutions, you can overcome common challenges in avocado cultivation and enjoy a lush, thriving tree. With patience, care, and the right techniques, you’ll be harvesting fresh avocados in no time.
Frequently Asked Questions
How often should I change the water in my avocado seed’s container?
Change the water every 7-10 days to prevent bacterial growth and maintain a healthy environment for your seedling. Make sure to use fresh, lukewarm water each time to promote optimal growth.
What are some common issues I might encounter when planting an avocado seed in water?
Rot, mold, and unhealthy growth are common issues that can arise when planting an avocado seed in water. To prevent these problems, ensure the water is at room temperature, change it regularly, and provide adequate light for your seedling.
Can I plant multiple seeds from one avocado fruit, or should I use separate fruits?
It’s generally recommended to use separate avocado fruits for each seed you want to plant, as this will increase the chances of successful germination. Using seeds from the same fruit can lead to lower success rates and increased competition among the seedlings.
How long does it take for an avocado seedling in water to be ready for transplanting into soil?
Avocado seedlings typically take 3-6 months to reach a height of 6-8 inches and develop enough roots to be transplanted into soil. Keep monitoring your seedling’s growth, and once it has developed a strong root system and is growing vigorously, it’s ready for transfer.
Can I speed up the germination process by using a heating mat or other methods?
While some growers use heating mats or warm water bottles to accelerate the germination process, these methods are not recommended. Avocado seeds typically take 3-12 weeks to germinate, and using external heat sources can cause more harm than good, potentially killing your seedling.