Planting an oak tree from an acorn can be a fun and rewarding experience, especially for nature enthusiasts. If you’ve been lucky enough to collect some acorns from a mature oak tree, you might be wondering where to start. Planting an oak tree requires more than just sticking the acorn in the ground – it needs proper care and attention from the beginning.
In this article, we’ll take you through the essential steps of planting and caring for your oak tree. From selecting the right acorns to long-term maintenance, we’ll cover everything you need to know to grow a healthy and thriving oak tree. With our expert tips and techniques, you’ll be well on your way to growing your very own oak tree from an acorn. Whether you’re a seasoned gardener or just starting out, this guide is for anyone looking to bring a piece of nature into their yard.
Choosing the Right Location and Soil
When it comes to planting an oak acorn, choosing the right location and soil is crucial for its success. Let’s explore how to select the perfect spot.
Understanding Oak Tree Requirements
When planting an oak acorn, it’s essential to choose a location that meets the tree’s specific needs. Oak trees require full sun to partial shade, meaning they need at least six hours of direct sunlight per day. If you’re planting in a shaded area, consider thinning out nearby trees or pruning branches to allow more sunlight to reach your oak.
The soil type is another crucial factor for oak growth. These trees prefer well-draining acidic soils with a pH between 6.0 and 7.0. Avoid planting in areas with heavy clay or sandy soils, as they can lead to nutrient deficiencies. To test the soil pH, you can purchase a DIY kit or consult with a local nursery.
Moisture levels also play a significant role in oak tree growth. Young trees require consistent moisture, especially during their first year of establishment. Water your oak regularly, but avoid overwatering, which can lead to root rot and other issues. Aim for about 1 inch of water per week, either from rainfall or irrigation.
Keep in mind that oak trees have a taproot that grows deeper into the soil as they mature. This means they can be more drought-tolerant than other tree species once established.
Preparing the Site for Planting
Before you can start planting your oak acorn, it’s essential to prepare the site where it will take root. Clearing debris and removing weeds is a crucial step in creating an environment that will support healthy growth.
Begin by surveying the area and removing any large rocks, sticks, or other obstacles that could hinder growth or damage your tree as it matures. Next, use a tool like a hoe or shovel to clear out any existing weeds, grass, or debris. Be sure to remove all weed roots as well, as they can compete with your new oak for water and nutrients.
Once the area is cleared, take the opportunity to test the pH levels of your soil. Oak trees prefer slightly acidic to neutral soil, ranging from 6.0 to 7.0 on the pH scale. You can purchase a DIY testing kit or send a sample to a lab for analysis. Based on your results, you may need to add lime to raise the pH or sulfur to lower it.
Remember to also check the drainage in the area, as oak trees don’t thrive in standing water. Make sure the soil is loose and well-draining before planting your acorn.
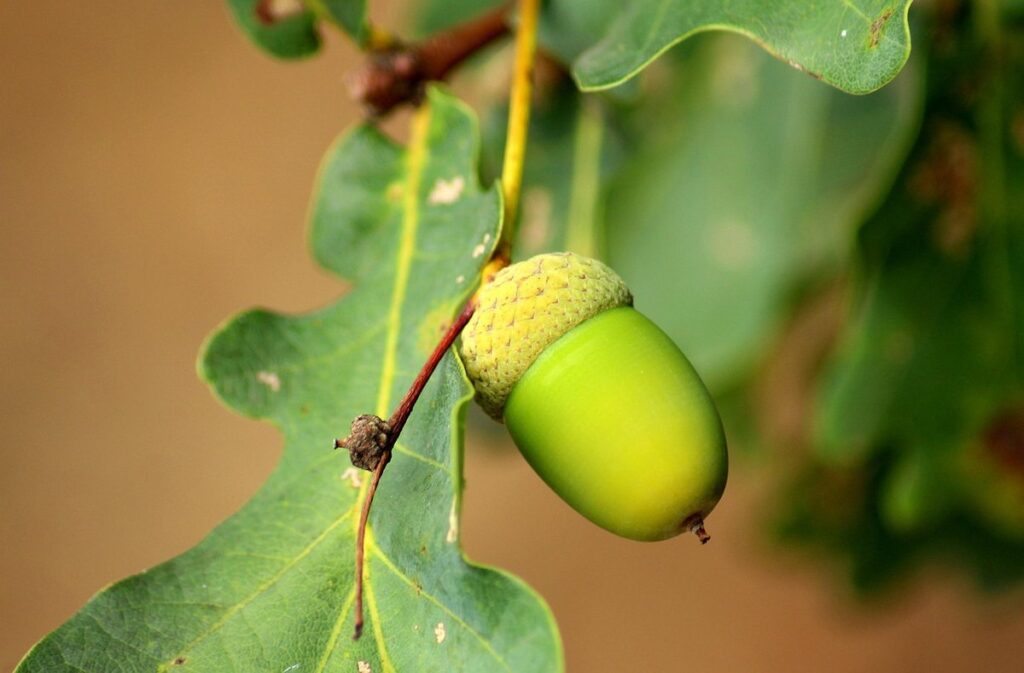
Selecting a Healthy Acorn
When selecting a healthy acorn for planting, it’s essential to take a closer look before making a decision. At first glance, all acorns may seem similar, but there are several factors to consider that can make all the difference in the success of your tree.
Start by looking at the size and shape of the acorn. A healthy acorn is typically plump and symmetrical, with a well-defined cap on top. Avoid any acorns that appear shriveled, twisted, or misshapen, as these can be signs of disease or damage.
The color of the acorn is also important to consider. While most oak trees produce brown acorns, some varieties may have a reddish-brown or even tan hue. Look for acorns with a uniform color and avoid any that appear faded or discolored. Additionally, inspect the cap and shell for any visible damage, such as cracks or breaks. A healthy acorn should have a tight-fitting cap and a smooth, unblemished shell.
By taking the time to carefully select a healthy acorn, you can increase the chances of successfully growing a strong and thriving oak tree.
Preparing the Acorn for Planting
To successfully plant an oak acorn, it’s essential that you prepare it properly beforehand by cleaning and treating the seed to give your new tree the best chance of thriving. Begin by selecting a healthy acorn with no visible signs of damage.
Cleaning and Scarification
Before planting an oak acorn, it’s essential to clean and scarify it properly. Cleaning involves gently brushing away any debris or dirt from the surface of the acorn using a soft-bristled brush. This process helps remove any fungi or bacteria that may be present on the seed coat.
Scarification is a crucial step in stimulating germination. It involves creating a small notch or scratch on the surface of the acorn, about 1/8 inch deep and 1/4 inch long. This can be done using a nail file or a sharp knife. The purpose of scarification is to break through the seed coat, allowing moisture and oxygen to penetrate and initiate germination.
It’s worth noting that scarifying too aggressively can damage the embryo inside the acorn, so it’s essential to be gentle yet firm when creating the notch. If you’re unsure about how deep or long to make the cut, start with a small scratch and gradually increase the depth and length as needed.
Once you’ve cleaned and scarified your oak acorn, it’s ready for planting.
Soaking and Stratification
Soaking and stratification are two crucial steps that mimic the natural winter conditions for an oak acorn to successfully germinate. Begin by filling a cup with water, then gently place the acorns inside, making sure they’re fully submerged. Cover the cup with plastic wrap or a damp cloth to prevent moisture loss. Place this in the refrigerator overnight, allowing the acorns to soak in cold water for at least 30 days.
The following day, remove the soaked acorns from the refrigerator and gently pat them dry with paper towels to remove excess moisture. Next, place the acorn in a plastic bag or an airtight container filled with peat moss or a similar material that retains moisture but doesn’t compact easily. Seal the bag or container and store it in the refrigerator for another 30-90 days, depending on your region’s climate.
This process allows the acorns to break dormancy, initiating germination when they’re ready. It’s essential not to skip this step, as oak trees require a cold period to start growing. By following these simple steps, you’ll give your acorn the best chance at successful growth and development in the future.
Planting the Acorn
Now that you have a healthy oak acorn, it’s time to start thinking about planting it. In this next step, we’ll cover how to prepare your acorn for successful germination and growth.
Digging the Planting Hole
When digging the planting hole for your oak acorn, it’s essential to consider the mature size of the tree and its root growth requirements. Oak trees can have a wide canopy and a deep root system, so dig a hole that’s at least 3-4 times as wide and just as deep as the root ball of the acorn.
The ideal planting depth for an oak acorn is about 1/8 inch below the soil surface. This allows for easy germination and reduces the risk of rot or fungal diseases. Make sure to loosen the soil at a depth of 12-18 inches, creating a saucer-like shape around the planting area. This will give the roots room to grow and help establish a strong foundation.
As you dig, consider the native soil conditions in your area. If your soil is heavy clay or dense sand, you may need to mix in some organic matter like compost or well-rotted manure to improve its structure.
Planting the Acorn at the Correct Depth
When planting an oak acorn, it’s essential to get the depth just right. This can be influenced by several factors, including the soil type and the specific species of oak tree you’re working with.
In general, a good rule of thumb is to plant the acorn about 1-2 inches deep in well-draining soil. If your soil tends to retain water, it’s best to plant the acorn a bit shallower, around 0.5-1 inch deep. On the other hand, if you’re dealing with sandy or rocky soil that dries out quickly, you can plant the acorn slightly deeper, up to 2.5 inches.
Keep in mind that oak trees have a long taproot that develops over time, so it’s better to err on the side of caution and start the acorn at a shallower depth. This will give the root system room to grow without being constricted by too much soil. As you plant, make sure the pointed end of the acorn is facing upwards towards the sun, and gently firm the soil around it to secure the seed in place.
Caring for Your Oak Tree
Now that you’ve successfully planted your oak acorn, let’s move on to the next crucial step: providing it with the proper care to ensure a healthy and thriving tree. This section will guide you through the essential tasks.
Watering and Mulching
Regular watering is crucial for newly planted oak trees. Water them deeply at least once a week during their first year of growth, taking care not to overwater which can lead to shallow root systems and other problems. You can also check the soil moisture by sticking your finger into the soil up to the knuckle – if it feels dry, it’s time for watering.
Mulching around the base of your oak tree is another essential care technique. Organic mulch materials such as wood chips or bark retain moisture in the soil and regulate its temperature, preventing extreme fluctuations that can harm your tree. Spread a 2-3 inch layer of mulch around the trunk, keeping it at least 6 inches away to prevent damage from moisture accumulation.
As for fertilization, wait until your oak tree is at least a year old before applying fertilizer. At this stage, you can use a balanced, slow-release fertilizer following the manufacturer’s instructions. Fertilize in early spring when new growth begins, and avoid overfertilizing which can cause more harm than good.
Pruning and Training
As your young oak tree grows, it will need regular pruning to develop a strong structure and promote healthy growth. Pruning helps remove dead, diseased, or damaged branches, which can weaken the tree and make it more susceptible to pests and diseases.
When pruning your oak tree, focus on removing any weak or crossing branches that rub against each other. These types of branches can cause damage to the surrounding bark and create entry points for disease-causing pathogens. Remove any suckers or water sprouts growing from the base of the tree, as these can divert nutrients away from the rest of the tree.
To promote a strong structure, prune your oak tree in a way that allows sunlight to reach all parts of the canopy. This means removing branches that are growing inward and pruning back branches that are over-growing. Remove any branch tips that are beyond 6-8 feet tall to encourage branching and create a more balanced shape. By pruning regularly, you’ll be helping your oak tree develop a strong root system and promote healthy growth for years to come.
Pruning is an essential part of caring for your young oak tree, and it’s best to prune during the dormant season when the tree is less active. Prune in late winter or early spring before new growth begins, and avoid pruning during the summer months when the tree is actively growing.
Troubleshooting Common Issues
Don’t worry if things don’t go as planned, we’ve got you covered. This section will walk through common problems that can arise when planting oak acorns and how to fix them quickly.
Identifying Potential Problems Early On
When planting an oak acorn, it’s essential to be aware of potential problems that may arise during its first year of growth. Some common issues include pests and diseases that can damage the delicate roots and leaves.
Keep a close eye out for signs of infestation by rodents, deer, or insects like slugs or snails. These pests can eat away at the tender shoots, leaving holes in the leaves and stems. To prevent this, use physical barriers around the plant, such as chicken wire or fine mesh, to deter larger animals.
Diseases like root rot, fungal infections, and powdery mildew are also possible concerns. Fungal diseases often thrive in damp environments, so make sure your oak acorn has good air circulation. Regularly inspect the leaves for signs of yellowing or white patches – these can be indicative of a problem.
Monitor the soil moisture level as well, as overwatering can lead to root rot. Be cautious not to let the area surrounding the plant get too dry either, as this can cause stress and make it more susceptible to disease. Regularly check for any unusual changes in your oak acorn’s appearance or behavior, and address issues promptly if you notice them.
Addressing Specific Challenges with Oak Trees
If you’re experiencing more serious problems with your oak tree, such as root rot or branch failure, it’s essential to address these issues promptly to prevent further damage and ensure the tree’s survival.
Root rot is a common problem for oak trees, especially if they receive too much water. Symptoms include yellowing leaves, droopy branches, and a soft, mushy trunk. To treat root rot, stop watering your oak tree immediately and remove any excess moisture from the soil. Next, inspect the roots and trim away any affected areas. Make sure to disinfect your pruning tools between cuts to prevent spreading the disease.
Another issue you may encounter is branch failure. This can be caused by various factors, such as weak growth patterns or storm damage. To prevent branch failure, inspect your tree regularly for signs of weakness, like cracks or splits in the bark. Prune any branches that are rubbing against each other or growing at awkward angles. By addressing these issues promptly and with care, you can help ensure your oak tree stays healthy and thriving.
In severe cases, it may be necessary to consult a professional arborist for assistance. Don’t hesitate to seek advice if you’re unsure about how to proceed.
Ensuring Long-Term Health and Success
To guarantee a thriving oak tree for years to come, it’s essential that you provide proper care during its first year of growth. Let’s explore some key tips to ensure your young sapling gets off on the right foot.
Regular Maintenance Routine
As you enjoy watching your oak sapling grow into a majestic tree, it’s essential to remember that regular maintenance is crucial for its long-term health and success. Just like our cars need regular tune-ups to keep them running smoothly, your young oak needs consistent care to ensure it continues to thrive.
Start by watering your oak regularly, but avoid overwatering which can lead to root rot. Aim to provide about 1 inch of water per week, either through rainfall or irrigation. As your tree grows, prune its branches annually to promote a strong structure and encourage healthy growth. This will also help remove any dead or damaged leaves that might be susceptible to disease.
Additionally, fertilize your oak every few years with a balanced fertilizer to provide essential nutrients for growth. Mulching around the base of the tree can also help retain moisture and suppress weeds. Regularly inspect your tree for signs of pests or diseases, such as aphids, scales, or fungal infections, and take action promptly if you notice any issues. By following this simple maintenance routine, you’ll be well on your way to raising a healthy and robust oak tree that will provide shade and beauty for generations to come.
Monitoring Progress and Making Adjustments
As you continue to nurture your newly planted oak tree, it’s essential to regularly inspect its progress and make adjustments as needed. This will help ensure that your tree remains healthy and thrives over the long-term.
Keep a close eye out for signs of stress or disease, such as yellowing leaves, wilting branches, or fungal growth on the trunk. These can be indicative of underlying issues that need attention. For example, if you notice that your tree is struggling to adapt to drought conditions, consider adjusting its watering schedule accordingly.
To monitor progress, set aside time each week to inspect your tree’s foliage, bark, and root system. Check for any dead or damaged branches, pruning them back as needed to promote healthy growth. Also, keep an eye out for pests like aphids, spider mites, or scale insects that can cause harm if left unchecked.
By regularly monitoring your tree’s health and making adjustments as necessary, you’ll be able to address potential issues before they become serious problems. This will help ensure that your oak tree grows strong and healthy, providing shade and beauty for years to come.
Frequently Asked Questions
Can I Plant Multiple Acorns at the Same Time?
Yes, you can plant multiple acorns in the same location, but make sure to space them about 6-8 feet apart to allow for proper growth and air circulation.
How Often Should I Water My Oak Tree After Planting?
Water your oak tree regularly during its first year of growth, providing about 1 inch of water per week. Avoid overwatering, which can lead to root rot and other problems. Check the soil moisture by inserting a finger into the soil up to the knuckle.
What Are Some Common Challenges I Might Face When Planting an Oak Acorn?
Some common challenges include poor germination rates due to incorrect stratification or insufficient light exposure. Make sure you’re following proper soaking and stratification techniques, and consider planting in an area with full sun to partial shade.
How Long Does It Take for My Oak Tree to Start Producing Leaves After Planting?
After planting your oak acorn, it can take anywhere from 2-5 years for the tree to start producing leaves. This is a normal part of the growth process, and don’t worry if you notice little or no growth during the first year.
Can I Use Compost or Fertilizer on My Oak Tree Right Away?
No, it’s best to wait until your oak tree has established itself before using compost or fertilizer. Young trees can be sensitive to over-fertilization, which can lead to weak and scrawny growth. Wait for the first year after planting before adding any nutrients.