Are you looking to bring some shade and delicious nuts to your backyard? Planting a chestnut tree can be a wonderful investment for any home or community, providing years of enjoyment and benefits. But where do you start? Choosing the right location and preparing the soil are crucial steps in giving your tree the best chance at success. In this article, we’ll guide you through the process of planting a chestnut tree from scratch. We’ll cover everything from selecting the perfect spot to caring for your new tree after it’s been planted. By following our comprehensive guide, you can enjoy the beauty and bounty of a healthy chestnut tree for years to come. Whether you’re an experienced gardener or just starting out, this article will provide you with all the information you need to get started.
Choosing the Right Location and Climate
When planting a chestnut tree, selecting the right location is crucial for its survival and optimal growth. A suitable climate and soil type will also impact your tree’s overall health and productivity.
Understanding Chestnut Tree Requirements
When selecting a location for your chestnut tree, it’s essential to consider the key factors that will determine its health and productivity. As mentioned earlier, these trees prefer well-drained soil and full sun, making them ideal for planting in areas with good sunlight exposure.
In reality, most residential properties have some amount of shade due to surrounding structures or neighboring trees. If this is the case for your property, don’t worry – you can still plant a chestnut tree! However, ensure that it’s not directly under any branches that might cast heavy shadows on your tree during peak hours. Aim for at least 6-8 hours of direct sunlight per day to promote healthy growth.
When evaluating your yard’s potential, also consider the soil type and drainage. Chestnut trees can tolerate a range of soils but will perform best in areas with good water flow and minimal standing water. Avoid planting near low-lying areas or where water tends to collect after rainfall.
Assessing Your Soil Type and pH Level
When it comes to planting a chestnut tree, understanding your soil type and pH level is crucial for its growth and health. The type of soil you have will determine the nutrients available to your tree, while the pH level will affect how those nutrients are absorbed.
To assess your soil type, start by observing its texture. Is it sandy, silt, or clay? If it’s heavy clay, you may need to add organic matter like compost to improve drainage and aeration. On the other hand, if your soil is too dry, consider adding mulch to retain moisture. You can also perform a simple DIY test by mixing 1 tablespoon of hydrogen peroxide with 1 tablespoon of soil in a jar. If it fizzes, your soil has high pH levels; if not, it’s likely acidic.
Most chestnut trees prefer well-draining, slightly acidic soils with a pH between 6.0 and 7.0. To check the pH level, purchase a DIY testing kit or send a sample to a lab for analysis. Based on the results, you can adjust your soil accordingly by adding lime (to raise pH) or sulfur (to lower it). Remember that small adjustments are better than drastic changes, as this will help prevent shocking your tree’s roots.
Ensuring Proper Climate Conditions
When it comes to planting a chestnut tree, choosing the right location with proper climate conditions is crucial for its growth and productivity. As mentioned earlier, chestnut trees thrive in temperate climates with moderate temperatures and rainfall. To ensure that you’re providing the ideal environment for your new sapling, look for regions with:
• Moderate winters: Chestnut trees can tolerate cold temperatures but prolonged exposure to harsh winter conditions can cause damage or even kill the tree. Aim for areas with average winter lows between 25°F (-4°C) and 35°F (2°C).
• Mild summers: While chestnut trees prefer cooler climates, they still need some warmth to grow well. Average summer highs above 65°F (18°C) are ideal.
• Adequate rainfall: Chestnut trees require around 30-40 inches of annual rainfall, evenly distributed throughout the year. If your region has a dry spell, consider installing irrigation systems or selecting drought-tolerant varieties.
Identify potential climate-related challenges in your area by researching local weather patterns and consulting with local nurseries or gardening experts. This will help you make informed decisions about when to plant and how to care for your chestnut tree.
Preparing the Planting Site
Before you start digging, it’s essential to prepare your planting site properly to give your chestnut tree the best chance of thriving. This involves clearing and loosening the soil in a way that will support healthy growth.
Clearing the Area and Removing Debris
Before planting your chestnut tree, it’s crucial to clear the area of any debris, weeds, or obstacles that could hinder its growth. Start by removing any rocks, branches, or other obstructions from the planting site. You can use a shovel or a garden fork to loosen and remove any compacted soil, which will make it easier for roots to spread.
Next, take care of the weeds. Use a herbicide specifically designed for broadleaf weeds, as they are often invasive in chestnut tree plantings. Be sure to follow the instructions carefully and apply the herbicide on a dry day when the sun is not intense. Alternatively, you can manually remove weeds by digging them out or using a hoe.
Cut back any nearby plants or shrubs that might compete with your chestnut tree for water and nutrients. Keep in mind that it’s essential to leave enough space around the planting site for proper air circulation and sunlight penetration.
Digging the Hole and Mixing the Soil
When digging the hole for your chestnut tree, it’s essential to create a spacious and well-draining environment. A general rule of thumb is to dig a hole that is one-and-a-half times as wide and just as deep as the root ball of your tree. This will give the roots room to grow and absorb water and nutrients.
Mixing in organic matter such as compost or well-rotted manure is crucial for creating an ideal growing environment. It improves soil structure, increases fertility, and supports beneficial microbial activity. Aim to add 2-3 bucketloads of compost per square meter of planting area. This will not only provide essential nutrients but also help the tree establish a strong root system.
You can also incorporate a balanced fertilizer specifically formulated for fruit trees into the mix. Follow the manufacturer’s instructions for application rates, and be sure to water the soil well after adding any amendments.
Planting the Chestnut Tree
Now that you have selected a healthy chestnut tree, it’s time to start planting – let’s begin with preparing the perfect spot for your new tree.
Unpacking and Handling the Sapling
When receiving your chestnut tree sapling, carefully inspect its packaging for any visible damage. If it’s been shipped in a burlap sack, gently remove the straps and fold back the burlap to prevent moisture buildup and promote healthy root growth.
Next, gently lift the sapling out of its container or bag, taking care not to disturb the roots. If the roots are wrapped in a biodegradable sleeve or mesh, you can leave it intact – this helps retain soil and moisture around the roots. Gently place the sapling into a bucket or tray filled with water to settle the soil.
Avoid exposing your sapling to direct sunlight during unpacking, as this can cause stress and damage its tender leaves. Handle the sapling by the root ball, never by its stem or branches, to prevent bruising or breakage. If you notice any bunched or circling roots, gently tease them apart with your fingers to encourage healthy growth.
Make sure to inspect your sapling for pests or diseases before planting – a quick visual check can save you from potential problems down the line.
Digging the Final Hole and Planting the Tree
Digging the final hole for your chestnut tree sapling is a crucial step in its successful establishment. It’s essential to make sure the hole is large enough to accommodate the root ball without damaging the delicate roots. As a general rule, the hole should be about 2-3 times wider and as deep as the root ball of the sapling.
To ensure stability, dig the hole on a slight incline, allowing water to drain freely from the area. This will prevent waterlogged soil and root rot, common problems that can hinder the tree’s growth. If your soil is heavy clay or prone to waterlogging, consider adding organic matter like compost or well-rotted manure to improve drainage.
As you dig the final hole, gently loosen the surrounding soil to create a smooth transition between the hole and the surrounding area. This will help prevent any air pockets from forming around the roots, which can cause stress to the tree. Once the hole is prepared, you’re ready to plant your chestnut tree sapling in its new home.
Post-Planting Care and Maintenance
Now that you’ve planted your chestnut tree, it’s time to focus on giving it the best chance to thrive – proper care and maintenance are crucial in this next stage. Watering, pruning, and fertilizing are key tasks to keep in mind.
Watering and Mulching Techniques
Watering and mulching are two critical aspects of post-planting care that require attention to ensure your chestnut tree thrives. When it comes to watering, the key is to strike a balance between providing enough moisture for growth and avoiding overwatering, which can lead to root rot.
Begin by watering your newly planted chestnut tree regularly during its first year, ideally once or twice a week, depending on weather conditions. As the tree matures, reduce watering frequency to about once every 10-14 days. Be cautious not to waterlog the soil, as this can cause more harm than good.
Mulching plays an essential role in retaining moisture and suppressing weeds around your chestnut tree. Organic mulches like wood chips or bark work well for this purpose. Apply a layer of 2-3 inches (5-7.5 cm) around the tree’s drip line, keeping it at least 6 inches (15 cm) away from the trunk to prevent decay.
Keep in mind that chestnut trees prefer slightly acidic soil with good drainage. Mulching will help maintain this balance, but be sure to adjust watering accordingly as the mulch breaks down and retains more moisture. By implementing these effective watering and mulching techniques, you’ll set your chestnut tree up for a strong foundation and optimal growth in years to come.
Fertilizing and Pruning Your Chestnut Tree
To ensure your chestnut tree thrives, regular fertilization and pruning are crucial. Fertilize your tree annually, ideally during its dormant season (winter or early spring). A balanced fertilizer with a ratio of 10-10-10 (nitrogen-phosphorus-potassium) is recommended. Apply the fertilizer around the base of the tree, following the manufacturer’s instructions for the right amount.
Pruning your chestnut tree promotes healthy growth and helps prevent disease. Prune in late winter or early spring, removing any dead or diseased branches. Start by removing any suckers (shoots growing from the base of the tree) and weak or crossing branches. Cut branches at a 45-degree angle, about 1/4 inch above a bud. Make clean cuts to prevent damage and promote healing.
A general rule of thumb is to remove no more than one-third of the tree’s branches in a single pruning session. This helps maintain the tree’s shape and encourages new growth.
Common Challenges and Pests
As you nurture your chestnut tree, be aware of potential pests and challenges that might affect its growth. Learn how to identify and address issues like blight, aphids, and deer damage to ensure a healthy crop.
Identifying and Managing Diseases
As you plant your chestnut tree, it’s essential to be aware of the common diseases that can affect its growth and productivity. Chestnut blight, for example, is a highly infectious disease caused by Cryphonectria parasitica fungus. It can cause significant damage to the tree, leading to defoliation, branch dieback, and even death.
Another common disease affecting chestnut trees is powdery mildew, which is characterized by a white, powdery coating on leaves and stems. To manage these diseases effectively, it’s crucial to maintain good sanitation practices in your orchard. Remove any infected branches or debris to prevent the spread of the disease.
Regular monitoring and inspections are also vital. Look out for signs of disease, such as lesions, cankers, or unusual growth patterns. If you notice any of these symptoms, take prompt action by pruning affected areas and applying fungicides according to the manufacturer’s instructions.
By being proactive in managing diseases, you’ll significantly reduce the risk of infection and ensure your chestnut tree remains healthy and productive for years to come.
Recognizing and Controlling Insect Pests
When planting a chestnut tree, it’s essential to be aware of potential insect pests that can cause damage. One of the most significant threats is the chestnut blight, caused by the fungus Cryphonectria parasitica. However, there are other insect pests that can harm your tree, such as the following:
• The Asiatic longhorned beetle (Anoplophora glabripennis), which attacks the tree’s bark and can spread disease
• The emerald ash borer (Agrilus planipennis), a wood-boring beetle that targets chestnut trees
• Aphids, small sap-sucking insects that can weaken the tree
To identify insect pests on your chestnut tree, look for signs of damage such as holes in the bark, leaves with curled or distorted edges, or sticky honeydew droplets. Control measures include using integrated pest management (IPM) techniques like introducing beneficial insects, practicing good hygiene, and applying targeted pesticides when necessary. Regular monitoring and pruning can also help prevent infestations from taking hold. By staying vigilant and proactive, you can protect your chestnut tree from insect pests and ensure its long-term health and productivity.
Monitoring Progress and Harvesting Chestnuts
Now that you have planted your chestnut tree, it’s essential to regularly monitor its progress and know when to harvest those delicious nuts. We’ll walk you through how to track your tree’s growth and collect the bounty of your efforts.
Tracking Growth and Development
As you continue to care for your chestnut tree, it’s essential to track its growth and development regularly. This will help you identify potential issues before they become major problems. Look for signs of stress or disease, such as yellowing leaves, premature leaf drop, or black spots on the bark.
To monitor your tree’s progress, schedule regular check-ins with yourself. Choose a consistent time of day and season to observe the tree, such as early morning during spring growth. Take note of any changes you see, including:
* Leaf shape, color, and size
* Bark condition, including cracks or splits
* Presence of pests, diseases, or other issues
Also, keep an eye on the overall health of the tree’s root system. If you notice water pooling around the base or roots growing out of the soil, it may be a sign that the tree needs more space to grow.
By regularly monitoring your chestnut tree’s growth and development, you’ll be able to address any potential issues promptly, ensuring the tree stays healthy and thrives over time.
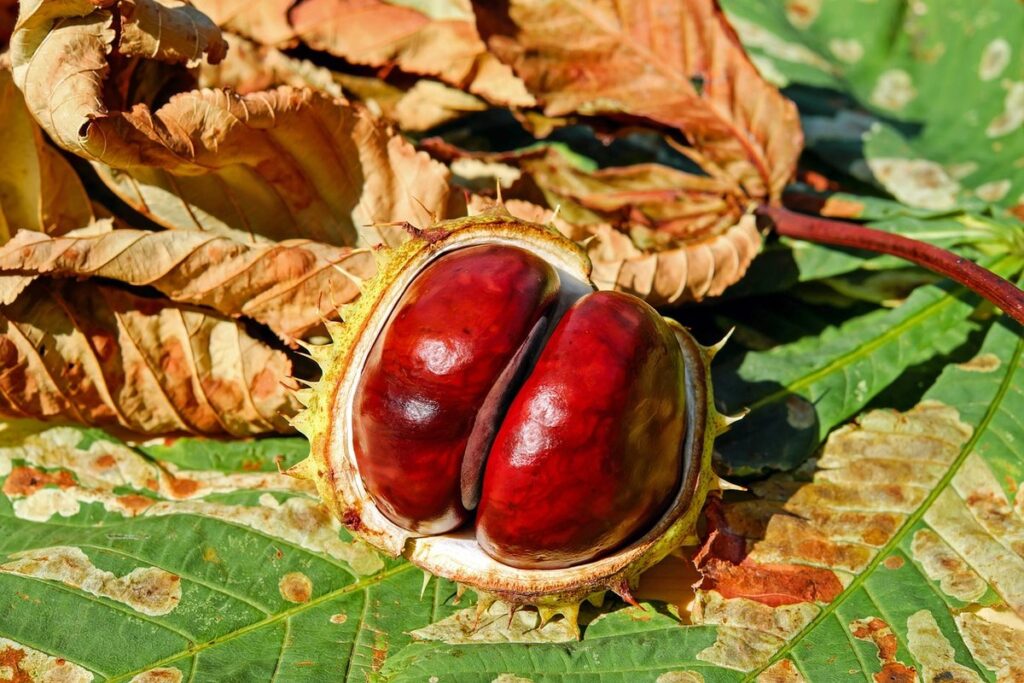
Timing and Collecting Your First Chestnut Crop
When you finally harvest your first chestnut crop, it’s an incredibly rewarding experience. The ideal time for harvesting depends on various factors, including the tree’s maturity and the weather conditions.
In general, chestnuts are ready to be picked between 120 to 150 days after flowering. However, this timeframe may vary depending on your location and specific climate. It’s essential to check on the nuts regularly during this period to avoid missing the optimal harvest time.
Here are some signs that indicate it’s time to collect your chestnuts:
* The nuts have reached their full size and color.
* The shells start to split, allowing you to see the inner nut.
* The tree’s leaves have started to turn yellow or drop off, signaling the end of the growing season.
To collect your chestnuts efficiently, use a gentle touch to avoid damaging them. Wear gloves to protect your hands from any sharp edges on the shells. You can also lay down a sheet or tarp under the tree to make collection easier and less messy.
Frequently Asked Questions
Can I plant a chestnut tree in partial shade or will it not thrive?
Chestnut trees prefer full sun, but they can tolerate partial shade to some extent. However, if you’re planting in an area with significant shade, consider the variety’s growth habits and potential for disease susceptibility. In such cases, choose a cultivar that is more shade-tolerant.
What are some common pests or diseases I should watch out for when growing chestnut trees?
Keep an eye out for diseases like powdery mildew, leaf blight, and root rot. Pests include aphids, borers, and scales. Regularly inspect your tree, practice good hygiene, and use organic or integrated pest management techniques to mitigate risks.
How long does it take for a chestnut tree to produce its first crop?
The time frame varies depending on factors like climate, soil quality, and the specific variety you’re growing. Generally, expect 3-5 years after planting before your tree starts producing nuts regularly. Keep in mind that young trees require adequate care and nutrients during this period.
What’s the best way to propagate a new chestnut tree from seed?
While chestnuts can be propagated from seed, it’s not always the most reliable method. For better success rates, consider purchasing grafted saplings or seedlings from reputable nurseries. These will have a head start and are more likely to produce consistent results.
Can I grow multiple chestnut trees in close proximity without impacting their growth?
While chestnut trees can be grown together, overcrowding can lead to reduced growth rates and increased disease susceptibility. Planting them 20-30 feet apart ensures proper air circulation and sunlight penetration for each tree’s optimal development.