If you’re eager to grow vibrant gladiolus blooms in your garden, one crucial aspect often overlooked is planting depth. But don’t worry, we’ve got you covered! Understanding how deep to plant gladiolus bulbs is essential for achieving those stunning flowers and preventing any potential issues with growth or disease.
In this article, we’ll delve into the world of gladiolus care, starting with the basics: choosing the right variety, preparing the soil, and – most importantly – planting depth. We’ll provide you with a clear guide on how to plant your gladiolus bulbs correctly, including the ideal depth for optimal growth and blooming results. By following these simple steps, you’ll be well on your way to enjoying beautiful, long-lasting flowers in your garden.
Choosing the Right Gladiolus Variety
To get the best results from your gladiolus bulbs, you need to choose a variety that’s well-suited to your climate and gardening style. Let’s look at some popular varieties to consider.
Understanding Gladiolus Classification
When it comes to choosing the right gladiolus bulbs for your garden, understanding the different types is crucial. There are three main categories: species, hybrids, and cultivars.
Species gladiolus, such as G. tristis and G. oppositiflorus, are the original wildflowers found in their natural habitats. They tend to be smaller in stature, with fewer blooms, but often retain the unique characteristics of the parent plant. If you’re looking for a more authentic experience, growing a species gladiolus can be rewarding.
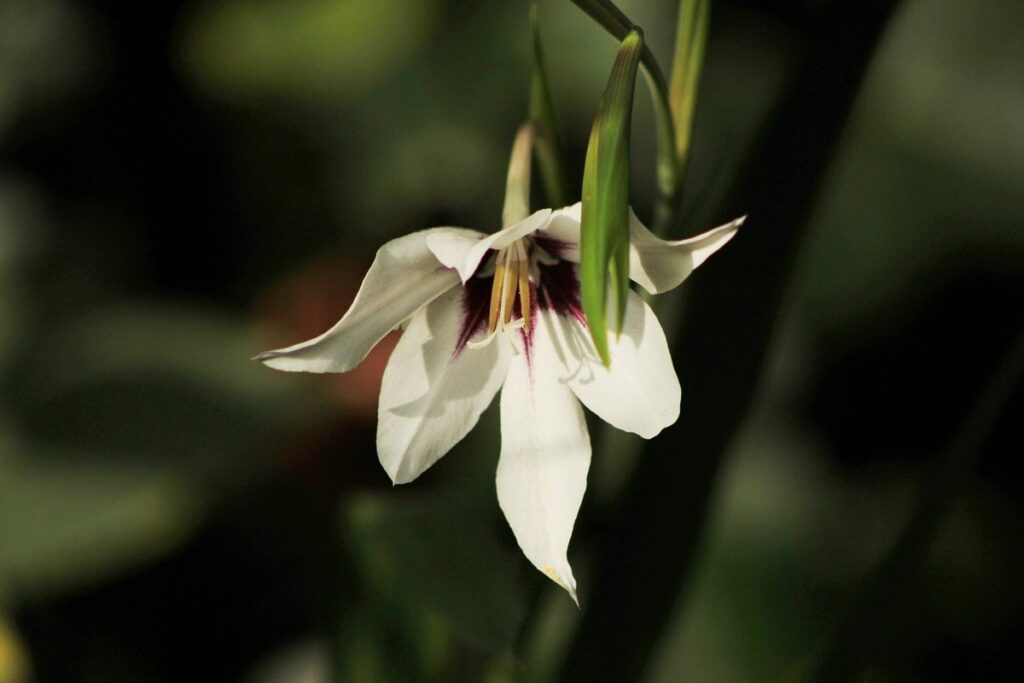
Hybrids, on the other hand, are bred specifically for their improved traits such as size, color, and disease resistance. They come in an array of colors and bloom sizes, making them versatile choices for gardeners. Cultivars, or specific varieties within a hybrid category, offer even more variety.
When selecting gladiolus bulbs, consider your climate, desired bloom period, and personal preference for flower size and color. If you’re new to growing gladiolus, starting with a popular hybrid cultivar can be a good way to get started.
Selecting the Perfect Variety for Your Garden
When selecting a gladiolus variety for your garden, it’s essential to consider three key factors: climate, growing conditions, and desired flower characteristics. Start by determining the hardiness zone you live in, as different varieties thrive in varying temperature ranges. For example, if you’re in a cooler climate (USDA zones 3-5), opt for varieties like ‘Nanus’ or ‘Crista’, which are more resistant to cold temperatures.
In warmer climates (USDA zones 8-10), seek out varieties like ‘Pluma’ or ‘Seagull’, which can handle the heat. Think about your garden’s light exposure, too – do you have full sun, partial shade, or dappled shade? This will help you choose a variety that won’t be stressed by inadequate light.
Consider what type of flowers you want to produce: large and showy, smaller and more delicate, or perhaps a specific color palette. Research different varieties online or consult with local nurseries to find the perfect match for your garden’s conditions and your personal preferences. By taking these factors into account, you’ll be well on your way to selecting a gladiolus variety that will thrive in your garden.
Preparation is Key: Preparing the Soil
To successfully plant gladiolus bulbs, it’s essential that you prepare the soil properly to give them a strong foundation and optimal growing conditions. Let’s get started by learning how to prepare your soil for planting.
Soil Requirements for Gladiolus Growth
When it comes to growing gladiolus, having well-draining soil that’s rich in essential nutrients is crucial. The ideal pH range for gladiolus growth is between 6.0 and 7.5, making most garden soils suitable for these bulbs.
However, if your soil tends to retain water or has poor drainage, you’ll need to take corrective action. Adding organic matter such as compost or well-rotted manure can significantly improve the structure of your soil, allowing excess water to drain quickly and roots to breathe easily. To check the pH level of your soil, consider investing in a DIY kit or consult with a local nursery expert.
Gladiolus bulbs also require a balanced diet of nutrients to produce vibrant blooms and strong growth. A general-purpose fertilizer that’s rich in nitrogen, phosphorus, and potassium (NPK) will work well, but you can also opt for a high-phosphorus fertilizer to promote healthy root development.
To incorporate these fertilizers into your soil preparation routine, mix 1-2 cups of fertilizer with the top 6-8 inches of soil before planting. This will give your gladiolus bulbs a strong foundation for growth and help them thrive throughout the season.
Testing and Amending Your Soil
Before planting gladiolus bulbs, it’s essential to test and amend your soil to ensure optimal growing conditions. You can purchase a soil testing kit from a garden center or local nursery, which will help you determine the pH level of your soil. Most gladiolus varieties prefer well-draining, fertile soil with a slightly acidic to neutral pH (around 6.0-7.0).
If your test results indicate that your soil is too alkaline or has high salt levels, you can amend it by adding organic matter like compost or manure. Mix in 2-3 inches of compost into the top 6-8 inches of soil to improve its structure and fertility.
Another crucial aspect to consider is nutrient availability. Gladiolus bulbs require a balanced diet of nitrogen, phosphorus, and potassium. If your test results reveal low levels of these nutrients, you can apply a fertilizer specifically formulated for bulbous plants. Follow the manufacturer’s instructions for application rates and timing.
It’s also vital to check for any underlying soil problems like drainage issues or pests. Make sure your soil drains well to prevent waterlogged conditions that can lead to root rot. If you notice any signs of pests, such as whiteflies or aphids, take necessary measures to control them before planting gladiolus bulbs.
Once you’ve amended and prepared your soil, it’s ready for planting.
Planting Gladiolus Bulbs: Depth Matters
When planting gladiolus bulbs, getting the depth right is crucial for healthy growth and flowering. Let’s dive into the ideal depth for these beautiful bulbs to ensure a stunning display.
The Correct Planting Depth for Different Varieties
When planting gladiolus bulbs, it’s essential to consider the specific variety you’re working with, as some require deeper planting than others. For example, smaller varieties like ‘Peaches and Cream’ and ‘Raspberry Sorbet’ thrive when planted about 3-4 inches deep, while larger varieties like ‘Avalon’ and ‘Soleil’ prefer a depth of around 6-8 inches.
On the other hand, some gladiolus varieties have unique growth habits that require special attention. For instance, ‘Crane’s Delight’ produces multiple stalks from a single bulb, so it needs to be planted slightly deeper (around 5-6 inches) to accommodate its sprawling habit. Similarly, ‘Nymph’ and ‘Golden Hour’ varieties tend to produce smaller blooms, but they require a bit more depth (about 4-5 inches) to encourage strong stem growth.
To determine the optimal planting depth for your gladiolus variety, research the specific needs of that particular cultivar or consult with a gardening expert. Keep in mind that planting too shallow can lead to weak and top-heavy stalks, while planting too deep can cause the bulb to rot. By understanding the unique requirements of your gladiolus bulbs, you’ll be well on your way to enjoying a thriving and beautiful display of flowers come springtime.
Planting at the Right Time: Seasonal Considerations
When it comes to planting gladiolus bulbs, timing is everything. The best time to plant them depends on your region’s climate, frost, and temperature. In areas with mild winters, you can plant gladiolus bulbs as early as February or March, while in colder regions, it’s best to wait until the soil has warmed up in late spring.
In general, gladiolus bulbs need a period of dormancy before they start growing, which is why planting them too early can lead to weak and spindly stems. In most areas, April or May is an ideal time to plant gladiolus bulbs, as the soil has warmed up and the risk of frost has passed.
Before planting, check your local weather forecast to ensure that there won’t be any unexpected frosts in the coming weeks. If you live in a region with short growing seasons, consider pre-cooling your gladiolus bulbs by storing them in a cool, dark place for 4-6 weeks before planting. This will help them establish a strong root system and increase their chances of success.
Watering and Caring for Your Gladiolus Plants
To ensure your gladiolus plants thrive, proper watering and care are crucial after planting. This includes providing them with the right amount of moisture and nutrients to promote healthy growth.
Irrigation Strategies for Gladiolus
When it comes to watering gladiolus plants, getting the frequency and depth right is crucial for their survival. You want to avoid overwatering, which can lead to root rot and weakened stems, but also under-watering, which can cause the bulbs to dry out.
A good rule of thumb is to water your gladiolus bulbs when the soil feels dry to the touch, usually about 1-2 inches deep. Check for moisture by sticking a finger into the soil up to this depth; if it’s dry, it’s time to give them a drink. Water thoroughly until you see water coming out of the drainage holes in the pot.
In general, gladiolus bulbs need watering once or twice a week during the growing season (spring and summer). However, this frequency may vary depending on weather conditions. For example, if your area is experiencing a heatwave or dry spell, you’ll want to water them more frequently to ensure they’re getting enough moisture.
It’s also essential to avoid getting water directly onto the crown of the plant, as this can cause rot and other problems. Instead, aim for the soil around the base of the stem.
Fertilization and Pest Control
Fertilizing your gladiolus plants is essential to promote healthy growth and flowering. Gladiolus bulbs are heavy feeders, meaning they require a consistent supply of nutrients to thrive. Start by applying a balanced fertilizer at planting time, following the manufacturer’s instructions for application rates. You can also use compost or well-rotted manure as a natural alternative.
To avoid burning your gladiolus roots with excessive fertilization, it’s crucial to water them thoroughly after feeding. Monitor your plants closely for signs of nutrient deficiencies, such as yellowing leaves or stunted growth. Common problems include magnesium deficiency, which can cause interveinal chlorosis (yellowing between leaf veins), and potassium deficiency, leading to scorching on the tips of the leaves.
Common pests that target gladiolus plants include aphids, slugs, and snails. Regularly inspect your plants for these pests, using neem oil or insecticidal soap as a control measure if necessary. For example, aphids can be treated with a mild dish soap solution mixed with water (1 tablespoon of soap per gallon of water). To prevent root rot and disease caused by overwatering, make sure the soil drains well and avoid getting water on the crown (where the stem meets the bulb).
Common Mistakes to Avoid When Planting Gladiolus Bulbs
When planting gladiolus bulbs, many gardeners make mistakes that can affect bloom production and even kill the plants. Let’s explore some of these common errors to avoid.
Misconceptions About Planting Depth
When planting gladiolus bulbs, one of the most common misconceptions is that they need to be planted very deep. Some gardeners believe that burying them up to their necks will promote healthier growth and more vibrant blooms. However, this couldn’t be further from the truth.
In reality, gladiolus bulbs prefer to be planted with the ‘eyes’ (small buds on the top of the bulb) exposed at or just below the soil surface. Planting them too deep can lead to a range of problems, including delayed emergence, reduced flowering, and increased susceptibility to rot. This is because the eyes need light to trigger growth, and if they’re buried too deeply, it’s difficult for the bulb to access this essential resource.
A good rule of thumb is to plant gladiolus bulbs 2-3 times their height below the surface, or about 4-6 inches deep in most cases. This allows the eyes to be exposed while still providing some protection from extreme temperatures and moisture fluctuations. By avoiding the common mistake of planting too deeply, you can help your gladiolus bulbs establish a strong foundation for healthy growth and abundant blooms.
Other Common Errors to Watch Out For
When planting gladiolus bulbs, it’s easy to overlook some critical details that can affect their growth and performance. One common mistake is improper spacing, which can lead to overcrowding and reduced air circulation. This can cause the plants to be more susceptible to diseases like neck rot and stem rot.
To avoid this issue, make sure to space your gladiolus bulbs 3-6 inches apart, depending on the variety. If you’re planting a large number of bulbs, consider creating rows with about 12-18 inches between them. This will give each plant enough room to grow without competing for resources.
Another common error is inadequate care after planting. Gladiolus bulbs need regular watering, especially during their first growing season. Aim to provide about 1 inch of water per week, either through rainfall or irrigation. Additionally, fertilize your gladiolus plants with a balanced fertilizer once they’re about 6 inches tall. This will promote healthy growth and blooming.
By being mindful of these potential pitfalls, you can set your gladiolus bulbs up for success and enjoy vibrant blooms all season long.
Encouraging Repeat Bloom: Post-Harvest Care
To encourage your gladiolus bulbs to bloom again, proper post-harvest care is crucial. We’ll cover the essential steps to store and maintain your bulbs for a repeat display next season.
Allowing for a Healthy Dormancy Period
Allowing gladiolus plants to go dormant after blooming is essential for their future growth and health. When a gladiolus plant finishes blooming, it uses up its stored energy reserves to produce flowers. If the bulb is not given time to recharge, it can lead to weak or sparse growth in subsequent seasons.
During dormancy, the bulb’s energy is redirected towards rebuilding its storage capacity, which is crucial for producing large, healthy blooms in the following season. Think of it like recharging your batteries after a long period of use – you wouldn’t expect them to keep performing at peak levels without a break! Similarly, gladiolus bulbs need this downtime to recover and come back stronger.
By allowing your gladiolus plants to go dormant, you’re essentially giving them permission to take a well-deserved rest. This can be done by stopping fertilization and watering once the blooms have faded. Leave the foliage intact until it starts to yellow and die back naturally, which usually takes 4-6 weeks after blooming has finished. Only then can you cut back the stalks to about an inch above the soil surface, and wait patiently for next year’s flowers to emerge!
Preparing Your Gladiolus Bulbs for Next Year’s Crop
Now that you’ve harvested your gladiolus bulbs, it’s time to prepare them for next year’s crop. Proper post-harvest care and storage are crucial to encourage repeat bloom in subsequent seasons.
To store your gladiolus bulbs, start by allowing the soil to dry out slightly around the base of each bulb. This will help prevent rot from setting in during the winter months. Next, gently dig up the bulbs, taking care not to damage any of the delicate offsets or scales. Brush off any excess dirt and inspect the bulbs for signs of disease or pests.
Place the cleaned bulbs in a cool, dry location with good air circulation. You can store them in paper bags or breathable containers, such as mesh or canvas sacks. Keep the bulbs away from direct sunlight and heat sources, as this can cause them to sprout prematurely. Aim to keep the storage area at a consistent temperature between 40°F to 50°F (4°C to 10°C).
Frequently Asked Questions
How Do I Know If My Gladiolus Variety Requires Specialized Care?
Gladiolus varieties can have different needs, so it’s essential to research the specific requirements for your chosen variety. Check the seed packet or consult with a local nursery or gardening expert to ensure you’re providing the best conditions for your gladiolus plants.
What If I Plant My Gladiolus Bulbs Too Shallow and They Don’t Bloom?
If you’ve planted your gladiolus bulbs too shallow, they may not bloom as expected. In this case, try replanting them at the correct depth (about 3-4 times the height of the bulb) to give them a better chance of success.
Can I Plant Gladiolus Bulbs in Containers or Are They Strictly for Garden Beds?
Yes, you can plant gladiolus bulbs in containers as long as they have good drainage and receive adequate sunlight. Choose a container that’s at least 6-8 inches deep to accommodate the bulb’s root system.
How Long After Planting Can I Expect My Gladiolus Plants to Bloom?
The time it takes for gladiolus plants to bloom after planting can vary depending on factors like climate, soil quality, and variety. Generally, you can expect blooms within 60-90 days of planting, but some varieties may take longer.
What’s the Best Way to Store My Gladiolus Bulbs After Harvesting?
After harvesting your gladiolus bulbs, allow them to dry in a cool, dark place for a few weeks before storing. Then, store them in a paper bag or breathable container in a cool, dry location, such as a basement or garage. This will help preserve the bulbs for next year’s crop.