Planting cabbage can be a bit intimidating if you’re new to gardening, but don’t worry – with the right guidance, you’ll be enjoying delicious homegrown cabbages in no time. Not only is cabbage an incredibly nutritious addition to any meal, packed with vitamins and antioxidants, but it’s also one of the most versatile vegetables out there. From crunchy slaws to hearty stews, cabbage is a staple ingredient for many cuisines around the world. But how do you grow this amazing veggie? Choosing the right variety, preparing the perfect soil, planting at the ideal time, and caring for your cabbages throughout their growth are all crucial steps that we’ll cover in detail below. Our comprehensive guide will walk you through everything you need to know about growing nutritious and delicious cabbage at home.
Choosing the Right Variety of Cabbage
When it comes to growing delicious cabbage, selecting the right variety is crucial. With numerous options available, let’s dive into the key factors to consider when choosing a cabbage type for your garden.
Understanding the Different Types of Cabbage
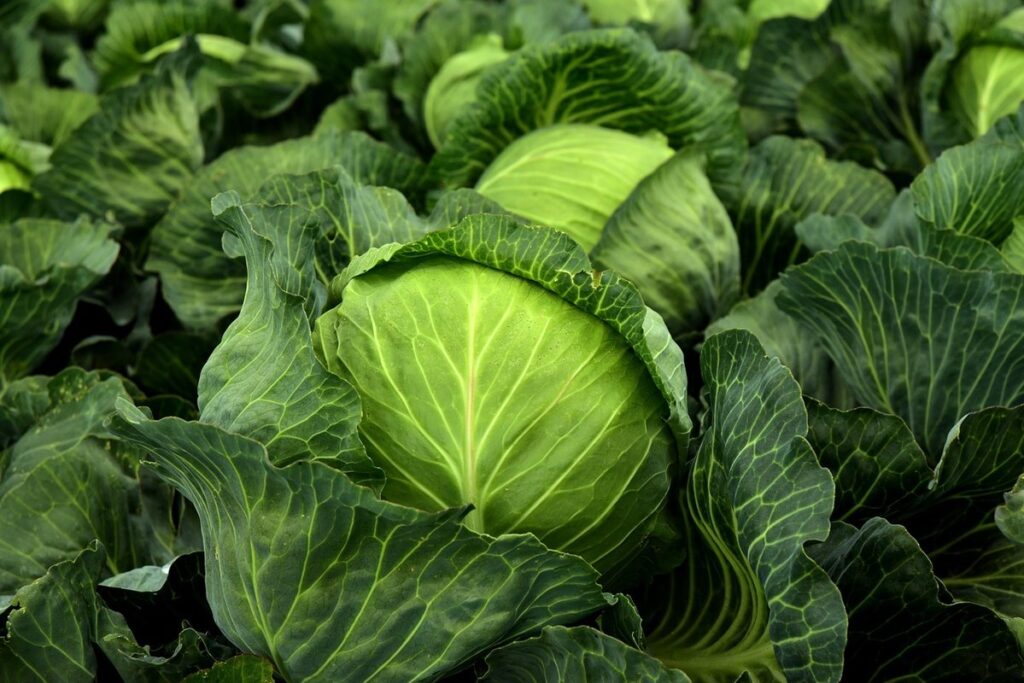
When it comes to choosing the right variety of cabbage for your garden and kitchen, understanding the different types is crucial. Let’s start with the main categories: crunchy, savoy, red, and green.
Crunchy cabbages are perfect for salads and slaws because they have a firm texture that holds up well to chopping. They’re also great for fermenting into sauerkraut or kimchi. Popular varieties like Early Jersey Wakefield and Red Express fit this category. Savoy cabbages, on the other hand, have beautiful, crinkled leaves and are ideal for soups, stews, and braises due to their milder flavor.
Red cabbage is a stunning addition to any meal, with its deep purple color adding visual appeal to salads, sauerkraut, and slaws. Its slightly sweeter taste makes it perfect for roasting or grilling. Green cabbages, like the popular varieties Copenhagen Market and Winterkeeper, are great all-around choices for cooking, with a mild flavor that works well in everything from stir-fries to soups.
When selecting your cabbage variety, think about how you plan to use it in your recipes. This will help you choose the perfect type of cabbage for your needs.
Factors to Consider When Selecting a Cabbage Variety
When selecting a cabbage variety, it’s essential to consider several factors that will impact its growth and performance. The first consideration is climate – if you live in an area with extreme temperatures, you’ll want a variety that can tolerate heat or cold well. For example, ‘Early Jersey Wakefield’ is a great choice for cooler climates, while ‘Red Drumhead’ excels in warmer regions.
Soil type is another critical factor to consider. Different cabbage varieties have varying requirements when it comes to soil pH and nutrient levels. If you have heavy clay or sandy soil, look for varieties that are more adaptable. For instance, ‘Savoy King’ is a good choice for areas with poor drainage, as it’s resistant to root rot.
Finally, think about how you plan to use your cabbage harvest. Do you want to grow compact varieties for smaller gardens or space-saving containers? Or perhaps you need a larger head of cabbage for slicing or fermenting? Consider the mature size and growth habits of each variety before making your final selection. By taking these factors into account, you can choose the perfect cabbage variety for your needs.
Preparing the Soil for Cabbage Planting
Before planting cabbage, it’s essential to prepare the soil properly to give your plants a healthy start. This section will walk you through the steps to create an ideal growing environment for your cabbage crop.
Assessing Your Soil Type and pH Level
Before planting cabbage, it’s essential to understand your soil type and its pH level. To determine your soil’s pH level, you can purchase a DIY soil testing kit from a gardening store or have your local nursery conduct a test for you. The ideal pH range for cabbage growth is between 6.0 and 7.0, making most home garden soils suitable for cultivation.
If your soil test reveals a pH level outside this range, don’t worry – it’s relatively easy to adjust the pH. To lower acidic soil (pH above 7.0), add elemental sulfur or peat moss, while to raise alkaline soil (pH below 6.0), mix in lime. However, be cautious not to overdo it, as sudden changes can harm your plants.
Another crucial aspect is identifying your soil type. Most gardeners have either clay, loamy, sandy, or a combination of these soils. Cabbage prefers well-draining soil with adequate moisture retention. If you’re unsure about your soil’s composition, observe how water behaves in it – if it puddles, you likely have clay; if it drains quickly, it might be sandy.
To give cabbage the best chance to thrive, try mixing in organic matter like compost or manure to improve drainage and fertility. This will also help maintain an optimal pH level for your plants.
Amending Your Soil for Optimal Growth
When it comes to growing cabbage, having well-amended soil is essential for optimal growth. This involves adding specific nutrients and materials to improve the soil’s fertility and structure. One common amendment is compost, rich in organic matter that helps retain moisture and suppress diseases.
You can also add well-rotted manure or peat moss to increase the soil’s water-holding capacity and provide a slightly acidic pH. For those with alkaline soils, adding elemental sulfur or aluminum sulfate can help lower the pH to around 6.0-6.5, which is ideal for cabbage growth.
Incorporating cover crops like clover or rye into your rotation can also improve soil health by increasing microbial activity and reducing erosion. Additionally, using mulch made from organic materials such as straw or wood chips can help regulate soil temperature and retain moisture.
If you’re unsure about the nutrient levels in your soil, consider getting a soil test to determine its pH and nutrient content. Based on the results, you can choose the necessary amendments to improve your soil’s fertility and structure for healthy cabbage growth.
Planting Cabbage: From Seeds or Seedlings
Whether you’re starting from seeds or seedlings, planting cabbage requires careful consideration of timing and soil conditions to ensure healthy growth. Let’s dive into the specifics of getting your cabbage crop off to a strong start.
Sowing Cabbage Seeds Indoors or Outdoors
When it comes to planting cabbage from seeds, you have two primary options: sowing indoors 4-6 weeks before the last frost date or direct sowing outdoors when the weather permits. Both methods have their advantages and disadvantages, which we’ll explore below.
Sowing Cabbage Seeds Indoors
If you want to get a head start on the growing season, consider starting your cabbage seeds indoors. This method allows you to control the temperature and light conditions, giving your seedlings a strong foundation for growth. About 4-6 weeks before the last frost date in your area, fill small pots or cell trays with a good quality seed starting mix. Plant one seed per pot, about ¼ inch deep, and place them in a sunny location with temperatures around 70-80°F (21-27°C). Once the seedlings have 2-3 sets of leaves, transplant them into larger containers or directly into the garden when the weather warms up.
Direct Sowing Outdoors
Alternatively, you can sow cabbage seeds directly outdoors after the last frost date. Choose a spot with full sun and well-draining soil that’s rich in organic matter. Plant the seeds about ¼ inch deep and 2-3 inches apart in late spring to early summer, depending on your climate. Keep the soil consistently moist during the first few weeks after sowing, but avoid overwatering which can lead to root rot.
When direct sowing outdoors, it’s essential to select a variety that matures within the local growing season. This will ensure you harvest before the weather starts to cool down again. Additionally, sow seeds in rows that are about 2-3 feet apart to make harvesting easier and prevent overcrowding.
Keep in mind that direct sowing can be riskier than starting indoors, as seedlings may be vulnerable to pests and diseases. However, if done correctly, it’s a cost-effective and low-maintenance way to grow cabbage.
Transplanting Seedlings into Larger Containers
When transplanting seedlings into larger containers, it’s essential to handle them with care to prevent shocking the roots. Start by gently removing the seedling from its original container and trimming off any loose or damaged roots. This will help the roots grow outwards more efficiently.
Next, transfer the seedling into a larger container filled with well-draining potting mix. Make sure the soil level is the same as it was in the original container to avoid disturbing the roots further. Water thoroughly after transplanting and provide sufficient humidity by covering the container with a clear plastic bag or cloche.
To harden off your seedlings for outdoor planting, start by moving them outside during the day but bringing them back inside at night. Gradually increase the duration of their outdoor exposure over 7-10 days to acclimate them to the sun’s intense rays and cooler evening temperatures. After this period, they’ll be ready to thrive in the garden. Monitor your seedlings’ progress closely, and avoid direct sunlight for more than a few hours at a time during the hardening off process.
Keep an eye out for signs of transplant shock, such as yellowing leaves or stunted growth. If you notice any issues, adjust your hardening off schedule accordingly to prevent further damage.
Caring for Your Cabbage Crop
Now that you’ve successfully planted your cabbage crop, it’s time to focus on keeping it healthy and thriving throughout its growth cycle. This section will walk you through essential care tips.
Watering and Mulching Strategies
When it comes to caring for your cabbage crop, maintaining consistent moisture levels is crucial. Cabbage requires about 1-2 inches of water per week, either from rain or irrigation. If the soil feels dry to the touch, it’s time to water. Avoid overwatering, as this can lead to root rot and other problems.
To retain water in the soil, use a thick layer of organic mulch around your cabbage plants. Mulching helps regulate soil temperature, suppress weeds, and conserve moisture. Choose materials like straw, wood chips, or grass clippings that break down easily and won’t compete with your cabbage for nutrients. Apply 2-3 inches of mulch, keeping it a few inches away from the plant stems to prevent rot.
Remember, mulching isn’t just about retaining water; it also helps control weeds that can steal moisture and nutrients from your plants. Regularly replenish mulch as it breaks down over time. Keep an eye on soil moisture levels and adjust your watering schedule accordingly. By implementing these simple strategies, you’ll be well on your way to growing a healthy, thriving cabbage crop.
Fertilizing and Pruning Your Cabbage Plants
As your cabbage plants grow and mature, they’ll require some TLC to reach their full potential. Fertilizing at different growth stages is crucial for a bountiful harvest. For young seedlings, start with a balanced fertilizer (10-10-10) applied at planting time. As they develop their root system, switch to a high-phosphorus fertilizer (10-20-10) to promote healthy growth.
For more established plants, focus on potassium-rich fertilizers (0-0-60) to boost resistance to disease and pests. Don’t overdo it, though – excessive nitrogen can lead to weak, leggy growth. Side-dress your cabbage with a high-potassium fertilizer 2-3 weeks before harvest to give the crop an extra boost.
Pruning techniques can also help promote healthy growth and prevent pests from taking hold. Remove any weak or damaged leaves to allow sunlight to reach inner plants. This will also reduce moisture loss through transpiration, reducing the risk of fungal diseases. If necessary, pinch off flower buds to direct energy towards head formation – this is especially important if you’re growing cabbage for its crunchy texture.
Keep in mind that these fertilizing and pruning techniques are specific to cabbage varieties. Research your specific type to ensure optimal care. Regular monitoring will help you identify potential issues before they become major problems, ensuring a healthy, productive crop.
Common Problems and Pests Affecting Cabbage
As you’re learning how to plant cabbage, it’s essential to be aware of the common issues that can affect your crop, including pests and diseases that might compromise its health. This section will address these potential problems head-on.
Identifying Common Pests and Diseases
When planting cabbage, it’s essential to be aware of common pests and diseases that can affect your crop. Aphids are a significant threat, as they feed on the sap of the plant, causing curled or distorted leaves. Slugs and snails are another concern, particularly at night when they tend to emerge. These pests can chew holes in the leaves and create an entry point for other pathogens.
Club root is a fungal disease that causes swellings to form on the roots of infected plants, restricting water and nutrient uptake. Powdery mildew is a common issue, characterized by a white, powdery coating on the upper surfaces of leaves. It’s often spread through spores carried by wind or insects.
To prevent infestations, ensure your cabbage crop has adequate space to breathe and grow. Use row covers to keep pests away, and maintain good garden hygiene by removing weeds and debris that can harbor disease-causing organisms. Regularly inspect your plants for signs of pests or diseases, and take action promptly if you notice any issues.
Monitoring weather conditions is also crucial, as extreme temperatures and rainfall can exacerbate the risk of disease. By being aware of these potential threats and taking proactive steps, you can minimize the impact of common pests and diseases on your cabbage crop.
Preventative Measures and Organic Control Methods
To prevent infestations and minimize the risk of pests and diseases affecting your cabbage crop, it’s essential to take preventative measures from the start. Begin by choosing a location with good air circulation and sunlight to reduce the likelihood of fungal diseases.
When preparing the soil, make sure to rotate crops to avoid depleting nutrients and creating an environment conducive to pest buildup. You can also incorporate natural repellents like garlic or hot pepper into the soil to deter pests.
Organic control methods are a great way to manage infestations without resorting to chemical pesticides. For example, introducing beneficial insects like ladybugs or lacewings can help control aphid and whitefly populations. Encourage these beneficial bugs by planting a diverse range of flowers that provide nectar and shelter.
For more severe infestations, try using neem oil or soap solutions to control pests without harming the environment. These methods may require repeated applications, but they’re effective in preventing long-term damage to your crop.
Harvesting and Storing Cabbage
Once your cabbage plants are mature, it’s time to think about harvesting and storing them properly. We’ll walk you through the best ways to do both in this crucial next step.
Signs of Maturity and Harvest Timing
When to harvest cabbage depends on several factors, including the variety and growing conditions. It’s essential to check for signs of maturity before cutting the heads from the plant. A mature head will be firm to the touch and have compact leaves that are tightly wrapped around it.
For early-maturing varieties like ‘Early Jersey Wakefield’ or ‘Savoy King’, you can start checking for maturity after about 50-60 days from sowing. These varieties tend to form small, tight heads that can be harvested before they reach full size.
For late-maturing varieties like ‘Danver’s Half-Red’ or ‘Red Drumhead’, it may take around 80-90 days for them to mature. As these varieties grow larger and more dense, the leaves will begin to relax slightly from their compact formation, signaling that the head is nearly ready to harvest.
Check the heads regularly during this period, lifting one side of the leaf to peek under it without damaging the plant. When you find a firm, well-formed head with tightly closed leaves, use a sharp knife or garden tool to cut the stem about an inch above the head, taking care not to bruise the cabbage.
Tips for Storage and Preservation
To keep your freshly harvested cabbage fresh for as long as possible, proper storage is essential. First, make sure to trim the outer leaves and remove any damaged parts to prevent moisture from accumulating and promoting spoilage. Next, store the cabbage heads in a cool, dry place with good ventilation, such as a root cellar or a pantry with a low humidity level.
For longer-term preservation, consider freezing or canning your cabbage. Freezing is a great method for retaining the vegetable’s texture and flavor. To freeze cabbage, blanch it in boiling water for 2-3 minutes to inactivate enzymes that cause spoilage, then package it in airtight containers or freezer bags. Frozen cabbage is perfect for soups, stews, and casseroles.
Canning is another excellent method for preserving cabbage, allowing you to enjoy it year-round. To can cabbage, follow safe canning practices and use a pressure canner to ensure the vegetable reaches a temperature of at least 240°F (115°C) to kill off bacteria. This method yields delicious pickled cabbage that’s perfect as a side dish or topping for sandwiches.
When storing or preserving cabbage, always keep it away from strong-smelling foods, as the vegetable can absorb odors easily. With these simple tips and techniques, you’ll be able to enjoy your fresh harvest throughout the year.
Frequently Asked Questions
How long does it take to see results after planting cabbage seeds?
Cabbage growth is relatively slow, but consistent with other vegetables. It typically takes 70-100 days from sowing the seeds to harvest. Factors like weather, soil quality, and care can influence this timeframe, so be patient and monitor your plants regularly.
Can I grow multiple varieties of cabbage together in the same bed?
Yes, you can plant different types of cabbage next to each other. However, ensure they have enough space (around 12-18 inches apart) to prevent overcrowding, which can lead to disease transmission and reduced growth. Consider companion planting for optimal results.
How often should I water my cabbage plants during the hot summer months?
Cabbage requires consistent moisture, especially when it’s young. Water your plants deeply once or twice a week, depending on weather conditions. Keep in mind that overwatering can be detrimental; monitor soil moisture and adjust watering schedules accordingly to prevent root rot.
What are some common pests I should watch out for when growing cabbage?
Common pests affecting cabbage include aphids, slugs, and caterpillars. Regularly inspect your plants for signs of infestation, such as holes in leaves or unusual white powdery patches (aphid droppings). Use organic control methods like neem oil or hand-picking to minimize damage.
Can I store my harvested cabbage in the same container used for planting?
No, it’s not recommended. Cabbage requires a different storage environment than soil and moisture levels. Harvest your cabbages separately and store them in a cool, dry place (around 32°F) to maintain freshness and prevent spoilage.