Are you ready to add some crunch to your garden with delicious homegrown cabbage? Whether you’re a seasoned gardener or just starting out, growing cabbage can be a rewarding and flavorful experience. But where do you start? With so many varieties of cabbage to choose from, it’s essential to select the right one for your climate and desired use – whether that’s for sauerkraut, slaws, or as a standalone side dish.
In this comprehensive guide, we’ll walk you through the process of planting, growing, and harvesting cabbage plants. From preparing the perfect soil to knowing when to harvest at peak freshness, we’ve got you covered. By the end of this article, you’ll be confident in your ability to grow delicious cabbage plants that will become a staple in your kitchen. Let’s dive in!
Choosing the Right Variety of Cabbage
When it comes to planting cabbage, selecting the right variety is crucial for a successful harvest. Let’s explore the different types and their characteristics to help you make an informed decision.
Understanding Cabbage Types
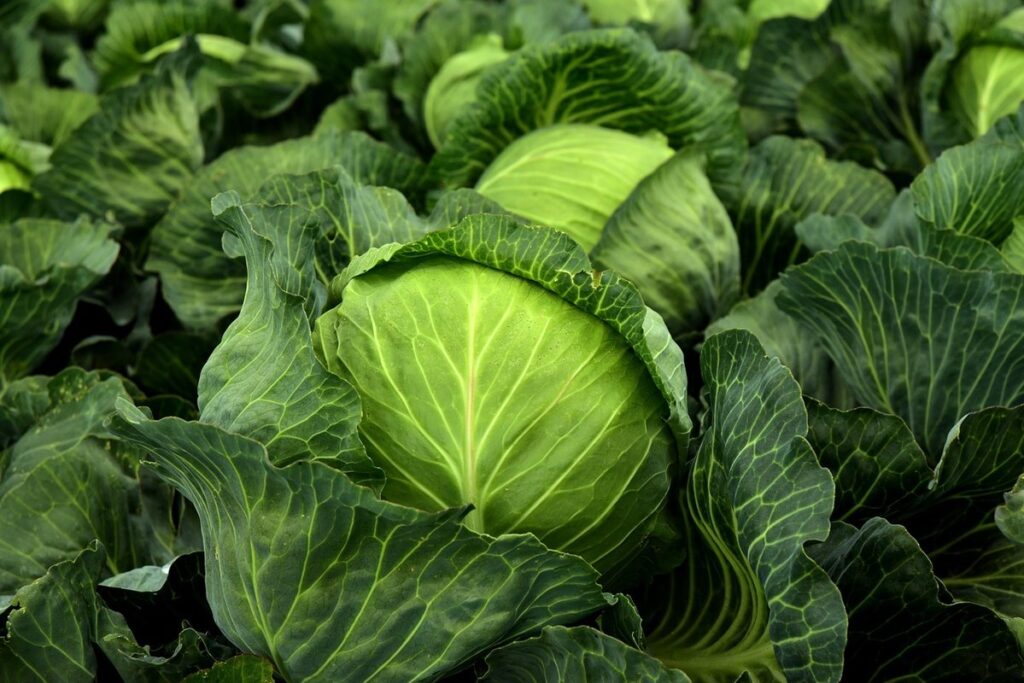
When selecting a cabbage variety for your garden, it’s essential to understand the different types available. Cabbage is a cool-season crop that comes in various shapes, sizes, and colors. There are several main categories of cabbage, including green, red, savoy, napa, and bok choy.
Green cabbage, such as the popular ‘Savoy King’ variety, has dense, crinkled leaves and is ideal for traditional coleslaw and sauerkraut recipes. Red cabbage, like ‘Cherry Belle’, has a more delicate flavor and is great for salads and slaws due to its attractive color.
Consider your climate and seasonality when choosing a cabbage type. In warmer regions, heat-tolerant varieties like ‘Southern Belle’ are better suited, while in cooler climates, early-season types like ‘January King’ can be planted as soon as the soil can be worked. Keep in mind that some varieties are more prone to pests or diseases, so choose ones bred for your specific region’s challenges.
If you’re new to growing cabbage, start with a few easy-to-grow varieties and experiment from there. This will help you determine which types thrive best in your garden conditions.
Considerations for Different Growing Conditions
When selecting a cabbage variety, it’s essential to consider the growing conditions of your garden. If you have full sun, look for varieties that are resistant to bolting and can tolerate high temperatures. For example, ‘Early Jersey Wakefield’ is a great choice for sunny spots. This heirloom variety is known for its reliability and ability to withstand heat.
On the other hand, if your garden receives partial shade or is prone to frost, opt for varieties like ‘Savoy King’ or ‘Red Express’. These types of cabbage are more tolerant of cooler temperatures and can handle some shade. When choosing a variety for heavy soil, select cabbages with deeper taproots, such as ‘Kilimanjaro Red’ or ‘Golden Acre’, which can break through compacted soil.
In areas with poor drainage, it’s best to choose cabbage varieties that are resistant to root rot. Look for words like “drought-tolerant” or “rot-resistant” when selecting a variety. Some popular options include ‘Danver’s Half-Red’ and ‘Early White’.
Preparing the Soil and Site
Before you start planting those delicious cabbage heads, let’s get your soil and site ready for optimal growth by tackling some essential prep work. This includes choosing the right location and loosening up your soil.
Testing and Amending the Soil
Testing the pH level and nutrient content of the soil is crucial to ensure that it’s suitable for growing cabbage plants. You can purchase a DIY soil testing kit from most gardening stores or online retailers. These kits usually come with a set of test strips that you dip into a small sample of soil, which changes color depending on the pH level.
If your test results show that the soil is too acidic (pH below 6) or alkaline (pH above 7), it’s essential to amend it before planting. Adding lime will raise the pH level and make the soil more suitable for cabbage growth. On the other hand, if you have alkaline soil, adding elemental sulfur can help lower the pH.
It’s also vital to test for nutrient deficiencies, such as nitrogen, phosphorus, and potassium (NPK). If your results show a lack of these nutrients, consider applying organic amendments like compost or manure tea. A good rule of thumb is to aim for a balanced soil mix with a NPK ratio of 10-10-10.
Keep in mind that cabbage plants prefer slightly acidic to neutral soil conditions, typically between pH 6 and 7. By testing and amending the soil accordingly, you’ll be well on your way to growing healthy, thriving cabbage plants.
Creating a Suitable Growing Environment
When planting cabbage, it’s essential to create a suitable growing environment for optimal growth. Cabbage plants require specific conditions to thrive, and understanding these requirements will help you provide the best possible start for your crop.
Sunlight is one of the most critical factors for cabbage plants. They need full sun to partial shade, with at least six hours of direct sunlight per day. However, excessive heat can lead to bolting, a condition where the plant shoots up too quickly and flowers instead of forming a head. Aim for an area that receives morning sun and afternoon shade to prevent scorching.
Temperature is another crucial factor. Cabbage plants prefer cooler temperatures between 60°F and 70°F (15°C and 21°C). Avoid planting in areas with extreme temperature fluctuations, as this can cause stress to the plant. Keep the soil consistently moist but not waterlogged, as cabbages don’t like standing water.
To create an optimal growing environment for your cabbage plants, ensure that your site receives sufficient sunlight, has a consistent temperature range, and maintains adequate moisture levels. This will help your crop grow strong and healthy, producing delicious and nutritious heads of cabbage.
Planting Cabbage Seeds or Seedlings
When it comes to growing delicious cabbage, you’ll want to start by planting either seeds directly into your garden bed or seedlings that have been started indoors. Let’s cover the best methods for each approach.
Direct Sowing vs. Transplanting
When it comes to planting cabbage, you have two main options: direct sowing and transplanting seedlings. While both methods can produce a bountiful harvest, they each come with their own set of benefits and challenges.
Direct sowing involves scattering seeds directly into the garden bed where they will mature. This method allows for faster growth, as the seeds don’t need to be handled or adapted to new soil conditions. Additionally, direct sowing promotes healthy root development, which is essential for cabbage’s characteristic compact head formation. However, direct sowing can lead to variable spacing and uneven germination rates.
Transplanting seedlings, on the other hand, involves starting seeds indoors 4-6 weeks before the last frost date and then transferring them to the garden bed once they have 2-3 sets of leaves. This method gives you more control over seedling spacing and can result in a higher success rate due to reduced exposure to pests and diseases. However, transplanting requires more time and effort, as it necessitates handling delicate young roots.
Consider your specific climate, soil conditions, and the amount of time you have available for gardening when deciding between direct sowing and transplanting. If you’re short on space or want a quick start, direct sowing might be the better choice. However, if you prioritize precise control over seedling spacing and growth rates, transplanting may be the way to go.
Tips for Successful Germination
To achieve successful germination, it’s essential to get the basics right. When sowing cabbage seeds, make sure the soil is warm and moist but not waterlogged. Aim for a temperature of at least 60°F (15°C) for optimal germination.
Sow your seeds about 1/8 inch deep and 2-3 inches apart in rows that are 12-18 inches apart. You can also sow them in seed trays or cells, allowing the seedlings to develop before transplanting. Keep the soil consistently moist during this period, but avoid overwatering.
Proper soil preparation is critical for successful germination. Use a well-draining potting mix and add organic matter like compost or well-rotted manure to improve its fertility. If your soil is heavy clay or sandy, consider mixing in some perlite or vermiculite to create a more balanced growing medium.
For optimal results, sow seeds 1/8 inch deep and maintain consistent moisture levels during the germination period, which typically lasts around 7-10 days. By following these guidelines, you’ll be well on your way to achieving successful germination and strong seedlings that will thrive in their new environment.
Caring for Your Cabbage Plants
Now that you’ve successfully planted your cabbage seedlings, it’s time to focus on keeping them healthy and thriving through proper care and attention. We’ll walk you through the essential tasks to ensure a bountiful harvest.
Watering and Irrigation Strategies
Maintaining consistent moisture levels is crucial for cabbage plants to thrive. Cabbage requires about 1-2 inches of water per week, either from rainfall or irrigation. Inadequate watering can lead to stress, making the plant more susceptible to pests and diseases.
Drip irrigation is an effective method for providing cabbage plants with a steady supply of water directly to the roots. This approach reduces evaporation and runoff, ensuring that the plant gets exactly what it needs. Soaker hoses are another popular option, as they slowly release water along their length, allowing the soil to absorb it evenly.
To implement these strategies, start by checking the soil moisture daily. Stick your finger into the soil up to the knuckle; if it feels dry, it’s time to irrigate. For drip irrigation, lay out the tubing and connect it to a timer or controller for easy management. With soaker hoses, simply place them alongside the plants and adjust as needed.
By adopting these watering techniques, you can create an ideal environment for your cabbage plants to grow strong and healthy.
Fertilizing and Pest Management
As you tend to your cabbage plants, it’s essential to provide them with the necessary nutrients for optimal growth. Fertilizing is a crucial aspect of their care, and timing is everything. Start by using a balanced fertilizer (10-10-10 NPK) when transplanting your seedlings into larger pots or directly into the garden bed. You can also side-dress with a high-phosphorus fertilizer to promote root development.
However, over-fertilization can be detrimental, so be cautious not to overdo it. Cabbage plants don’t require much nitrogen, especially when they’re producing heads. In fact, excessive nitrogen can lead to weak and leggy growth. For this reason, consider switching to a low-nitrogen fertilizer (5-10-10 NPK) once your plants have formed buds.
When it comes to pest management, keep an eye out for common culprits like aphids, slugs, and caterpillars. Use organic methods whenever possible, such as introducing beneficial insects or applying neem oil to control pests. For example, if you notice aphid colonies on your cabbage plants, use a gentle stream of water to dislodge them, followed by an application of insecticidal soap.
Regularly inspect your plants and address any issues promptly. Healthy soil and a balanced ecosystem can go a long way in preventing disease and pest problems.
Harvesting Your Cabbage Crop
Now that your cabbage crop is mature, it’s time to learn how to harvest it properly to enjoy its crunchy goodness for months to come. Let’s explore the best techniques for cutting and storing your homegrown cabbages.
Monitoring for Ripeness
When it comes to harvesting your cabbage crop, timing is everything. You’ll want to catch your cabbages at their peak ripeness to ensure maximum flavor and texture. So, how do you know when they’re ready? Start by checking for visual cues.
Look for the leaves of the cabbage head to be tightly packed and compacted against each other. The head should also be firm to the touch, with a slight give when pressed. Avoid selecting cabbages with loose or sagging heads, as these will not store well. Check the color of the leaves as well – a deep green indicates maturity.
Next, perform a taste test on a small sample. Cut into the center of the cabbage head and taste a bit of the inner core. If it’s crunchy and sweet, it’s ready to harvest! Avoid eating cabbages that are too bitter or tough. By monitoring your cabbages closely for these visual cues and taste tests, you’ll be able to harvest them at their peak ripeness, ensuring a delicious crop.
Techniques for Harvesting and Storing
When it’s time to harvest your cabbage crop, you’ll want to do so carefully to avoid damaging the heads. For compact varieties, simply lift the entire plant out of the ground, taking care not to tear the stem or roots. This method is ideal for smaller crops, as it helps preserve soil integrity.
For larger cabbages, you may need to cut the head from the stalk using a sharp knife or pruning shears. Cut as close to the base as possible, leaving about an inch of stem attached to the head. This will help prevent moisture loss and promote better storage.
Regardless of which method you choose, handle your harvested cabbages gently to avoid bruising or damaging them. For storage, keep heads in a cool, dry place with good air circulation. A temperature range of 32°F (0°C) to 40°F (4°C) is ideal for long-term storage. You can also consider storing them in a root cellar or cold storage room if available.
To maintain freshness, keep the stored cabbages away from direct sunlight and moisture. Check on them regularly to remove any damaged or rotting heads.
Frequently Asked Questions
What is the optimal time for planting cabbage in my region, considering different climate zones?
Cabbage is a cool-season crop that thrives in temperatures between 40°F (4°C) and 75°F (24°C). In temperate climates, plant cabbage from early spring to late summer. For regions with harsh winters or extreme heat, consider planting in the fall for a winter harvest. Always check your local climate zone and adjust planting times accordingly.
How do I prevent pests like aphids and slugs from damaging my cabbage crop?
To minimize pest damage, ensure good air circulation around plants by spacing them 12-18 inches apart. Remove any weeds that can harbor pests, and use organic methods to control infestations, such as introducing beneficial insects or using neem oil.
Can I grow multiple varieties of cabbage in the same garden bed, and if so, what are some considerations?
Yes. Cabbage plants have different space requirements and growth habits. If growing multiple varieties, separate them by at least 3 feet to prevent overcrowding. Consider companion planting to deter pests or improve growth – for example, planting onions near cabbage can help repel aphids.
How do I know when my cabbage is ready for harvest, and what are the best ways to check for ripeness?
Check for ripeness by gently tugging on a leaf; if it comes off easily, the cabbage is mature. Also, inspect the head’s color, shape, and size, depending on the variety. Harvest at dawn or late afternoon when leaves are crisp.
Can I grow cabbage in containers or do I need a large garden bed?
Yes, you can grow cabbage in containers with a minimum depth of 6-8 inches to accommodate the plant’s taproot. Use well-draining potting mix and maintain consistent moisture levels. Keep in mind that container-grown cabbage may require more frequent watering due to increased evaporation rates.