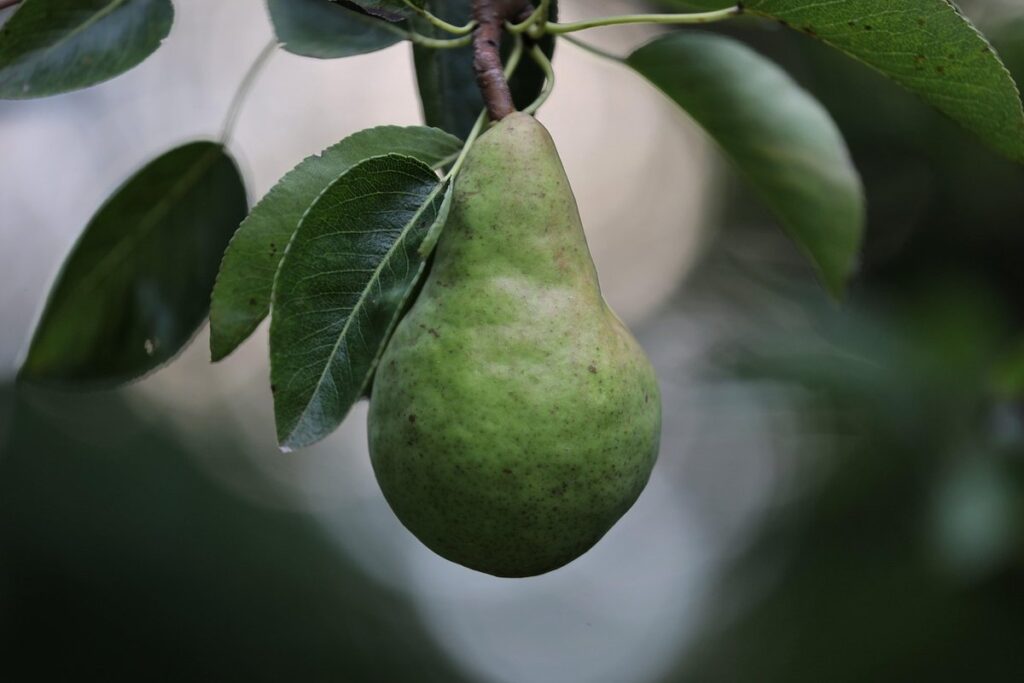
Are you a proud pear tree owner looking to get the most out of your harvest? Or perhaps you’re eager to give your tree a little TLC to boost its aesthetic appeal? Whatever the reason, pruning is an essential part of pear tree care that can make all the difference. Not only will it encourage more fruit production and improve overall health, but with some expert guidance, you’ll be amazed at how a simple trim can transform your tree’s shape and beauty.
In this article, we’ll dive into the world of pear tree pruning tips, covering everything from pre-pruning preparation to basic and advanced techniques. We’ll also reveal common mistakes to avoid so you don’t unknowingly harm your tree. By following our expert advice, you’ll be well on your way to a more bountiful harvest and a stunningly beautiful tree that will be the envy of your neighborhood.
Understanding the Importance of Pruning
Pruning is a crucial aspect of maintaining healthy and productive pear trees, ensuring they receive the right amount of sunlight and air circulation to thrive. Let’s dive into why pruning is essential for your orchard.
The Role of Pruning in Pear Tree Growth
Pruning plays a vital role in pear tree growth, and its effects are quite remarkable. When done correctly, pruning can increase fruit production by up to 30% (University of California, Davis). This is because pruning encourages the tree to produce more shoots, which in turn lead to an abundance of fruiting branches.
Regular pruning also improves the overall health of your pear tree. By removing diseased or damaged branches, you’re reducing the risk of disease spread and promoting a healthy environment for growth. In fact, studies have shown that well-pruned trees are 50% less susceptible to pests and diseases (Ohio State University Extension).
To maximize the benefits of pruning, focus on cutting back around one-third of your tree’s canopy each year. This will encourage new growth, promote air circulation, and allow more sunlight to reach the fruiting branches. Remember to remove any crossing or rubbing branches, as these can lead to damage and reduce fruit quality. By incorporating regular pruning into your orchard maintenance routine, you’ll be well on your way to cultivating a thriving and productive pear tree.
Common Mistakes to Avoid When Pruning
When it comes to pruning pear trees, it’s easy to make mistakes that can have long-term consequences for the tree’s health. One common mistake beginners make is over-pruning, which involves cutting back too much of the tree at once. This can shock the tree and lead to a weak and vulnerable growth spurt in the following growing season.
Pruning at the wrong time of year is another rookie error. Prune your pear trees during their dormant season (winter or early spring) when they are least active, not in the fall after harvest. Pruning too late can stimulate new growth that may not have enough time to harden off before winter, making it more susceptible to damage from cold temperatures.
Additionally, avoid pruning during extreme weather conditions like intense heat or rain, as this can cause damage to the tree’s delicate tissues. By being mindful of these common mistakes and pruning at the right time with the right techniques, you’ll be well on your way to cultivating a healthy and thriving pear tree orchard.
Pre-Pruning Preparation
Before you start pruning, take care of a few essential tasks to ensure your pear trees receive the best care possible and respond well to pruning. This includes inspecting and preparing necessary tools and equipment.
Choosing the Right Tools for the Job
When it comes to pruning your pear tree, having the right tools for the job can make all the difference. You’ll want to start with some essential equipment that will help you tackle even the toughest branches. A good pair of loppers is a must-have for most pruning tasks – look for ones with long handles and sturdy blades that can cut through thicker stems.
A pruning saw is also crucial for cutting larger branches or those that are too thick for loppers to handle. Choose a saw with a curved blade and a comfortable grip, as this will make it easier to maneuver in tight spaces. Lastly, don’t forget about your safety gear – a good pair of gloves can protect your hands from thorns and cuts.
To keep your tools in top condition, be sure to clean them regularly after use. Wipe down loppers and pruning saws with a damp cloth to remove any sap or debris. Store your tools in a dry, protected area when not in use – a toolbox or shed is perfect for this purpose. Regular maintenance will help extend the life of your equipment and ensure that you’re always ready to tackle whatever pruning tasks come your way.
Identifying the Best Pruning Time
When it comes to pruning pear trees, timing is everything. Pruning at the right moment can make all the difference in maintaining a healthy and thriving orchard. One of the primary factors to consider when deciding on the best pruning time for your pear tree is climate and seasonality.
In general, the ideal time to prune most pear varieties is during their dormant season, typically between late winter and early spring, around February or March in the Northern Hemisphere. This allows the tree to heal quickly from any pruning cuts before new growth begins, reducing the risk of disease and pests.
For specific types of pear trees, such as dwarf or semi-dwarf varieties, it’s best to prune them right after they finish fruiting, which is usually around July or August. Younger trees (less than 2 years old) should be pruned minimally, if at all, to allow for proper establishment.
Keep in mind that these are general guidelines and the specific needs of your tree may vary depending on factors like climate, soil quality, and pest/disease pressure. Always assess your tree’s unique circumstances before deciding on pruning timing.
Basic Pruning Techniques
To effectively prune your pear tree, it’s essential to understand basic pruning techniques that promote healthy growth and maximize fruit production. This involves shaping the tree’s structure.
Removing Dead, Diseased, or Damaged Branches
When pruning your pear tree, it’s essential to remove dead, diseased, or damaged branches. These types of branches can weaken the tree and create an environment for pests and diseases to thrive. Start by inspecting your tree carefully, looking for signs of death, disease, or damage such as cracks in the bark, soft spots, or brittle wood.
To remove a branch, cut just above a growth node using a clean, sharp tool. This will help the tree heal quickly and reduce the risk of decay. Make cuts at a 45-degree angle, about one-quarter inch above the node. If you’re removing a larger branch, make sure to cut it back to a lateral bud or a healthy side shoot.
When dealing with diseased branches, take extra precautions to prevent spreading the disease to other parts of the tree or nearby plants. Wear protective clothing and gear, and disinfect your tools between cuts. By regularly removing dead, diseased, or damaged branches, you’ll be able to maintain your pear tree’s health and promote a thriving orchard.
Reducing Tree Height and Promoting Air Circulation
Reducing tree height is crucial to maintaining air circulation and preventing disease. When pear trees grow too tall, their lower branches can become shaded, creating an environment conducive to fungal diseases like powdery mildew. To reduce the height of your pear tree while preserving its shape, focus on removing select limbs rather than cutting back the entire canopy.
Identify weak or crossing branches that are obstructing air circulation and prune them at a 45-degree angle using sharp, sterile tools. This will not only promote healthy airflow but also prevent damage to the surrounding bark. Be sure to leave at least two-thirds of the branch intact to maintain the tree’s natural shape.
Properly securing branches in place after pruning is essential for maintaining your tree’s integrity. Use twine or wire ties to gently tie the cut ends together, and ensure they’re not too tight as this can cause damage.
Advanced Pruning Techniques
Now that you’ve mastered the basics of pear tree pruning, it’s time to dive into some advanced techniques to take your orchard to the next level. We’ll cover expert methods for shaping and maintaining healthy trees.
Thinning Out Branches for Better Sunlight Penetration
When thinning out branches on your pear tree, it’s essential to focus on allowing more sunlight to reach the fruiting wood. This will not only improve yields but also enhance the quality of your harvest. To achieve this, look for branches that are growing inward or crossing over other limbs, and carefully remove them.
You can think of thinning out branches like pruning a layer cake – you’re removing the densest layers to reveal the tender shoots below. This technique is known as “disbudding,” and it’s a crucial step in pear tree pruning. By reducing competition for sunlight, water, and nutrients, you’ll give your remaining branches the best chance to thrive.
When selecting which branches to remove, consider their proximity to fruiting wood. Cut any that are too close to existing limbs or growing directly above them. This will create space for sunlight to filter through and promote healthy growth. By thinning out branches in this way, you’ll be amazed at the difference it makes in your pear tree’s overall health and productivity.
Shaping the Tree for Aesthetic Appeal
When it comes to shaping your pear tree for aesthetic appeal, you want to create a visually stunning canopy that also supports overall health and structure. A well-pruned tree can add beauty and value to your orchard, not to mention increase fruit production.
Consider a central leader pruning style, where the strongest branch is allowed to grow as the main trunk, and then branches are trained outwards in an open ‘V’ shape. This encourages even sunlight penetration, promotes air circulation, and makes harvesting easier. Alternatively, you might prefer a free-standing tree with multiple leaders, creating a more relaxed, natural look.
To achieve this, focus on selecting 2-3 main limbs that will become the new leaders, then prune all others back to about 12 inches from their point of attachment. This will allow your chosen branches to grow and fill out over time, creating an attractive, balanced canopy. Remember to also remove any dead, diseased or damaged wood, as this can create a haven for pests and diseases that can harm the rest of the tree.
Post-Pruning Care
Now that you’ve pruned your pear tree, it’s essential to provide the right care for a smooth recovery and optimal growth. Here’s how to nurture your tree back to health.
Watering and Fertilizing After Pruning
After pruning your pear tree, it’s essential to provide the right care to ensure a strong recovery and optimal growth. Proper watering and fertilization are critical during this period, as the tree is vulnerable to stress and nutrient deficiencies. Without adequate nutrients, the tree may not be able to produce new growth or fruit.
When watering, make sure the soil remains consistently moist but not waterlogged. This can be achieved by providing about 1 inch of water per week, either through rainfall or irrigation. To balance nutrient intake with reduced foliage, consider a balanced fertilizer (10-10-10 NPK) applied at a rate of 1/4 to 1/2 cup per tree. This will provide essential macronutrients without overloading the tree.
Keep in mind that excessive fertilization can lead to overgrowth and reduce fruit production. Monitor your tree’s response to fertilizer application, adjusting as needed to avoid burn or under-fertilization. Regular soil testing can help determine the specific nutrient needs of your pear tree, ensuring you’re providing what it requires for optimal growth.
Monitoring Tree Health and Adjusting Pruning Strategies
As you continue to care for your pear tree after pruning, it’s essential to monitor its health and adjust your pruning strategies accordingly. Just like humans, trees are not static entities; they grow, adapt, and respond to their environment over time. Regular monitoring will help you identify potential issues before they become major problems.
Look out for signs of stress or disease, such as yellowing leaves, leaf drop, or an increase in pests and diseases. Check the tree’s overall vigor, growth patterns, and response to pruning. Are new shoots growing vigorously, or are they weak and spindly? Are there any areas where water might be collecting, potentially leading to root rot?
Adjust your pruning strategy based on what you observe. If a branch is consistently showing signs of stress, consider removing it entirely. Alternatively, prune the affected area more aggressively to promote healthy growth. Remember that every tree is unique, and what works for one pear tree may not work for another. Stay vigilant and adapt your care routine as needed to ensure your tree remains healthy and thriving.
Common Pear Tree Varieties and Their Pruning Needs
Let’s take a closer look at some of the most popular pear tree varieties, each with its own unique pruning requirements to ensure optimal growth. From Bartlett to Red Anjou, we’ll break it down.
Discussion of Popular Varieties
Many popular pear tree varieties exist, each with its unique characteristics and pruning needs. For example, ‘Bartlett’ pears are known for their sweet flavor and tender flesh. However, they tend to produce long, slender branches that require more frequent thinning and shaping to maintain a balanced canopy.
On the other hand, ‘Anjou’ pears have a more compact growth habit and can tolerate some shade, making them suitable for smaller orchards or spaces with limited sunlight. They also produce smaller fruit and less vigorous growth, requiring less pruning overall.
Another popular variety is ‘Bosc’, which has a distinctive shape and produces large, sweet fruit. Its growth habit is more upright than other varieties, but it can be prone to over-production, leading to heavy fruiting and subsequent branch damage if not pruned regularly.
When choosing pear tree varieties for your orchard, consider factors such as climate, soil type, and intended use (eating fresh or cooking). Research the specific pruning needs of each variety to ensure you’re providing the best care for your trees.
Special Considerations for Each Variety
When it comes to pruning your pear tree variety, understanding its specific needs is crucial for optimal growth and fruit production. Let’s take a closer look at some popular varieties and their unique considerations.
For Bartlett pears, frequent thinning is essential to prevent over-cropping and promote air circulation, which reduces the risk of disease. Remove any weak or spindly branches, as they can be more susceptible to damage from wind and frost. Anjou pears, on the other hand, require less pruning due to their naturally compact growth habit.
Bosc pears have a more vigorous growth pattern and need regular pruning to maintain shape and promote fruiting. Be sure to remove any crossing branches that may rub against each other, causing damage and reducing air circulation. Kieffer pears are relatively low-maintenance but still require attention to disease susceptibility, particularly fire blight. Regularly inspect your tree for signs of infection and take action promptly.
Understanding the specific pruning needs of your pear tree variety will help you create a thriving and productive orchard.
Frequently Asked Questions
Can I prune my pear tree at any time of the year?
Pruning is best done during the dormant season, which typically occurs from late winter to early spring (December to February). Avoid pruning during periods of active growth or when your tree is under stress.
How often should I water and fertilize after pruning?
Watering and fertilizing are crucial for promoting healthy growth after pruning. Water your pear tree regularly, especially during the first growing season after pruning. Fertilize annually with a balanced fruit tree fertilizer (10-10-10 NPK) following package instructions.
What’s the best way to remove dead, diseased, or damaged branches?
Remove these types of branches carefully using clean, sharp pruning tools. Cut at a 45-degree angle, making sure the cut is about one-quarter inch above the bud eye (the swollen area from which new growth emerges).
Can I prune my pear tree in just one session, or should it be done over multiple days?
It’s generally recommended to divide your pruning sessions into two or three, depending on the size of your tree and your comfort level. This will help prevent fatigue and allow you to take breaks without leaving an incomplete job.
How can I know which branches to remove for better sunlight penetration and air circulation?
Thinning out branches involves removing select branches that obstruct sunlight or restrict airflow. Look for branches growing inwards towards the center of the tree, crossing other branches, or rubbing against them. Remove these branches carefully, making sure not to damage nearby shoots.