As a rose enthusiast, you’ve probably experienced the disappointment of watching your beautiful blooms shrivel up under the harsh winter frost. But fear not! With some simple and effective techniques, you can protect your precious roses from damage and even thrive through the coldest months. Overwintering roses is an essential practice for any gardener who wants to keep their plants healthy and vibrant year-round. In this article, we’ll explore the best methods for mulching, covering, and pruning your roses to ensure they survive the winter with minimal stress. We’ll also cover some valuable tips on how to prepare your rose garden for the cold weather ahead, so you can enjoy a stunning display of blooms come springtime. Get ready to learn the secrets of overwintering roses and keep your garden looking its best!
Understanding Rose Dormancy
Now that we’ve covered preparation and protection, let’s dive into what happens when your rose goes dormant: a natural process that can be a bit mysterious if you’re new to overwintering.
What is Winter Dormancy in Roses?
As winter approaches, rose plants undergo a crucial process called winter dormancy. This natural adaptation allows them to conserve energy and protect themselves from harsh weather conditions. During this period, roses prepare for the cold months by slowing down their growth and shutting down certain metabolic processes.
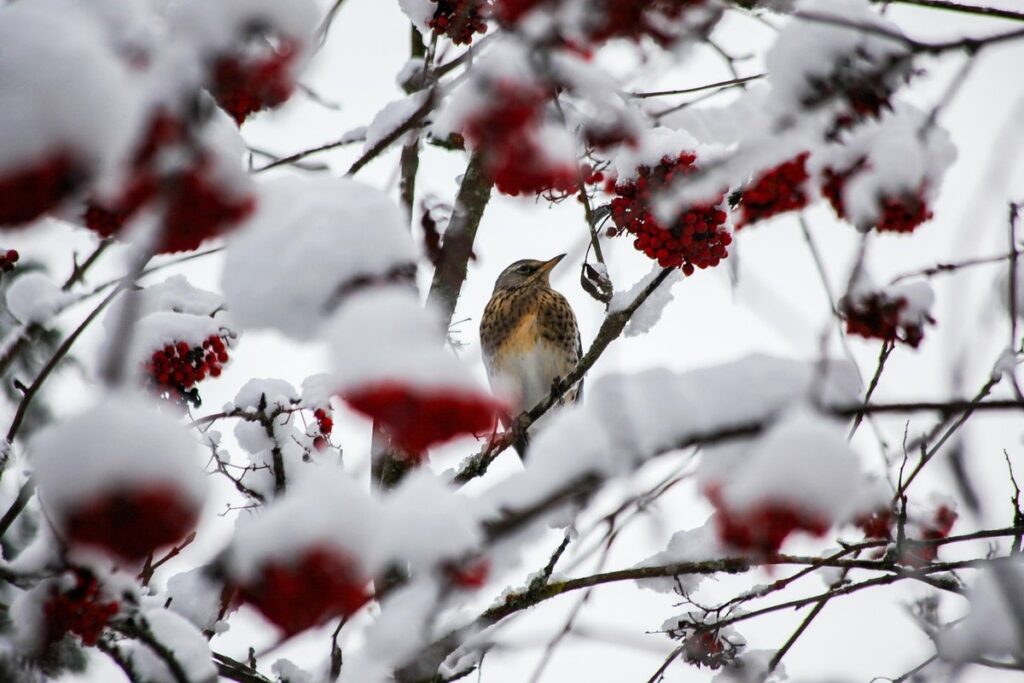
In late fall or early winter, roses begin to transition into dormancy. They stop producing new growth, and the leaves start to yellow and drop off. This is a normal process that signals the end of the growing season. As temperatures drop, the plant’s energy resources are redirected from growth to storage, allowing it to survive the cold months.
Understanding winter dormancy is essential for rose care during this time. By recognizing the signs of dormancy, you can provide your plants with the necessary protection and care to ensure their survival until spring returns. With proper overwintering techniques, your roses will emerge healthy and strong come springtime.
Types of Rose Plants That Require Protection
If you’re a rose enthusiast with hybrid teas, floribundas, shrub roses, and climbing roses in your garden, it’s essential to know which ones require protection during the harsh winter months. Hybrid teas, for instance, are particularly sensitive to cold temperatures and may need mulching or covering to protect their delicate branches from damage.
Floribundas, on the other hand, can be a bit more resilient but still benefit from some form of protection. A layer of straw or bark chips around the base of the plant can help insulate the roots and keep them warm. Shrub roses are generally hardier than hybrid teas and floribundas, but may still need some protection to prevent winter kill.
Climbing roses often require more extensive care during the winter months. Prune them back to about two feet from the ground before the first frost, and consider applying a protective layer of mulch or burlap to shield the canes from wind and cold temperatures.
Preparing Roses for Winter: Timing is Everything
Timing is everything when it comes to preparing roses for winter. As we discussed earlier, rose dormancy is a crucial part of their life cycle, and understanding when to start protecting your plants from frost damage is essential for their survival.
To determine the right time to start protecting your roses, monitor local weather forecasts closely. In most regions, the first frost typically occurs between late October and early November. As temperatures begin to drop, roses will start to slow down their growth, producing fewer leaves and flowers. This is a sign that they’re preparing for dormancy.
Start wrapping or covering your rose bushes around 2-4 weeks before the first frost date in your area. This will give them time to adjust to their protective coverings and reduce the risk of damage from wind and cold temperatures. For example, if your local frost date is November 1st, begin preparing your roses by October 15th at the latest.
Keep an eye on nighttime temperatures, as they’re usually colder than daytime temps. If you live in an area with extreme temperature fluctuations, consider using additional protective measures, such as mulching around the base of your plants or bringing potted roses indoors during the coldest months.
Protecting Your Roses from Frost Damage
As winter approaches, it’s crucial to take extra steps to safeguard your delicate rose blooms from harsh frost and freezing temperatures that can cause significant damage. We’ll explore practical methods for protecting your roses in this section.
Choosing the Right Mulch or Cover
When it comes to protecting your rose plants from frost damage during the winter months, choosing the right mulch or cover is crucial. Mulch acts as a barrier between the soil and extreme temperatures, preventing moisture loss and retaining heat. Popular options for rose mulching include straw, bark chips, and leaves.
Straw is an excellent choice due to its ability to retain heat while allowing excess moisture to escape. It’s also easy to apply and can be replenished as needed. Bark chips, on the other hand, provide good insulation but may not retain moisture as effectively as straw. Leaf mulch is another option, but it can break down quickly and create a weed problem.
Another effective solution for protecting rose plants from frost damage is using row covers. These lightweight fabrics allow sunlight to reach your roses while preventing cold air and frost from penetrating the plant’s foliage. Simply drape the cover over your rose plants at night and remove it during the day when temperatures rise.
Applying Mulch or Covers: Step-by-Step Guide
To ensure your rose plants stay protected from frost damage, applying mulch or covers is an essential step. Start by choosing a suitable material for the mulch or cover – straw, bark chips, or even old sheets work well. For optimal protection, apply a 2-3 inch layer of mulch around the base of each plant, keeping it a few inches away from the stem to prevent moisture accumulation.
When using covers, select a breathable fabric like burlap or canvas to allow for air exchange while keeping cold air out. Place the cover over the plant, securing it with stakes or weights to prevent wind damage. Make sure the cover is not too tight, allowing room for growth and expansion as new buds develop in spring.
Regularly check your mulch or cover for signs of moisture accumulation, lifting or removing any wet material to maintain a dry environment. By following these simple steps, you’ll be able to safeguard your rose plants from frost damage, ensuring they thrive through the winter months and bloom beautifully come springtime.
Additional Protection Measures for Vulnerable Areas
If you live in an area prone to harsh winters, it’s essential to consider additional protection measures for vulnerable areas of your roses. Sensitive buds and new growth are particularly susceptible to frost damage, so take extra care when protecting these delicate areas.
Apply a layer of snow or straw around the base of each plant to insulate the sensitive roots and prevent them from freezing. You can also use a frost blanket or tarp to cover individual plants, weighing it down with rocks or sandbags to prevent it from blowing away in strong winds.
For young, newly planted roses, consider using a protective cage or trellis to shield them from harsh winds and frost. This will not only protect the plant but also help retain moisture and reduce water loss through evaporation.
Additionally, make sure to mulch around the base of each plant, keeping the mulch layer at least 6-8 inches away from the trunk. This will help regulate soil temperature and prevent extreme fluctuations that can damage the roots. By taking these extra precautions, you’ll significantly reduce the risk of frost damage to your vulnerable roses.
Overwintering Techniques: Mulching, Covering, and Pruning
To protect your roses from harsh winter conditions, you’ll want to learn about effective mulching, covering, and pruning techniques that will keep them safe and healthy. These methods are essential for a successful overwintering strategy.
Mulching: A Deep Layer of Protection
Mulching is an effective overwintering technique that provides a deep layer of protection for rose plants. By applying a thick layer of organic mulch around the base of the plant, you can shield it from harsh winter conditions such as freezing temperatures, drying winds, and extreme moisture fluctuations. Organic mulches like wood chips, bark, or straw are ideal choices because they:
• Retain moisture in the soil, reducing water loss through evaporation
• Regulate soil temperature, keeping it warmer during cold snaps and cooler during heatwaves
• Suppress weeds that compete with your rose plants for nutrients
• Add organic matter to the soil as they break down, improving its structure and fertility
When applying mulch, aim for a depth of 2-3 inches, but avoid piling it against the plant’s stem. This can cause moisture to accumulate and lead to rot or disease. Replenish the mulch layer annually, replacing it with fresh material to maintain its effectiveness. By incorporating mulching into your overwintering strategy, you’ll be providing your rose plants with a robust defense against winter’s challenges.
Covering Roses with Row Covers or Tarps
When extreme cold snaps are predicted, providing an additional layer of protection for your rose plants is crucial. One effective method to safeguard them is by covering them with row covers or tarps.
Row covers are lightweight, breathable fabrics that allow some sunlight and moisture to reach the plants while keeping frost out. They come in different weights and materials, such as polypropylene or polyester, and can be used for partial or complete coverage. For example, if you’re expecting a light frost, a lighter-weight row cover may suffice, but for harsher conditions, opt for a heavier-duty one.
Tarp covers, on the other hand, are ideal for more extensive protection. You can drape them over your rose bushes using stakes and weights to secure them in place. The benefits of tarp covers include their ability to retain heat and protect against strong winds. When choosing a tarp, select one that’s specifically designed for outdoor use and has UV-resistant properties to prevent degradation from sunlight.
Some essential considerations when using row covers or tarps include ensuring they don’t touch the plant leaves, as this can cause damage, and removing them as soon as temperatures rise above freezing to allow your roses to breathe and recover.
Pruning: Preparing Your Roses for Winter
Pruning is an essential step in preparing your roses for winter. It helps to promote healthy growth, encourages new blooms, and protects the plant from disease and pests. When done correctly, pruning can make a significant difference in how well your roses will overwinter.
In autumn, focus on reducing the height of your rose bushes by about one-third to half. This helps prevent damage from harsh winter winds and snow loads. Remove any dead, diseased, or damaged branches, cutting them back to healthy wood. This not only maintains the plant’s appearance but also reduces the risk of disease spread.
In early spring, prune your roses again, this time focusing on promoting new growth. Cut out any weak or spindly growth, and shape the plant to maintain a balanced, bushy habit. Remove any deadheading, allowing the rose to focus its energy on producing new blooms. Prune no later than late March or early April to allow the plant sufficient time to recover before new growth begins.
Troubleshooting Common Problems During Overwintering
If you’re facing issues while overwintering your roses, don’t worry – we’ve got you covered. This section will walk you through common problems and solutions to get your plants thriving again.
Identifying Signs of Stress or Damage
As you monitor your rose plants during overwintering, it’s essential to be aware of common signs of stress or damage. Yellowing leaves can be a warning sign that something is amiss. This discoloration might be due to insufficient moisture, extreme temperatures, or nutrient deficiencies. Check if the soil feels dry to the touch; water your rose plant if necessary. Nutrient deficiencies can also cause yellowing leaves, so consider providing a balanced fertilizer specifically formulated for roses.
Another indicator of stress or damage is reduced growth. This could be due to disease, pests, or inadequate light exposure during winter months. Inspect your plants regularly for signs of fungal diseases like black spot or powdery mildew, which can cause weakened stems and stunted growth. If you suspect pests like aphids or spider mites are present, treat them promptly with neem oil or insecticidal soap.
Watch for droopy canes, brittle twigs, and curled-up leaves, all of which may indicate damage from extreme cold snaps or frost. If possible, prune damaged areas to prevent the spread of disease and encourage healthy growth come springtime.
Common Pests and Diseases That Affect Roses During Winter
As winter sets in, roses can become vulnerable to common pests and diseases that can cause significant damage. One of the most prevalent issues is spider mites, tiny arachnids that feed on plant sap, causing yellowing leaves and distortion. To prevent infestations, inspect your plants regularly for fine webbing or actual mites.
Powdery mildew and black spot are two other common diseases that can affect roses during winter. Powdery mildew appears as a white, powdery coating on the leaves and stems, while black spot forms small, circular lesions with a black center. Both diseases thrive in cool, humid conditions, making them more likely to occur during this time.
To manage these issues, ensure good air circulation around your plants, water carefully to avoid wetting leaves, and remove any infected foliage. Fungicides can also be applied according to product instructions. Regular monitoring and prompt action are key to preventing the spread of pests and diseases that can devastate rose plants over winter.
Solutions for Common Problems: Fixes and Preventatives
If you’re experiencing common problems during overwintering, such as deadheading, branch dieback, canker or black spot, there are fixes and preventatives that can help. Deadheading involves removing spent flowers to encourage new blooms. For roses with excessive deadheading, a fall pruning can be beneficial, cutting back the plant by about one-third to promote healthy growth.
Another common issue is branch dieback, where stems turn brittle and break off. To fix this, remove any weak or damaged branches in the spring, using clean cuts and disinfecting your tools between cuts to prevent spreading disease.
Black spot and canker are fungal diseases that can be prevented with regular maintenance. Ensure good air circulation around plants by thinning out nearby vegetation, and apply a fungicide in early spring as soon as new growth appears. Regularly inspect plants for signs of disease, treating promptly if you notice any issues.
To prevent these problems from arising in the first place, maintain healthy soil conditions by adding organic matter and ensuring adequate moisture levels. This will help your rose plants establish strong root systems and be more resilient to winter stressors.
Bringing Your Roses Back to Life in Spring
Now that winter is coming to an end, it’s time to give your overwintered roses a little TLC as they begin to stir back to life in spring. Let’s talk about how to coax them back into bloom.
Removing Protection Measures: Timing is Everything
Removing protection measures from your rose plants at the right time is crucial for their recovery and health. As winter’s grip begins to loosen, it’s essential to gradually transition your roses back to normal growing conditions. This process should start with gentle exposure to direct sunlight and warmer temperatures.
Begin by slowly removing any mulch or coverings that have been protecting your roses from harsh winds and freezing temperatures. Allow the soil to dry out slightly before resuming regular watering schedules. As you do this, keep an eye on your plants’ response to changes in temperature and light.
Monitor your rose bushes for signs of new growth, such as buds swelling or leaves unfolding. This will help you determine when it’s safe to remove any remaining protection measures, like frost blankets or cold frames. Be patient and flexible, as every plant recovers at its own pace. By gradually easing your roses into spring conditions, you’ll be giving them the best chance to thrive in the warmer months ahead.
Inspecting for Damage or Pests After Winter
As winter comes to an end, it’s time to inspect your rose plants for signs of damage or pests. This crucial step ensures that your overwintered roses emerge healthy and strong in the spring. Begin by gently examining each plant, looking for any visible signs of damage such as broken branches, torn leaves, or exposed roots.
Check for pests like aphids, whiteflies, and spider mites that might have taken refuge on your rose bushes during the cold winter months. Inspect the undersides of leaves and stems, as well as the soil around the base of each plant. If you notice any infestations, treat the affected areas promptly using organic or chemical pesticides.
Keep an eye out for signs of disease like black spot, powdery mildew, or rust, which can weaken your rose plants and make them more vulnerable to pests. Prune any damaged or diseased branches to prevent the spread of infection. Regular inspection after winter is essential in identifying potential issues before they become major problems, ensuring a healthy start for your roses in spring.
Encouraging New Growth and Blooming
As winter’s grip begins to loosen, it’s time to coax your roses back into vibrant bloom. Encouraging new growth and blooming is a delicate process, but with the right care, you can enjoy stunning displays of color all spring long.
To stimulate growth, start by pruning your rose bushes in late February or early March, removing any dead or damaged wood. This will help prevent disease from taking hold and promote healthy new growth. Next, feed your roses with a balanced fertilizer to provide essential nutrients for blooming. Consider using a rose-specific fertilizer, which typically contains higher levels of phosphorus to support fruiting.
After fertilizing, give your roses a good watering to settle the nutrients into the soil. Make sure not to overwater, as this can be detrimental to new growth. As temperatures rise and daylight hours lengthen, you should start to see signs of new buds forming. Be patient and keep an eye on your plants – with proper care, they’ll soon burst forth in a riot of color, rewarding all your hard work over the winter months.
When it comes to blooming, remember that roses typically require around 40 hours of chill time below 45°F (7°C) before producing flowers. So, if you’ve provided your plants with a warm and cozy spot during winter, you may need to move them outside once temperatures stabilize in spring.
Conclusion: Overwintering Roses with Confidence
Now that you’ve learned how to prepare your roses for winter, it’s time to wrap up with some final tips and insights on overwintering with confidence.
Recap of Key Points
As you wrap up this comprehensive guide to overwintering roses, let’s take a moment to recap the key points that’ll help you protect your plants through the cold winter months.
You’ve learned about the different overwintering techniques, including mulching, covering with burlap or frost blankets, and digging up and storing in a protected area. You now know how to choose the right protection measure for your rose variety, climate, and garden conditions.
Common problems like black spot, powdery mildew, and winter damage can be addressed by implementing regular maintenance tasks such as pruning, watering, and fertilizing. Don’t forget to keep an eye out for pests like aphids and whiteflies, which can weaken your roses over the winter.
Some of the most important takeaways from this guide include creating a layered protection system, monitoring weather forecasts, and being prepared to make adjustments on short notice. By following these tips, you’ll be well-equipped to handle whatever Mother Nature throws at you – even the harshest of winters.
Final Tips and Recommendations
As you’ve made it through this comprehensive guide on overwintering roses, it’s time to summarize the key takeaways and offer some final tips for a successful winter season. Remember, every rose is unique, so be prepared to adapt these strategies to fit your specific climate and plant needs.
To build resilience in your rose plants, consider mulching around their bases to retain moisture and regulate soil temperature. Prune them back in late fall or early spring, removing any dead or diseased wood. Also, inspect your plants regularly for signs of winter damage and address any issues promptly.
As you embark on this overwintering journey, keep an eye out for pests like aphids and spider mites, which can thrive during the colder months. Regularly monitor your soil’s pH levels to ensure it remains within the optimal range (5.5-6.5) for rose growth. By following these best practices and staying vigilant, you’ll be well-equipped to protect your rose plants from the harshest winter conditions.
Now that you’re armed with knowledge, we’d love to hear about your overwintering experiences! Share your tips, tricks, and triumphs in the comments below – let’s learn from each other and make this a winter season to remember.
Frequently Asked Questions
Can I Overwinter Roses in Containers?
Yes, you can overwinter roses in containers! Simply follow the same mulching and covering techniques as for in-ground plants, taking care to keep the soil level at the top of the container to prevent waterlogging. This method is ideal for rose enthusiasts who live in areas with limited garden space.
How Do I Know If My Roses Are Truly Dormant?
Roses are truly dormant when their canes appear dead or bare, and they show no signs of new growth. However, if you notice any green shoots or buds on the stems, it’s likely that your roses haven’t entered dormancy yet. Check for this before applying mulch or cover to prevent damage.
Can I Mulch Around the Base of My Roses Too Deep?
Yes, but be cautious not to smother the rose canes! A 2-3 inch layer of organic mulch around the base of your roses is generally sufficient. Any deeper and you risk suffocating the roots. Regularly check and refresh the mulch as needed to ensure it doesn’t become too compacted.
How Long Do I Need to Keep Mulch or Cover on My Roses?
Typically, mulch or cover should remain in place until late winter or early spring, when new growth starts to emerge. Monitor your rose garden closely for signs of bud swell and green shoots, then carefully remove any protection measures at this point.
What Happens If I Apply Protection Too Early or Late?
Applying protection too early can cause more harm than good – it’s essential to wait until your roses have actually entered dormancy. Conversely, if you apply protection too late, it may not be effective in protecting against frost damage. Timing is everything when it comes to overwintering roses!