As gardeners, we’re always on the lookout for ways to give our plants a boost. But have you ever stopped to think about the importance of nitrogen in your gardening endeavors? Nitrogen is the key nutrient that drives plant growth and development, making it essential for optimal yields and healthy plant development. Yet, many of us don’t fully understand how to effectively utilize nitrogen sources, or even test our soil to determine if we’re meeting our plants’ needs. In this article, we’ll delve into the world of nitrogen gardening, covering types of nitrogen sources, soil testing techniques, and methods for increasing availability to ensure your plants receive the nitrogen they crave. By the end of it, you’ll have a solid understanding of how to harness the power of nitrogen to take your garden to the next level!
Benefits and Importance of Nitrogen in Gardening
Nitrogen is a crucial element for your garden, and understanding its benefits can make all the difference in growing lush, healthy plants. In this section, we’ll explore why nitrogen is essential for gardening success.
What is Nitrogen?
Nitrogen is one of the essential macronutrients that plants need to grow and thrive. It’s an element that makes up a significant portion of amino acids, which are the building blocks of proteins. Without sufficient nitrogen, plants will struggle to produce healthy leaves, roots, stems, and flowers.
In plant growth, nitrogen plays several crucial roles. Firstly, it helps in the formation of chlorophyll, the green pigment that enables plants to undergo photosynthesis. This process is vital for converting sunlight into energy, which supports plant development. Secondly, nitrogen promotes root growth, allowing plants to absorb water and essential minerals from the soil more efficiently.
In nature, nitrogen is abundant in the atmosphere as a gas (N2). However, plants cannot directly utilize this form of nitrogen. Instead, they rely on microorganisms like bacteria and fungi that convert atmospheric nitrogen into a usable form through processes such as fixation. As gardeners, we can provide our plants with the necessary nitrogen by using organic fertilizers or soil conditioners rich in nitrogen, ensuring optimal growth and development.
Why is Nitrogen Essential for Plants?
Nitrogen plays a vital role in plant growth and development, making it an essential element for gardening. One of the primary reasons nitrogen is crucial for plants is its involvement in photosynthesis. During this process, plants use energy from sunlight to convert carbon dioxide and water into glucose and oxygen. Nitrogen-rich compounds like chlorophyll, which gives plants their green color, are produced through photosynthesis. Without sufficient nitrogen, plants may appear pale or yellowish due to a lack of these essential pigments.
Nitrogen is also necessary for protein synthesis in plants. Proteins make up the building blocks of plant cells and are responsible for various functions such as enzyme production, hormone regulation, and structural support. Adequate nitrogen levels ensure that plants can produce sufficient proteins to carry out these essential tasks. Moreover, nitrogen helps plants respond to environmental stresses like disease and pests by producing defense-related compounds.
To illustrate the importance of nitrogen in gardening, consider this: a study found that corn crops fertilized with nitrogen-rich soil produced significantly higher yields than those without nitrogen supplementation. This demonstrates how nitrogen’s role in photosynthesis and protein synthesis directly affects plant growth and productivity.
The Dangers of Nitrogen Deficiency
Nitrogen deficiency is one of the most common issues gardeners face, and it can have severe consequences on plant growth. When plants lack sufficient nitrogen, they may exhibit stunted growth, which can lead to reduced yields and lower fruiting or flowering capabilities. One of the first visible signs of nitrogen deficiency is yellowing leaves, particularly on younger leaves.
If left unaddressed, nitrogen deficiency can cause a range of problems for your garden. For example, the lack of nitrogen can reduce plant height by up to 50%, decrease root growth, and even lead to a decrease in photosynthesis. This can ultimately result in reduced yields or lower quality produce.
To prevent nitrogen deficiency, it’s essential to maintain good soil health through regular fertilization and monitoring of soil nutrient levels. You can also incorporate cover crops into your garden rotation to naturally replenish nitrogen levels.
Types of Nitrogen Sources
When it comes to nitrogen gardening, there are several types of nitrogen sources you can use to give your plants a boost. Let’s take a look at some popular options.
Organic Nitrogen Sources: Manure and Compost
When it comes to organic nitrogen sources, few options are as rich and diverse as manure and compost. These natural materials can provide a significant boost to your garden’s nitrogen levels without the need for synthetic fertilizers.
Manure from animals such as cows, horses, or chickens is an excellent source of nitrogen. As these animals digest their food, they absorb the nutrients, which are then stored in their waste. By applying this manure to your garden, you’re providing a concentrated dose of nitrogen that will support healthy plant growth. However, it’s essential to mix it with other compost materials and soil to avoid overloading the soil with excessive salts.
Compost is another outstanding organic nitrogen source. By combining “green” materials like food scraps, grass clippings, or leaves with “brown” materials such as straw or wood chips, you create a nutrient-rich humus that releases nitrogen slowly over time. This steady supply of nitrogen will promote healthy plant development and soil structure.
When using manure or compost, be sure to follow proper application rates to avoid burning your plants’ roots. A general rule of thumb is to mix 10% manure or compost into the top 6-8 inches of soil before planting.
Synthetic Fertilizers: Pros and Cons
When it comes to providing nitrogen to your plants, synthetic fertilizers are a common choice. These man-made products contain nitrogen-rich compounds that can quickly deliver nutrients to your soil and boost plant growth. On the plus side, synthetic fertilizers offer fast results, which is beneficial for crops that need a quick nutrient boost, such as corn and wheat.
However, using synthetic fertilizers consistently can lead to several negative consequences. For instance, they can pollute waterways and harm aquatic life when washed away by rain or irrigation. Moreover, excessive use of these fertilizers can damage soil health by altering its pH balance and disrupting the microbial ecosystem. This, in turn, can make your plants more susceptible to diseases and pests.
To mitigate these drawbacks, it’s essential to use synthetic fertilizers judiciously. Start with a small dose and gradually increase as needed, rather than overfertilizing. Also, consider combining synthetic fertilizers with organic matter like compost or manure tea for a balanced nutrient regimen.
Liquid Nitrogen Fertilizers
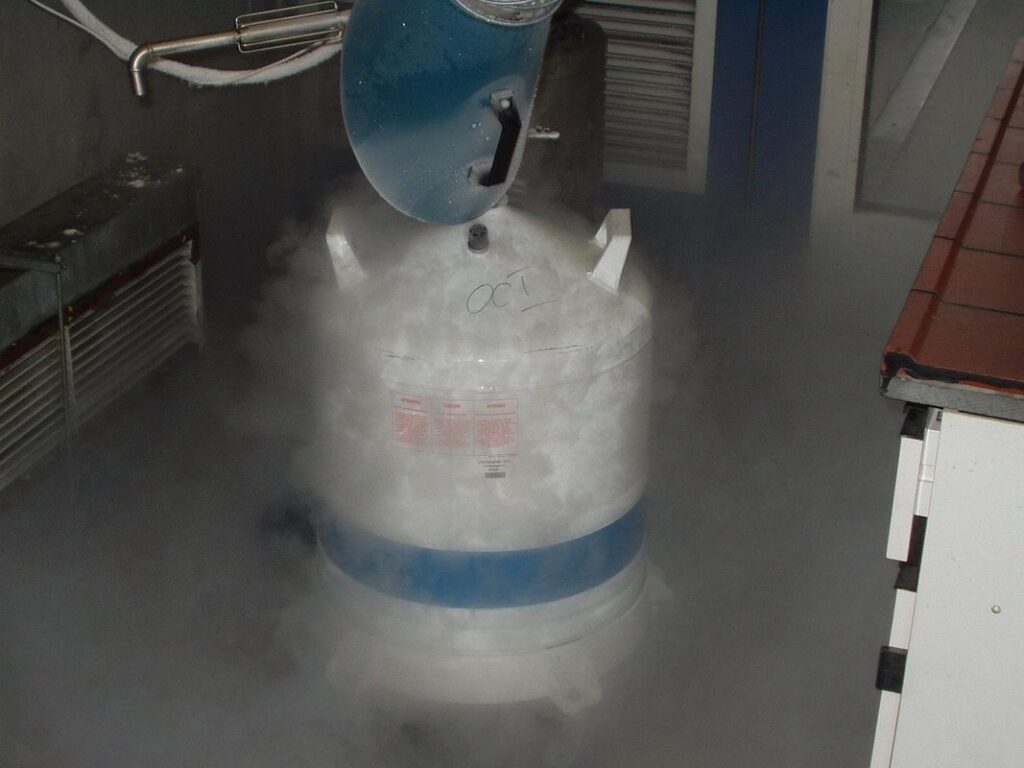
Liquid nitrogen fertilizers are a highly concentrated and effective way to deliver nitrogen to your plants. These fertilizers are typically made from ammonia or urea that has been dissolved in water and cooled to extremely low temperatures using liquid nitrogen. This process turns the solution into a clear, odorless liquid that can be easily applied to soil or foliage.
One of the main advantages of liquid nitrogen fertilizers is their high solubility rate, which allows them to penetrate deep into the soil quickly. This results in faster nutrient uptake by plants and improved crop yields. They are also often more energy-efficient than traditional dry fertilizers, as they require less water for application.
However, there are some potential downsides to consider. Liquid nitrogen fertilizers can be expensive, especially if you’re using them on a large scale. Additionally, improper handling or storage of these fertilizers can be hazardous due to the risk of explosion or fire. It’s essential to follow all safety precautions and use protective gear when working with liquid nitrogen fertilizers.
To get started with liquid nitrogen fertilizers, it’s recommended that you begin with small amounts to gauge your plants’ response. Start by applying a 10-15% solution to your soil, then adjust the concentration as needed based on plant growth and health. Always follow the manufacturer’s instructions for application rates and timing.
Soil Testing and Analysis
Now that we’ve covered the basics of nitrogen gardening, let’s dive into what’s really going on beneath your feet: soil testing and analysis. This is where science meets your garden.
Understanding Your Soil Type
Understanding your soil type is crucial to successful nitrogen gardening. It’s not just about throwing fertilizer on the ground and hoping for the best. Your soil type plays a significant role in determining nitrogen availability, which can make all the difference between lush growth and stunted plants.
Soil types fall into three main categories: sandy, clay, and loamy. Sandy soils drain quickly but often lack essential nutrients, while clay soils retain moisture but can become waterlogged and oxygen-deprived. Loamy soils strike a balance between these two extremes, with good drainage and nutrient-holding capacity.
To determine your soil type, grab a handful of soil from your garden bed and squeeze it gently. If it crumbles easily, you likely have sandy soil. If it forms a tight ball that’s difficult to break apart, you’ve got clay soil. And if it holds its shape but still breaks apart with some effort, congratulations – you’re working with loamy soil! Now that you know your soil type, adjust your fertilizer application accordingly.
How to Take a Soil Sample
Collecting a soil sample may seem daunting, but it’s essential to get accurate results from your soil test. Here’s a step-by-step guide on how to collect a representative soil sample:
First, choose a location that reflects the area you plan to fertilize. If you have multiple garden beds or sections with different soil types, take separate samples for each area. Remove any debris, rocks, and weeds from the sampling site.
Using a clean, 6-inch deep trowel or spade, collect about one pint of soil. Insert the tool at an angle to avoid compacting the soil. Start by digging in the center of your chosen area and work your way outward, creating a small hole about six inches wide and deep. Carefully scrape out the sides and bottom of the hole without disturbing the surrounding soil.
Transfer the collected soil to a clean plastic bag or container, making sure not to cross-contaminate samples. Label the sample with the date, location, and any other relevant information.
Interpreting Nitrogen Test Results
When you receive your nitrogen test results, it’s essential to understand what they mean and how to apply that information to your gardening decisions. The test will provide a report on the total nitrogen (TN) levels in your soil, as well as the ammonium (NH4-N) and nitrate (NO3-N) components.
The TN level is usually expressed as a percentage or parts per million (ppm). A higher TN value indicates that your soil has more available nitrogen. However, excessive nitrogen can lead to environmental problems like water pollution and harm beneficial microorganisms in the soil.
To interpret your results, compare them to the recommended ranges for your specific plant species. For example, if you’re growing tomatoes, which prefer a slightly acidic pH and high nitrogen levels, your TN value should ideally be between 50-70 ppm. However, if you have plants like lettuce or spinach that require lower nitrogen levels, your target range might be between 20-40 ppm.
A good starting point is to aim for the middle of the recommended range. From there, you can make adjustments based on your specific soil conditions and plant needs.
Methods for Increasing Nitrogen Availability
To get the most out of your nitrogen-fixing plants, you’ll want to consider a few key methods for increasing nitrogen availability in your garden. Let’s take a look at some simple yet effective techniques.
Crop Rotation Strategies
Rotating crops is one of the most effective ways to improve nitrogen availability in your soil. By changing up what you’re growing from year to year, you can break disease and pest cycles, reduce weed pressure, and replenish depleted nutrients. This simple technique allows different plants to benefit each other’s growth patterns.
For example, planting legumes like beans or peas will fix nitrogen into the soil through their roots. When these plants are incorporated back in as mulch or compost, that stored nitrogen becomes available for future crops. Corn and tomatoes, on the other hand, require a lot of nitrogen to grow. By following them with a nitrogen-fixing crop, you’re ensuring your soil stays healthy.
Some essential rotation strategies include:
* Growing legumes after heavy feeders like corn or tomatoes
* Incorporating cover crops during off-seasons to replenish nutrients
* Avoid planting the same crop in the same spot for consecutive years to prevent depleting the soil of specific nutrients
By implementing a rotation plan, you can improve your soil’s fertility and reduce synthetic fertilizer use. This is a straightforward yet effective way to boost nitrogen levels, making it easier to grow nutrient-rich produce with minimal extra effort.
Cover Cropping
Cover crops are an excellent way to boost nitrogen levels in your soil. By incorporating these crops into your rotation, you can harness their ability to fix atmospheric nitrogen, making it available for your plants to absorb. Legumes such as clover and beans are ideal cover crop choices due to their high nitrogen-fixing capabilities.
To implement a successful cover cropping strategy, consider the following steps:
* Choose a legume-based cover crop that suits your climate and soil type.
* Plant the cover crop in the off-season or between crops to allow it to grow undisturbed.
* Incorporate the cover crop into your rotation plan to ensure continuous soil improvement.
For example, planting winter rye as a cover crop can help replenish nitrogen-depleted soils. When it’s time to till the land for spring planting, incorporate the rye biomass into the soil. This process will release stored nitrogen, making it available for your crops’ growth.
Green Manure
Incorporating green manure into your garden is an effective way to boost nitrogen levels naturally. Green manure, also known as cover crops, are plants that are grown specifically for their ability to enrich the soil with nutrients. To use green manure, start by selecting a crop that is high in nitrogen such as clover or rye. Plant the seeds at the right time for your climate and allow them to grow until they reach full maturity.
Once the plants have reached their full height, typically around 6-8 weeks after planting, it’s time to incorporate them into the soil. You can either dig them in directly or use a mower to chop them down and leave them on top of the soil as a mulch. As they break down, they will release nitrogen-rich compounds that benefit your plants.
The benefits of using green manure are numerous – not only do you get a natural source of nitrogen, but also improved soil structure and increased biodiversity in your garden. Just remember to choose a green manure crop that suits your climate and growing season for optimal results.
Tips for Managing Nitrogen Levels
If you’re looking to optimize your garden’s nitrogen levels, mastering a few key strategies can make all the difference. Let’s dive into our top tips for balancing and managing these essential nutrients effectively.
Monitoring Soil pH and Nutrient Levels
Monitoring soil pH and nutrient levels is crucial to optimize nitrogen availability in your garden. When soil pH is too high or too low, it can limit the uptake of essential nutrients by plants, including nitrogen. For example, if your soil has a pH above 7, phosphorus becomes less available, which in turn affects nitrogen fixation by legumes.
To monitor soil pH and nutrient levels, you can collect a soil sample from your garden and send it to a lab for analysis. Alternatively, use a DIY kit or digital meter that measures pH and nutrient levels on-site. A basic test will provide information on the following key parameters:
• pH: This determines the availability of nutrients like nitrogen, phosphorus, and potassium.
• Nitrate-N (NO3-N): Measures the amount of nitrate available for plants to absorb.
• Phosphorus (P): Essential for root development and plant growth.
• Potassium (K): Helps with overall plant health and resistance to disease.
Once you have these results, adjust your fertilization strategy accordingly. If your soil is lacking in nutrients, incorporate organic amendments or apply targeted fertilizers to ensure optimal nitrogen availability. Regular monitoring of soil conditions will help you make informed decisions about nutrient management, ultimately leading to healthier plants and a more balanced ecosystem.
Adjusting Fertilizer Applications
When you receive your soil test results, it’s time to adjust fertilizer applications to ensure your plants are getting the right amount of nitrogen. The ideal approach is to match your fertilizer application rates with your plant’s specific needs and soil conditions.
First, analyze your soil test report to identify its nitrogen levels. This will help you determine if your soil is deficient in nitrogen or if it has too much. If your soil is low in nitrogen, you’ll need to apply more fertilizer to correct the imbalance. On the other hand, if your soil already has adequate nitrogen levels, reduce your fertilizer application rates.
To adjust fertilizer applications effectively, consider the following steps:
* Calculate the nitrogen requirements of each plant species based on their growth stages and developmental needs.
* Consider the nitrogen content in your fertilizers and adjust application rates accordingly.
* Factor in the weather conditions and time of year to ensure you’re not over-fertilizing during periods of high rainfall or warm temperatures.
* Monitor your plants’ responses to fertilizer applications and make adjustments as needed.
Remember, it’s always better to err on the side of caution when adjusting fertilizer applications. Under-applying nitrogen can be just as detrimental to plant growth as over-applying it.
Integrated Pest Management (IPM) Techniques
When it comes to managing nitrogen levels in your garden, Integrated Pest Management (IPM) techniques can play a vital role in promoting sustainable gardening practices and minimizing the need for synthetic fertilizers. By adopting an IPM approach, you’ll focus on creating a balanced ecosystem that encourages beneficial insects and microorganisms to thrive.
This not only reduces the reliance on chemical pesticides but also helps to maintain soil health and fertility. For instance, introducing beneficial nematodes or ladybugs can control pests like grubs and aphids without harming other organisms in your garden. Similarly, practicing crop rotation and companion planting can help break disease cycles and promote nutrient uptake.
To implement IPM techniques effectively:
* Monitor your garden regularly to identify potential issues before they escalate.
* Maintain a diverse range of plants that attract beneficial insects and microorganisms.
* Avoid overwatering, which can lead to pest infestations and nutrient deficiencies.
* Consider using natural deterrents like garlic or hot peppers to repel pests.
Frequently Asked Questions
How often should I retest my soil to ensure optimal nitrogen levels?
You should retake a soil sample every 2-3 years, or sooner if you notice changes in plant growth or nutrient deficiencies. This will help you adjust fertilizer applications and maintain a balanced nitrogen level.
What are some common mistakes to avoid when using synthetic fertilizers?
Avoid over-fertilizing, which can lead to nutrient imbalances and harm the environment. Also, be cautious of high-nitrogen, low-phosphorus formulas that can promote weak root growth. Choose slow-release or organic alternatives whenever possible.
Can I use compost tea as a nitrogen-rich fertilizer in my garden?
Yes! Compost tea is an excellent way to deliver beneficial microbes and available nutrients to your plants. However, be aware that its effectiveness may vary depending on factors like brewing time, temperature, and soil type.
How do I incorporate crop rotation strategies into my existing gardening routine?
Begin by dividing your garden into sections based on plant families (e.g., legumes, brassicas). Rotate these sections every 2-3 years to break disease cycles, reduce pests, and replenish nitrogen levels. Consider adding cover crops or green manure to further enrich the soil.
What are some key factors to consider when selecting a liquid nitrogen fertilizer?
When choosing a liquid fertilizer, look for products with balanced N-P-K ratios (e.g., 20-5-10). Also, check the label for added micronutrients and ensure it’s compatible with your irrigation system. Always follow the recommended application rates to avoid over-fertilization.