As the last wisps of summer fade away, the threat of frost looms over your garden. A single harsh night can leave you with damaged or even dead plants, making it difficult to enjoy the fruits of your labor. But there’s a simple solution: mulching before frost. This tried-and-true technique is a game-changer for protecting your plants from freezing temperatures and preventing soil damage. By applying a layer of organic mulch, such as straw or leaves, you can shield your garden from the worst effects of frost. In this article, we’ll explore the benefits and best practices of mulching before frost, including how to apply it effectively and what types of materials work best for long-term protection.
Understanding the Importance of Pre-Frost Mulching
As we delve into the benefits of pre-frost mulching, it’s essential to understand why protecting your garden soil before winter is crucial for a thriving landscape come spring. Proper mulching can make all the difference in your garden’s health.
Benefits of Mulching in Fall
As we approach the fall season, it’s essential to mulch before frost sets in. Mulching plays a crucial role in maintaining garden health during this period, and its benefits extend far beyond just aesthetic appeal. By applying a layer of organic mulch, you can regulate soil temperature, suppress weeds, and create an environment that promotes healthy plant growth.
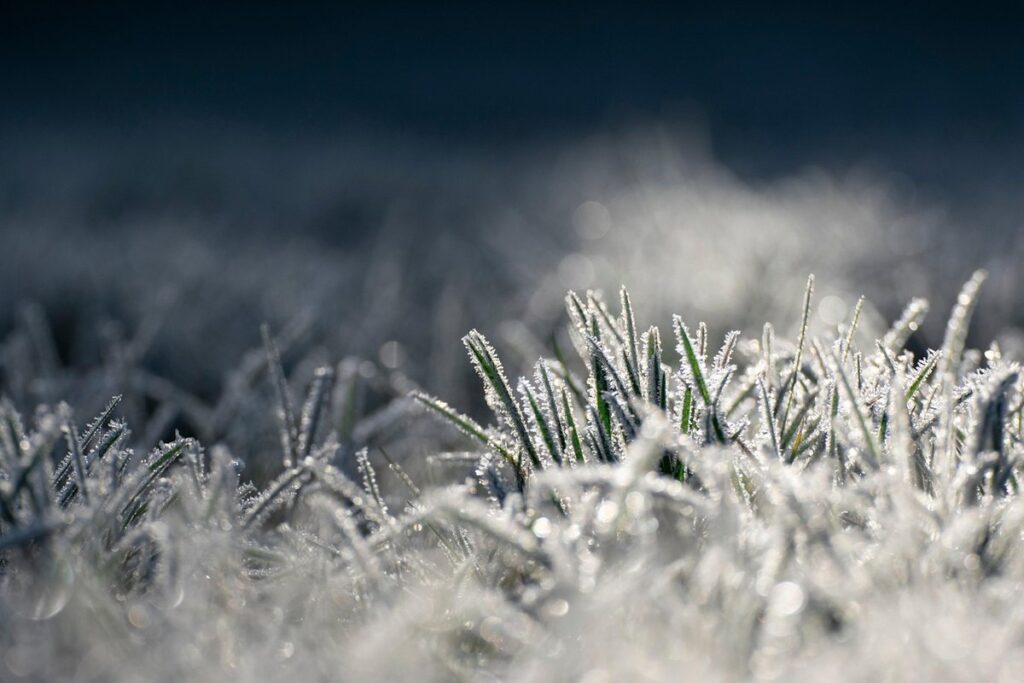
Soil temperature regulation is one of the most significant advantages of pre-frost mulching. Organic mulches like straw, bark chips, or leaves insulate the soil, keeping it cooler in the summer and warmer in the winter. This temperature moderation helps plants to grow more evenly and reduces the risk of root damage from extreme temperatures. For instance, if you’re growing tender perennials that are sensitive to frost, a layer of mulch can provide them with protection during the coldest months.
Regularly applying a 2-3 inch layer of organic mulch also suppresses weeds effectively. Weeds compete with your plants for water, nutrients, and light, which can lead to decreased growth and poor yields. Mulching prevents weed seeds from germinating by blocking out sunlight and preventing moisture from reaching them. By reducing the weed population in your garden, you’ll save time and resources that would have been spent on manual weeding or chemical control methods.
Choosing the Right Mulch Material
When it comes to choosing the right mulch material for pre-frost application, you have several options to consider. Organic materials are a popular choice, as they’re environmentally friendly and can help improve soil health over time. Leaves, straw, and wood chips are all great organic options that can provide adequate protection from frost damage. For example, a 2-3 inch layer of wood chips can keep soil temperatures around 10-15°F warmer than the air temperature, which is especially important for young or sensitive plants.
Inorganic mulch materials like plastic sheeting can also be effective in preventing frost damage, but they have their own set of drawbacks. For one, they don’t allow water to penetrate the soil, which can lead to root rot and other issues if not properly installed. Additionally, plastic sheeting doesn’t break down naturally over time, so it may need to be removed or replaced after a few years.
When selecting a mulch material for pre-frost application, consider factors like durability, maintenance requirements, and environmental impact. Be sure to apply your chosen mulch in a 2-3 inch layer, keeping it away from plant stems to prevent moisture accumulation and reduce the risk of disease.
Preparing Your Garden for Mulching
Before you start mulching, it’s essential to prepare your garden for optimal results, which includes clearing away debris and aerating the soil. This step ensures a smooth and effective mulching process.
Assessing Soil Conditions
Before applying mulch to your garden, it’s essential to assess the soil conditions to ensure you’re creating an optimal environment for your plants. Start by evaluating the pH level of your soil. Most vegetables and flowers prefer a slightly acidic to neutral soil pH between 6.0 and 7.0. You can use a DIY kit or send a sample to a lab for analysis.
Next, check the nutrient levels in your soil. Mulch can help retain moisture and suppress weeds, but it won’t improve poor soil quality. Test your soil for nitrogen, phosphorus, and potassium (NPK) using a soil testing kit. Based on the results, you may need to add organic amendments like compost or manure.
Moisture content is another crucial factor to consider. Mulch can help retain moisture in the soil, but if the soil is too wet, it can lead to root rot and other problems. Check your soil’s moisture level by inserting a finger into the soil up to the knuckle. If the soil feels dry, it’s time to water.
You should also look out for compacted or poorly draining soil, which can cause root growth issues and make mulch less effective. Aerate the soil if necessary, and consider adding organic matter like compost to improve its structure and drainage.
By understanding your soil conditions before applying mulch, you’ll be able to create a healthy environment that supports plant growth and minimizes potential problems.
Clearing Debris and Weeds
Clearing debris and weeds from your garden bed is an essential step before mulching. This task might seem daunting, but it’s a crucial part of preparing the area for optimal mulch effectiveness. To start, survey your garden bed to identify areas with overgrown weeds or scattered debris.
Begin by removing weeds using a combination of physical removal and herbicides (if necessary). Use tools like hoes or weeding forks to gently dig up weeds without damaging surrounding plants. If you’re dealing with persistent weeds, consider applying a non-selective herbicide in early fall for more effective control. Dispose of the removed weeds properly by bagging them or adding them to your compost pile.
Next, clear debris such as dead leaves, branches, and twigs from the garden bed. Use a rake or broom to gather loose material and dispose of it accordingly. Additionally, inspect the soil surface for any compacted areas that may hinder mulch distribution. Loosen these sections with a fork or spade to create an even, stable base for your mulch layer.
Clearing debris and weeds will ensure you have a clean slate for mulching before frost sets in, allowing your mulched garden bed to thrive throughout the cold winter months.
Applying Mulch Before Frost
Before you get started, let’s talk about when and how to apply mulch as winter approaches, which will protect your plants from frost damage. This is crucial for a successful mulching experience.
Techniques for Effective Application
When applying mulch before frost, the technique you choose can greatly impact its effectiveness. There are several methods to consider: layering, mounding, and sheet mulching.
Layering involves adding a new layer of mulch over existing material, typically 2-3 inches deep. This method is ideal for large areas where you need to cover existing plants or soil. To achieve optimal results, focus on maintaining a uniform depth and avoid piling mulch too high around plant stems.
Mounding creates raised beds of mulch around individual plants. This technique is suitable for garden beds with isolated plants or when you want to create defined spaces within a larger area. For mounding, use 3-4 inches of mulch per mound and maintain a 12-inch diameter.
Sheet mulching involves covering an entire area with a single sheet of organic material, often in combination with cardboard or landscape fabric. This method is best for large expanses where you want to suppress weeds and regulate soil temperature. To sheet mulch effectively, apply a minimum of 4-6 inches of material and ensure the surface is smooth and even.
Common Mistakes to Avoid
When applying mulch before frost, it’s essential to avoid common mistakes that can compromise its effectiveness and even damage your garden. One of the most critical errors is selecting the wrong type of material for your climate and plant needs. For example, using organic mulches like wood chips or bark in areas with high rainfall can lead to mold growth and waterlogged soil.
Incorrect application techniques are another pitfall to watch out for. Mulching too close to plants can cause rotting and damage roots, while applying it too thickly can suffocate them. Aim for a 2-3 inch layer, keeping it 6-8 inches away from plant stems.
Additionally, don’t overlook the importance of mulch quality. Buying low-quality or unprocessed mulches can harbor weed seeds and pests, which can spread to your garden. Opt for reputable suppliers that provide organic, clean, and processed materials.
Lastly, avoid applying mulch too early in the season, as this can create a conducive environment for disease and pest infestations. Instead, wait until frost is imminent to maximize benefits.
Managing Mulch During the Frost Period
Now that you’ve applied mulch, let’s discuss how to care for it during frosty periods when temperatures drop. We’ll cover the essentials of managing your mulch to keep your plants healthy and protected.
Protecting Plants from Extreme Temperatures
When you pre-mulch before frost, it doesn’t just protect the soil from erosion and retain moisture – it also shields your plants from extreme temperatures. This is especially crucial during winter months when freezing temperatures can be damaging to even the hardiest of plants.
As a mulched plant grows through the winter, its root system continues to develop beneath the protective layer. When a frost hits, the mulch acts as an insulating barrier, keeping the soil around 5-10°F warmer than the air temperature above it. This reduced temperature fluctuation helps prevent root damage and maintains soil moisture levels.
Monitoring plant health during this period is essential. Look for signs of stress such as yellowing leaves or a decline in growth rate. Check your mulch layer regularly to ensure it’s not too deep, which can cause moisture accumulation and lead to root rot. Keep an eye out for any winter pests like rodents that may try to burrow through the mulch to reach their next meal.
By combining pre-frost mulching with regular plant monitoring, you’ll be well-equipped to protect your garden from extreme temperatures during the frosty months.
Preparing for Spring Renewal
As we approach the end of the frost period, it’s essential to start thinking about reviving our garden beds for the upcoming spring season. One crucial step in this process is replenishing mulch that has been depleted during the winter months.
Before adding new mulch, make sure to inspect your garden bed for any dead or decaying plant matter. Remove any debris and aerate the soil using a fork or spade to improve drainage and prevent waterlogging. This simple step will help promote healthy root growth and prevent disease when you reintroduce new plants.
To replenish your mulch, choose materials that complement the existing organic matter in your bed. Consider mixing in compost, well-rotted manure, or leaf mold to add beneficial microbes and nutrients. Apply a 2-3 inch layer of fresh mulch, keeping it evenly spread and avoiding piling it against plant stems.
Proper mulching techniques will not only protect your soil from erosion but also retain moisture, suppress weeds, and regulate soil temperature – setting your garden up for a thriving spring renewal.
Mulching After Frost: Best Practices
Now that you’ve protected your garden from frost, it’s time to think about mulching after the fact – but when exactly is the best time?
Timing of Post-Frost Mulching
When it comes to mulching after frost has passed, timing is everything. You’ll want to wait until new growth begins to emerge from the soil, which can be a week to 10 days after the last frost date for your area.
Applying additional mulch at this stage is crucial to protect new shoots and tender leaves from extreme temperatures, moisture fluctuations, and potential pests. Consider re-mulching around newly emerged perennials, shrubs, and trees, as well as any areas where soil temperature might be inconsistent.
To ensure the new growth is protected, spread a 2-3 inch layer of organic mulch evenly over the soil surface, keeping it a few inches away from plant stems to prevent moisture accumulation. This will not only shield young growth but also help retain moisture and suppress weeds.
For example, if you applied a thick layer of straw mulch before frost, consider topping it off with 1-2 inches of fresh compost or well-rotted manure to enrich the soil and provide essential nutrients for new growth.
Introducing New Plants to Mulched Beds
When introducing new plants to an established mulched bed, it’s essential to consider their optimal spacing and soil preparation to ensure a harmonious coexistence. First, choose plants that complement each other in terms of growth habits, sunlight requirements, and moisture needs. For example, pairing tall perennials with low-growing groundcovers or shrubs can create a visually appealing layered effect.
Before adding new plants, assess the existing mulch depth and adjust it if necessary. A minimum of 2-3 inches of organic mulch helps retain soil moisture and suppress weeds. However, when introducing new plants, you may need to remove some mulch around the planting area to prevent suffocation or promote healthy root growth.
As a general rule, maintain a distance of at least 12-18 inches between newly planted species and established perennials to prevent overcrowding. This spacing allows for proper air circulation, sunlight penetration, and soil health maintenance. Consider incorporating organic amendments like compost or well-rotted manure to enrich the soil structure and fertility, promoting healthy plant growth.
Frequently Asked Questions
Can I mulch my garden too heavily, leading to waterlogged soil during the frost period?
Yes, over-mulching can lead to waterlogging issues, which is detrimental to plant health. To avoid this, apply a 2-3 inch layer of organic mulch, ensuring it’s evenly distributed and not compacted.
How long does it take for mulch to start protecting my plants from frost damage?
Mulch begins working within the first few days after application, but its effectiveness peaks during prolonged periods of cold temperatures. It’s essential to reapply mulch as needed throughout the winter months to maintain protection.
What if I miss the optimal pre-frost mulching window? Can I still apply mulch after frost sets in?
Yes, you can still apply mulch after frost, but its effectiveness will be reduced compared to applying it before the event. Post-frost mulching is particularly useful for protecting newly planted areas or addressing damage caused by early frosts.
Are there any specific types of plants that benefit more from pre-frost mulching than others?
Yes, tender perennials, young trees, and vulnerable shrubs require extra protection during frosty periods. Mulch these plants with a thicker layer (4-6 inches) to shield them from extreme temperatures and damage.
Can I mix different types of organic materials for a more effective mulch blend?
Yes, combining various organic materials like straw, leaves, and wood chips can create a robust and long-lasting mulch blend. Just ensure you balance their textures and moisture levels to avoid attracting pests or creating anaerobic conditions.