If you’re like many Monstera enthusiasts, you’ve likely encountered one of the biggest challenges in caring for these stunning plants: successfully propagating new ones. While some may shy away from attempting to propagate their beloved Monstera deliciosa cuttings, with the right guidance and techniques, it’s easier than you think! In this article, we’ll walk you through a step-by-step guide on how to propagate Monstera cuttings like a pro. From choosing healthy mother plants to achieving root development, we’ll cover all the essential tips and tricks for a successful propagation process. We’ll also address some common challenges and provide expert advice to help you overcome them. Whether you’re looking to multiply your Monstera collection or simply want to share your love of these unique plants with friends and family, this article has everything you need to get started.
Preparing for Success
Before you begin cutting and rooting, make sure you’ve got all the necessary tools and supplies on hand to ensure a smooth propagation process. This includes sharp knives, potting mix, and clean water for optimal results.
Choosing Healthy Mother Plants
When it comes to successfully propagating Monsteras from cuttings, selecting healthy mother plants is crucial. A robust and thriving mother plant ensures that you’ll be working with the best possible material for propagation. So, how do you choose a healthy Monstera deliciosa for this purpose?
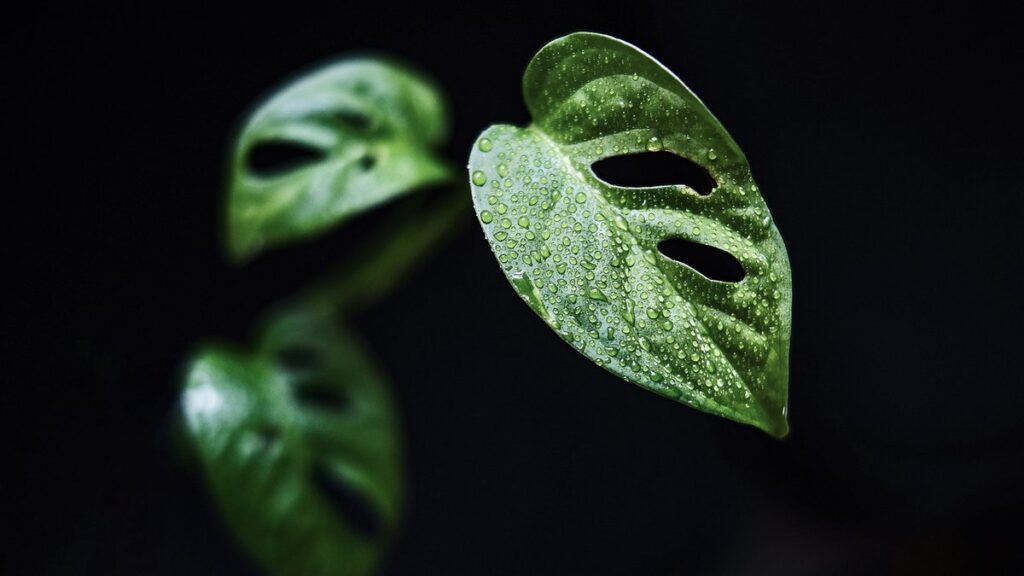
Firstly, look for a plant with sturdy stems that are at least 6-8 inches long. Avoid plants with thin or weak stems as they may not produce viable cuttings. Next, examine the leaves – they should be a deep green color and have no signs of yellowing or browning. Healthy leaves will also have a glossy appearance.
When selecting a mother plant, choose one that has plenty of nodes (the joints where new growth emerges). This will increase your chances of successfully rooting multiple cuttings at once. Avoid plants with damaged or diseased leaves, as these can transfer to the new cuttings and reduce their chances of survival. By choosing a robust and healthy mother plant, you’ll be well on your way to achieving success in Monstera propagation from cuttings.
Preparing Tools and Materials
To embark on successful Monstera propagation from cuttings, you’ll need to gather the right tools and materials. Start by preparing a clean workspace where you can handle the cuttings without contaminating them with dirt or oils from your skin.
Gather the following essential items: potting mix specifically designed for tropical plants like Monsteras, a rooting hormone powder or liquid, a watering can filled with room-temperature water, and pots or containers with good drainage holes. It’s crucial to use clean materials to avoid introducing bacteria or fungal spores that could harm your Monstera cuttings.
For propagation, you’ll also need a pair of sharp, sterile scissors or pruning shears for cutting the stems, as well as some form of plant labels to keep track of the different cuttings. Using a rooting hormone will increase the chances of successful propagation by stimulating root growth and promoting healthy development.
Remember, using high-quality potting mix and clean materials is key to establishing strong roots and healthy new plants.
Taking Cuttings from the Mother Plant
Now that you’ve prepared your mother plant, it’s time to take cuttings and start growing new Monstera plants. This process is relatively simple, but requires some care.
Stem Cuttings: The Best Method
Taking 2-3 inch stem cuttings with at least two nodes is widely considered the most effective method for Monstera propagation. This method allows you to capture a segment of the mother plant’s stem, which contains multiple nodes, each capable of producing a new root system.
When taking these cuttings, look for sections of the stem that are around 2-3 inches long and have at least two visible nodes. A node is where a leaf meets the stem, and it’s the ideal spot to encourage rooting. Make sure the cut is made just above a node, using a clean pair of pruning shears or scissors.
This method works particularly well for Monstera because it allows you to replicate the parent plant’s genetic material with high accuracy. As a result, new plants grown from stem cuttings will exhibit similar characteristics to the mother plant, including leaf shape and size.
Leaf Cuttings: A Less Common Approach
While stem cuttings are the most common method of Monstera propagation from cuttings, you can also use leaf cuttings as an alternative approach. However, it’s essential to note that this method has a lower success rate compared to stem cuttings. This is because leaves contain less stored energy and have fewer nodes for rooting.
To prepare and propagate Monstera leaves for cutting, select healthy leaves with a length of at least 4-6 inches. Gently remove the leaf from the mother plant, making sure not to damage any delicate tissue. Cut the base of the petiole (stem) using a sharp, sterile tool, just above a node. This will increase the chances of successful rooting.
For propagation, you can either use a rooting hormone or place the cut end directly into a pot filled with well-draining mix. Water thoroughly and maintain high humidity until roots develop. Keep in mind that leaf cutting propagation can be more time-consuming, requiring patience and potentially multiple attempts to achieve success.
Root Development and Care
To encourage healthy growth, it’s essential to provide your newly propagated monstera plant with proper root development and care techniques from the very start. We’ll walk you through these crucial steps next.
Creating a Favorable Environment
When creating cuttings for propagation, it’s essential to provide them with an optimal environment for root development. This means replicating the conditions found in the monstera’s natural habitat as closely as possible.
Temperature plays a significant role in this process, and most houseplants prefer temperatures between 65°F to 75°F (18°C to 24°C). However, some species of Monstera can thrive in warmer environments. Keep your propagation area within this temperature range for best results.
Maintaining high humidity is also crucial during the rooting phase. You can achieve this by placing the cutting on a tray filled with water and pebbles or using a humidifier nearby. A 50-60% relative humidity level is ideal, but you can adjust it based on your environment’s conditions.
In terms of light exposure, a low to medium light area is perfect for rooting monstera cuttings. Direct sunlight can cause the cutting to dry out too quickly, hindering the root development process. Keep the propagation area away from direct sunbeams and artificial lighting with a warm color temperature (around 2800-3000K).
Watering and Fertilization Techniques
When you’re propagating Monstera cuttings, it’s essential to establish a proper watering and fertilization routine. Newly propagated cuttings need consistent moisture to develop roots. Water them thoroughly once a week, allowing the top inch of soil to dry out between waterings. You can also use the “watering stick” method: insert a chopstick or pencil into the potting mix until you hit the bottom; if it’s dry, it’s time to water.
For fertilization, start with a balanced, water-soluble fertilizer (20-20-20) at half strength. You can also use a fertilizer specifically formulated for tropical plants like Monstera. Apply it once every two weeks during the growing season (spring and summer). Make sure not to over-fertilize, as this can cause more harm than good.
Monitor your cutting’s progress and adjust your fertilization schedule accordingly. If you notice any signs of nutrient deficiency (yellowing leaves, weak growth), increase the frequency or strength of your fertilizer application.
Transferring Cuttings to Soil
Now that you’ve successfully rooted your monstera cuttings, it’s time to transfer them into individual pots filled with a well-draining potting mix. This will help prevent overwatering and promote healthy growth.
Recognizing Root Development Signs
As you continue to care for your Monstera cutting, it’s essential to monitor its progress and look out for signs of root development. This is a critical step in the propagation process, as it indicates that your cutting has started to establish itself independently.
You can determine if your Monstera cutting has developed roots by checking for new growth and resistance when gently tugging on the stem. If you notice a few inches of new leaf growth or a visible increase in foliage density, this is often an indication that the roots have taken hold. You should also test the resistance of the stem by gently pulling on it; if the cutting resists being pulled away from the potting mix, this suggests that roots are anchoring it in place.
Pay close attention to your cutting over the next few weeks, and look for these signs as indicators of root development. This will let you know when it’s time to transfer your Monstera cutting into a larger pot with soil, where it can continue to thrive.
Planting in Soil: Timing and Technique
When transferring healthy cuttings into individual pots or containers filled with a well-draining potting mix, timing and technique are crucial for successful soil transition. The ideal time to transfer cuttings is when they have developed a robust root system, usually 2-4 weeks after taking the initial cutting.
To achieve this, water your cuttings thoroughly a day before transferring them into individual pots. This will help to settle the roots and prevent any potential shock during the transfer process. Once you’ve prepared the containers with a good quality potting mix, gently remove the cutting from its original container and carefully place it into the new soil, making sure not to disturb the roots.
Root disturbance is a common mistake that can lead to failure in soil transition. To minimize this risk, handle the cuttings by their base, rather than their delicate leaves. Place the cutting at the same depth as it was previously, firming the soil gently around it to secure its position.
Common Challenges and Solutions
As you start experimenting with monstera propagation from cuttings, you might encounter a few common obstacles that can be frustrating to overcome. Let’s explore some solutions together.
Overwatering and Root Rot Prevention
When propagating Monstera plants from cuttings, it’s essential to be mindful of overwatering and root rot prevention. Overwatering is a common challenge many plant enthusiasts face, especially when they’re new to propagation. Too much water can cause the roots to rot, leading to the death of your newly propagated Monstera.
To avoid this issue, ensure that the cutting’s soil is consistently moist but not waterlogged. Check the soil by sticking your finger into it up to the first knuckle; if the soil feels wet, wait a day or two before watering again. Also, make sure the pot has good drainage holes to prevent excess water from accumulating.
Monitor your plant closely for signs of root rot, such as yellowing leaves, droopy stems, and soft, mushy roots. If you notice any of these symptoms, adjust your watering schedule immediately. To further prevent root rot, use a well-draining potting mix specifically designed for tropical plants like Monstera.
By being attentive to your plant’s needs and making a few simple adjustments, you can minimize the risk of overwatering and ensure healthy growth for your newly propagated Monstera.
Pests and Diseases: Identification and Treatment
As you work on propagating your Monstera plant from cuttings, it’s essential to be aware of common pests and diseases that can affect these plants. Pests like mealybugs, spider mites, and scale insects feed on the sap of Monstera leaves, causing curled or distorted leaves, and a sticky substance on the surface of the plant.
To identify pests, inspect your plant regularly for any signs of infestation. For example, if you notice white, cottony patches on the stems or leaves, it’s likely an infestation of mealybugs. To treat pest infestations, isolate the affected area and spray with a mixture of soap and water. You can also use neem oil as a natural pesticide.
Diseases like root rot and leaf spot are common in Monstera plants. Root rot occurs when the roots are overwatered, causing them to rot. Symptoms include yellowing leaves and soft stems. To prevent root rot, ensure good air circulation around your plant and avoid overwatering. Leaf spot is caused by fungal infections that can be spread through touch or contaminated tools.
Regularly inspect your plant for any signs of disease, such as black spots on the leaves or a powdery white coating. Treat leaf spot with fungicides and remove affected areas to prevent further spread. By being aware of these common pests and diseases, you can take preventative measures and treat issues promptly, ensuring the health and success of your Monstera plant propagated from cuttings.
Tips for Successful Monstera Propagation
Now that you’ve successfully taken your cuttings, it’s time to focus on giving them the best chance at thriving. This section shares expert tips for successful monstera propagation.
Repetition and Patience are Key
When it comes to successful Monstera propagation from cuttings, repetition and patience are essential. It’s not a one-time task, but rather an ongoing process that requires consistent effort and dedication. Don’t be discouraged if you don’t see immediate results – it can take several attempts before you achieve success.
The key is to practice regularly, experimenting with different techniques and approaches until you find what works best for you. Try setting aside a specific time each week or month to work on your Monstera propagation projects. This will help you stay focused and ensure that you’re making steady progress.
To illustrate this point, consider a skilled gardener who has spent years perfecting the art of propagating Monstera cuttings. They’ve tried countless combinations of factors, from soil mix to humidity levels, until they arrived at their optimal method. The result is a thriving collection of new Monsteras that they’ve cultivated with patience and persistence. By emulating this approach, you can develop your own expertise in Monstera propagation and achieve the same level of success.
Experimenting with Different Techniques
As you gain more experience with Monstera propagation from cuttings, it’s essential to experiment with different techniques to refine your knowledge. Trying out various cutting methods, potting mixes, and environmental conditions can help you identify what works best for your specific climate and plant type.
For instance, you might want to experiment with different rooting hormone concentrations or application times to see if it affects the success rate of your cuttings. Some growers swear by using a high concentration of rooting hormone, while others prefer a more diluted solution. You can also try out various potting mixes to see which one provides better drainage and moisture retention.
Additionally, experimenting with different environmental conditions, such as temperature, humidity, or light exposure, can help you optimize the propagation process. For example, some growers have found that placing cuttings in a humid microclimate, such as a propagation tray or a plastic bag, can improve rooting success rates. By exploring these variables and adjusting your technique accordingly, you’ll become more confident in your ability to successfully propagate Monstera from cuttings.
Frequently Asked Questions
How soon can I expect to see root development after taking cuttings?
Yes, with proper care and conditions, you should start seeing signs of root development within 1-3 weeks after planting your Monstera cuttings in soil. Be patient, as this process can vary depending on the quality of the cutting, environmental factors, and individual plant responses.
What’s a good indication that my Monstera cuttings have successfully rooted?
A key sign of successful rooting is when you notice new leaves emerging from the node or crown area of the cutting. This indicates that roots are developing and the plant is beginning to establish itself in its new environment.
Can I propagate Monsteras using leaf cuttings, or should I stick with stem cuttings?
While it’s technically possible to propagate Monstera deliciosa using leaf cuttings, this method can be more challenging and less successful than using stem cuttings. Stem cuttings tend to produce better results due to the presence of a node, which promotes root development.
How often should I water my newly propagated Monsteras during the rooting stage?
Water your Monstera cuttings sparingly but consistently during the first few weeks after planting. Watering once a week is usually sufficient for most environments, as you want to prevent overwatering and promote healthy root growth.
What’s a common mistake that can lead to failure when propagating Monsteras from cuttings?
One of the most common mistakes when propagating Monstera deliciosa from cuttings is overwatering. This can cause root rot and kill the cutting, so it’s essential to maintain optimal moisture levels and ensure good air circulation around your plants during the rooting stage.