Are you ready to become a monarch-friendly gardener? If so, then it’s time to learn the ins and outs of milkweed plant care. This beautiful yet resilient plant is the sole host for monarch butterfly caterpillars, making it a crucial component in supporting these incredible pollinators. However, milkweed plants require specific care to thrive, which can be a challenge even for experienced gardeners.
In this article, we’ll take you through the process of choosing and planting milkweed, providing expert tips on how to care for them, and sharing the secrets to successfully propagating more plants. By the end of it, you’ll have all the knowledge you need to create a haven for monarchs and other pollinators in your own backyard. So let’s dive into the world of milkweed plant care and discover the best practices for supporting these magnificent creatures!
Choosing the Right Milkweed Species
When selecting milkweed for your garden, it’s essential to choose a species that thrives in your climate and suits your specific needs. This decision can greatly impact the health of your plants.
Understanding Native and Ornamental Varieties
When it comes to choosing the right milkweed species for your garden, understanding the difference between native and ornamental varieties is crucial. Native milkweeds are plants that have evolved over time in their specific region, developing unique characteristics that enable them to thrive in local conditions. These plants typically require minimal maintenance and care, as they’ve adapted to the local climate, soil, and pests.
On the other hand, ornamental milkweed species are often bred for their showy flowers or drought tolerance, making them a popular choice among gardeners. However, these plants may not be as effective at supporting monarch populations, as they can be less attractive to the butterflies’ caterpillars. To choose the right variety for your region and needs, consider factors such as hardiness zone, bloom time, and growth habit.
For example, if you live in a warm climate (hardiness zones 9-11), you may want to opt for native species like Asclepias curassavica or A. incarnata. In cooler climates (zones 3-5), choose from native options such as A. syriaca or A. tuberosa. Always check the specific growth habits and bloom times of each variety to ensure they’ll perform well in your garden conditions.
Selecting a Variety for Monarchs and Other Pollinators
When selecting milkweed for your garden, it’s essential to choose a variety that benefits monarch butterflies and other pollinators. Different species of milkweed attract different types of pollinators, so consider what visitors you want to attract to your garden.
For example, the Common Milkweed (Asclepias syriaca) is a favorite among monarchs, as it’s their primary food source in the caterpillar stage. However, it also attracts other pollinators like bees and wasps. On the other hand, Butterfly Milkweed (Asclepias tuberosa) attracts a wide range of pollinators, including hummingbirds and butterflies.
When selecting milkweed for your garden, consider the local ecosystem and what types of pollinators are present in the area. You can also research which species thrive in your region’s climate and soil type. For instance, if you live in an area with dry soil, choose a drought-tolerant milkweed variety like Swamp Milkweed (Asclepias incarnata).
Remember to plant multiple varieties of milkweed to create a pollinator-friendly garden that supports the local ecosystem. By doing so, you’ll be creating a haven for these vital creatures and contributing to their conservation.
Planting Milkweed: Tips and Best Practices
When it comes time to plant milkweed, you’ll want to consider a few key factors to ensure your monarch butterfly garden is thriving. This section covers the essential tips and best practices for successful planting.
Preparing the Soil and Climate
When it comes to planting milkweed, the soil and climate conditions are crucial for optimal growth. Milkweed prefers well-draining soil with a pH between 6.0 and 7.0, making it suitable for most garden beds. However, if your soil is heavy clay or sandy, you may need to amend it before planting.
In terms of sunlight, milkweed requires full sun to partial shade, depending on the climate. In warmer regions, it’s best to provide some afternoon shade to prevent scorching. When choosing a location, consider the amount of rainfall your area receives. Milkweed is drought-tolerant but will perform better with regular watering.
To prepare your garden bed or container for milkweed, start by loosening the soil to a depth of 12-18 inches. Remove any debris and mix in a balanced fertilizer according to the manufacturer’s instructions. If you’re using a container, make sure it has drainage holes to prevent waterlogged soil. Water your milkweed thoroughly after planting and keep the soil consistently moist during its first growing season. By providing the right conditions, you’ll be well on your way to supporting a healthy milkweed plant.
Transplanting and Direct Sowing Options
When it comes to planting milkweed, you have two main options: transplanting and direct sowing. Both methods can be effective, but they require different approaches.
Transplanting involves moving seedlings from a pot to the ground. This method is ideal for regions with a long growing season. Start by hardening off your seedlings 7-10 days before transplanting them outside. Begin by placing them in a shaded area outdoors for a few hours, gradually increasing their exposure to sunlight over the course of several days.
To minimize transplant shock, water your seedlings thoroughly the day before moving them. Dig a hole that’s just as deep and wide as the pot, and gently place the seedling in the ground, making sure not to disturb its roots. Water well after planting and keep the soil consistently moist during the first few weeks.
Direct sowing is another option for planting milkweed, especially in regions with mild winters or short growing seasons. In this case, sow seeds directly in the ground when temperatures are at least 60°F (15°C). Sow them about 1/4 inch deep and 6-8 inches apart to prevent overcrowding. Keep the soil consistently moist during the first few weeks after sowing.
Caring for Milkweed: Watering, Fertilizing, and Pruning
Proper care is essential to keeping your milkweed plants thriving – in this next part, we’ll walk you through how to water, fertilize, and prune them for optimal health.
Proper Watering Techniques
Watering milkweed correctly is crucial for its survival and healthy growth. Unlike other plants, milkweed doesn’t thrive in wet conditions and can be susceptible to root rot if the soil is consistently waterlogged.
To determine how often to water your milkweed, check the top inch of soil daily. If it feels dry, it’s time to water. However, if you’re unsure, wait a day or two before watering again.
Rainfall plays a significant role in supporting healthy growth. When rainfall occurs, reduce supplemental irrigation to avoid overwatering. Conversely, during periods of drought, increase the frequency of watering. Aim for about 1-2 inches of water per week, either through rain or irrigation.
Monitor your milkweed’s response to watering conditions by observing its leaves and stems. If they start to wilt or turn yellow, it may be a sign that the plant needs more water. Conversely, if new growth slows down or you notice brown tips on the leaves, cut back on watering.
Feeding Your Milkweed: Fertilization Methods
When it comes to fertilizing milkweed, you have several options, but not all are created equal. Some gardeners swear by synthetic fertilizers for a quick boost, while others opt for organic methods that promote long-term health.
The truth is, milkweed doesn’t require much fertilizer at all – in fact, over-fertilization can harm the plant and the environment. A balanced diet of composted manure or worm castings can provide the necessary nutrients without harming pollinators. If you choose to use synthetic fertilizers, make sure they are free of phosphorus and nitrogen to avoid damaging local ecosystems.
To create a balanced fertilizer regimen for your milkweed, start by testing your soil pH and nutrient levels. Based on these results, add small amounts of organic matter such as compost or well-rotted manure to promote healthy growth. For example, if your soil is lacking in potassium, you can apply a small amount of kelp meal or alfalfa meal to give it a boost.
Keep in mind that milkweed’s growth rate slows down significantly after its first year, so there’s no need to over-fertilize later on. By promoting healthy soil conditions and providing the necessary nutrients through organic means, you’ll be giving your milkweed the best chance to thrive without harming the environment.
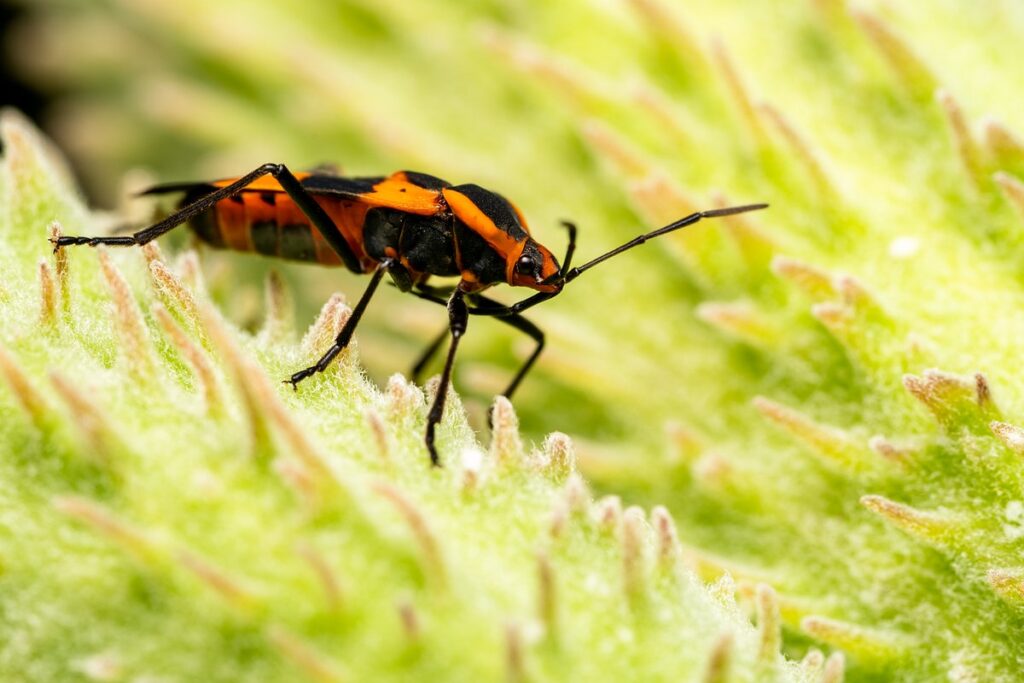
Common Pests and Diseases Affecting Milkweed
As you tend to your milkweed plant, be aware of common pests that can threaten its health, such as aphids and whiteflies. These tiny invaders can quickly multiply and spread disease throughout the plant.
Identifying Common Issues
Milkweed plants are susceptible to various pests and diseases that can weaken their overall health. Among the most common issues, aphids and spider mites are notorious for sucking sap from leaves, causing curled or distorted growth. These tiny insects often appear as small, moving dots on stems or under leaves.
To monitor for infestations, inspect your plants regularly, particularly during periods of high temperature and humidity. Look for sticky honeydew droplets, white powdery residue (a sign of aphid activity), or fine webbing (indicative of spider mites).
Powdery mildew is another common disease affecting milkweed, characterized by a grayish-white powder coating leaves and stems. This fungal infection thrives in warm, humid environments.
Root rot is often caused by overwatering, leading to soft, mushy roots and wilting plants. Check for waterlogged soil conditions and ensure proper drainage.
Regularly inspect your milkweed plants for these signs of infestation or disease, and take prompt action to prevent the problem from spreading.
Organic and Integrated Pest Management Techniques
When it comes to managing pests and diseases on your milkweed plant, it’s essential to consider organic and integrated pest management techniques that minimize harm to beneficial insects. These methods not only promote a healthier ecosystem but also reduce the risk of chemical residues contaminating soil and water.
One effective approach is using neem oil, which can be applied directly to affected areas or mixed with water for foliar sprays. Neem oil disrupts insect growth and development, preventing infestations from spreading. Insecticidal soap is another gentle yet effective option, often used in conjunction with neem oil.
Physical barriers can also be an excellent deterrent against pests like aphids and whiteflies. Covering plants with fine-mesh screens or row covers during peak pest seasons can prevent these insects from reaching your milkweed.
To adopt a truly integrated approach, consider combining chemical controls with cultural practices. For example, rotating crops to avoid monoculture, maintaining healthy soil through composting, and promoting beneficial insect populations through plant selection can all contribute to a balanced ecosystem that’s less susceptible to pests and diseases.
Propagating Milkweed: Seeds, Cuttings, and Division
To successfully propagate milkweed, you’ll want to learn about seed starting, taking cuttings, and dividing established plants to ensure a healthy supply of these vital pollinators. This section will guide you through each method.
Starting from Seed
Starting milkweed seeds indoors or directly in the garden requires some planning and attention to detail. To ensure proper stratification, most milkweed species require a period of cold temperatures to break dormancy. This can be achieved by refrigerating seeds for 30-60 days before sowing, or by direct sowing in late winter to early spring when the soil is still cool.
When it’s time to sow, use a high-quality seed starting mix that provides good drainage and moisture retention. Avoid using regular potting soil, as it can be too dense for seeds to germinate easily. Fill small pots or cells with the seed starting mix, and plant the seeds about 1/4 inch deep. Cover the seeds with a thin layer of the mix, and gently water.
Some milkweed species, like Butterfly Milkweed (Asclepias tuberosa), can be direct-sown in late winter to early spring, while others, such as Common Milkweed (Asclepias syriaca), may benefit from cold stratification before sowing. Experiment with different methods and record the results to find what works best for your specific climate and milkweed species.
Taking Cuttings and Divisions
Propagating milkweed through stem cuttings is an excellent way to share this valuable plant with friends and family. To take a successful cutting, wait until the stems are around 6-8 inches long and have developed at least two nodes. Cut just above a node using a pair of sharp, clean pruning shears or scissors. Remove lower leaves, leaving only a few sets of leaves at the top to prevent moisture loss.
For optimal growth, prepare the cuttings by dipping the cut end into rooting hormone powder or liquid. This will stimulate root development and increase the chances of successful propagation. Plant the cutting in well-draining soil, making sure the node is buried beneath the surface. Water thoroughly and provide a warm location with indirect light until roots develop.
Division is another effective method for propagating milkweed. Wait until spring or early summer when new growth begins to emerge. Gently dig around the plant, taking care not to damage the roots. Lift the entire clump out of the ground and separate the sections using a sharp knife or pruning shears. Replant each section in a new location with well-draining soil and keep the soil consistently moist until established.
Harvesting Milkweed: Tips for a Sustainable Yield
To harvest milkweed sustainably, you’ll want to learn how to cut back your plants at the right time and in the right way. We’ll share our expert tips on doing just that.
Timing and Techniques
When it comes to harvesting milkweed, timing is everything. The best time for harvest depends on what you’re using the plant for and which species of milkweed you have. For example, if you’re looking to use the flowers or foliage for cooking or crafts, summer is usually the best time. This is when the plants are in full bloom and producing the most nectar-rich flowers.
For seed harvesting, wait until the pods turn a light brown color and start to split open. This is usually late summer to early fall, depending on your climate. Be sure to harvest seeds before they disperse naturally, as this can be a challenge when working with milkweed. When harvesting seeds, use scissors or pruning shears to cut off the seed pod near the base of the plant. This will prevent damage to the stem and ensure the plant continues to grow.
To maintain a sustainable yield, avoid over-harvesting, which can stress the plant and reduce its reproductive cycle. Harvest only what you need, and consider dividing or transplanting your milkweed plants every few years to promote healthy growth and encourage new seed production.
Using Milkweed in Your Garden: Culinary, Medicinal, and Ornamental Uses
Milkweed is often associated with its vital role in supporting pollinators, but this versatile plant offers numerous other benefits for gardeners. Beyond attracting beneficial insects and providing a food source for monarch caterpillars, milkweed can be used as a medicinal herb, culinary ingredient, or ornamental plant.
For instance, the leaves of milkweed have been traditionally used to treat wounds and reduce inflammation due to their antibacterial properties. You can make a tea by infusing dried milkweed leaves in hot water to create a soothing remedy for minor skin irritations. When it comes to cooking with milkweed, its delicate flavor is often compared to asparagus or green beans. Simply harvest young shoots and sauté them like you would spinach.
If you’re looking to incorporate milkweed into your garden design, consider planting multiple varieties to attract a variety of pollinators. You can also use the plant’s vibrant flowers in bouquets or arrangements for an added pop of color. By embracing the multifaceted uses of milkweed, you can reap its many benefits while maintaining a thriving and diverse garden ecosystem.
Frequently Asked Questions
Can I grow milkweed indoors, or is it strictly an outdoor plant?
Yes, you can grow milkweed indoors, but it requires specific conditions to thrive. Choose a species that tolerates indoor temperatures and provide bright light. Use a well-draining potting mix and maintain proper watering techniques.
How do I protect my milkweed plants from pests like aphids, whiteflies, and spider mites?
To control these pests, inspect your plants regularly for signs of infestation. Use neem oil or insecticidal soap to treat affected areas, and apply a sticky barrier around the plant to capture flying insects.
What are some common mistakes beginners make when planting milkweed, and how can I avoid them?
Common mistakes include insufficient soil preparation and inadequate watering. To avoid these errors, research your specific climate’s requirements for milkweed growth. Prepare the soil with compost or well-rotted manure before transplanting or direct sowing.
Can I harvest milkweed seeds from my own plants to propagate more, or do I need to purchase them?
You can indeed harvest milkweed seeds from your mature plants. Allow seed pods to dry completely on the plant, then remove and store them in a cool, dry place for future use. However, be aware that some milkweed varieties may not produce viable seeds.
How often should I fertilize my milkweed plants during their growing season?
Fertilization is crucial for milkweed growth. Feed your plants with a balanced fertilizer (10-10-10 NPK) once a month during the growing season. However, avoid over-fertilizing, as this can harm the plant and affect its monarch-supporting abilities.