Wicking hydroponics has been gaining popularity in recent years, and for good reason. This innovative method of growing plants allows for maximum water efficiency and minimal waste, making it an attractive option for environmentally conscious gardeners. But what exactly is wicking hydroponics, and how can you get started? As a beginner, navigating the world of hydroponics can be overwhelming – but don’t worry, we’ve got you covered.
In this comprehensive guide, we’ll take you through the benefits and basics of wicking hydroponics, from the advantages of this method over traditional soil-based gardening to advanced techniques for maximizing yields. We’ll also provide expert insights on setting up a successful system, including choosing the right components and troubleshooting common issues. Whether you’re looking to start small or scale up your operation, our beginner’s handbook has got everything you need to get growing with wicking hydroponics.
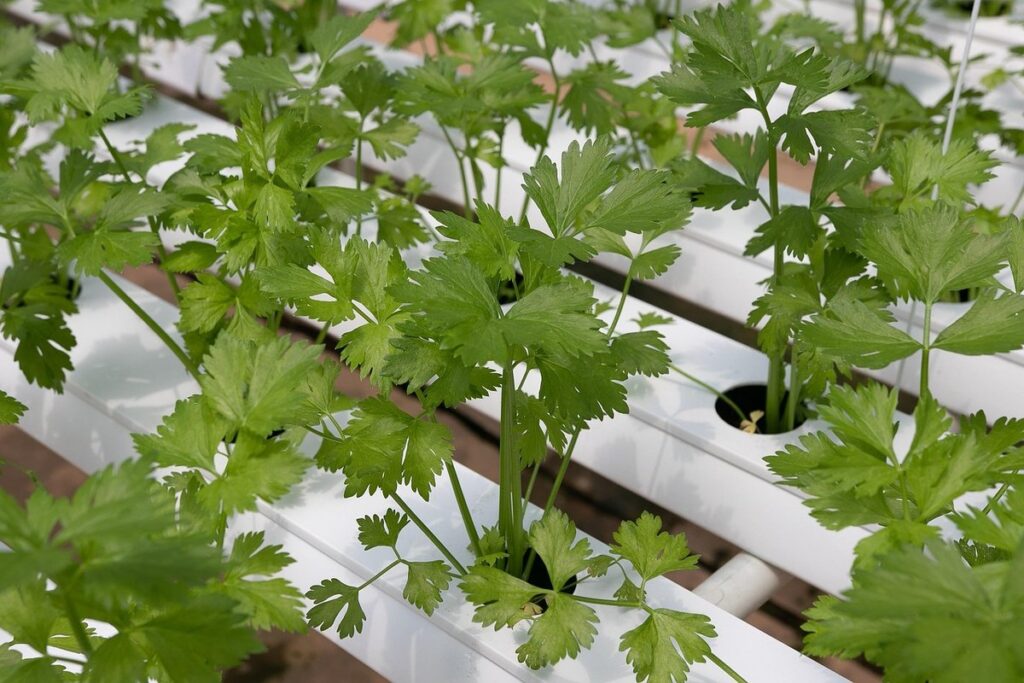
What is Wicking Hydroponics?
Wicking hydroponics is a fascinating and innovative method of growing plants, where water is drawn upwards through a wick to provide nutrients exactly when your crops need them most. Let’s dive into the details!
Understanding the Basics of Wicking Systems
Wicking hydroponics has been around for centuries, with ancient cultures like the Incas and Chinese using wick irrigation systems to cultivate crops. However, modern wicking hydroponics as we know it today originated in the 1970s from Robert Nunnally’s patented system. It’s a unique approach that differs significantly from other hydroponic methods.
At its core, wicking hydroponics relies on a capillary action process where plants absorb nutrients and water through a network of tubes or wicks. This method is designed to mimic the natural way plants absorb moisture from the soil. Unlike NFT (Nutrient Film Technique) or Ebb and Flow systems that use pumps and timers, wicking hydroponics is a more straightforward and low-maintenance approach.
The fundamental principles of wicking systems revolve around creating an optimal balance between water absorption and nutrient delivery. This requires careful consideration of factors like the material used for the wick, the depth of the grow medium, and the frequency of watering. By understanding these basics, you can create a thriving wicking hydroponic system that promotes healthy plant growth.
Advantages and Disadvantages of Wicking Hydroponics
Wicking hydroponics offers several advantages that make it an attractive option for growers. For instance, this method allows for low water usage, which is a significant benefit, especially in areas where water is scarce. According to a study published by the University of California, wicking systems can conserve up to 90% of water compared to traditional hydroponic methods. This not only reduces the environmental impact but also saves growers money on their water bills.
Another advantage of wicking hydroponics is reduced nutrient burn. In this system, nutrients are absorbed as needed by the plants, minimizing the risk of over-fertilization and subsequent damage to roots and leaves.
However, there are some drawbacks to consider. For example, wicking systems can be prone to clogging if not properly maintained. This can lead to uneven water distribution, resulting in poor plant growth. Additionally, wicking hydroponics may have limited scalability compared to other methods, making it less suitable for large-scale commercial operations. Despite these limitations, many growers swear by the benefits of wicking hydroponics and find it to be a reliable and effective method for growing healthy plants.
Choosing the Right Components for Your Wicking System
When it comes to setting up a wicking hydroponic system, choosing the right components is crucial. In this next part of our guide, we’ll walk you through selecting the perfect fit for your needs.
Selecting the Perfect Reservoir
When it comes to selecting the perfect reservoir for your wicking hydroponic system, there are several factors to consider. The size of the reservoir is crucial, as it needs to be large enough to hold enough water for your plants’ needs without being too cumbersome or taking up valuable space in your grow area.
A popular choice for wicking systems is a plastic container, such as a food-grade bucket or tote. These are often inexpensive and can be easily cleaned and sanitized between crops. IBC (Intermediate Bulk Container) totes are another option, offering more space and durability than smaller containers. However, they may require additional support to prevent collapse.
When choosing a reservoir, also consider the material it’s made of. For example, food-grade plastic is a safe choice for growing plants, but avoid using containers with any signs of wear or damage that could leach chemicals into your water.
For specific plant needs, think about the mature size and root depth of your plants. Larger plants like tomatoes may require a larger reservoir to accommodate their extensive root systems.
Pump Selection and Placement
When it comes to choosing a pump for your wicking system, there are several factors to consider. First and foremost is flow rate: you’ll want a pump that can supply enough water to your plants without wasting resources. Submersible pumps are often a good choice for indoor setups, as they’re compact and easy to install. However, be aware that their efficiency can decrease over time due to sediment buildup.
For outdoor setups or larger systems, external pumps may be more suitable. These tend to have higher flow rates and are less prone to clogging. However, keep in mind that they require a dedicated space for installation and can be noisier than submersible options.
When selecting a pump, also consider its power consumption and ease of maintenance. Look for models with adjustable flow rates and built-in shut-off switches to prevent overwatering. In terms of specific numbers, aim for a minimum flow rate of 1-2 gallons per minute (GPM) for small systems, increasing as needed depending on the size of your setup.
Regularly cleaning or replacing your pump can help ensure optimal performance. Some pumps come with self-cleaning features or interchangeable filters to make maintenance easier.
Setting Up Your Wicking System
To get started with wicking hydroponics, you’ll need to set up a reliable watering system that delivers the right amount of nutrient-rich solution to your plants’ roots at all times. In this section, we’ll walk you through every step.
Designing the Wicking Bed
When designing a functional wicking bed, it’s essential to consider three key factors: depth, width, and material selection. The ideal depth for a wicking bed is between 6-12 inches, allowing for sufficient root growth while minimizing water evaporation.
A wider bed can accommodate more plants, but be mindful of the surface area-to-depth ratio. A general rule of thumb is to keep the bed’s width to no more than 3-4 times its depth. This balance ensures even water distribution and prevents over-saturation.
When it comes to materials, you’ll want to choose a bed liner that’s durable, resistant to moisture, and easy to clean. Some popular options include polypropylene, PVC, or recycled plastic sheets. Avoid using wood or metal as they can leach chemicals into the system or harbor bacteria.
To ensure adequate drainage and prevent clogging, incorporate a layer of perlite or vermiculite at the bottom of the bed. This will help filter out excess water and prevent nutrient buildup.
Assembling and Testing the System
Assembling and testing your wicking system is a crucial step that requires attention to detail. Start by connecting the tubes and drippers according to the manufacturer’s instructions. Make sure all connections are secure and not kinked, as this can affect the flow of nutrients.
Next, set up your nutrient delivery system. This typically involves filling a reservoir with water and nutrients, which is then pumped into the wicking system. Use a timer to control the frequency of nutrient delivery, ensuring that plants receive a consistent supply throughout the day.
When testing the system, start by checking for leaks or blockages in the tubing. Run a small amount of water through the tubes to identify any issues before introducing nutrients. Also, check the drippers and emitter lines to ensure they’re not clogged. With these checks complete, your wicking system is ready to be used.
Common issues with wicking systems include nutrient overabundance, which can lead to root burn. To avoid this, use a timer to regulate nutrient delivery, and keep an eye on the pH levels of your water. Regularly check the system for blockages and clean or replace parts as needed.
Caring for Your Wicking Hydroponics Plants
Now that your plants are thriving, it’s essential to learn how to care for them properly to ensure they continue to grow and flourish in their wicking hydroponic system. This section will walk you through the key maintenance tasks.
Monitoring pH and Nutrient Levels
Monitoring pH and nutrient levels is crucial to ensure the health and well-being of your wicking hydroponics plants. Failure to regularly check these levels can lead to reduced yields, weakened plant growth, and even plant death.
pH levels should be checked at least once a week, using a pH meter or pH test kit. Most wicking hydroponic systems prefer a slightly acidic to neutral pH range of 6.0-7.0. If your system’s pH is too high (above 8.5) or too low (below 4.5), it can cause nutrient deficiencies, impaired plant growth, and even damage the equipment.
Maintaining optimal nutrient levels involves monitoring the N-P-K (nitrogen-phosphorus-potassium) balance in your system. Over-fertilization can lead to an overabundance of nutrients, causing a toxic buildup that can harm plants. Conversely, under-fertilizing can cause stunted growth and reduced yields. Regularly check your nutrient levels by testing the solution with a kit or through lab analysis.
To avoid these issues, consider implementing a pH buffer system or using a self-regulating nutrient mix specifically designed for wicking hydroponics. These solutions can help maintain optimal pH and nutrient levels without the need for frequent adjustments.
Managing Water Flow and Salinity
Managing water flow rates is crucial in wicking hydroponics to prevent overwatering and underwatering issues. Overwatering can lead to root rot, while underwatering can cause nutrient deficiencies. To control the water flow rate, you’ll need to adjust the height of the water reservoir or the wick’s position.
A general rule of thumb is to maintain a 1-2 inch (2.5-5 cm) water level above the roots. However, this may vary depending on your plant species and climate. For example, plants like tomatoes require more water than lettuce. Check your plant’s soil moisture by inserting your finger into the growing medium up to the knuckle.
To prevent salinity issues, use a 1-2% nutrient solution strength (N-P-K) and change it every 7-10 days. Monitor your EC levels regularly using an EC meter to detect any changes. If you notice high salinity levels, flush the system with distilled water or reduce the nutrient concentration.
Regularly inspect your wick for kinking or blockages, which can cause inconsistent water flow. Replace the wick every 2-3 months or when it shows signs of wear.
Troubleshooting Common Issues in Wicking Hydroponics
Even seasoned hydroponic enthusiasts encounter problems with wicking systems, so let’s tackle common issues that might be stumping you right now.
Dealing with Clogging and Blockages
Clogging and blockages are common issues that can arise in wicking hydroponic systems. These problems often occur when debris, sediment, or other contaminants accumulate in the wick, reducing its ability to draw nutrient-rich solution from the reservoir to the roots of the plants.
To identify clogging issues, inspect your system regularly for signs of blockage, such as reduced plant growth, discolored leaves, or water pooling around the roots. Check the wick and pipe connections for any visible debris or kinks that may be obstructing flow.
When troubleshooting clogs, start by cleaning the wick with a small brush to remove any visible blockages. If this doesn’t resolve the issue, try soaking the affected area in warm water to loosen stubborn deposits. As a preventative measure, install a 1/4 inch mesh screen at the intake of your reservoir to catch debris before it enters the system.
Monitor your system’s flow rates regularly by measuring the time it takes for solution to travel from the reservoir to the roots. Proper maintenance and attention can prevent clogging issues, ensuring optimal growth and minimizing downtime in your wicking hydroponic system.
Resolving pH Imbalance and Nutrient Burn
pH imbalance and nutrient burn are common issues that can arise in wicking hydroponics systems. To diagnose these problems, monitor your plants’ growth and look for signs of stress, such as yellowing leaves, stunted growth, or a decrease in yield. A pH imbalance occurs when the nutrient solution’s acidity deviates from the optimal range, usually between 5.5 and 6.5.
To correct pH imbalance, test your nutrient solution regularly using pH test kits or meters. If it’s too acidic, add a small amount of pH adjuster (lime) to raise the pH gradually. Conversely, if it’s too alkaline, use an acidic substance like vinegar. However, avoid extreme corrections, as sudden changes can shock your plants.
To prevent nutrient burn and pH imbalance, maintain regular water changes, check your nutrient levels regularly, and monitor temperature fluctuations in your grow room. Keep your system well-oxygenated by ensuring adequate air circulation and preventing waterlogging.
Advanced Techniques and Future Developments
As you become more comfortable with wicking hydroponics, it’s time to explore some advanced techniques that can help take your grow to the next level. We’ll delve into innovative methods and emerging trends in this field.
Implementing Automated Systems
Implementing automated systems is a game-changer for wicking hydroponics enthusiasts. Not only does it save time and effort, but it also ensures that your plants receive the perfect amount of water and nutrients at all times. Let’s dive into the world of automation and explore how you can implement sensors, timers, and smart irrigation controllers to take your wicking hydroponic system to the next level.
When it comes to monitoring your system, temperature and humidity sensors are a must-have. These tiny devices can be placed near the roots or in the growing chamber to monitor temperature fluctuations and maintain an optimal range between 65-75°F (18-24°C). This is particularly important for wicking hydroponics as plants prefer consistent temperatures.
To automate water distribution, you’ll need a smart irrigation controller that can detect soil moisture levels and adjust watering schedules accordingly. These devices often come with built-in timers and sensors to prevent overwatering or underwatering. For example, the WaterChef controller allows you to set customized watering cycles for different plant varieties.
Some potential challenges to consider when integrating automation include compatibility issues between devices, limited battery life, and the initial investment cost. However, these drawbacks are far outweighed by the benefits of precise control and optimized growing conditions. By embracing automation, you’ll be able to enjoy higher yields, reduced waste, and a more enjoyable gardening experience.
Research and Innovations in Wicking Hydroponics
Recent studies have been exploring ways to optimize water management in wicking hydroponics systems. One notable area of research is the use of submersible pumps to improve the efficiency and uniformity of nutrient delivery. These pumps can be programmed to adjust flow rates according to plant needs, reducing waste and enhancing overall system performance.
Innovations in materials science have also led to the development of new reservoir designs, such as ceramic or glass containers that allow for precise control over water chemistry and reduce the risk of contamination. Additionally, researchers are investigating the use of advanced monitoring systems, including sensors and data loggers, to provide real-time feedback on plant health and system performance.
As a wicking hydroponics enthusiast, it’s essential to stay up-to-date with these developments and consider integrating them into your own setup. By doing so, you can improve yields, reduce water consumption, and create a more sustainable growing environment. For example, you could invest in a submersible pump or opt for a reservoir made from ceramic materials to upgrade your system’s performance.
Conclusion
As you’ve reached the end of this beginner’s handbook on wicking hydroponics, it’s time to summarize the key takeaways and offer some final advice. Remember that patience and experimentation are essential in mastering wicking hydroponics. Don’t be discouraged if your first attempts don’t yield the desired results – keep tweaking and adjusting your setup until you achieve optimal growth.
By now, you should have a solid understanding of how wicking hydroponics works, including the importance of maintaining proper pH levels and monitoring nutrient intake. With practice and experience, you’ll become more comfortable fine-tuning your system to meet the unique needs of different plants. Whether you’re growing for personal consumption or experimenting with new varieties, the skills and knowledge gained from this guide will serve as a foundation for continued growth and improvement in your hydroponic endeavors.
Frequently Asked Questions
Can I use wicking hydroponics with any type of plant, or are there some plants that don’t thrive well in this system?
While many plants can be grown using wicking hydroponics, it’s essential to choose varieties that are adapted to a consistent water supply and precise nutrient delivery. Leafy greens, herbs, and flowering plants tend to do exceptionally well in wicking systems. However, plants with deeper root systems or those requiring more complex nutrient profiles might not fare as well.
What if I don’t have space for a dedicated reservoir? Can I still use a wicking system?
Yes, it’s possible to set up a wicking system without a separate reservoir. You can use a self-contained reservoir, such as a watering can or a small bucket, integrated into your wicking bed design. This approach is ideal for smaller spaces and can be just as effective.
How often should I check the pH levels in my wicking hydroponics system?
Regular monitoring of pH levels is crucial to maintain optimal growing conditions. Check the pH at least once a week, ideally when you’re watering or adding nutrients. If you notice any significant changes or signs of nutrient deficiencies, adjust your schedule accordingly.
Can I use a DIY approach to build my wicking hydroponics system, or should I invest in commercial components?
While building a wicking system from scratch can be cost-effective and rewarding, it’s essential to choose the right materials and ensure proper design. Commercial components often come with quality assurances and easier assembly. If you’re new to wicking hydroponics, using established products might simplify the process.
How do I prevent clogging in my wicking system?
Clogs can be frustrating but are relatively easy to address. Regularly inspect your system for blockages, especially around the wick and tubing. Use a gentle cleaning solution or replace clogged sections as needed. Implementing a regular maintenance schedule will help you stay on top of potential issues.