Managing a thriving garden hive requires attention to every detail, and one crucial aspect is ensuring you have the right type of queen cell. Did you know that there are three primary types of queen cells: emergency, supplemental, and nucleus colony? Each has its unique purpose and plays a significant role in maintaining a healthy and productive hive. Effective management of these queen cells can significantly boost your hive’s performance and overall productivity.
In this article, we’ll delve into the world of queen cells, exploring their characteristics, benefits, and uses. You’ll learn how to identify each type and determine which one is best suited for your garden hive. By understanding the differences between emergency, supplemental, and nucleus colony queen cells, you’ll be better equipped to make informed decisions about your hive’s management. This knowledge will help take your beekeeping skills to the next level and ensure the long-term health of your garden hives.
What are Queen Cells and Their Importance
Let’s dive into the world of queen cells, where three types play a vital role in the health and productivity of your garden hive. You’ll learn what makes each unique and why they matter.
Definition and Purpose of Queen Cells
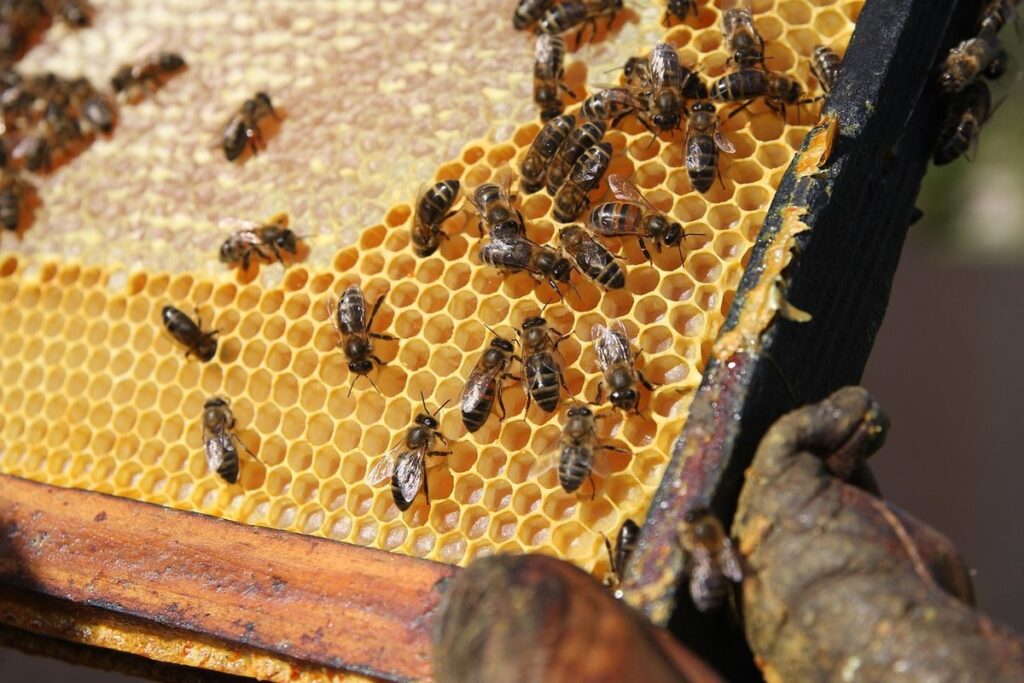
Queen cells are specialized structures within a garden hive where new queens are produced. They play a crucial role in the development and stability of the colony. When a queen bee‘s health begins to decline or she leaves the hive, the worker bees take it upon themselves to create replacement queens by building these cells.
These cells are usually built from wax and are specifically designed for the growth and development of young queens. Inside each cell, a larva is fed royal jelly, which provides it with essential nutrients for its transformation into a queen bee. The larva develops inside the cell over several days before emerging as an adult queen.
The purpose of these cells is to ensure that the colony remains viable even if the current queen dies or leaves. A new queen helps to control the population size and genetic diversity within the hive, making it essential for maintaining healthy and productive colonies.
Types of Queen Cells Found in Hives
When it comes to queen cells in garden hives, there are three main types that beekeepers need to be aware of: emergency cells, supersedure cells, and grafted cells. Emergency cells are created when a hive’s queen is dying or has failed, and the bees produce a new queen cell as a replacement. These cells are usually smaller and more irregularly shaped than normal queen cells.
Supersedure cells, on the other hand, are produced by hives that already have an established queen but decide to replace her with a new one. This can happen for various reasons, such as the old queen becoming too old or worn out, or the bees deciding they want a change of leadership. Supersedure cells are often larger and more well-formed than emergency cells.
Grafted cells, also known as donor larvae, are created when beekeepers manually graft a larvae from one colony into another to increase population or introduce new genetics. This process requires careful attention to detail and can be a bit tricky, but it’s an effective way for beekeepers to manage their hives and promote healthy growth.
Why Queen Cell Management is Crucial for Beekeepers
Effective queen cell management is crucial for maintaining healthy hives and achieving successful beekeeping practices. As a beekeeper, you’re likely aware that a thriving colony relies heavily on the queen’s reproductive capabilities. If left unchecked, unhealthy or failing queens can lead to reduced honey production, decreased brood counts, and even complete hive collapse.
When managing queen cells, it’s essential to identify and replace failing queens before they compromise the entire colony. Regular inspections of your hives will help you detect early signs of queen decline, such as decreased egg-laying rates or an uneven brood pattern. In these cases, consider introducing new queen cells to promote genetic diversity and ensure the health of your bees.
To maintain a strong hive, aim for a ratio of one queen to every 30-40 thousand workers. This balance ensures that each worker bee has access to sufficient nutrients and resources, promoting overall colony well-being. By prioritizing effective queen cell management, you’ll be better equipped to tackle common challenges and set your bees up for long-term success.
Type 1: Emergency Queen Cells
When it comes to emergency queen cells, beekeepers need to know what to look for and how to identify them quickly. These critical cells are formed in times of crisis within a hive.
Formation of Emergency Queen Cells
Emergency queen cells are formed under two main circumstances: when a hive loses its queen or is preparing for swarming. When a hive detects that its queen’s pheromone levels are dropping, it triggers the formation of emergency queen cells as a survival mechanism. This process usually occurs 7-10 days before the old queen leaves the hive with her swarm.
In this scenario, worker bees will prepare a cell in one of the honeycomb frames by sealing off a part of the brood nest with wax. They then select an emergency queen candidate, usually a larva that is around 3-4 days old, and place it into the prepared cell along with some royal jelly to feed it.
Preparation for swarming is another instance where emergency queen cells are formed. As the hive prepares for this natural process, it starts producing excess queens as a precautionary measure. This way, if the swarm successfully establishes itself and its original queen dies or leaves, there will be an existing emergency queen cell ready to take over.
When you notice your hive is forming emergency queen cells, it’s essential to understand that it may soon swarm.
Characteristics of Emergency Queen Cells
Emergency queen cells are characterized by their rapid development and unique location within the hive. They emerge as a result of extreme circumstances such as a missing or dying queen, or when the colony is under stress. These cells develop more quickly than standard queen cells, often taking just 5-7 days to mature compared to 8-12 days for regular cells.
They are usually located on the edges of frames or in areas where there may be existing brood or honey stores. Emergency cells tend to be smaller and less uniform in shape compared to standard queen cells. Another distinguishing feature is their development rate, which can lead to multiple queens emerging from a single frame within a short period.
It’s essential to identify emergency queen cells correctly, as they often result in the production of multiple queens, leading to competition among them for dominance. If you notice multiple queen cups or cells on a single frame, it may indicate that an emergency queen cell has been initiated. Regular monitoring and inspection can help prevent issues related to multiple emergences.
Pros and Cons of Rearing from Emergency Queen Cells
Rearing from emergency queen cells can be both beneficial and challenging for beekeepers. On one hand, allowing these cells to mature into new queens can provide a natural solution to replacing an existing failing or dead queen, eliminating the need for importing external queens. This method also promotes genetic diversity within the hive by introducing bees that are well-adapted to local conditions.
However, there are several potential drawbacks to consider. For instance, emergency queen cells may produce queens of varying quality, some of which might not be suitable for the colony’s needs. Moreover, these cells can lead to swarming if they’re not managed correctly, as the new queens will attempt to leave the hive in search of a mate. To mitigate this risk, beekeepers should carefully monitor the development of emergency queen cells and consider capping or removing them before they reach maturity.
Ultimately, rearing from emergency queen cells requires a delicate balance between allowing nature to take its course and intervening when necessary. By being aware of both the advantages and disadvantages, beekeepers can make informed decisions that promote healthy hive dynamics and successful queen rearing outcomes.
Type 2: Supplemental Queen Cells
In a supplemental queen cell, a new queen is raised from a larva that’s been separated from its usual duties and fed a special diet to encourage her development. This process can be beneficial in certain situations.
Purpose and Benefits of Supplemental Queen Cells
When it comes to maintaining a healthy and thriving garden hive, supplemental queen cells are an essential tool. These cells serve as a backup plan for your existing queen population, ensuring that if anything were to happen to her, the hive wouldn’t be left without a new queen.
By introducing supplemental queen cells, you’re not only providing insurance against queen loss but also promoting genetic diversity within your hive. This can lead to improved resistance against pests and diseases, as well as increased honey production. Think of it like having multiple safety nets in place – if one fails, the others are there to pick up the slack.
To integrate supplemental queen cells into your beekeeping routine, start by introducing a few extra cells alongside your existing queen population. This will allow you to observe and assess their performance before deciding whether or not to make them part of the main hive.
Formation and Maintenance of Supplemental Queen Cells
Creating supplemental queen cells is an art that requires patience, dedication, and attention to detail. To start, you’ll need a healthy hive with a strong worker population. Select the best frame with a mix of brood and food stores, and gently remove it from the hive. This will help prevent your bees from becoming defensive.
Next, take 2-3 frames from this selected frame, leaving some space between them for ease of management. You’ll need to create a cell builder by adding about 200-300 cells per frame using sugar or candy. Bees thrive on simplicity and minimal disturbance when it comes to queen rearing.
Now, carefully place the frames back into the hive, ensuring they’re secure but not sealed off completely. It’s essential to provide your bees with adequate ventilation while maintaining the desired temperature range (around 93°F for optimal cell development). Monitor their progress closely, as this is a critical period in queen cell formation.
Challenges and Considerations in Rearing from Supplemental Queen Cells
Rearing new queens from supplemental queen cells can be a rewarding experience for beekeepers, but it’s not without its challenges. One of the primary concerns is ensuring that the queen cells are healthy and free from pests or diseases before grafting them onto the brood box.
Another crucial consideration is maintaining a consistent temperature between 92°F to 95°F (33°C to 35°C) in the incubator, as this will significantly impact the development and survival of the larvae. Beekeepers must also be mindful of humidity levels, keeping them around 50-60% during the grafting process.
It’s also essential to monitor the queen cells daily for any signs of failure, such as reduced activity or an unusual number of dead or dying larvae. This can help beekeepers identify potential issues early on and take corrective action before it’s too late.
To overcome these challenges, beekeepers should focus on developing a well-established workflow that includes regular checks and adjustments to temperature and humidity levels. With patience, attention to detail, and practice, rearing new queens from supplemental queen cells can be a successful experience for both the bees and the beekeeper.
Type 3: Nucleus Colony or Grafting Queen Cells
This method of creating new queens involves grafting larvae onto cells made of a specially designed plastic material, offering a convenient and controlled process. Let’s dive into how it works and its benefits for your hive.
Introduction to Nucleus Colonies
A nucleus colony is an essential tool for beekeepers involved in queen breeding. It’s essentially a miniature version of a full hive, containing all the necessary components to create new queens. A nucleus colony typically consists of 3-5 frames with about 8-10 pounds of bees, including a laying worker or a young queen.
The importance of nucleus colonies lies in their ability to provide a controlled environment for queen breeding. By starting with a small population, beekeepers can closely monitor the development and health of the queen, ensuring that she meets the desired traits. This is particularly useful when trying to introduce new genetics into your apiary or developing queens for specific climates.
In practice, nucleus colonies are used in several ways. One common method is to split an existing hive and create a new colony with a laying worker, which will then develop its own queen. Alternatively, you can purchase a pre-made nucleus colony from a reputable supplier.
Grafting Queen Cells into Nucleus Colonies
Grafting queen cells into nucleus colonies is a crucial step in creating new bee colonies. The process involves carefully selecting and grafting individual queen cells onto a host larva, allowing the colony to raise a new queen from a known lineage. This method ensures that the colony has a strong, genetically diverse queen that will lay eggs at an optimal rate.
To begin, you’ll need to prepare the nucleus colony by ensuring it’s free of pests and diseases. Next, select 2-3 high-quality queen cells with a well-formed cap and a developed embryo. Gently remove the cell from its container and insert it into the host larva’s cell, making sure the embryo is centered and secure.
It’s essential to monitor the grafted cells closely for signs of acceptance or rejection by the host colony. This may involve observing changes in brood pattern, food stores, or even the presence of guard bees around the introduced cells. By following these steps and being attentive to potential challenges, you can successfully graft queen cells into your nucleus colonies and enjoy a strong, healthy new bee population.
Advantages and Considerations When Using Nucleus Colonies or Grafting Queen Cells
Using nucleus colonies or grafting queen cells offers several advantages for queen breeding. One of the primary benefits is increased control over the selection process. By introducing a high-quality queen into a nucleus colony, beekeepers can focus on developing desirable traits without the need to worry about diseases or pests that may be present in a full hive.
Another advantage is improved overall hive health and productivity. A strong, healthy nucleus colony with a well-selected queen is more likely to thrive than a larger hive with an inferior queen. This method also allows beekeepers to fine-tune their breeding programs by introducing new genetics and observing the results in a controlled environment.
However, grafting or using nucleus colonies can be labor-intensive and may require specialized equipment. Beekeepers must also consider the potential for disease transmission and ensure that proper hygiene protocols are followed. Additionally, it’s essential to monitor the colony’s growth and adjust as needed to prevent overcrowding and maintain optimal queen performance.
Factors Influencing Queen Cell Health and Development
When it comes to raising healthy, thriving queens from your garden hive’s queen cells, several key factors come into play that can make all the difference. Let’s take a closer look at what influences their health and development.
Environmental Conditions Affecting Queen Cell Development
When it comes to queen cell development, environmental conditions play a crucial role in their health and survival. Temperature, humidity, and nutrition are three critical factors that beekeepers need to consider when monitoring queen cells.
Temperature fluctuations can be particularly damaging to developing queens. High temperatures above 90°F (32°C) can lead to queen cell death, while prolonged exposure to temperatures below 50°F (10°C) can cause significant delays in development. To mitigate this risk, beekeepers should ensure that the hive is located in a spot with some shade and protection from harsh winds.
Humidity levels also impact queen cell development. Bees need a certain level of moisture in the air to thrive, but excessive humidity can lead to fungal growth and disease. A general rule of thumb is to maintain a relative humidity between 40% and 60%. Regular inspections of the hive’s ventilation system can help ensure optimal airflow.
Nutrition also plays a vital role in queen cell development. Bees need access to an adequate supply of nectar, pollen, and water to produce healthy queens. Regular feeding with high-quality supplements can support the growth of strong, productive queens.
Importance of Hygiene in Maintaining Healthy Queen Cells
Maintaining cleanliness and hygiene practices is crucial when handling and managing queen cells to prevent disease and parasites that can decimate an entire colony. When it comes to queen cells, a single mistake in sanitation can have far-reaching consequences. For instance, a dirty queen cell can harbor diseases like American Foulbrood or Varroa mites, which are notorious for causing significant damage to the colony.
To maintain healthy queen cells, beekeepers must prioritize hygiene practices such as disinfecting equipment and tools after each use, washing hands before handling queen cells, and maintaining a clean environment around the hive. It’s also essential to monitor the queen cell regularly for signs of disease or parasites. Regular inspections can help identify potential issues early on, allowing beekeepers to take corrective action.
Some best practices include using a 3% bleach solution to disinfect equipment, wearing protective clothing when handling queen cells, and ensuring that the hive is well-ventilated to prevent moisture buildup. By prioritizing hygiene and cleanliness, beekeepers can significantly reduce the risk of disease and parasites affecting their queen cells, ultimately leading to healthier colonies.
Impact of Pests and Diseases on Queen Cell Health
Pests and diseases can have a significant impact on queen cell health, and it’s essential to recognize the signs of infestation or infection. Common pests like mites, small hive beetles, and wax moths can weaken the queen’s immune system, making her more susceptible to disease. Mite infestations can cause the queen’s body to swell, while small hive beetles can damage the queen cells themselves.
Diseases such as American Foulbrood (AFB) and Nosema can also wreak havoc on a healthy queen cell. AFB is caused by a bacterium that kills bee larvae, often causing the queen to abandon her own eggs. Nosema, on the other hand, is a fungal infection that can cause the queen’s digestive system to shut down.
Prevention is key in maintaining queen cell health. Keep your apiary clean and well-maintained, removing any debris or dead bees that could harbor pests or diseases. Regular inspections of the queen cells can also help catch any issues early on. If you do notice signs of infestation or infection, isolate the affected cells immediately to prevent further spread.
Some common control methods include using essential oils like thymol to repel mites, and administering antibiotics to combat bacterial infections. In extreme cases, it may be necessary to replace the queen altogether. By staying vigilant and taking proactive steps to prevent pests and diseases, you can help ensure a healthy and thriving queen cell.
Managing Queen Cells for Optimal Hive Performance
When it comes to maintaining a healthy and thriving garden hive, managing queen cells is crucial. Here, we’ll explore the three most common types of queen cells and how to incorporate them for optimal performance.
Monitoring and Evaluating Queen Cell Development
Monitoring queen cell development is crucial for maintaining optimal hive performance. Without proper monitoring, you may miss signs of issues related to the queen’s health or the quality of her offspring. A healthy and productive queen is essential for a thriving colony.
To ensure successful queen cell development, monitor the cells regularly for brood pattern, egg laying, and pheromone production. Check for any unusual odors or colors that could indicate disease or pests. Observe the brood’s health, color, and size to gauge the quality of eggs laid by the queen.
Regular inspections will also help you identify potential issues early on, such as swarming behavior or reproductive problems. For example, a sudden drop in egg laying can be an indicator of the queen’s declining fertility or even death. By recognizing these signs in time, you can take corrective action to prevent colony damage and ensure optimal performance.
In most cases, queen cell development should last around 10-14 days before the new queen emerges. Monitor for signs of emergence, such as reduced egg laying, pheromone trails, and an increase in guard bee activity. Keep a close eye on the cells during this critical period to ensure a healthy replacement queen is raised.
Strategies for Balancing Queen Cell Numbers with Hive Population Size
Balancing queen cell numbers with hive population size is crucial for maintaining optimal health and productivity. A single queen can lay up to 2,000 eggs per day, which translates to a significant number of bees within a short period. When managing three types of queen cells – emergency cells, supersedure cells, and swarm cells – beekeepers must ensure that the hive population size is in harmony with these numbers.
To achieve this balance, monitor your hive’s population growth closely. Aim for a ratio of 1:10 to 1:15 (one queen to ten or fifteen thousand worker bees). If you notice an imbalance, adjust by either adding more frames to accommodate the growing population or culling excess bees to maintain a stable environment.
Consider introducing new queens through swarm cells or supersedure cells when your hive’s population reaches 60% capacity. This approach helps prevent overcrowding and reduces the risk of queenless periods. Keep in mind that every hive is unique, so observe and adapt your strategy accordingly. By striking this delicate balance, you’ll create a thriving environment for your bees to grow and flourish.
Long-term Planning and Management of Queen Cells
When managing queen cells for optimal hive performance, it’s essential to consider long-term planning and strategies. A sustainable beekeeping operation relies on a robust queen cell management system that ensures a steady supply of high-quality queens. To achieve this, you need to develop a plan for maintaining a healthy queen population, replacing aging or failing queens, and anticipating future needs.
One effective approach is to maintain a reserve stock of 5-10 queen cells, which can be used as replacements or additions to the hive. This way, you’ll have a safety net in case of unexpected losses or increased demand for queens. Regularly inspect your queen cells and monitor their quality, replacing any that show signs of weakness or disease.
Consider implementing a rotation system, where older queens are replaced with new ones every 2-3 years to maintain genetic diversity and vigor within the hive. This will also give you an opportunity to evaluate the performance of each queen and make informed decisions about their future roles in your operation. By adopting these strategies, you’ll be better equipped to manage your queen cells and ensure a thriving beekeeping operation for years to come.
Frequently Asked Questions
How often should I inspect my queen cells for signs of disease or pests?
It’s recommended to inspect your queen cells every 7-10 days, especially during peak production seasons. Look for any visible signs of pests or diseases such as mites, small hive beetles, or fungal growth on the cells.
What happens if I don’t have a mature queen bee in my hive, and an emergency queen cell is forming?
If an emergency queen cell forms without a mature queen bee, it can lead to a split in the colony. To prevent this, you can remove the emerging queen and replace her with a new one or allow another queen to develop.
Can I use a single type of queen cell for all my hives, or should I consider different types based on hive size and needs?
While it’s tempting to simplify your management by using one type of queen cell, each type serves a specific purpose. For example, emergency cells are ideal for smaller colonies, while supplemental cells can be used in larger operations with established populations.
How long does it typically take for a new queen bee to emerge from a queen cell?
The emergence time varies depending on factors like temperature and the age of the larvae. Generally, you can expect queens to emerge between 7-14 days after the cells are sealed.
What’s the best way to handle a situation where multiple queens develop in the same hive?
In cases of multiple queens developing, it’s essential to remove all but one emerging queen from the hive. This will prevent fighting and allow the colony to establish itself around a single dominant queen.