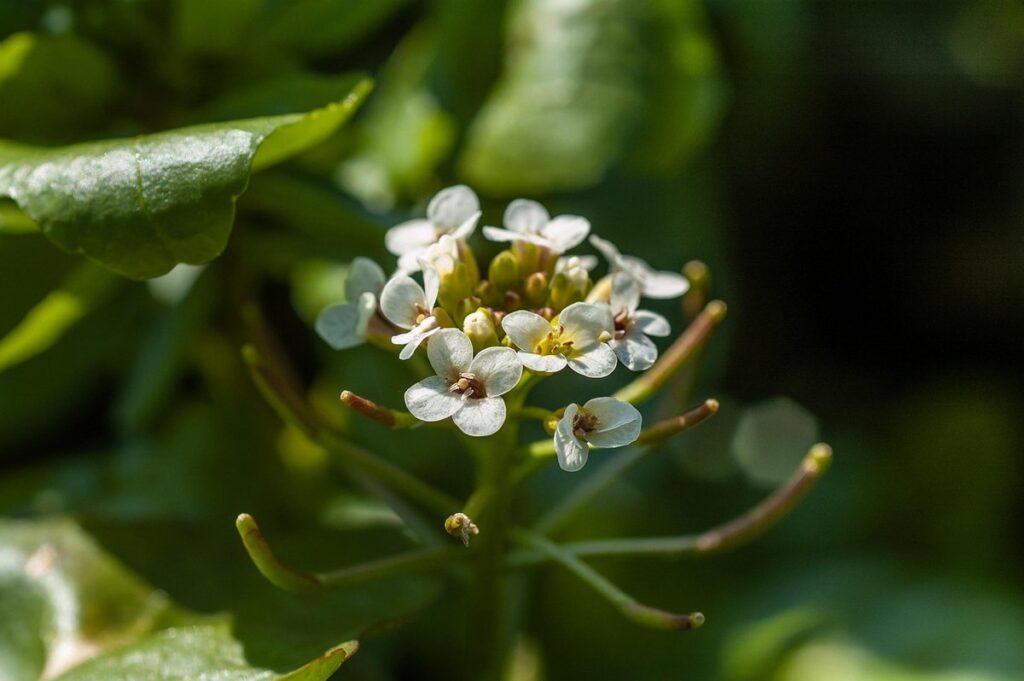
Starting your garden from scratch can be intimidating, especially for beginners. But with the right tools and techniques, you can jumpstart your growth and enjoy a thriving harvest in no time. One essential key to success is using plant starters – small pots or containers filled with soil and seeds that give your plants a head start on life. By choosing the right type of starter mix, creating optimal growing conditions, and avoiding common mistakes, you’ll be well on your way to maximizing growth and reaping the rewards of your labor.
This article will delve into the world of plant starters, covering everything from soil-based versus seed starting mixes to mini greenhouses and advanced techniques for maximum growth. We’ll explore how to select the perfect starter mix, prevent common pitfalls, and create a thriving garden ecosystem that produces healthy, vibrant plants all season long. Whether you’re a seasoned gardener or just starting out, this guide will provide you with expert advice and insider tips to take your gardening skills to the next level.
Choosing the Right Plant Starter Type
When it comes to starting your garden from scratch, choosing the right plant starter is crucial. Let’s explore the different types of plant starters and how they can help you get a head start on your gardening journey.
Soil-Based Starters vs. Seed Starting Mixes
When it comes to starting seeds, you have two primary options: using traditional soil and creating your own mix, or investing in a specialized seed starting mix. While both methods can be effective, they come with distinct benefits and drawbacks.
Using regular garden soil as a starter medium is often the most cost-effective option. You can repurpose leftover soil from your garden beds, which not only saves money but also reduces waste. However, this approach can lead to inconsistent results due to potential contaminants or pathogens present in the soil. Additionally, regular garden soil may be too dense for seedlings, hindering root development and making them more susceptible to disease.
On the other hand, specialized seed starting mixes are specifically designed to provide optimal conditions for germination and seedling growth. These mixes usually contain a blend of peat moss, perlite, or vermiculite that promotes drainage, aeration, and moisture retention. While they may be pricier than traditional soil, their benefits often outweigh the costs. For instance, they help prevent overwatering, which is common with regular garden soil, and provide a more consistent growing environment for your seedlings.
Mini Greenhouses for Starting Seeds Indoors
When it comes to starting seeds indoors, many gardeners opt for mini greenhouses as a controlled environment for germination. These compact, self-contained units offer a range of advantages over traditional methods.
One key benefit is the ability to maintain precise temperature and humidity levels, allowing seedlings to develop more rapidly and healthily. Mini greenhouses can be set up on a windowsill or under grow lights, providing optimal conditions for seedling growth. Some models also feature automated ventilation systems, which help regulate temperature fluctuations and prevent overheating.
Another advantage of mini greenhouses is their compact size, making them ideal for small spaces such as apartments or condos. They’re also easy to clean and maintain, reducing the risk of disease and pests that can be common issues with traditional seed starting methods.
To get started with a mini greenhouse, choose a model that fits your needs and budget. Look for one with adjustable shelves and good air circulation to promote healthy growth. Once set up, simply sow your seeds, water, and provide adequate light – the rest is taken care of by the mini greenhouse’s controlled environment.
Selecting the Perfect Plant Starter
When it comes time to choose your plant starters, selecting the right ones can make all the difference in your garden’s success. Let’s break down what to look for in a top-notch starter.
Factors to Consider When Choosing Seedlings or Seeds
When choosing seedlings or seeds for your garden, it’s essential to consider several key factors to ensure they’ll thrive. Climate is a crucial factor to consider, as some plants are more sensitive to temperature fluctuations than others. For instance, if you live in an area with harsh winters, choose varieties that can tolerate frost or are specifically bred for cold climates.
Soil type is another critical consideration. Different plants have specific soil requirements, and using seedlings or seeds that aren’t suited to your soil type can lead to poor growth or even plant death. For example, if you have heavy clay soil, look for seedlings or seeds that prefer moist, fertile conditions.
The level of care required is also vital to consider. Some plants need regular watering, pruning, and fertilization, while others are more low-maintenance. Be sure to select seedlings or seeds that fit your lifestyle and schedule. Additionally, think about the space you have available for your garden and choose varieties that will grow to a suitable size. By considering these factors, you’ll be able to choose the perfect plant starters for your specific needs.
How to Handle and Store Plant Starters for Optimal Results
When handling and storing plant starters, it’s essential to take steps that ensure they arrive in good condition and thrive after transplanting. First, inspect seed packets for damage, moisture, and pests before storing them in a cool, dry place. Keep seeds away from direct sunlight, as this can cause them to degrade quickly.
Seedling trays require more attention. Avoid exposing them to sudden temperature fluctuations or excessive watering, which can lead to damping off. Store trays in a protected area, maintaining consistent temperatures between 60°F and 70°F (15°C and 21°C). Keep the trays away from windows and doors that may let in drafts.
When transporting seedling trays, handle them carefully to avoid damaging roots or disturbing soil. Place them upright, with drainage holes facing downwards, to prevent water from collecting inside the tray. By following these simple guidelines for handling and storing plant starters, you can minimize losses and ensure a healthy start for your garden.
Seed Starting 101: A Step-by-Step Guide
Now that you’ve got a solid understanding of plant starter types, it’s time to dive into the process of starting seeds indoors. In this next step, we’ll walk you through the basics of seed starting.
Preparing the Seeds and Soil for Germination
When preparing seeds and soil for germination, it’s essential to get it right. Seeds have varying depths of dormancy, and incorrect sowing can hinder their ability to sprout. Start by reading the seed packet for specific instructions on sowing depth and spacing.
For most seeds, a general rule is to plant them about 2-3 times deeper than their width. This allows enough room for expansion and minimizes overcrowding. For example, if you’re planting small tomato seeds, sow them about ¼ inch deep. Larger seeds like beans or squash can be sown slightly shallower.
When it comes to spacing, leave about 1-2 inches between seedlings to prevent competition for resources like water and nutrients. This also helps with air circulation, reducing the risk of fungal diseases.
Keep in mind that different types of soil have varying drainage properties. If you’re using a potting mix specifically designed for seed starting, follow its instructions for sowing depth and spacing. As a general guideline, avoid compacting the soil too much, as this can prevent proper water penetration and air exchange. Gently firm the soil around the seeds to ensure they’re secure but not suffocated.
Providing Adequate Light and Temperature Conditions
When starting seeds indoors, it’s easy to underestimate the importance of providing adequate light and temperature conditions. However, this is a crucial aspect of seedling development, as it directly affects their growth and resilience.
Seedlings need sufficient light to undergo photosynthesis, which fuels their growth and development. Insufficient light can lead to weak, spindly plants that are prone to disease and pests. The ideal light spectrum for seedlings includes blue and red light, which promotes healthy leaf growth and root development. Aim for 12-14 hours of direct light per day, or use grow lights if natural light is limited.
Temperature conditions also play a critical role in seedling development. Most seedlings prefer daytime temperatures between 65-75°F (18-24°C) and nighttime temperatures around 55-65°F (13-18°C). Be cautious not to expose seedlings to extreme temperature fluctuations, which can shock the plant and stunt its growth.
To ensure optimal conditions, consider using a propagation tray with built-in heat mats or warm shelves. This will help maintain consistent temperatures and promote even growth.
Plant Starter Kits: What’s Included and How to Use Them
If you’ve got your plant starter kits, let’s dive into what you can expect inside and how to use each component effectively. This will help ensure a smooth start for your new plants.
Overview of Common Components in Plant Starter Kits
When you crack open a plant starter kit, you’ll typically find several essential components that work together to help your seedlings get off to a strong start. These kits usually include trays, growing medium, and irrigation systems – let’s take a closer look at each of these vital components.
Trays are the foundation of any plant starter kit, providing a stable base for the growing medium and giving you easy access to your seedlings as they develop. They’re often made from durable materials like plastic or foam and come in various sizes to accommodate different types of plants. Make sure to choose trays that fit snugly inside your growing area to prevent water from spilling over.
Growing medium is another crucial component, typically consisting of a mix of peat moss, vermiculite, and perlite. This blend helps retain moisture while allowing for good drainage – perfect conditions for seedlings to establish themselves. Some kits may also include a fertilizer-rich potting mix specifically designed for young plants.
Irrigation systems in plant starter kits usually involve water reservoirs or saucers that collect excess water from the trays, ensuring your seedlings don’t become too wet or dry. These systems often come with built-in filters to prevent clogging and promote healthy root growth.
Setting Up and Using a Plant Starter Kit Successfully
When you receive your plant starter kit, it’s essential to set it up correctly to maximize growth rates and yields. First, read through the instructions provided with the kit to understand its specific requirements and components.
Typically, a plant starter kit includes seed trays or cells, potting mix, and sometimes even fertilizers or grow lights. To prepare the kit for planting, fill the seed trays or cells with the provided potting mix, following the recommended depth guidelines.
Next, carefully place one or two seeds in each cell, depending on the type of plant. Gently firm the soil to ensure good contact between the seed and the growing medium. Water the seeds gently but thoroughly, making sure not to overwater. Place the kit under grow lights or in a sunny spot with temperatures suitable for germination.
To maintain optimal growth conditions, keep the soil consistently moist during the first few weeks after planting. Once seedlings emerge, you can gradually increase watering and fertilization as needed.
Common Mistakes to Avoid When Using Plant Starters
When using plant starters, it’s easy to make mistakes that can harm your plants’ growth and development, so let’s discuss some common pitfalls to watch out for.
Understanding the Dangers of Overwatering and Underwatering
When using plant starters, it’s easy to get caught up in the excitement of watching them grow and flourish. However, improper watering habits can quickly turn this excitement into disappointment. Overwatering and underwatering are two common mistakes that can have devastating effects on your plants.
Overwatering occurs when you provide too much water for your plant starter, causing the roots to rot and the plant to suffocate. This can lead to fungal diseases, root decay, and even death. On the other hand, underwatering happens when you don’t provide enough moisture, causing the soil to dry out and the plant to become stressed.
To avoid these pitfalls, it’s essential to maintain optimal moisture levels in your plant starter. Check the soil daily by sticking your finger into the soil up to the first knuckle. If the soil feels dry, it’s time for a drink. But don’t overdo it – too much water can be just as bad as not enough. Water your plants when the top inch of soil is dry, and avoid getting water on the leaves to prevent fungal diseases. By following these simple guidelines, you’ll be well on your way to creating a thriving garden from scratch.
Identifying and Addressing Pests and Diseases in Plant Starters
When using plant starters, it’s essential to be aware of common pests and diseases that can affect them. Some of the most prevalent issues include aphids, whiteflies, spider mites, mealybugs, and fungal infections like powdery mildew and root rot.
To prevent infestations, keep your plant starters in a well-ventilated area with good air circulation. Avoid overcrowding, which can create an environment conducive to pest growth. Regularly inspect your plants for signs of pests or diseases, such as curled or distorted leaves, sticky residue on the leaves or stems, or yellowing or browning foliage.
If you do detect an issue, treat it promptly with organic or chemical pesticides, depending on your preference and the severity of the infestation. For example, neem oil can be used to control aphids and other soft-bodied pests, while insecticidal soap can help manage mealybugs and spider mites.
In addition to prevention and treatment, maintaining good hygiene practices can also help prevent the spread of disease. This includes cleaning your tools regularly, disinfecting your growing area, and removing any infested or diseased plants to prevent further contamination.
Advanced Techniques for Maximizing Growth with Plant Starters
Now that you’ve mastered the basics of using plant starters, let’s dive into some advanced techniques to take your gardening game to the next level. You’ll learn expert tips for maximum growth and success.
Hydroponic Systems: A High-Tech Approach to Growing with Plant Starters
Hydroponic systems have revolutionized the way we grow plants, and when combined with plant starters, they offer a high-tech approach to maximizing growth. In this method, plants are grown in a nutrient-rich solution rather than soil, allowing for precise control over water and nutrients.
Using hydroponic systems with plant starters can be particularly beneficial for indoor gardening or areas with limited space. This method can increase yields by up to 30% compared to traditional soil-based growing methods. For instance, the University of Arizona’s Controlled Environment Agriculture (CEA) department achieved remarkable results using a combination of hydroponics and LED grow lights.
However, there are challenges associated with this approach. Initial setup costs can be steep, and requires investment in specialized equipment such as pumps, sensors, and nutrient solutions. Moreover, maintaining optimal pH levels and preventing overwatering or under-watering require close monitoring.
To get started, it’s essential to research and choose the right type of hydroponic system for your needs, whether it’s NFT (Nutrient Film Technique), DWC (Deep Water Culture), or Ebb-and-Flow. Also, be mindful of plant starter selection; ensure they are compatible with the chosen hydroponic method.
Using LED Grow Lights for Enhanced Seedling Development
When it comes to growing seedlings from scratch, one of the most effective tools at your disposal is LED grow lights. These energy-efficient and versatile lights offer a range of benefits that can significantly accelerate seedling growth and development.
LED grow lights mimic the spectrum of natural sunlight, which is essential for photosynthesis. By providing seedlings with the right light spectrum, you can promote healthy growth, boost yields, and reduce the risk of pests and diseases. When selecting an LED grow light, look for one that offers a balanced spectrum of blue, red, and green lights. Blue light promotes leaf growth, while red light encourages root development.
Aim to provide your seedlings with 12-14 hours of light per day, adjusting the intensity as they grow. A general rule of thumb is to start with low-intensity lighting (20-40 watts) for small seedlings and gradually increase the intensity as they mature. This will help prevent burning or scorching their delicate leaves. By choosing the right LED grow lights and adjusting their settings accordingly, you can give your seedlings a head start on a healthy and productive growth cycle.
Frequently Asked Questions
Can I use a plant starter mix for seeds that require different pH levels?
Yes, many modern plant starter mixes are designed to be pH-neutral or adaptable to different seed types. However, if you’re working with sensitive plants, it’s always best to consult the specific seed package instructions and adjust the mix accordingly.
How do I prevent fungal diseases in my plant starters, especially in humid environments?
To minimize the risk of fungal diseases, ensure good air circulation around your plant starters. You can also use a fungicide specifically designed for seedlings or apply a thin layer of cinnamon powder to the soil surface to deter fungal growth.
Can I reuse plant starter mixes after multiple uses, or do I need to discard them?
It’s generally not recommended to reuse plant starter mixes after they’ve been used once. Seedlings can introduce pests and diseases into the mix, making it less effective for subsequent uses. Fresh mixes ensure optimal growing conditions and reduce contamination risks.
Are mini greenhouses suitable for all types of plants, including seedlings that require direct sunlight?
While mini greenhouses provide excellent protection from extreme temperatures and weather conditions, they may not be ideal for plants requiring direct sunlight. Some plant starters may benefit from supplemental lighting, but it’s essential to research the specific needs of your chosen variety.
Can I start seeds in plant starter kits without using a greenhouse or grow light?
Yes, many seedlings can thrive in standard indoor environments with adequate natural light and proper care. However, keep in mind that some varieties might require additional support or specialized growing conditions to reach their full potential.