Gladiolus bulbs are one of the most popular and versatile summer-flowering bulbs, offering a burst of vibrant color to any garden. Whether you’re a seasoned gardener or just starting out, growing gladiolus bulbs can be a thrilling experience, but it requires some knowledge and care. With proper planting, propagation, and maintenance, these beautiful flowers can add a stunning pop of color to your outdoor space.
In this comprehensive guide, we’ll walk you through the ins and outs of growing and caring for gladiolus bulbs, covering essential tips on planting, propagation, and common problems that may arise. From understanding how to plant gladiolus bulbs correctly to troubleshooting issues with blooming or pests, our expert advice will help you grow these gorgeous flowers with confidence.
What are Gladiolus Bulbs?
Let’s dive into what gladiolus bulbs actually are and why they’re such a great choice for adding some vibrant color to your garden. You’ll be surprised by their simple yet versatile nature!
Overview of Gladiolus Flowers
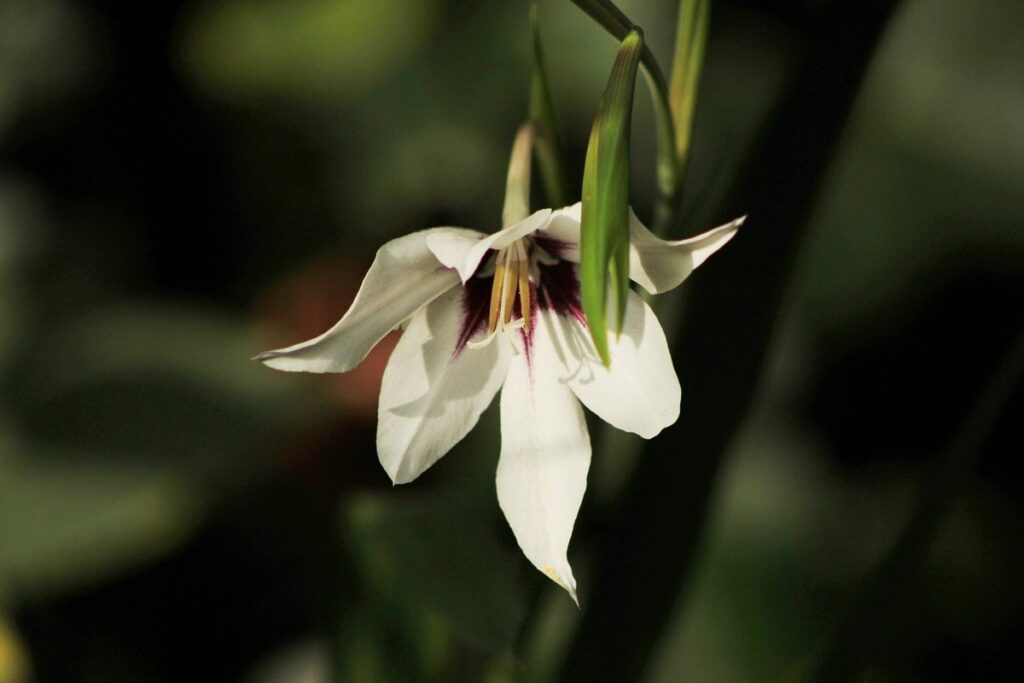
Gladiolus flowers have been a popular choice among gardeners and florists for centuries. Originating from South Africa and the Mediterranean regions, these beautiful blooms were first introduced to Europe in the 17th century. Today, they are grown worldwide for their vibrant colors, elegant shapes, and long-lasting beauty.
There are several types of gladiolus flowers, including Grandiflorum, Nanum, and Callianthus varieties. Each type offers unique characteristics, such as bloom size, stem height, and flower color. For example, the Grandiflorum variety is known for its large, showy blooms that can reach up to 4 inches in diameter.
When it comes to growing gladiolus flowers, gardeners must consider factors like climate, soil type, and sun exposure. These bulbs thrive in well-draining soil and full sun conditions, making them ideal for gardens with plenty of sunlight. To ensure a successful harvest, plant gladiolus bulbs in the fall or early spring, about 3-4 inches deep and spaced 6-12 inches apart.
Some popular varieties to consider include ‘Kirstenbosch’, which features bright pink blooms with yellow tips, and ‘Nanus’, which produces delicate white flowers. By choosing the right type of gladiolus for your garden and following proper planting procedures, you can enjoy these stunning flowers from mid-summer to early fall.
Types of Gladiolus Bulbs
When it comes to choosing gladiolus bulbs, you’re not limited to just one type. There are several varieties to select from, each with its own unique characteristics and features.
Dwarf gladiolus bulbs are perfect for smaller spaces or containers, growing to be around 10-12 inches tall. They come in a wide range of colors and patterns, making them an excellent choice for adding some color to your patio or balcony.
Tall gladiolus bulbs, on the other hand, can grow up to 3 feet or more in height, making them ideal for adding a dramatic pop of color to your garden. These varieties are perfect for attracting pollinators and providing a striking focal point in your landscape design.
Miniature gladiolus bulbs are another popular option, growing to be around 6-8 inches tall. They’re great for adding some delicate charm to your garden beds or containers and come in an assortment of colors and patterns.
Regardless of the variety you choose, make sure to plant them at least 3-4 inches deep and provide full sun to partial shade conditions for optimal growth.
Choosing the Right Gladiolus Bulb Variety for Your Garden
With so many beautiful gladiolus varieties to choose from, selecting the perfect one can be overwhelming. Let’s break down the key factors to consider in your selection process.
Factors to Consider When Selecting a Gladiolus Bulb
When selecting a gladiolus bulb variety for your garden, there are several key factors to consider. First and foremost, think about the color palette you want to achieve in your garden. Gladiolus bulbs come in a wide range of colors, including vibrant hues like red, orange, yellow, pink, purple, and white. Consider what colors will complement the other flowers in your garden and choose varieties that fit your desired aesthetic.
Another crucial factor is bloom time. Some gladiolus varieties bloom early in the summer, while others may not start blooming until late summer or even early fall. If you want a continuous display of blooms throughout the growing season, look for varieties that have staggered bloom times. This will ensure that there’s always something in bloom, even if one variety finishes its cycle.
Finally, consider disease resistance when selecting your gladiolus bulbs. Some varieties are more prone to diseases like powdery mildew or root rot than others. Look for varieties that have built-in disease resistance or take steps to prevent disease by providing good air circulation and watering carefully.
Popular Varieties of Gladiolus Bulbs for Beginners
When it comes to growing gladiolus bulbs, there are numerous varieties to choose from. For beginners, some popular options include ‘Carnival’, ‘Amsterdam’, and ‘Imperial Blue’. These varieties offer a range of growth habits and blooming times, allowing you to select the best fit for your garden.
‘Carnival’ is an excellent choice for those who want tall spikes of colorful blooms. It grows up to 40 inches in height and produces vibrant flowers in shades of pink, red, yellow, and white. The ‘Carnival’ variety typically takes around 90-100 days from planting to blooming.
The ‘Amsterdam’ variety is known for its compact growth habit, making it ideal for smaller gardens or containers. It grows up to 24 inches tall and produces delicate blooms in shades of pink, red, and white. This variety typically takes around 70-80 days from planting to blooming.
For those who want a reliable performer with consistent blooms, ‘Imperial Blue’ is an excellent choice. This variety grows up to 36 inches in height and produces vibrant blue flowers that last throughout the summer. It typically takes around 90-100 days from planting to blooming.
Planting and Caring for Gladiolus Bulbs
To successfully grow beautiful gladiolus flowers, you’ll need to know how to properly plant and care for their bulbs, which we’ll cover in detail next. This includes tips on soil preparation and bulb maintenance.
Preparing the Soil for Gladiolus Bulb Planting
Proper soil preparation is essential for successful gladiolus bulb planting. Gladiolus bulbs prefer well-draining, fertile soil with a pH between 6.0 and 7.5. If your soil is too acidic or alkaline, it can affect the bulb’s ability to absorb nutrients.
To check your soil’s pH level, you can purchase a soil testing kit or send a sample to a laboratory for analysis. Based on the results, you can adjust the pH by adding lime to raise the pH or sulfur to lower it. For example, if your soil has a pH of 5.5 and you want to raise it to 6.5, add 1 cup of lime per 10 square feet of soil.
In addition to adjusting the pH, fertilize your soil with a balanced fertilizer (10-10-10) in early spring before planting gladiolus bulbs. This will provide essential nutrients for healthy growth and blooming. Make sure not to overfertilize, as this can cause more harm than good. Water the soil well after fertilizing to help the nutrients reach the roots.
Remember to also improve drainage by adding organic matter like compost or well-rotted manure to your soil. This will prevent waterlogged conditions that can lead to root rot and other problems.
Planting and Spacing Gladiolus Bulbs
When planting gladiolus bulbs, it’s essential to get the spacing just right. You don’t want them too close together, as this can lead to overcrowding and make it difficult for the stems to grow upright. On the other hand, if they’re too far apart, you may not achieve the desired effect of a lush, vibrant display.
For optimal growth, plant gladiolus bulbs 3-6 inches deep in well-draining soil. The exact depth will depend on the variety, but generally, it’s best to plant them at a depth that’s two to three times the height of the bulb.
When spacing gladiolus bulbs, consider planting them about 4-6 inches apart. This allows for good air circulation and prevents overcrowding. If you’re planting in rows, make sure to stagger the bulbs slightly to create a more visually appealing display. For example, if you have two rows of gladiolus, plant the bulbs at an angle so that they don’t line up perfectly.
Keep in mind that gladiolus bulbs will multiply over time, producing new offsets or “daughter” bulbs around the base of the parent bulb. When planting, leave about 6-8 inches between each group of bulbs to allow for this natural multiplication process to occur without overcrowding.
Growing Conditions for Gladiolus Bulbs
To grow stunning gladiolus blooms, you need to provide your bulbs with the right conditions: adequate sunlight and optimal temperatures are key.
Lighting Requirements for Gladiolus Plants
When it comes to lighting requirements for gladiolus plants, you’ll want to provide them with plenty of direct sunlight to encourage healthy growth and vibrant blooms. Gladiolus bulbs can thrive in full sun conditions, where they receive at least 6 hours of direct sunlight per day. In fact, a study by the Royal Horticultural Society found that gladiolus plants grown in full sun produced more flowers than those grown in partial shade.
However, if you live in an area with extremely hot or dry climates, it’s essential to provide some afternoon shade to prevent scorching of the leaves and flowers. A good rule of thumb is to provide at least 2-3 hours of dappled shade during the hottest part of the day. If you’re growing gladiolus in containers, you can move them to a shaded area during this time.
In terms of direct sunlight, it’s best to avoid placing your gladiolus plants in a spot where they receive intense sunlight for more than 4 hours per day. This can cause the leaves and flowers to become scorched and discolored. By providing your gladiolus plants with the right amount of light, you’ll be rewarded with stunning blooms that will add a pop of color to your garden or containers.
Watering and Humidity Needs of Gladiolus Plants
Gladiolus plants require consistent moisture levels to thrive, making them one of the easiest summer bulbs to care for. However, overwatering can be detrimental, causing root rot and killing the plant. To ensure proper watering, allow the soil to dry slightly between waterings. Stick your finger into the soil up to the first knuckle; if it feels dry, it’s time to water.
The ideal humidity level for gladiolus plants is between 40-60%. If you live in a dry climate or during periods of low humidity, consider using a humidifier near the plant. Keep in mind that gladiolus are more sensitive to moisture fluctuations than temperature changes, so it’s essential to maintain consistent humidity levels.
In addition to maintaining optimal moisture and humidity levels, make sure not to get water on the leaves or flowers of your gladiolus plants, as this can cause spotting and promote disease. Water at soil level instead, allowing the plant to absorb the water through its roots.
Common Problems and Pests Affecting Gladiolus Bulbs
Gladiolus bulbs can be susceptible to certain issues, so it’s essential to know how to identify and prevent common problems like rot, pests, and diseases. Let’s take a closer look at these potential threats together.
Dealing with Gladiolus Pest Infestations
Gladiolus bulbs can be susceptible to various pests that can cause damage and harm the plant. Some common pests that affect gladiolus bulbs include aphids, slugs, and snails.
Aphids are small, soft-bodied insects that feed on plant sap, causing curled or distorted leaves. They can also spread plant viruses. To control aphid infestations, use neem oil or insecticidal soap to spray the affected area. You can also introduce beneficial insects like ladybugs or lacewings, which prey on aphids.
Slugs and snails are common pests that feed on gladiolus leaves and flowers at night. They leave behind a slimy trail as they move around. To control slugs and snails, use copper tape or crushed eggshells around the plant’s stem to deter them. You can also hand-pick these pests at night and release them far away from your garden.
Regularly inspecting your gladiolus plants for signs of pest infestations is key to preventing damage. Keep an eye out for sticky honeydew droplets, curled leaves, or holes in the leaves. Early detection allows you to take action promptly and prevent the problem from spreading.
Common Diseases Affecting Gladiolus Plants
Gladiolus plants are susceptible to several diseases that can cause damage and reduce their lifespan. One of the most common issues is root rot, which occurs when the roots become waterlogged and start to decay. This can be caused by overwatering, poor drainage, or high humidity. To prevent root rot, make sure the soil isn’t too moist and provide good air circulation around the plants.
Another disease affecting gladiolus is leaf spot, which appears as small, circular lesions on the leaves. This is often caused by fungal infections such as Cercospora or Septoria. Leaf spot can be treated with fungicides, but prevention is key. Regularly inspect your plants for signs of disease and remove any affected leaves to prevent further spread.
Crown rot is another serious issue that affects gladiolus bulbs. This occurs when the crown (the base of the plant where the stem meets the roots) becomes infected with bacteria or fungi. Crown rot can be prevented by ensuring good hygiene when handling the bulbs, using sterile equipment, and not overcrowding the plants. If you do notice signs of crown rot, carefully remove affected areas to prevent further infection.
To minimize the risk of these diseases, it’s essential to maintain good hygiene practices when handling gladiolus bulbs. Wash your hands before and after touching the bulbs, and disinfect any equipment with a solution of 1 part bleach to 10 parts water.
Propagating and Storing Gladiolus Bulbs for Year-Round Growth
To ensure your gladiolus bulbs bloom year after year, you’ll need to learn how to properly propagate and store them. This section will guide you through the process.
Propagation Methods for Gladiolus Bulbs
When it comes to propagating gladiolus bulbs, you have several methods at your disposal. One of the most effective ways is through division. This process involves separating established clumps into individual bulbs, each with its own set of leaves and roots. To divide a mature gladiolus bulb, carefully dig up the entire clump in the spring or fall, then gently separate the bulbs, taking care not to damage any of the delicate roots.
Another method is through seed, although this approach can be more time-consuming as it requires allowing the seeds to germinate and grow into mature plants before harvesting the bulbs. This method is often used by commercial growers who need large quantities of gladiolus bulbs for sale.
Stem cuttings are yet another option, but they’re not typically recommended for gladiolus, as the process can be quite tricky and may result in a lower success rate compared to division or seed propagation. When attempting to propagate through stem cuttings, make sure to remove a section of stem with at least two sets of leaves and allow it to dry out for 24-48 hours before planting.
If you’re planning on propagating gladiolus bulbs using one of these methods, keep in mind that the ideal time for division is after the foliage has died back, usually in the fall. This allows for new growth to emerge in the spring and provides a head start on the growing season. For seed propagation, sow the seeds indoors 6-8 weeks before the last frost date in your area.
Storage Tips for Gladiolus Bulbs During Winter
When winter sets in and the gladiolus plants have finished blooming, it’s essential to store the bulbs properly to ensure they remain healthy and viable for next year’s growth. The storage process is a critical step in maintaining the integrity of the bulbs.
To begin with, you’ll want to allow the gladiolus bulbs to dry out slightly after digging them up from the soil. This helps prevent rotting and promotes healthier storage. To achieve this, spread the bulbs out in a single layer on newspaper or paper towels, making sure not to overlap any of them.
Next, store the dried bulbs in a cool, dark place with consistent temperatures between 40°F (4°C) and 50°F (10°C). You can also use ventilated bags or cardboard boxes for storage. Avoid storing them near frosty areas or places where they might be exposed to cold drafts.
Refrigeration is another viable option for storing gladiolus bulbs during winter. To do this, wrap the dried bulbs in a paper bag and store them in the refrigerator at around 40°F (4°C). Check on them periodically to ensure they’re not developing any moisture or mold.
Frequently Asked Questions
How do I know if my gladiolus bulbs are suitable for storage during winter?
If you live in an area with frost, it’s essential to store your gladiolus bulbs properly to ensure they survive the cold temperatures. Check if your bulbs have already started to sprout or if they’re still firm and healthy. If they’re still firm, they can be stored in a cool, dry place until spring.
Can I plant gladiolus bulbs in containers?
Yes! Gladiolus bulbs can thrive in containers as long as you provide them with well-draining soil and sufficient support for the tall stems. Choose a container that’s at least 6-8 inches deep to accommodate the bulb size, and make sure it has good drainage holes to prevent waterlogged soil.
How often should I water my gladiolus plants?
Water your gladiolus plants regularly during their growing season, but avoid overwatering. Aim for about 1 inch of water per week, either from rainfall or irrigation. Check the soil moisture by inserting a finger into the soil up to the first knuckle; if it feels dry, it’s time to water.
What are some common pests that affect gladiolus plants?
Aphids, slugs, and snails can be significant pests for gladiolus plants. Regularly inspect your plants for signs of infestation, such as curled or distorted leaves. Use organic pest control methods like neem oil or hand-picking to prevent damage.
Can I divide and replant my gladiolus bulbs after they’ve finished blooming?
Yes! Gladiolus bulbs can be divided and replanted every 3-4 years to maintain their health and vigor. After the blooms have faded, carefully dig up the entire clump, gently separate the offsets (smaller bulbs), and replant them in a new location with fresh soil.