When it comes to watering your garden or lawn, you’re probably familiar with the problem of water waste. Whether it’s evaporation from hot summer sun or runoff from heavy rainfall, it can be frustrating and costly. But did you know that there’s a better way? A drip pipe system is an efficient and effective solution for conserving water and reducing evaporation. By delivering water directly to the roots of your plants, rather than spraying it everywhere, you can save money on your water bill and enjoy healthier plants. In this article, we’ll show you how to design, install, and maintain a drip pipe system that will make your gardening life easier. We’ll cover everything from choosing the right pipes to troubleshooting common issues, so whether you’re a beginner or an expert, you’ll be covered.
Introduction to Drip Pipe Systems
Let’s start by covering the basics of drip pipe systems, and I’ll walk you through what they’re all about and how they work. You’ll be a pro in no time!
Benefits of Drip Irrigation
Drip irrigation systems have been widely adopted by farmers and gardeners due to their numerous benefits. One of the most significant advantages is water conservation. Drip irrigation delivers water directly to the roots of plants, reducing evaporation and runoff compared to traditional sprinkler systems. According to a study published in the Journal of Irrigation and Drainage Engineering, drip irrigation can reduce water usage by up to 50% while maintaining crop yields.
Another benefit of using drip irrigation is reduced evaporation. Since water is delivered directly to the roots, there’s less opportunity for it to evaporate into the air. This not only conserves water but also reduces the amount of nutrients lost through leaching. A study conducted in California found that drip irrigation systems resulted in a 25% reduction in nutrient loss compared to traditional sprinkler systems.
By adopting drip irrigation, you can save money on water bills and extend the life of your crops.
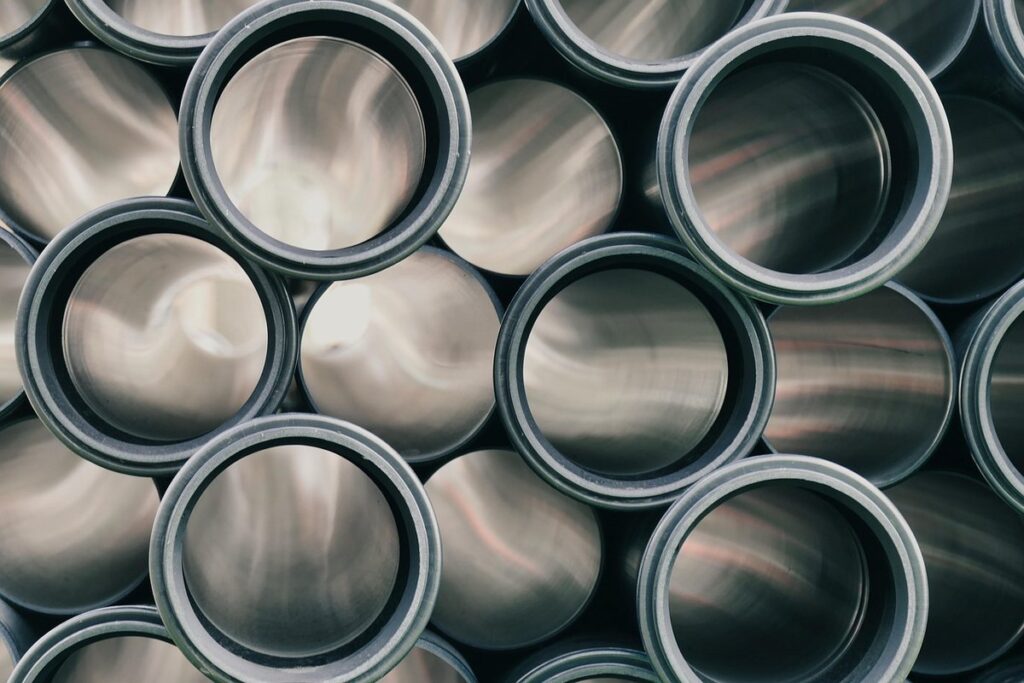
Types of Drip Pipes Available
When it comes to choosing the right drip pipe for your irrigation needs, you’re spoiled for choice. There are several types of drip pipes available on the market, each with its own set of pros and cons.
One popular option is HDPE (High-Density Polyethylene) drip pipe. This type of pipe is known for its durability and resistance to corrosion, making it an excellent choice for areas with high water pressure or aggressive soils. However, HDPE pipes can be more expensive than other options, and they may require specialized installation tools.
PVC (Polyvinyl Chloride) drip pipe is another common choice. PVC pipes are lightweight, easy to install, and relatively inexpensive. They’re also resistant to corrosion and UV light damage. However, PVC pipes may not be as durable as HDPE pipes and can become brittle over time.
Another option is polyethylene-coated pipes, which offer a cost-effective alternative to HDPE and PVC pipes. These pipes are made from a thin layer of polyethylene coating applied to a lower-cost base material, making them an attractive choice for budgets-conscious gardeners.
When choosing the right drip pipe for your needs, consider factors such as your soil type, water pressure, and budget. With a little research and planning, you can find the perfect drip pipe to deliver efficient watering to your plants.
Choosing the Right Drip Pipe System for Your Needs
When selecting a drip pipe system, it’s essential to consider your specific needs and the unique requirements of your garden or landscape. Let’s break down the key factors to help you make an informed decision.
Assessing Your Irrigation Requirements
When it comes to selecting the right drip pipe system for your needs, assessing your irrigation requirements is a crucial step. To determine what you’ll need, let’s start by considering three key factors: plant type, soil condition, and climate.
First, think about the types of plants you’re irrigating. Different plants have varying water requirements, so it’s essential to know how much water each one needs. For example, if you’re growing vegetables like tomatoes or peppers, they’ll require more frequent watering than flowers or herbs. Similarly, trees and shrubs will need less frequent but deeper watering.
Next, consider the condition of your soil. Sandy soils drain quickly, so they may require more frequent watering, while clay soils retain water and might not need as much irrigation. You should also think about the pH level of your soil, as this can impact nutrient availability for plants.
Finally, take into account your local climate. In hot or dry regions, you’ll likely need to irrigate more frequently than in cooler, wetter areas. Additionally, consider any seasonal fluctuations in temperature and precipitation that may affect plant growth. By understanding these factors, you can determine the right drip pipe system for your needs and ensure efficient irrigation of your plants.
Factors to Consider When Selecting a Drip Pipe System
When selecting a drip pipe system for your irrigation needs, there are several essential factors to consider. First and foremost, you’ll want to think about the water pressure and flow rate required for your specific application.
For instance, if you’re planning to use the system for large areas or high-pressure applications such as sprinkler systems, you’ll need a drip pipe with a higher flow rate (measured in gallons per minute) to ensure proper water distribution. Conversely, smaller plots or low-pressure systems may require a lower flow rate, making it essential to select a drip pipe that meets these specific needs.
Installation ease is another critical consideration. If you’re not familiar with irrigation installation or are on a tight budget, look for drip pipes with simple and straightforward installation processes. Some systems come with pre-assembled tubing and fittings, while others may require more manual assembly. Be sure to assess your skills level and the complexity of your project before choosing a system.
It’s also worth considering the pipe material, as some materials are better suited for certain climates or soil types.
Designing an Effective Drip Pipe System
When designing a drip pipe system, it’s essential to consider several key factors that will ensure efficient water distribution and minimize evaporation. This section will walk you through those crucial considerations.
Planning the Layout
When planning the layout of your drip pipe system, it’s essential to consider how you’ll route the pipes and place the emitters to maximize efficiency and minimize waste. A well-designed layout can make all the difference in ensuring that water reaches every plant evenly and effectively.
To start, take stock of the area where your plants will be located. Consider the spacing between each plant, as well as any obstacles like trees or paths that may need to be navigated around. Next, decide on a routing system for your drip pipes – you can use a grid pattern, a spiral design, or even bury them under mulch.
When placing emitters, think about how close they should be to the plant’s roots. A good rule of thumb is to place an emitter within 6-8 inches of each plant. However, if you’re using a tree or shrub with a wide canopy, you may need to space emitters farther apart to avoid overwatering.
As you plan your layout, keep in mind that it’s better to err on the side of caution and install fewer emitters than needed, rather than too many. This will help prevent overwatering and waste. With careful planning and consideration for the unique needs of each plant, you can create a drip pipe system that delivers water exactly where it’s needed.
Calculating Water Requirements
When designing an effective drip pipe system, it’s essential to calculate water requirements accurately. This ensures optimal watering levels for your plants, while also preventing overwatering and its associated problems. To do this, you’ll need to consider three key factors: plant types, climate, and soil conditions.
Start by researching the water needs of each specific plant species in your garden or landscape. Some plants require more frequent watering than others, especially during hot summer months. For example, tomatoes typically need about 20 gallons of water per week, while succulents can get by with as little as 1 gallon per month.
Next, consider the climate where you live. Regions with high temperatures and low rainfall will require more frequent watering, while areas with mild winters may only need to water every few days. Soil type is also crucial – sandy soils drain quickly, so plants in these types of soil will require more frequent watering than those in clay or loam soils.
To calculate your water requirements, multiply the water needs of each plant species by the number of plants you have, then add 10-20% to account for evaporation and other losses. For example, if you have 5 tomato plants that need 20 gallons per week, your total weekly water requirement would be: 5 x 20 = 100 gallons + (10-20%) = 110-120 gallons.
Installing and Maintaining Your Drip Pipe System
To ensure your drip pipe system runs smoothly, it’s essential to follow proper installation and maintenance procedures, which we’ll outline in detail below. This section covers key steps to get you started.
Preparation Before Installation
Before installing your drip pipe system, it’s essential to prepare the soil and lay a foundation for optimal performance. Begin by testing the pH level of your soil, as most plants thrive in slightly acidic to neutral conditions (pH 6.0-7.0). Adjusting the pH level can be done using lime or sulfur, but make sure to follow the manufacturer’s instructions.
Next, inspect the area where you’ll be installing the drip pipes and ensure it’s clear of debris, rocks, and any other obstructions. Remove any existing weeds or vegetation to prevent damage to the pipes during installation. If your soil is particularly dense or clay-heavy, consider aerating it to improve water penetration and root growth.
Additionally, lay a foundation for your drip pipe system by installing a suitable irrigation filter, if necessary. This will help remove debris and sediment from the water supply, ensuring consistent water flow and preventing clogs in the pipes. By taking these pre-installation steps, you’ll set your drip pipe system up for success and ensure it runs efficiently throughout its lifespan.
Step-by-Step Installation Guide
Installing different components of your drip pipe system can seem daunting at first, but with these step-by-step instructions, you’ll be up and running in no time. Let’s start with the pipes themselves.
To begin, turn off the water supply to the area where you’ll be installing the system. Next, lay out the mainline pipe, making sure it’s long enough to reach from the watering source to the farthest point of your garden or lawn. Use a trenching shovel to dig trenches for both the mainline and lateral pipes.
Now, let’s move on to filters and emitters. For filters, attach them to the end of each lateral pipe using a filter clip. Make sure they’re securely fastened and won’t come loose over time. As for emitters, place one at the end of each branch line, making sure it’s level and not clogged with debris.
Remember to check your local water pressure requirements to ensure proper system performance. Also, always follow the manufacturer’s instructions for specific installation recommendations.
Troubleshooting Common Issues with Drip Pipe Systems
We’ve all been there – a malfunctioning drip pipe system can be frustrating and wasteful, so let’s tackle some common issues you might encounter.
Identifying Common Problems
When working with drip pipe systems, it’s not uncommon to encounter common issues that can hinder their performance and efficiency. One of the most prevalent problems is clogged emitters. These small, delicate devices are responsible for dispersing water into the soil, but over time, they can become blocked by debris, sediment, or even algae growth.
Clogged emitters can lead to reduced watering effectiveness, uneven moisture distribution, and even plant stress. To prevent this issue, make sure to install emitters in well-ventilated areas and regularly inspect them for signs of clogging. A simple solution is to clean the emitters with a soft brush or replace them altogether if necessary.
Another common problem is low water pressure, which can be caused by kinks or blockages in the pipe lines, or faulty sensors that fail to detect adequate water levels. To troubleshoot this issue, check the entire system for any signs of damage or malfunction and ensure that all components are properly installed and calibrated.
Solutions to Common Problems
When encountering issues with drip pipe systems, it’s essential to address them promptly and effectively. One common problem is clogged pipes due to mineral buildup or debris accumulation. To resolve this, start by cleaning the affected area using a soft brush or a specialized pipe cleaner. For tougher cases, soak the pipes in a mixture of vinegar and water to break down mineral deposits.
In some instances, faulty components may need replacement. Inspect the system for damaged or corroded parts, such as drippers or filters. Replace them with new ones, ensuring compatibility with your existing setup. Regular maintenance can help prevent this issue altogether – consider implementing a schedule for inspecting and replacing worn-out components.
Another common problem is inefficient water distribution due to incorrect setup or clogged emitters. To optimize system performance, review the installation manual for specific guidance on emitter placement and spacing. Additionally, ensure that all connections are secure and free from leaks. By following these steps, you’ll be able to identify and resolve issues with your drip pipe system, restoring optimal performance and efficiency.
Advanced Drip Pipe System Features and Technologies
As you dive deeper into designing a sophisticated drip irrigation system, you’ll want to know about the cutting-edge features that take water management to the next level. This is where advanced technologies come in, enhancing efficiency and sustainability.
Pressure Regulators and Pumping Systems
In modern drip irrigation systems, pressure regulators and pumping systems play a vital role in ensuring efficient water distribution. These advanced features enhance the overall performance of the system, making it possible to achieve optimal crop yields while conserving water resources.
Pressure regulators are essential for maintaining a stable water pressure throughout the system. Without proper regulation, high pressure can damage pipes and emitters, leading to reduced efficiency and increased maintenance costs. By installing a pressure regulator, you can ensure that your drip irrigation system operates at its best. For instance, if you’re using a booster pump to increase the water pressure, a pressure regulator will prevent excessive pressure from causing damage.
A well-designed pumping system is also crucial for delivering the right amount of water to the plants. It’s not just about selecting the right pump; it’s also about ensuring that it’s properly sized and installed. A common mistake made by farmers is choosing a pump that’s too small, resulting in inadequate water supply or frequent cycling. Conversely, using a pump that’s too large can lead to excessive energy consumption and reduced system lifespan.
When designing your pumping system, consider factors such as flow rate, head pressure, and pipe sizing. You should also choose pumps that are specifically designed for agricultural applications and compatible with your existing equipment. By incorporating these features into your drip irrigation system, you’ll enjoy improved efficiency, increased crop yields, and reduced maintenance needs.
Soil Moisture Sensors and Automation
Integrating soil moisture sensors and automation technologies into drip pipe systems is a game-changer for optimal performance. These advanced features enable precise control over water distribution, ensuring that plants receive exactly what they need when they need it.
Soil moisture sensors are inserted directly into the soil to measure the level of moisture present. This data is then transmitted wirelessly to a central hub or smartphone app, where it’s used to automate irrigation decisions. For example, if the sensor detects low moisture levels, the system can initiate an irrigation cycle, ensuring that plants receive adequate water.
Automated systems can also be programmed to adjust watering schedules based on factors like weather forecasts, soil type, and plant growth stages. This level of precision reduces waste, saves water, and promotes healthy root development. By incorporating soil moisture sensors and automation technologies, growers can take their drip pipe system to the next level, optimizing performance and yields while minimizing environmental impact.
Some popular types of soil moisture sensors include capacitance-based probes and frequency domain sensors. When selecting a sensor, consider factors like accuracy, range, and durability to ensure optimal performance in your specific application.
Conclusion: Maximizing Efficiency with Drip Pipe Systems
In conclusion, implementing a drip pipe system can greatly enhance your watering efficiency. By delivering water directly to the roots of plants, you’re able to conserve up to 50% more water compared to traditional sprinkler systems. To maximize this benefit, make sure to carefully plan out your irrigation network, taking into account the specific needs of each plant variety and soil type.
As you begin to integrate drip pipe systems into your garden or yard, remember to monitor your water usage closely to ensure that you’re not overwatering any areas. With a little practice and fine-tuning, you’ll be amazed at how much more efficiently your plants are able to thrive on less water. By combining this with other water-saving techniques, such as mulching and rainwater harvesting, you can truly create a low-maintenance oasis that requires minimal upkeep while still producing lush, vibrant results.
Frequently Asked Questions
Can I install a drip pipe system myself, or do I need professional help?
Yes, you can definitely install a drip pipe system yourself with some basic plumbing knowledge and DIY skills. However, if you’re not comfortable working with pipes and tubing, it’s recommended to hire a professional for the installation.
What types of plants are best suited for drip irrigation systems?
Drip irrigation is ideal for plants that require precise moisture control, such as vegetables, fruits, flowers, and trees. It’s also suitable for lawns, gardens, and even greenhouses. However, it may not be the best option for larger areas with dense vegetation.
How do I troubleshoot clogged or blocked drip pipes?
Clogged or blocked drip pipes can be a common issue. To troubleshoot, check for debris or mineral buildup in the pipes. Use a gentle cleaning solution and a soft brush to clean out any blockages. Regular maintenance, such as flushing the system with water, can also help prevent clogs.
Can I use recycled or reclaimed water in my drip pipe system?
Yes, you can use recycled or reclaimed water in your drip pipe system, but it’s essential to ensure that the water is properly filtered and disinfected to prevent any potential health risks. You may need to install additional filtration systems or treatment equipment to make the water safe for irrigation.
How often should I inspect and maintain my drip pipe system?
Regular inspection and maintenance are crucial to ensure your drip pipe system operates efficiently and effectively. Check the system at least once a month, looking for signs of wear, leaks, or blockages. Clean or replace any damaged components promptly to prevent further issues.