Are you eager to grow your own lush green meadow or add some nitrogen-rich goodness to your garden? Look no further than the humble clover plant! With its vibrant purple flowers and hardy nature, clover is a popular choice for gardeners of all levels. But did you know that choosing the right type of clover seed can make all the difference in its success?
In this comprehensive guide, we’ll walk you through everything you need to know to grow your own clover from scratch. From selecting the perfect seed type to preparing your soil and sowing seeds effectively, we’ve got you covered. We’ll also share expert tips on how to care for your clover plants and – the best part – harvest those precious seeds to sow again next year. Whether you’re a seasoned gardener or just starting out, this guide is the perfect resource for anyone looking to grow and cultivate their own clover plant seeds.
Choosing the Right Clover Seed Type
When it comes to choosing clover seeds, there are several types to consider, each with its own unique characteristics and benefits for your lawn or garden. Let’s explore the options together!
Understanding the Different Species of Clover
When it comes to choosing the right clover seed type for your lawn or garden, understanding the different species of clover is crucial. There are three main types of clover: white clover, red clover, and microclover.
White clover (Trifolium repens) is a perennial legume that thrives in moist environments with partial shade. It’s an excellent choice for lawns, as it can tolerate foot traffic and requires minimal maintenance. White clover is also a favorite among bees and other pollinators due to its high nectar content.
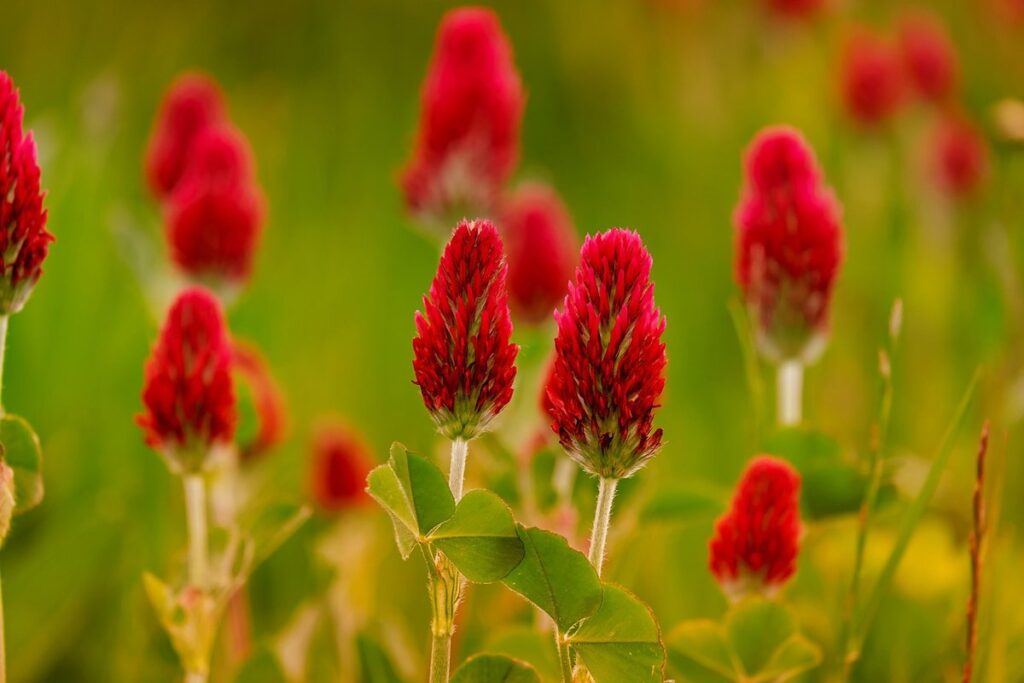
Red clover (Trifolium pratense), on the other hand, is an annual legume that prefers well-drained soils with full sun. It’s often used as a cover crop to improve soil fertility and suppress weeds. Red clover has a slightly bitter taste and can be used in salads or as a natural food coloring.
Microclover (Trifolium microphyllum), also known as ‘N-fixing’ microclover, is a low-growing perennial legume that’s gaining popularity for its ability to fix nitrogen in the soil. It’s an ideal choice for areas with poor soil quality and can be used as a companion plant to improve the health of nearby plants.
When choosing between these types of clover, consider your specific climate, soil type, and desired benefits. For example, if you’re looking to attract pollinators, white clover might be the best option. If you’re aiming to improve soil fertility, red clover could be a better choice.
Factors to Consider When Selecting a Seed Type
When selecting the right type of clover seed for your needs, there are several key factors to consider. Climate is a crucial consideration, as different types of clover thrive in varying temperature and moisture conditions. For example, white clover excels in cooler temperatures, making it an ideal choice for regions with mild winters, while red clover performs well in warmer temperatures.
Soil type is another essential factor to consider. Clover prefers well-drained soil that is rich in organic matter, but some types of clover are more tolerant of poor soil conditions than others. If you have heavy clay or sandy soils, a specific type of clover such as ‘Microclover’ may be the best choice.
Intended use is also an important consideration when selecting clover seed. For hay production, white clover or red clover may be suitable choices, while for erosion control, a more aggressive spreading type like ‘Ladino’ clover could be effective.
Preparing the Soil for Clover Plant Seeds
To ensure a successful clover crop, it’s essential to prepare your soil properly before planting seeds. This involves loosening and aerating the soil to create an ideal growing environment.
Testing and Amending Your Soil
When it comes to growing clover successfully, testing and amending your soil is crucial. This step ensures that you’re providing optimal conditions for your clover seeds to thrive. Soil deficiencies can hinder growth and lead to disappointing results.
A simple pH test kit can reveal if your soil’s acidity or alkalinity level is suitable for clover growth. Clover prefers a slightly acidic to neutral soil pH, between 6.0 and 7.0. If your soil tests too high or low, you may need to add elemental sulfur to lower the pH or lime to raise it.
Common soil deficiencies include nitrogen, phosphorus, and potassium imbalances. Clover is a legume, so it fixes nitrogen from the air into the soil as it grows. However, if your soil lacks sufficient nitrogen, clover growth will be stunted. A soil test can identify these issues, guiding you to apply the necessary amendments. For example, adding compost or well-rotted manure can replenish depleted nutrients.
Remember that it’s better to take a precautionary approach when amending your soil rather than risking inadequate conditions for your clover seeds. This step may seem tedious, but it’s essential for fostering healthy growth and a thriving clover crop.
Creating a Conducive Environment for Seed Germination
Creating an optimal environment for seed germination is crucial for clover plant seeds to grow into healthy plants. The first step is to ensure the soil pH level is suitable for clover growth. Most clover species prefer a slightly acidic to neutral soil pH, ranging from 6.0 to 7.0. If your soil’s pH is too high or too low, it can hinder seed germination and affect plant growth.
In addition to maintaining an ideal pH level, the soil must also provide essential nutrients for seed germination and growth. Clover plants require a balanced diet of nitrogen, phosphorus, potassium, and other micronutrients. You can add organic matter like compost or well-rotted manure to enrich the soil with these nutrients.
Moisture is another critical factor in creating a conducive environment for seed germination. Keep the soil consistently moist during the first few weeks after sowing, but avoid overwatering, which can lead to rot and other problems. Aim for a moisture level that’s neither too dry nor too wet – perfect conditions for seeds to sprout.
Maintaining an optimal temperature range is also essential. Most clover species prefer temperatures between 65°F (18°C) and 75°F (24°C). If the soil temperature drops below 55°F (13°C), seed germination may be delayed or inhibited.
Sowing Clover Plant Seeds: Best Practices and Techniques
To get the best results from sowing clover plant seeds, it’s essential to follow proper techniques and adhere to some simple yet crucial best practices. Let’s dive into what you need to know!
Planning Your Sowing Schedule
When planning your sowing schedule for clover plant seeds, it’s essential to consider the climate and weather patterns of your area. The ideal time for sowing varies depending on whether you live in a cool or warm climate. In temperate climates with mild winters, spring is an excellent time to sow red clover (Trifolium pratense) and white clover (Trifolium repens). For warmer climates, the best time to sow is typically during the fall or early winter.
To determine the optimal sowing time for your area, check the soil temperature. Clover seeds germinate well when the soil reaches a temperature of around 40°F to 50°F (4°C to 10°C). You can purchase soil thermometers or download apps that provide local weather and soil temperature data. Additionally, observe the average rainfall in your area. Clover plants require about 20-25 inches of rainfall annually, so ensure you have a sufficient water supply before sowing.
It’s also crucial to consider the specific variety of clover you’re planting. Some species, like microclover (Trifolium microphyllum), are more tolerant of heat and drought than others. Research the specific needs of your chosen variety to plan accordingly.
Seed Spacing and Depth Guidelines
When it comes to sowing clover plant seeds, getting the spacing and depth just right is crucial for proper germination and growth. As a general rule of thumb, most clover varieties prefer being seeded about 1/8 inch deep and 6-12 inches apart. However, this can vary depending on the specific type of clover you’re planting.
For example, microclover prefers shallower depths (around 1/16 inch) and closer spacing (4-6 inches), while white clover can handle slightly deeper seeding (about 1/4 inch) and wider spacings (12-18 inches). It’s essential to check the specific seed package or consult with a local nursery expert for guidance tailored to your region’s climate and soil conditions.
To ensure even spacing, try using a rake or hoe to create shallow trenches before scattering the seeds. This will help prevent overcrowding, which can lead to weak growth and reduced yields. Keep in mind that proper spacing also promotes better air circulation, reducing the risk of disease and pests. By following these guidelines, you’ll be well on your way to growing healthy, thriving clover plants.
Care and Maintenance of Clover Plant Seeds
To ensure your clover plant seeds thrive, it’s essential to understand how to properly care for them and maintain a healthy growing environment. This includes tasks like watering, fertilizing, and controlling pests.
Watering and Irrigation Strategies
When it comes to caring for clover plant seeds, adequate watering is essential. Clover plants require consistent moisture, especially during their germination and seedling stages. Inadequate water supply can lead to stunted growth, reduced yields, or even complete failure of the crop.
To ensure your clover plants receive sufficient water, consider implementing a drip irrigation system. Drip irrigation delivers water directly to the roots, reducing evaporation and runoff, and allowing you to conserve water resources. This method is particularly effective for areas with limited water availability or where soil moisture levels are difficult to control.
Another efficient way to retain moisture in the soil is through mulching. Organic mulch materials such as straw or bark chips help regulate soil temperature, suppress weeds, and reduce evaporation. Apply a 2-3 inch layer of mulch around your clover plants, keeping it a few inches away from plant stems to avoid any damage.
Regularly monitoring soil moisture levels will also enable you to make informed irrigation decisions. You can use a finger test or install moisture sensors to determine when your clover plants need water.
Fertilization and Pest Management
When it comes to maintaining healthy clover plants, fertilization and pest management are crucial aspects to consider. Regular soil testing will help you identify nutrient deficiencies that can affect clover growth. For example, phosphorus deficiency is common in acidic soils and can lead to reduced plant growth and productivity.
To address this issue, apply a balanced fertilizer during the growing season, following the recommended application rates on the product label. It’s also essential to maintain a consistent fertilization schedule throughout the year, as clover plants have different nutrient requirements at various stages of their life cycle.
Pest management is another critical aspect to focus on. Common pests that affect clover plants include aphids, whiteflies, and spider mites. These pests can cause significant damage by feeding on plant sap, reducing growth rates, and increasing susceptibility to diseases.
To manage these pests effectively, introduce beneficial insects like ladybugs or lacewings into the area, as they feed on pest species. Regularly inspect your plants for signs of infestation, and apply targeted treatments if necessary. By implementing a combination of fertilization and integrated pest management strategies, you can maintain healthy clover plants that thrive in their environment.
Harvesting Clover Plant Seeds: Tips and Best Practices
When harvesting clover plant seeds, it’s essential to dry them thoroughly to preserve viability and quality, a crucial step many gardeners overlook. This section shares expert advice on doing just that.
Identifying the Right Time for Harvest
Determining when clover seeds are mature and ready for harvest is crucial to ensure maximum yield and quality. To do this, you’ll need to observe the seed pods closely and consider factors like seed color, size, and texture.
Start by examining the seed pods on your clover plants. As they mature, the pods will begin to dry out and turn a light brown or tan color. This is a clear indication that the seeds inside are ready for harvest. Look for a slight swelling at the tip of each pod, which indicates the presence of fully developed seeds.
Check the size of the seeds by gently opening one of the pods. Mature clover seeds should be plump and about 3-4 mm in length. If the seeds appear small or immature, it’s best to wait a few more days before harvesting. The texture of the seeds is also important – they should be hard and dry to the touch.
By carefully observing these characteristics, you’ll be able to determine when your clover seeds are mature and ready for harvest, ensuring that you get the best possible yield from your crop.
Techniques for Efficient Seed Collection
When it comes to harvesting clover plant seeds, having efficient techniques at your disposal can make all the difference. Manual collection methods are still a popular choice among gardeners and farmers alike. One effective way to collect seeds by hand is through a process called “stripping.” This involves gently removing the mature seed pods from the stem, taking care not to damage the surrounding foliage.
Another manual method is “threshing,” where you use your fingers or a specialized tool to separate the seeds from their pods. Threshing can be more time-consuming but offers better control over the final product.
For larger-scale operations or those with limited labor resources, mechanical aids are a viable option. Combine harvesters and seed threshers are designed specifically for this purpose, greatly increasing efficiency while maintaining high yields. Considerations when choosing between manual and mechanical methods include your specific needs, available resources, and the desired level of precision in your final product. Experimenting with different techniques can help you find what works best for you.
Troubleshooting Common Issues with Clover Plant Seeds
If you’re having trouble with your clover seeds, don’t worry – we’ve got some troubleshooting tips to help you get back on track. Let’s tackle those pesky problems together!
Addressing Poor Germination Rates
Poor germination rates can be frustrating and costly for clover plant seed growers. But before you dismiss the batch as unsalvageable, consider that many factors contribute to poor germination. Inadequate soil conditions are a common culprit – if your soil is too alkaline or lacks essential nutrients like nitrogen, phosphorus, and potassium, it can hinder seed growth.
Moisture levels also play a critical role in germination. Seeds need consistent moisture to break dormancy and initiate growth. Ensure the top 1-2 inches of soil are consistently moist but not waterlogged, as this can lead to rot and further compromise germination.
If your seeds are not responding despite optimal conditions, check for physical damage or contamination. Old or damaged seeds may struggle to germinate or fail altogether. Be sure to inspect your seed stock regularly to cull any non-viable seeds before planting.
To boost germination rates, consider incorporating beneficial microorganisms into the soil through compost or inoculants. These can help create a more favorable environment for seed growth and development.
Managing Pests and Diseases Affecting Clovers
As a clover plant seed enthusiast, it’s inevitable that you’ll encounter pests and diseases that can damage your crop. Identifying these issues early on is crucial to preventing further spread and reducing the need for chemical controls. Look out for signs of pests like whiteflies, aphids, or spider mites, which can cause yellowing or stunted growth. Diseases such as powdery mildew, leaf spot, or root rot can also affect your clover plants.
To manage these issues effectively, consider implementing integrated pest management (IPM) strategies. This involves combining physical, cultural, biological, and chemical controls to minimize harm to the environment and human health. For example, you can use row covers to prevent pests from reaching your plants or practice good sanitation by removing weeds that can harbor disease-causing organisms.
When organic controls aren’t enough, consider using chemical pesticides or fungicides. Always read labels carefully and follow instructions for application rates and timing. In severe cases, consult with a local expert or nursery professional for guidance on managing pests and diseases specific to your region. By taking proactive steps, you can protect your clover crop from harm and ensure healthy growth throughout the season.
Frequently Asked Questions
Can I grow multiple types of clover together?
Yes, you can grow multiple types of clover together, but it’s essential to choose species that are compatible and have similar growing conditions. White clover and microclover can be grown together, but red clover may require more space and separate care.
What happens if I don’t prepare my soil properly before sowing clover seeds?
Poor soil preparation can lead to poor germination rates, reduced growth, and increased susceptibility to pests and diseases. Make sure to test your soil pH, amend it as needed, and incorporate organic matter to create a conducive environment for clover seed germination.
Can I use clover plant seeds from last year’s harvest?
While you can reuse clover seeds from last year’s harvest, their viability may decrease over time. It’s recommended to store seeds in an airtight container in a cool, dry place and sow them within 12-18 months for optimal results.
How often should I water my newly sown clover plants?
Newly sown clover plants require consistent moisture, especially during the germination phase (7-10 days). Water your seedlings gently but thoroughly every 2-3 days until they establish a strong root system. After that, reduce watering to about once a week.
What are some common pests and diseases affecting clovers?
Common pests affecting clovers include aphids, whiteflies, and spider mites. As for diseases, powdery mildew and root rot are prevalent issues. Implement Integrated Pest Management (IPM) strategies, such as crop rotation and biological control methods, to minimize the risk of pest and disease infestations.