Chives are one of those underrated kitchen staples that add a burst of fresh flavor to any dish, but they require some TLC to keep them thriving. If you’re struggling to get your chive plants to grow and produce an abundance of tender shoots all year round, this comprehensive guide is for you. With the right care and attention, you can enjoy a bountiful crop of fresh chives in your own garden or indoor pots. In this article, we’ll cover everything from soil preparation and pruning techniques to fertilizing and pest management strategies that will help you grow healthy, fragrant chives. Whether you’re a seasoned gardener or just starting out, our tips and tricks will help you keep your chives happy and flourishing all season long.
Choosing the Right Location for Chives
When selecting a spot for your chive plants, consider factors such as sunlight exposure and soil quality to ensure optimal growth. A location that receives partial shade to full sun is ideal.
Understanding Chive Light Requirements
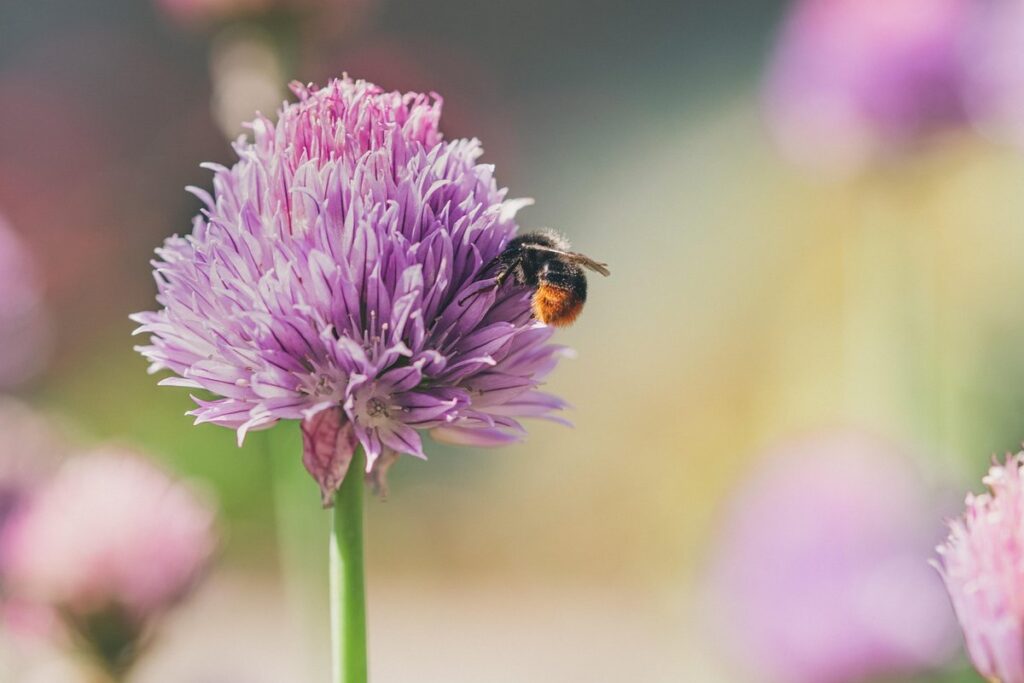
To thrive, chives require a moderate amount of light. While they can tolerate partial shade, direct sunlight is still essential for their growth and flavor development. If you’re planning to grow chives outdoors, choose a location that receives at least 4-6 hours of direct sunlight per day.
If direct sunlight isn’t feasible in your area, consider providing chives with indirect light. This can be achieved by growing them near an east- or west-facing window or using sheer curtains to filter the sun’s rays. Keep in mind that while indirect light is a suitable alternative, it may slow down the growth and flavor production of your chive plants.
In general, chives grown in direct sunlight will have a more robust flavor and aroma compared to those grown in partial shade. However, if you’re growing chives indoors, be cautious not to overexpose them to direct sunlight, which can cause scorching or burning of the leaves. Aim for 2-3 hours of direct sunlight per day for indoor plants.
Remember that even with sufficient light, chive plants will still require regular pruning and maintenance to encourage new growth and prevent flowering.
Preparing the Soil for Chives
Before planting chives, it’s essential to prepare the soil to provide a conducive environment for healthy root development. Start by testing the pH level of your soil using a DIY kit or sending a sample to a laboratory for analysis. Chives prefer a slightly acidic to neutral soil pH, ranging from 6.0 to 7.0.
Next, assess the drainage in your growing location. Chives don’t like wet feet, so ensure that the soil drains excess water quickly. If your area tends to be soggy, consider adding organic matter like compost or well-rotted manure to improve drainage and aeration.
To promote healthy growth, incorporate essential nutrients into your soil. Mix in 2-3 inches of compost or well-rotated manure, which will provide a balanced dose of nitrogen, phosphorus, and potassium (NPK) for the chives. You can also side-dress with a high-phosphorus fertilizer to encourage root development.
By addressing these factors, you’ll create an ideal environment for your chive plants to thrive. A well-prepared soil bed will also reduce the risk of pests and diseases, setting your chives up for success in their new home.
Planting Chive Seeds or Seedlings
When it comes to starting your chives, you have two main options: planting seeds directly into the ground or beginning with seedlings that need transplanting. Let’s walk through both methods.
Sowing Chive Seeds Indoors
Starting chive seeds indoors is an excellent way to get a head start on the growing season and ensure that your plants are ready for transplanting outside when the weather warms up. To begin, wait until 4-6 weeks before the last frost date in your area. This allows you enough time to raise healthy seedlings before moving them outdoors.
To create a suitable environment for germination, you’ll need a container with good drainage and a well-draining seed starting mix. Sow the seeds about 1/8 inch deep and 1-2 inches apart. Keep the soil consistently moist but not waterlogged – chive seeds can be sensitive to overwatering.
Provide adequate light by placing the container on a sunny windowsill or using grow lights. Aim for at least 12 hours of indirect light per day. Maintain a temperature between 65-75°F (18-24°C) during the day and slightly cooler at night. This will promote healthy germination and subsequent growth. With proper care, your chive seeds should sprout within 1-2 weeks, giving you a strong start for a thriving harvest.
Transplanting Chive Seedlings Outdoors
When transplanting chive seedlings outdoors, timing is crucial to ensure their survival. Wait until the weather has warmed up and there’s no risk of frost. Chives are hardy in zones 3-9, but they prefer a temperature range of 60°F to 80°F (15°C to 27°C) for optimal growth.
Before transplanting, acclimate your seedlings to outdoor conditions by gradually increasing their exposure to direct sunlight and wind over the course of 7-10 days. This will help prevent shock when they’re moved outdoors.
When transferring the seedlings, handle them gently to avoid damaging the delicate roots. Plant them in well-draining soil with full sun to partial shade, and space them about 6 inches apart. Keep the soil consistently moist during the first week after transplanting, but avoid overwatering.
As chives are sensitive to wind, choose a location that provides some protection from harsh gusts. If you live in an area prone to strong winds, consider using a trellis or other support to keep your plants upright and secure.
Watering and Fertilizing Chives
To keep your chive plants thriving, it’s essential to understand how often to water them and what fertilizers will give them an extra boost. Let’s dive into watering and fertilizing best practices for healthy growth.
Watering Needs of Chives
When it comes to watering chives, frequency is key. The ideal watering schedule for chives depends on various factors such as soil type, climate, and season. In general, chive plants prefer well-draining soil that’s not too wet or dry. If you’re using a potting mix specifically designed for herbs, you’ll want to water your chives more frequently than if you were growing them in a garden bed with good drainage.
In hot and dry climates, chives may need watering every 2-3 days during the peak summer months. However, in cooler and more humid environments, they might only require watering once a week. It’s also essential to consider the season: chives grow more rapidly in spring and fall, so you’ll want to water them more frequently during these periods.
Overwatering can be just as detrimental as underwatering – it can lead to root rot, yellowing leaves, and even kill your plant entirely. To avoid this, make sure the soil has a chance to dry out slightly between waterings. Water your chives in the morning so the plants have the entire day to absorb the moisture, reducing the risk of fungal diseases that thrive in moist conditions.
Keep an eye on the weather forecast too – if you’re expecting heavy rainfall or extreme heat, hold off on watering until the next day. Monitor your plant’s response to watering and adjust your schedule as needed. If the leaves start to droop or develop brown tips, it may be a sign that the soil is too dry. Conversely, if the leaves are consistently moist but start to turn yellow, you might be overwatering. By paying attention to these subtle signs, you’ll find the perfect balance for your chive plants’ watering needs.
Organic vs. Synthetic Fertilizers for Chives
When it comes to fertilizing chives, you have two main options: organic and synthetic fertilizers. Both types have their pros and cons, which we’ll explore below.
Organic fertilizers are a popular choice for gardeners who prioritize environmental sustainability. These fertilizers are derived from natural sources like compost, manure, or bone meal. They promote healthy soil biota, improve soil structure, and provide essential nutrients to your chives. For example, you can use fish emulsion or alfalfa meal as organic fertilizer alternatives.
Synthetic fertilizers, on the other hand, contain chemical compounds that provide a quick fix for nutrient deficiencies. However, their overuse can harm soil ecosystems and contaminate water sources. These fertilizers are usually more expensive in the long run due to the need for repeated applications. For instance, ammonium sulfate is a commonly used synthetic fertilizer, but it’s essential to follow the recommended application rates.
When choosing between organic and synthetic fertilizers, consider your garden’s specific needs and environmental goals. If you’re looking for a sustainable approach, opt for an organic option like compost or worm castings.
Pruning and Harvesting Chives
To keep your chive plants healthy and thriving, it’s essential to prune them regularly and harvest their leaves at the right time. Regular pruning will also encourage bushy growth.
How to Prune Chive Plants
Pruning chives regularly is essential for maintaining their flavor production and appearance. When left unpruned, chive plants can become leggy and flower more frequently, which reduces the potency of their leaves. Regular pruning encourages bushy growth, promotes a higher concentration of oils responsible for chives’ distinct onion-like flavor, and increases leaf production.
To prune your chive plants effectively, wait until they reach about 6-8 inches in height. Cut back the entire plant to within an inch from the base using scissors or pruning shears. This will stimulate new growth and encourage branching, resulting in a fuller, more compact plant. You can also remove individual flower stalks as they appear to direct the plant’s energy towards leaf production.
Pruning regularly also helps prevent chives from becoming too woody, which can happen if left unpruned for an extended period. By pruning your chive plants every 4-6 weeks during the growing season, you’ll be able to enjoy a continuous supply of fresh, flavorful leaves and promote a healthy plant appearance.
Tips for Harvesting Fresh Chives
When it’s time to harvest fresh chives from your garden, you want to make sure you’re doing it right. Harvesting at the right time and technique will not only ensure you get the most flavorful leaves but also promote healthy growth for your plant.
The best time to harvest chive leaves is in the morning after the dew has dried but before the heat of the day sets in. This is when the essential oils are most concentrated, giving your chives their distinctive flavor and aroma. Simply snip off individual leaves with scissors or pinch them off between your thumb and index finger. Leave about an inch of stem attached to the plant to allow for regrowth.
Another technique is to cut back the entire stem at a 45-degree angle just above a growth node. This will encourage bushy growth and promote new stems to emerge from the base of the plant. You can also try “pinching” – removing the top set of leaves with your fingers or scissors to encourage branching and prevent flowering. By harvesting regularly, you’ll keep your chive plants healthy and productive throughout the growing season.
Common Pests and Diseases Affecting Chives
Chives are susceptible to certain pests and diseases that can hinder their growth, so it’s essential to be aware of these common issues and how to address them. Some of these problems include aphids, spider mites, and powdery mildew.
Recognizing and Treating Chive Pests
As you tend to your chives, be on the lookout for common pests that can wreak havoc on their delicate growth. Aphids, with their soft, pear-shaped bodies, are a frequent visitor to chive gardens. These sap-sucking insects can weaken the plant’s defenses and spread disease. Spider mites, tiny arachnids with eight legs, also prey on chives, causing yellowing leaves and fine webbing.
To control infestations naturally, start by inspecting your plants regularly for signs of pests. Look for sticky honeydew droplets or actual insects on the stems and leaves. Use a strong jet of water to dislodge aphids and spider mites from the plant’s surface. For more severe infestations, try introducing beneficial insects like ladybugs or lacewings, which feed on these unwanted pests. You can also spray neem oil or horticultural soap directly onto the affected areas to deter further damage. By taking prompt action and employing these natural methods, you’ll be able to protect your chives from pest-related harm and maintain a healthy, thriving plant.
Identifying and Managing Fungal Diseases in Chives
Fungal diseases are a common threat to chive plants, particularly when they’re grown in moist conditions. To recognize leaf spot, look for circular lesions on the leaves that turn yellow or brown around the edges. The infected areas may also have a white or grayish powdery coating, which is a sign of fungal spores. Root rot is another concern; it causes the roots to soften and decay, leading to a range of symptoms from droopy leaves to plant death.
To prevent these diseases, maintain good hygiene practices around your chive plants. Start by removing any infected leaves or stems to prevent the spread of disease. Clean your tools regularly with soap and water to avoid transferring fungal spores between plants. Make sure to inspect your soil regularly for signs of fungal growth, such as a sour smell or slimy texture.
By recognizing the signs of fungal diseases early on and taking preventative measures, you can keep your chive plants healthy and thriving. Remember, it’s always better to err on the side of caution when dealing with potential threats to your plant’s health. Regularly inspecting your chives and maintaining a clean growing environment will go a long way in keeping these diseases at bay.
Tips for Extending the Harvest Season
To get the most out of your chive harvest, consider these practical tips to extend the season and enjoy your fresh chives well into autumn. With a little planning, you can keep harvesting for months!
How to Overwinter Chive Plants
If you want to enjoy fresh chives throughout the year, overwintering them is a great way to extend their harvest season. As the weather cools down, chive plants typically go dormant, but with proper care, you can coax them into surviving the winter months.
There are two methods for overwintering chive plants: bringing potted plants indoors or digging up and storing roots in a cool location. If you have potted chives, bring them inside to a bright, sunny spot with temperatures between 40-50°F (4-10°C). Water sparingly during the winter months, as the plant is dormant.
If you prefer to store the roots, dig up your chive plants in fall when the tops begin to yellow and die back. Trim the foliage to about an inch from the base of the plant. Then, gently separate the roots and store them in a breathable container like a paper bag or mesh bag filled with dry peat moss. Keep the stored roots in a cool, dark location with consistent temperatures between 32-40°F (0-4°C). Check on them periodically to ensure they remain dry and free of mold.
By overwintering your chive plants using either method, you’ll be able to harvest fresh chives as soon as new growth appears in the spring.
Strategies for Growing Chives Year-Round
To enjoy fresh chives throughout the year, you’ll need to employ some clever strategies for extending their harvest season. One effective way is by using containers. Since chives are hardy and can thrive in a variety of conditions, they’re perfect for container gardening. Simply plant them in a large pot or tub, place it in a sunny spot, and voilà! You’ll have a steady supply of fresh chives during the warmer months.
During winter, consider moving your containers to a cold frame or sunroom. This will provide protection from harsh weather conditions while still allowing for some sunlight. Alternatively, you can bring potted chive plants indoors and place them near a sunny window. With proper care, they’ll continue to produce fresh leaves even in the dead of winter.
Another approach is to set up an indoor growing setup using grow lights. This will allow you to control the light and temperature conditions, ensuring optimal growth and continuous harvesting throughout the year.
Frequently Asked Questions
Can I grow chives indoors if I don’t have a sunny windowsill?
Yes, it’s possible to grow chives indoors with indirect light. Use sheer curtains or blinds to filter the natural light, and ensure the temperature remains between 65-75°F (18-24°C). Chives can thrive in indoor containers under fluorescent lighting, making them a great option for urban gardeners.
How often should I water my chive plants during hot summer months?
Chives require consistent moisture, especially during hot weather. Water your chive plants when the top inch of soil feels dry to the touch. Increase watering frequency if you’re growing in containers or experiencing drought conditions. Be cautious not to overwater, as this can lead to root rot.
Are there any natural ways to repel pests from my chive plants?
Yes, you can use natural methods to deter pests from your chives. Spray neem oil or garlic spray on the leaves and soil to repel aphids, spider mites, and other common pests. Companion planting with basil, mint, or lemongrass can also help keep pests away.
Can I divide and replant my existing chive plants in the spring?
Yes, it’s a great idea to propagate your chives through division and replanting in the spring when new growth begins. Dig up the entire clump, separate the roots, and replant the divisions in well-draining soil with plenty of sunlight. This method helps maintain the plant’s vigor and promotes healthy growth.
How can I preserve fresh chive flowers for later use?
To preserve chive flowers, tie them in small bunches and hang upside down in a warm, dry place. Allow the flowers to air-dry completely before storing them in airtight containers or using them as is in your favorite recipes. You can also freeze or pickle chive flowers for future use, adding an extra burst of flavor to your dishes.