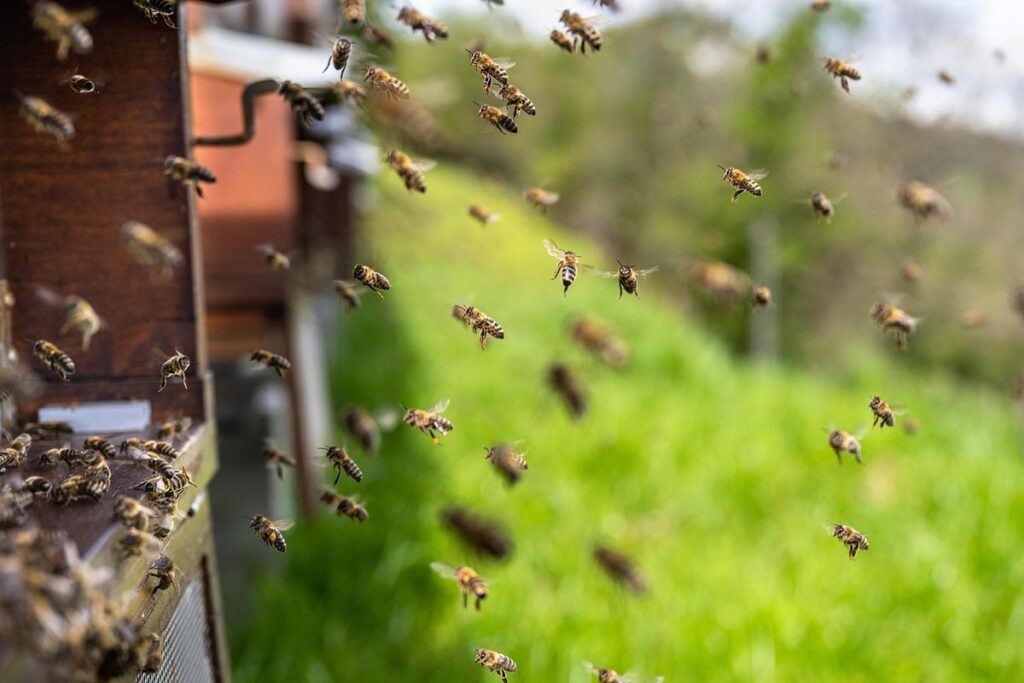
As a backyard beekeeper, you know that maintaining a healthy and thriving colony requires attention to every detail. One often-overlooked but crucial aspect is the frame wire used in your garden hive. This small component plays a significant role in supporting the structure of the hive and ensuring the well-being of your bees. Choosing the right frame wire can be daunting, especially with so many options available on the market. In this article, we’ll walk you through the process of selecting the perfect frame wire for your needs. We’ll cover topics such as material selection, size and gauge considerations, and troubleshooting common issues that may arise during installation or use. By following our expert tips, you’ll be well-equipped to choose a high-quality beekeeping frame wire and ensure the success of your garden hive.
Understanding Frame Wire Basics
Frame wire is a critical component of garden hive management, and understanding its basics will help you create strong, stable frames for your bees to thrive in. Let’s break down what you need to know about frame wire.
What is Frame Wire?
Frame wire is an essential component in beekeeping that plays a vital role in supporting frames within the hive. Its primary function is to provide structural integrity and stability to the frames, allowing them to hold their shape and maintain proper spacing throughout the honeycomb.
When it comes to frame wire, its purpose is multifaceted. Firstly, it helps to prevent warping or bending of frames due to weight or pressure from the bees’ activity. Secondly, it ensures that frames remain properly aligned with each other, which is crucial for maintaining optimal ventilation and airflow within the hive. Proper alignment also facilitates easy access for inspections and maintenance.
In addition, frame wire serves as a vital component in controlling pests and diseases within the hive. By providing a clean and well-structured environment, beekeepers can reduce the risk of pest infestations and disease outbreaks. Regular inspection and replacement of worn or damaged wire are essential to maintain its effectiveness.
For new beekeepers, selecting the right frame wire can be overwhelming due to the variety of materials and gauges available. However, most frame wires are made from durable, rust-resistant metals such as stainless steel or copper.
Types of Frame Wire Materials
When it comes to choosing frame wire for your garden hive, one of the most important decisions you’ll make is selecting the right material. The type of metal used can significantly impact the performance and longevity of your frames.
Steel is a popular choice for frame wire due to its high strength-to-weight ratio and affordability. However, it can be prone to rust and corrosion, especially when exposed to moisture and weather conditions. If you live in an area with high humidity or frequent rain, steel may not be the best option. On the other hand, aluminum is a lightweight and corrosion-resistant material that’s ideal for areas with high rainfall or coastal regions.
Copper wire, although more expensive, offers excellent durability and resistance to pests like rodents and insects. Its antimicrobial properties can also help prevent the spread of diseases within your hive. When selecting frame wire, consider factors like climate, budget, and personal preference. If you’re just starting out, steel may be a good option to start with, while experienced beekeepers may prefer the added benefits of copper or aluminum.
Frame Wire Sizes and Gauges
When it comes to frame wire sizes and gauges, beekeepers have several options to choose from. The most common standard size for frame wire is 16 gauge, but it’s essential to consider the specific requirements of your hive setup.
For smaller hives or nucs, a slightly thicker 14-gauge wire may be more suitable as it provides added support and stability. On the other hand, larger operations with multiple frames may prefer the thinner 18-gauge wire for better airflow and reduced weight.
When choosing the right size for your frame wire, consider the following factors: the type of bees you’re keeping (e.g., European or Italian), the climate, and the overall structure of your hive. For example, if you live in an area with high winds or heavy rainfall, a more robust 14-gauge wire may be necessary to prevent damage.
As a general rule, it’s best to stick with the standard sizes unless you have specific needs or preferences. Keep in mind that using frame wire that’s too thin can lead to weakened frames and compromised hive integrity, while excessive thickness can make assembly and disassembly more challenging.
Choosing the Right Frame Wire for Your Hive
When selecting frame wire, it’s essential to consider the gauge size and material, as these factors will impact the strength and durability of your hive frames.
Factors Influencing Frame Wire Selection
When selecting frame wire for your hive, there are several factors to consider to ensure it meets your needs and lasts throughout the season. First and foremost is durability – you want a wire that can withstand the wear and tear of regular inspection and manipulation without breaking or bending.
Another crucial factor is resistance to corrosion. Corrosion can weaken the wire over time, leading to breakage or even compromise the integrity of the hive itself. Look for wires made from durable materials such as stainless steel or galvanized wire, which offer excellent corrosion resistance.
It’s also essential to consider compatibility with other hive components. The frame wire should be able to fit snugly into the frame slots and not interfere with the movement of the frames themselves. Be sure to choose a wire that matches your frame type and size to avoid any potential issues.
When in doubt, consult with other beekeepers or suppliers for advice on selecting the right frame wire for your specific needs.
Options for Garden Hives: Wooden vs. Plastic Frames
When it comes to setting up garden hives, one of the most critical decisions is choosing between wooden frames with steel wire and plastic frames with aluminum or copper wire. Both options have their advantages and disadvantages, which can affect the health and productivity of your bees.
Wooden frames with steel wire are a classic choice for beekeepers. They offer excellent durability and can withstand the rigors of frequent inspections and honey harvesting. Steel wire also provides better support for the comb, allowing it to grow thicker and stronger over time. However, wooden frames can be heavier and more expensive than their plastic counterparts.
On the other hand, plastic frames with aluminum or copper wire are a popular alternative for garden hives. They are generally lighter and more affordable, making them easier to transport and install. Aluminum and copper wires also tend to last longer than steel wire, reducing the need for frequent replacements. Additionally, plastic frames can be easily sanitized and disinfected, which is essential for maintaining a healthy hive environment.
When deciding between wooden and plastic frames, consider your specific needs and preferences as a beekeeper. If you’re looking for durability and support for thick combs, wooden frames with steel wire may be the better choice. However, if you prioritize ease of installation, affordability, and ease of sanitizing, plastic frames with aluminum or copper wire could be the way to go. Ultimately, choose the option that best suits your garden hive setup and beekeeping style.
Installing Frame Wire in Your Hive
When installing frame wire in your hive, it’s essential to follow a few key steps to ensure a secure and efficient setup for your bees. This is where things can get a bit tricky!
Preparing Frames for Installation
Before you start installing frame wire in your hive, it’s essential to prepare each frame for optimal performance. Begin by removing any debris, old honeycomb, or propolis from the frames using a stiff brush and gentle scrubbing motion. This will ensure that the wire paths are free from obstructions and can properly support the comb.
Next, clean the wire paths on each frame with a soft-bristled brush to remove any residual wax or debris. Use a mixture of soap and water or a dedicated frame cleaner to gently scrub away any stubborn stains. Rinse thoroughly with warm water to prevent any residue buildup.
Once the frames are clean, lubricate the wire paths using a thin layer of bee-safe oil or wax, such as paraffin wax or lanolin. This will help reduce friction between the wire and the comb, making it easier for the bees to draw out their wax foundation. Be sure to apply the lubricant evenly and in moderation, as excessive amounts can attract pests or create an environment conducive to mold growth.
Remember to inspect each frame before installation to ensure that they are clean, dry, and free from any debris. This will help prevent issues during the installation process and promote healthy bee behavior once the hive is populated.
Securing Frames with Wire Tensioning
Proper wire tensioning is crucial to ensure that the frames are secure and functional. When installing frame wire, it’s easy to get carried away with tightening it excessively, but this can lead to damaged frames or even harm the bees. To avoid this, make sure to tighten the wire in a controlled manner.
Begin by attaching the wire to the hive stand and then work your way through each frame, ensuring that the tension is consistent throughout. A good rule of thumb is to leave about 1-2 inches of slack between the wire and the top bar of each frame. This will give you room to adjust as needed without over-tightening.
As you tighten the wire, check for any signs of strain on the frames or the bees’ behavior. If you notice the bees clustering at the bottom bars or showing signs of stress, it may be a sign that the wire is too tight. Adjust the tension accordingly and make sure to leave enough slack for the frames to expand with honey production.
Remember, proper wire tensioning takes practice, so don’t get discouraged if it takes a few attempts to get it right. With time and experience, you’ll develop a sense of what feels right and ensure that your bees have the best possible environment to thrive in.
Maintenance and Upkeep of Frame Wire
Regular maintenance is crucial for extending the life of your frame wire, ensuring it remains secure and effective in supporting your hive’s growth.
This section covers essential tasks to perform daily, weekly, and monthly to keep your frame wire in top condition.
Regular Inspections for Damage or Wear
Regular inspections for damage or wear on your frame wire are crucial to maintaining healthy and thriving colonies. As you check each frame, look for signs of wear such as broken or bent wires, loose joints, or rust spots. These can compromise the integrity of the frame and lead to issues with queen movement, brood distribution, and overall hive health.
Check for damage by gently lifting each frame out of the hive and examining the wire from both sides. Inspect the connections between frames and the hive box itself, ensuring that all joints are secure and not showing signs of wear. If you notice any issues, address them immediately to prevent further problems.
To replace damaged or worn-out wires, simply cut off the affected section using wire cutters and reattach a new piece using a small amount of beeswax to secure it in place. It’s also essential to clean the area around any repairs to prevent attracting pests and promote healthy bacteria growth within the hive. By incorporating regular inspections into your maintenance routine, you’ll be able to identify potential issues before they become major problems.
Replacing Damaged or Worn-Out Wire
When replacing damaged or worn-out frame wire, it’s essential to follow some key steps to ensure the new wire integrates seamlessly into your beehive. Before you start, take a moment to inspect the surrounding area for any signs of wear or damage on adjacent wires.
To begin, carefully remove the old wire by gently prying it away from the frame using a flat tool or a wire cutter. Be cautious not to touch any surfaces with your gloved hands, as this can transfer oils and create issues with paint adhesion or varnish. Clean the area thoroughly with soap and water to remove any debris.
Once you’ve removed the old wire, inspect the new one for any damage or kinks. If it’s damaged, don’t install it – set it aside in case you need an extra replacement down the line. Before installing the new wire, clean it gently with a soft brush to remove any dust or debris from manufacturing. This ensures the wire will sit smoothly against the frame and provides the best surface for the bees to build their comb.
When handling the new wire, be mindful of its flexibility – don’t stretch it too tightly as this can cause damage to both the wire and the surrounding area. Install the wire carefully, ensuring it’s not twisted or bent in any way that could interfere with the natural flow of the frame’s structure.
Troubleshooting Common Frame Wire Issues
We’ve all been there – a jammed frame wire causing more stress than sweetness from your hives. This section is designed to help you identify and resolve common issues with beekeeping frame wires.
Common Problems with Frame Wire
When it comes to maintaining a healthy garden hive, frame wire can be a culprit for common problems. Excessive wear and tear on frame wire is often caused by the constant opening and closing of frames during inspections and honey harvesting. This repeated stress can lead to frayed or broken wires, compromising the integrity of your frames.
Another issue that can arise with frame wire is damage from pests like mice or mites. These unwanted visitors love to chew on wire, causing irreparable harm to your frames. Mice, in particular, are notorious for gnawing on anything they can get their teeth into, including frame wire. A single mouse can chew through multiple wires in a short amount of time.
To prevent damage from pests, consider using hardware cloth or copper mesh to protect your frames. These materials are unpalatable to mice and mites, making them an effective deterrent. Regular inspections also help identify any signs of pest activity early on, allowing you to take action before the problem spirals out of control.
Solutions to Frame Wire-Related Issues
When dealing with frame wire-related issues in your garden hive, it’s essential to have a plan in place for prevention and repair. One of the most effective ways to prevent wire damage is by regularly inspecting your frames for signs of wear and tear.
To do this, gently remove each frame from the hive body and examine the wire for any signs of rust, fraying, or breakage. Make note of any damaged wires and replace them as needed to prevent further issues down the line. Consider using a wire brush to clean off any dirt or debris that may be accumulating on the frames.
If you do encounter damaged wire, don’t panic – there are several repair techniques you can use to get your hive back in working order. For minor fraying or rust spots, simply cut away the damaged section and re-splice the wire using a wire cutter and pliers. In more severe cases, consider replacing the entire frame to prevent further damage. By staying proactive and addressing issues promptly, you can keep your garden hive running smoothly all season long.
Conclusion: Optimizing Your Beekeeping Experience
As you’ve learned about the importance of beekeeping frame wire for your garden hive, it’s essential to remember that a happy and healthy hive starts with proper equipment. By choosing the right frame wire, you’re taking a crucial step towards creating an optimal environment for your bees. To take it even further, consider regularly inspecting your frames to ensure they’re properly aligned and free from debris. This simple habit can greatly reduce stress on your bees and make harvesting honey and monitoring their health much easier. By combining high-quality frame wire with regular maintenance, you’ll be well on your way to creating a thriving beekeeping experience that brings joy and satisfaction to your garden.
Frequently Asked Questions
How do I determine if my existing frame wire needs to be replaced?
If you’ve noticed a significant decrease in your hive’s performance or have observed signs of wear on the wire, it’s likely time for replacement. Inspect the wire regularly and replace it every 5-7 years or when damaged. Consider factors like temperature fluctuations, pests, and exposure to moisture.
What are some common mistakes to avoid when installing frame wire in my garden hive?
When installing frame wire, ensure that the tension is evenly distributed across each frame. Avoid over-tightening, which can cause warping or damage to the frames. Keep an eye out for uneven spacing between frames, as this can also lead to structural issues.
Can I use frame wire from a different manufacturer if I’ve already started with one brand?
While it’s technically possible to mix and match brands, it’s generally recommended to stick with a single manufacturer’s wire to ensure compatibility and consistency. Mixing brands may affect the overall performance and longevity of your frames.
How do I properly secure my frames with wire tensioning, especially if I have a lot of frames to manage?
For efficient frame securing, use a consistent tensioning method across all frames. Consider investing in a wire tensioner tool to streamline the process and prevent uneven tension. Practice makes perfect; start by securing one or two frames and work your way up.
What are some signs that my bees may be experiencing issues with their living conditions due to subpar frame wire?
Monitor your colony’s behavior closely for any changes in activity, honey production, or brood health. Keep an eye out for signs of structural damage, such as cracks or warping frames, and address these promptly to prevent long-term harm to the bees.