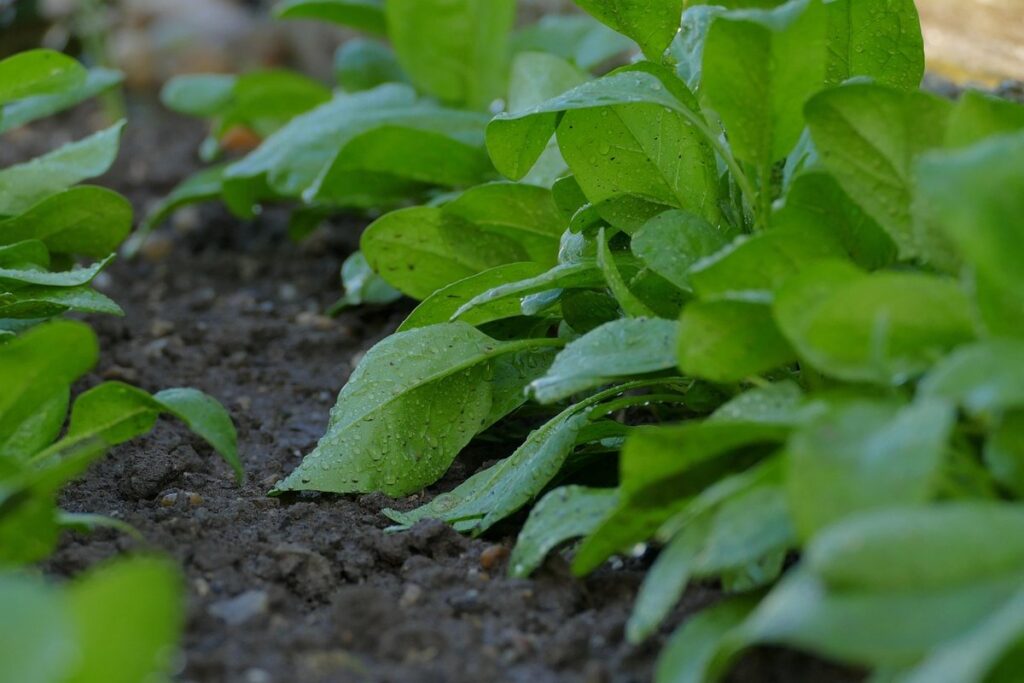
Getting your garden off to a great start begins with a solid foundation – literally. Soil preparation is the unsung hero of gardening, often overlooked until problems arise. But taking the time to understand and improve your soil can make all the difference between a thriving oasis and a struggling patch. In this article, we’ll delve into the essential techniques for preparing your soil, covering the importance of testing pH levels, types of soils, and how to create a garden that’s resilient enough to withstand seasons to come. We’ll also explore long-term conservation strategies to ensure your garden stays healthy and productive year after year, so you can enjoy the fruits of your labor with minimal maintenance.
Understanding Soil Types and pH Levels
To effectively improve your soil, it’s essential to grasp the basics of various soil types and pH levels, as each requires unique care and attention. Let’s dive into this crucial aspect of soil preparation together!
The Importance of Knowing Your Soil Type
Soil types are classified based on their texture and composition. There are primarily four main categories: clay, silt, sand, and loam. Clay soils have a high density and retain moisture well but can become waterlogged. Silt soils have a moderate density and are often found in areas with riverbanks or lakebeds. Sand soils drain quickly and dry out easily, making them suitable for plants that prefer dry conditions. Loam soils, considered the ideal mix of clay, silt, and sand, retain moisture but also allow air to penetrate.
Understanding your soil type is crucial for effective preparation. Knowing whether you have a heavy clay or sandy loam can help determine how much organic matter to add or how often to water. For example, if you have a clay soil, adding compost will improve drainage and structure, while over-tilling can damage the soil’s delicate ecosystem.
Knowing your soil type also informs crop selection and gardening techniques. Some plants thrive in specific soils, so it’s essential to choose varieties that suit your local conditions. By understanding and adapting to your soil’s characteristics, you’ll achieve better results from your garden and minimize the risk of common problems like erosion or nutrient deficiencies.
Measuring and Adjusting pH Levels for Optimal Growth
Measuring and adjusting pH levels is crucial for optimal plant growth. When it comes to soil, a suitable pH range varies depending on the type of plants you’re growing. Most vegetables, fruits, and flowers thrive in slightly acidic to neutral soils with a pH between 6.0 and 7.0.
To measure pH levels, use a pH meter or pH test kit. These tools will give you an accurate reading of your soil’s acidity level. Take multiple readings from different spots in the garden to get a comprehensive understanding of the soil’s pH.
If your soil is too acidic (low pH), add lime to raise it. On the other hand, if your soil is too alkaline (high pH), use elemental sulfur to lower it. Start with small increments and monitor the pH levels regularly to avoid over-correction. A 1-point change in pH can significantly impact plant growth, so be cautious when adjusting.
Remember, maintaining a consistent pH level throughout the growing season will ensure your plants receive the best possible conditions for optimal growth. Monitor and adjust as needed to achieve a thriving garden.
Testing Your Soil: Why and How
Now that you’ve got your soil ready, it’s time to put it to the test! Let’s explore why testing your soil is crucial and how to do it accurately at home.
Choosing the Right Testing Method
When it comes to determining the health and composition of your soil, choosing the right testing method is crucial. There are several options available, each with its own set of advantages and disadvantages.
Soil tests can be purchased at most gardening stores or online. These kits usually involve a simple process where you collect a small sample from your yard and follow the instructions to determine the pH level, nutrient content, and other key indicators of soil health. The results are often quick and easy to understand, but may not provide an accurate representation of your soil’s overall condition.
DIY testing kits can also be purchased, which typically include a more comprehensive set of tests than store-bought options. However, these kits can still lack the precision of laboratory analysis and may require some technical knowledge to interpret the results.
Laboratory analysis offers the most comprehensive and accurate assessment of your soil’s composition. This method involves sending a sample to a certified laboratory for testing, which can take several days or weeks to receive the results. While more expensive than other methods, laboratory analysis provides detailed information on nutrient levels, pH, and other factors that can help you create an effective fertilization plan.
Ultimately, the best testing method for your soil will depend on your specific needs and budget. Consider consulting with a gardening expert or taking a soil sample to a local nursery for guidance on choosing the right test.
What to Expect from a Soil Test Report
When you receive your soil test report, it’s essential to understand what information is being provided and what it means for your garden. A typical report will include details about the nutrient levels in your soil, such as nitrogen (N), phosphorus (P), and potassium (K) – often referred to as NPK.
You’ll also find the pH level of your soil, which measures its acidity or alkalinity on a scale of 0 to 14. A pH between 6.0 and 7.0 is generally considered ideal for most plants. If your report reveals a high or low pH, it may indicate the need for lime or sulfur to adjust the balance.
Other factors that might be included in a soil test report are the levels of micronutrients like calcium, magnesium, and sulfur. Additionally, some reports may provide information on the presence of contaminants, such as heavy metals or pesticides.
To make sense of your results, consider consulting with a gardening expert or agronomist who can help you interpret the data and create a plan to address any deficiencies or imbalances in your soil.
Preparing Your Soil for Planting
Before you start planting, it’s essential to give your soil a little TLC. In this next section, we’ll walk through some simple techniques to get your soil ready for a healthy harvest.
Removing Debris and Tillage
Removing debris and tilling your soil are essential steps in preparing it for planting. Debris can include weeds, rocks, twigs, and other organic matter that can hinder seed germination and root growth. It’s crucial to clear the area of debris before tilling to prevent any potential issues.
Mechanical tillage is a common method used to break up compacted soil. Tools like rototillers or plows help loosen the top layer of soil, allowing air, water, and nutrients to penetrate deeper. Manual tillage methods include using tools like hoes, rakes, and shovels to loosen and aerate the soil.
Both mechanical and manual tilling have benefits depending on your specific situation. Mechanical tillage is ideal for large areas or when you need to break up heavy clay soils. However, it can damage soil structure if overused. Manual tillage is better suited for smaller areas and allows for more precise control over soil depth and aeration.
To effectively remove debris and till your soil, start by clearing the area of any visible weeds and rocks. Use a mechanical tiller or manual tools to break up compacted soil, working in sections to avoid fatigue.
Adding Organic Matter: Compost, Manure, and More
Adding organic matter to your soil is one of the most effective ways to improve its structure and fertility. There are many types of organic matter that you can use, but let’s focus on a few popular ones.
Compost is perhaps the most well-known form of organic matter. It’s made from decomposed kitchen scraps, leaves, and other garden waste. To make compost at home, simply collect your organic materials in a designated bin or pile, add some brown materials like dried leaves to balance out the green materials, and let it break down over time.
Animal manure is another excellent option. Chicken manure, for example, is rich in nitrogen and phosphorus, making it perfect for vegetable gardens. You can also use cow or horse manure, which are high in potassium and other micronutrients. When using animal manure, be sure to mix it with some soil or compost to prevent burning your plants’ roots.
Other options include green sand (a type of glauconite that’s rich in potassium), alfalfa meal (high in nitrogen and phosphorus), and worm castings (nutrient-rich vermicompost). To incorporate these into your garden, start by mixing them with a small amount of soil or compost. This will help the organic matter break down evenly and prevent any potential nutrient shock to your plants. As you get more comfortable with using different types of organic matter, you can increase the amount you add to your soil.
Soil Conditioning Techniques for Specific Challenges
So, you’ve got a specific soil challenge on your hands and need some tailored solutions. We’re sharing our top techniques to overcome common issues like poor drainage and nutrient deficiencies.
Dealing with Compacted or Waterlogged Soil
Dealing with compacted or waterlogged soil can be a major challenge when it comes to garden or lawn care. Compacted soil occurs when the ground is repeatedly trodden on, causing the air pockets to collapse and making it difficult for roots to grow. On the other hand, waterlogged soil is saturated with too much moisture, which prevents oxygen from reaching the roots.
To address compacted soil, you can try aeration techniques such as spiking or slit-draining. Spiking involves using a fork to puncture the soil and allow air to penetrate, while slit-draining uses a specialized tool to create narrow channels for water to escape.
For waterlogged soil, adjusting your irrigation schedule is crucial. Make sure not to overwater, which can exacerbate the issue. Mulching can also help in both cases by retaining moisture and suppressing weeds. However, be cautious not to apply too much mulch, as this can cause more harm than good. By implementing these strategies, you can gradually improve soil conditions and create a healthier environment for your plants to thrive.
Correcting Nutrient Deficiencies in Your Soil
When it comes to soil conditioning, identifying and correcting nutrient deficiencies is crucial for a healthy and thriving ecosystem. Nitrogen, potassium, and phosphorus are some of the most common macronutrient deficiencies found in soils. Nitrogen deficiency often manifests as yellowing leaves or stunted growth, while potassium deficiency can lead to weak stems and reduced fruit yields.
To correct these deficiencies, consider incorporating nutrient-rich amendments into your soil preparation routine. Compost tea, for example, is an excellent source of beneficial microbes that help convert unavailable nutrients into a form accessible to plants. Alternatively, you could add a balanced fertilizer specifically formulated to address nitrogen or potassium imbalances.
Crop selection also plays a vital role in correcting nutrient deficiencies. Some crops, like legumes, are naturally adept at fixing atmospheric nitrogen and can be used as cover crops to enrich the soil. When choosing your crop rotation sequence, take into account the nutritional requirements of each plant variety to ensure you’re not exacerbating existing imbalances. By adopting these strategies, you’ll be well on your way to achieving a balanced nutrient profile in your soil.
Implementing Long-Term Soil Conservation Strategies
So, you’ve got your soil preparation underway, but now it’s time to think long-term: how will you protect and preserve your newly-prepped soil for years to come? We’ll explore effective strategies.
Mulching and Cover Cropping for Erosion Control
Mulching and cover cropping are two powerful tools for preventing soil erosion and promoting long-term soil health. By applying a layer of organic mulch to the soil surface, you can reduce soil compaction, retain moisture, and suppress weed growth – all of which contribute to reduced erosion risk.
Cover crops, on the other hand, are plants that are intentionally grown between crop cycles to protect and enrich the soil. Legumes like clover or beans fix nitrogen in the soil, while grasses like rye or oats help hold soil in place with their deep roots. By incorporating cover crops into your rotation, you can build up soil organic matter, improve soil structure, and increase water retention.
To implement these practices effectively, start by selecting a mix of mulch materials that suit your garden’s needs – such as wood chips, straw, or compost. Apply a 2-3 inch layer to the soil surface, leaving a small gap between the mulch and any plant stems to prevent moisture buildup. As for cover crops, choose varieties that thrive in your region and can be easily incorporated into your existing crop rotation. Plant them at the right time – usually in late summer or early fall – and let them grow until the following spring, when you’ll terminate them with a shallow tiller or mow them down to prepare for the next crop cycle.
Crop Rotation and Companion Planting for Healthy Soils
Crop rotation and companion planting are two powerful techniques that can help maintain healthy soils. By rotating crops and pairing plants together, you can create a balanced ecosystem that promotes soil fertility, reduces pests and diseases, and increases biodiversity.
When it comes to crop rotation, the goal is to break disease and pest cycles by alternating between different types of crops. For example, if you’ve grown corn in a particular field, it’s best to rotate to a legume like beans or peas the following season. Legumes have nodules on their roots that fix nitrogen from the air into the soil, making it available for subsequent crops.
Companion planting is also essential for healthy soils. Certain plants, such as marigolds and nasturtiums, repel nematodes that can harm crops, while others like beans and corn support each other’s growth through symbiotic relationships. Some examples of beneficial plant combinations include:
* Planting basil with tomatoes to improve flavor and reduce pests
* Pairing carrots with sage to deter carrot flies
* Growing marigolds with roses to repel nematodes
Monitoring Progress and Making Adjustments
Now that you’ve begun preparing your soil, it’s essential to keep a close eye on its progress and make adjustments as needed to ensure optimal conditions for growth. Let’s dive into monitoring techniques and adjusting your strategy accordingly.
Regular Soil Testing for Continuous Improvement
Regular soil testing is an often-overlooked but crucial step in monitoring progress and making adjustments to your soil preparation techniques. By conducting regular tests, you’ll be able to identify areas where your current methods are falling short and make targeted changes to improve soil health.
Without regular testing, it’s impossible to know if your amendments are having the desired effect or if there are underlying issues with pH levels, nutrient deficiencies, or contaminants that need attention. A simple test can reveal whether your soil is alkaline, acidic, or neutral, allowing you to adjust your liming and fertilizing strategies accordingly.
For example, a test may show that your soil’s nitrogen levels are high but phosphorus levels are low. This information enables you to rebalance your fertilizer application, avoiding over-nitrogenation that can lead to environmental problems and reduce crop yields. By incorporating regular soil testing into your routine, you’ll be able to make data-driven decisions and fine-tune your preparation techniques for optimal results.
Adapting to Seasonal Changes in Your Soil’s Needs
As you monitor your soil’s progress throughout the growing season, it’s essential to remember that seasonal changes can significantly impact its needs. In spring, for example, soils often require more moisture and organic matter to recover from winter dormancy. This is a great time to add compost or well-rotted manure to improve soil structure and fertility.
In summer, on the other hand, soils may need less water as plants are actively growing and taking up nutrients. Be cautious not to overwater, which can lead to nutrient deficiencies and root rot. Autumn brings a decrease in temperature and rainfall, making it an ideal time for incorporating cover crops or green manures to protect soil from erosion and replenish nutrients.
In contrast, winter often requires reduced maintenance as plants are dormant. However, it’s still crucial to maintain soil health by adding organic matter and ensuring adequate drainage to prevent waterlogging. By adapting your preparation techniques according to the season, you can create a balanced ecosystem that supports healthy plant growth throughout the year.
Conclusion: Putting It All Together for a Thriving Garden
Now that you’ve learned about various soil preparation techniques, it’s time to put them into practice. Remember, proper soil preparation is key to a thriving garden. Think of your soil as the foundation of your garden – if it’s solid, everything else will fall into place. To ensure this foundation is strong, incorporate all the tips and tricks you’ve learned throughout this article. For instance, test your soil pH levels regularly, mix in organic matter like compost or well-rotted manure, and consider using raised beds to improve drainage.
By combining these techniques, you’ll be well on your way to creating a garden that’s not only beautiful but also productive. Don’t forget to monitor your soil’s progress over time and make adjustments as needed. With patience and persistence, even the most challenging soil types can be transformed into a lush, thriving haven for your plants.
Frequently Asked Questions
What if I’m short on time for regular soil testing?
Regular soil testing is crucial, but it’s not always feasible to test your soil every month. Consider testing at the beginning of each season (spring and fall) to monitor pH levels, nutrient deficiencies, and overall health.
How do I know which organic matter to add to my soil?
Adding the right type and amount of organic matter can be overwhelming. Consult with a local nursery or gardening expert to determine which types of compost, manure, or other amendments are best suited for your specific climate and soil needs.
Can I use cover crops in areas with poor drainage?
Cover cropping is beneficial, but it may not be suitable for areas with waterlogged soils. Choose cover crops that thrive in wet conditions or consider using mulch to reduce erosion while improving soil structure over time.
What’s the difference between compost tea and worm casting?
Compost tea and worm casting are both valuable soil amendments, but they serve distinct purposes. Compost tea is a liquid solution made by steeping compost in water, providing beneficial microbes for improved soil health. Worm casting, or vermicompost, is a nutrient-rich fertilizer created by worms breaking down organic matter.
How often should I adjust the pH level of my soil?
pH adjustments should be made gradually to avoid shocking your plants. Monitor pH levels regularly and make adjustments every 6-12 months as needed. Keep in mind that some plants prefer slightly acidic or alkaline soils, so research specific requirements for your plants to ensure optimal growth.