Starting seeds indoors can be both an art and a science. Choosing the right type of seed starter is crucial to ensure your plants have a healthy head start before being transplanted into their final garden home. But with so many options available, it’s easy to feel overwhelmed. Should you go for peat moss, coconut coir, or perhaps a more eco-friendly alternative? And how do you know when the seedlings are ready to be transplanted outside? If you’re looking to boost your garden’s success and want to learn the secrets of successful seed starting, then this guide is for you. We’ll take you through the process of selecting the perfect seed starter, from choosing the right type to transplanting with ease.
Understanding Seed Starters
Let’s break down what seed starters are and how they can benefit your garden, from simplifying soil to reducing transplant shock for young plants.
What Are Seed Starters?
Seed starters are essentially small containers, usually made of plastic or biodegradable materials, designed to help seeds germinate and grow into robust seedlings before being transferred outdoors. They serve as a transitional phase between the initial sowing of seeds and their eventual transplantation into more permanent positions in your garden.
When seeds are directly planted into the ground, they often face challenges like competition from weeds, insufficient light, or waterlogging. Seed starters provide an environment that is tailored to meet these emerging seedlings’ needs. They typically consist of a mix of peat moss, vermiculite, and perlite, which retain moisture while ensuring proper drainage.
By providing a stable foundation for your plants, seed starters help them develop stronger root systems and adapt more effectively to the external conditions they’ll face when transplanted outdoors. This process not only enhances their chances of survival but also enables you to monitor their progress before making any changes to their environment.
Benefits of Using Seed Starters
Using seed starters can have a significant impact on the success of your garden. One of the most notable benefits is the increased germination rates. By providing seeds with the right amount of moisture and warmth, you can ensure that they sprout quickly and evenly. This means that more of your seeds will actually make it to the stage where they can be transplanted into larger containers or directly into the garden.
Seed starters also play a crucial role in improving seedling health. By giving young plants the right environment to grow in, you can prevent many common issues such as overwatering and underwatering. This is especially important for delicate seedlings that need gentle care during their early stages of development. With the right conditions, seedlings will be stronger and more resilient from an early age.
Furthermore, seed starters facilitate enhanced root development. By providing seeds with a controlled environment to grow in, you can encourage the growth of healthy roots that are essential for strong plant growth. This is especially important during the early stages of plant development when roots need all the support they can get.
Choosing the Right Seed Starter
When it comes to starting seeds successfully, choosing the right seed starter is crucial. This decision will set your plants up for a healthy and strong beginning.
Types of Seed Starters
When it comes to choosing the right seed starter for your garden, you’re spoiled for choice with the numerous options available. Let’s explore some of the most popular types of seed starters on the market.
One common option is plastic cell packs, which are often inexpensive and widely available at most gardening stores. However, they can be prone to drying out and may not provide enough room for root growth. On the other hand, biodegradable pots made from materials like peat or coconut coir offer a more environmentally friendly alternative. These pots are designed to break down in the soil as the seedling grows, eliminating the need for transplanting.
Another option is reusable containers, such as plastic trays or clay pots, which can be used multiple times and reduced waste. If you’re looking for an eco-friendly solution, consider using a set of bamboo seed starters, which are biodegradable and compostable at the end of their life cycle. Whichever type of seed starter you choose, make sure to select one that meets your specific needs and preferences.
Factors to Consider When Selecting a Seed Starter
When selecting a seed starter, there are several key factors to consider to ensure it meets your specific needs and provides the best possible start for your seeds. First and foremost, think about the material of the seed starter. Some popular options include plastic, bioplastic, and clay pebbles. Plastic seed starters can be lightweight and inexpensive, but may retain heat and moisture, which can lead to fungal diseases. Bioplastics, on the other hand, are made from renewable resources and are more eco-friendly.
Next, consider the size of the seed starter. A general rule of thumb is that seeds should have about 1-2 inches of space around them for root growth. If you’re starting a small batch of herbs or succulents, a smaller seed starter may be sufficient. However, if you’re planning to start multiple batches of vegetables or larger plants, you’ll need a larger seed starter.
Drainage is also crucial when selecting a seed starter. Look for starters with built-in drainage holes or those made from materials that allow excess water to pass through, such as coconut coir or rock wool. This will help prevent waterlogged soil and root rot, giving your seeds the best chance at success.
Preparing Your Seed Starters for Planting
Now that you’ve got your seeds germinated, it’s time to prepare them for a successful transition into their final garden home. This is where proper care and planning come into play.
Sowing Seeds in Seed Starters
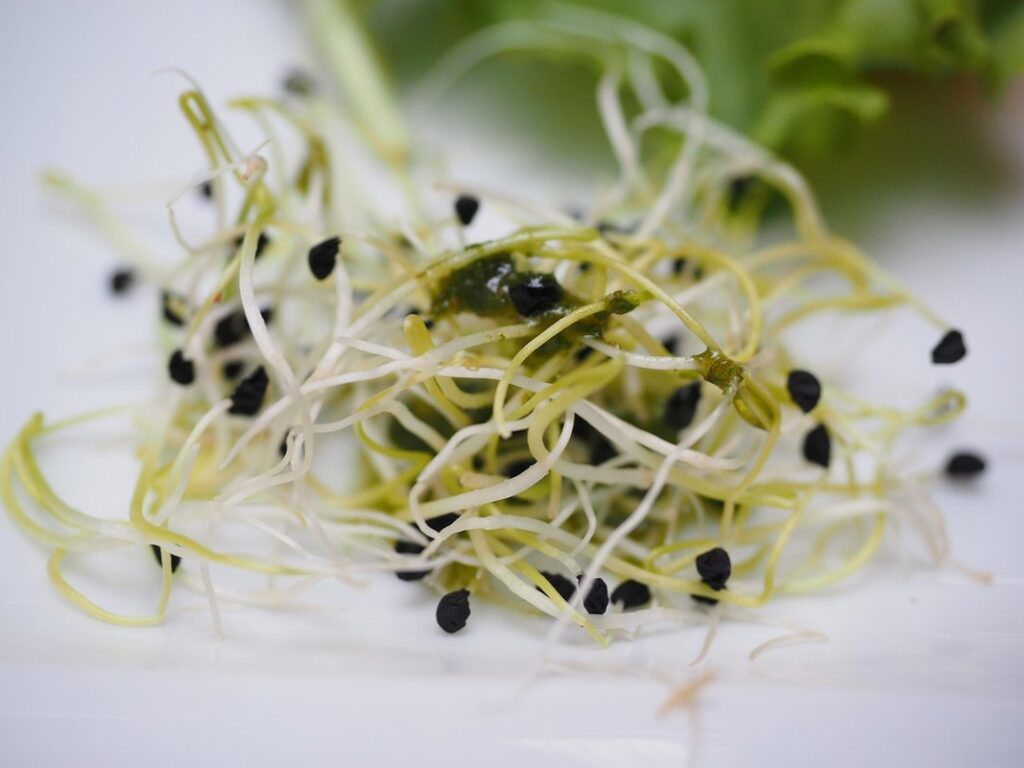
Sowing seeds in seed starters is an art that requires precision and care. When sowing seeds, it’s essential to follow a few simple steps to ensure they germinate and grow healthily. Start by selecting a well-draining seed starter mix and filling the cells or containers with it. Moisten the soil gently but thoroughly.
Next, read the seed packet carefully for specific instructions on sowing depth and spacing. Most seeds require their seeds to be planted at 2-3 times their own depth. For example, if you’re planting a small tomato seed, sow it about ¼ inch deep. Make sure to leave enough space between each seed for them to grow and mature.
For tiny seeds like lettuce or radish, sow them on the surface of the soil and gently press down with your fingers. Larger seeds can be sown deeper in the soil. Some examples include zucchini (about 1-2 inches deep) and cucumber (about ½ inch deep). Plant multiple seeds per cell to account for potential seed loss during germination.
Keep in mind that overcrowding will lead to stunted growth, disease, or pests infestations. Space seeds according to the packet’s recommendations, typically between ¼ to 1 inch apart.
Providing Adequate Light and Water
Providing adequate light and water is crucial for seedlings growing in seed starters. Light plays a significant role in photosynthesis, which enables seedlings to grow strong and healthy. However, if the light is too intense, it can cause stress to the seedling, leading to weakened stems and poor growth.
Ensure your seed starter receives at least 12-14 hours of indirect light per day. Placing them near an east-facing window or using a grow light with adjustable brightness can help achieve this balance. On the other hand, if your seed starter is placed in low-light conditions, it may not develop strong enough to handle outdoor conditions.
Watering also requires attention, as overwatering can be detrimental to seedlings. Check the soil daily by sticking your finger into it up to the first knuckle. If the soil feels dry, it’s time for a watering. Avoid getting water on the leaves to prevent fungal diseases; instead, water at the base of the plant.
Monitor your seed starter’s condition and adjust your light and watering schedule accordingly. This will help you create an ideal environment for healthy growth and development, ultimately boosting your garden’s success.
Transplanting Seedlings from Seed Starters
Now that you’ve nurtured your seedlings in a starter tray, it’s time to transplant them into their permanent homes outside, with care and attention to avoid shocking the roots. This process can be a bit tricky, but we’ll walk you through the essential steps.
Timing and Technique for Transplanting
Transplanting seedlings from seed starters to larger containers or directly into the garden requires careful timing and technique. When it comes to timing, wait until the seedlings have at least two sets of leaves and are about 1-2 inches tall. This allows them to be robust enough for transplanting without becoming stressed.
Technique-wise, gently remove the seedlings from their starter tray or pot by grasping the soil around the stem and not the delicate roots themselves. Trim any damaged or weakened roots with sterile scissors before replanting in fresh, well-draining mix. Water thoroughly after transplanting to settle the soil around the roots.
When transplanting directly into the garden, space seedlings 6-12 inches apart depending on mature plant size, and dig a hole slightly deeper than the pot. Place the seedling in the hole, firm the soil gently, and water well. Alternatively, harden off seedlings before direct transplanting by gradually exposing them to outdoor conditions over several days.
Pay attention to temperature fluctuations when transplanting; ideally choose calm, cloudy days for optimal success. By following these guidelines, you’ll be able to minimize stress on your seedlings and give them the best chance at thriving in their new environment.
Minimizing Shock and Ensuring Successful Establishment
When transplanting seedlings from seed starters to their final growing location, it’s crucial to minimize shock and ensure a successful establishment. One of the primary reasons why seedlings often fail is due to transplant shock, which occurs when the delicate roots are disturbed during the transfer process.
To mitigate this risk, it’s essential to handle the seedlings with care. Start by gently grasping the seed starter at the base, avoiding any contact with the leaves or stems. Then, rotate the seedling 180 degrees while still in the starter, allowing you to slide your finger under the root ball and loosen the soil without damaging the roots.
Next, place a small amount of water on the roots to help them absorb moisture and relax during the transfer process. This will make it easier for the roots to adapt to their new surroundings. By taking these simple steps, you’ll be able to minimize transplant shock and give your seedlings the best chance at thriving in their final growing location.
Make sure the soil in the new container is moist but not waterlogged before adding the seedling. This will help reduce stress on the roots during establishment. With a little patience and care, you can successfully transition your seedlings from their starter to their final home.
Common Challenges with Seed Starters
We’ve all been there: struggling with seed starters that don’t seem to be thriving, despite our best efforts. Let’s tackle some of the most common challenges you might be facing.
Overwatering and Root Rot
One of the most common challenges with seed starters is overwatering and root rot. This issue can arise from excessive watering or inadequate drainage in the seed starter tray. When roots are consistently waterlogged, they begin to break down, leading to root rot.
Symptoms of root rot include yellowing leaves, soft and mushy stems, and a foul odor emanating from the potting mix. To prevent overwatering, make sure your seed starters have adequate drainage holes in the bottom tray. Avoid getting water on the leaves or crown of the plant, as this can encourage fungal growth.
To recover an affected seedling, gently remove it from its potting mix and trim away any rotten roots. Repot the seedling in a well-draining mix, taking care to provide optimal watering conditions. Monitor your seedlings closely for signs of recovery, adjusting their watering schedule accordingly. Regularly inspecting your plants can help you catch overwatering issues before they become severe. By being mindful of watering habits and drainage, you can minimize the risk of root rot in your seed starters.
Pests and Diseases Affecting Seed Starters
Pests and diseases can be some of the most frustrating challenges you’ll face when growing seedlings in seed starters. One of the most common issues is fungal infections, which can cause soft rot and other problems that can quickly spread throughout the container. To prevent this, make sure to use a well-draining potting mix and avoid overwatering your seedlings.
Another major concern is insect infestations. Aphids, whiteflies, and spider mites are just a few of the common pests that can wreak havoc on your seedlings. To control these pests, you’ll want to inspect your seedlings regularly for signs of infestation, such as curled or distorted leaves, sticky honeydew droplets, or actual insects on the plants.
Some simple steps you can take to prevent pest and disease issues include keeping your seed starters clean, using physical barriers like row covers, and practicing good sanitation techniques when handling your seedlings. For example, wash your hands thoroughly before touching your seedlings, and make sure to disinfect any tools or equipment that may come into contact with the plants.
In terms of specific diseases, you’ll want to be on the lookout for powdery mildew, root rot, and leaf spot. These can often be caused by overwatering, so it’s essential to monitor your seedlings’ moisture levels carefully. By being vigilant about these potential issues, you can take action early and prevent them from becoming major problems.
Advanced Techniques for Using Seed Starters
Now that you’ve mastered the basics of seed starters, it’s time to take your gardening skills to the next level by exploring advanced techniques to maximize their effectiveness.
Hydroponic and Aeroponic Systems
Hydroponic and aeroponic systems are advanced techniques for using seed starters that can revolutionize the way you grow your plants. These methods involve growing plants without soil, but with a nutrient-rich solution that promotes healthy root development.
In hydroponic systems, plants are grown in a water-based solution that contains essential nutrients such as nitrogen, phosphorus, and potassium. This method allows for precise control over nutrient delivery, resulting in faster growth rates and higher yields. For example, a study conducted by the University of Arizona found that hydroponically-grown tomatoes yielded 50% more fruit than those grown in soil.
Aeroponic systems work similarly to hydroponics but use a fine mist instead of a liquid solution. This method allows for even better control over nutrient delivery and can result in healthier root growth. To set up an aeroponic system, you’ll need an air pump, a reservoir, and tubing that delivers the nutrient-rich mist to the roots.
When using hydroponic or aeroponic systems with seed starters, it’s essential to monitor pH levels closely to ensure optimal nutrient uptake. A pH meter can help you adjust the solution accordingly. Also, make sure to use a well-draining potting mix as an alternative to soil for optimal results.
Experimenting with Different Seed Starter Materials
Experiment with different seed starter materials to find what works best for you and your garden. One popular alternative to traditional peat moss is coconut coir. This sustainable option absorbs excess water well and can be composted at the end of its life cycle. Some users have reported increased germination rates when using coconut coir.
Another material gaining traction in the gardening community is bamboo fiber. It’s lightweight, breathable, and can help regulate moisture levels within the seed starter tray. However, it may not hold as much water as peat moss or coconut coir.
If you’re looking for a more affordable option, consider repurposing household items like egg cartons or toilet paper rolls as mini greenhouses for individual seeds. These makeshift starters allow for precise control over watering and can be easily transferred to larger containers once the seedling has outgrown its confines.
For those who want to avoid any materials at all, try using a biodegradable seed starting mix specifically designed for indoor use. These mixes often contain natural ingredients like recycled paper or sugarcane bagasse, which break down quickly in the garden without leaving behind any toxic residues.
Conclusion: Maximizing Success with Seed Starters
Now that you’ve learned how to create and use seed starters effectively, it’s time to discuss the key takeaways from our journey together so far. We’ll summarize the essential tips for maximizing your garden’s success.
Recap of Key Takeaways
By now, you’ve gained valuable insights into the world of seed starters and their immense potential to boost your gardening success. As we conclude this comprehensive guide, let’s recap the key takeaways that will help you achieve a thriving garden.
Choosing the right seed starter is crucial for optimal growth. Consider factors like material, size, and drainage when selecting your ideal option. We’ve discussed various types of seed starters, including peat moss-based and coconut coir-based options, each with its unique advantages and disadvantages.
Proper care and handling are equally important for healthy seedling development. Ensure adequate light, temperature control, and watering practices to give your seedlings the best chance at success. You can also take advantage of the “bottom heat” method to provide optimal warmth for germination and growth.
By incorporating these key takeaways into your gardening routine, you’ll be well on your way to achieving remarkable results with your seed starters.
Final Tips for Achieving Optimal Results
As you conclude this journey through the world of seed starters, it’s essential to remember that optimal results come from a combination of proper technique and attention to detail. To ensure you’re getting the most out of your seed starters, here are some final tips:
* Be gentle when handling seedlings; rough handling can cause damage to their delicate roots.
* Avoid overwatering, which can lead to root rot and other issues that can be fatal for young plants.
* Provide sufficient light – ideally 12-14 hours of direct sunlight per day. This will help your seedlings develop strong stems and healthy leaves.
Keep in mind that seed starters are a process, not an event. Monitor your progress closely, making adjustments as needed to ensure the best possible outcome. Don’t be afraid to experiment and try new techniques – it’s often through trial and error that we discover what works best for our specific climate or gardening style.
By following these final tips, you’ll be well on your way to creating a thriving garden filled with robust, healthy plants. Remember to stay patient, observe carefully, and have fun watching your seedlings grow into the beautiful blooms you’ve always wanted.
Frequently Asked Questions
Can I use seed starters with seeds that have a low germination rate?
While seed starters can help improve the chances of successful germination, they won’t guarantee success for seeds with naturally low rates. To maximize results, choose high-quality seeds and follow the specific sowing instructions for your chosen type of starter. This will ensure you’re providing optimal conditions for your seeds to thrive.
How often should I water my seedlings in seed starters?
Watering frequency will depend on the material used for the seed starter and the climate where you’re growing. A good rule of thumb is to water when the top inch of soil feels dry to the touch. Monitor your seedlings’ progress, and adjust your watering schedule accordingly to prevent overwatering and root rot.
Can I reuse seed starters multiple times?
Yes, some seed starters are designed for reuse, such as those made from biodegradable materials like coconut coir or peat moss. However, be sure to follow proper cleaning and sterilization procedures between uses to avoid contamination and the spread of diseases. Reusing seed starters can help reduce waste and save you money in the long run.
What happens if I notice signs of pests or diseases in my seedlings?
If you suspect your seedlings have been affected by pests or diseases, take action promptly to prevent further damage. Inspect your seed starter carefully for any signs of infestation or infection, and consider using organic pest control methods or fungicides specifically designed for seed starters. Prune infected areas, and isolate the affected plants to contain the issue.
Can I use hydroponic systems with seed starters?
Yes, you can adapt hydroponic systems for use with seed starters. In fact, this can be a great way to provide your seedlings with precise control over nutrient delivery and optimal growing conditions. Research specific hydroponic setups designed for seed starting, and ensure you’re providing the necessary support for young plants as they transition into more extensive hydroponic systems.