If you’re like many gardeners, you’re probably tired of relying on synthetic fertilizers that can harm your soil ecosystem and compromise the health of your vegetables. The good news is that making your own organic fertilizer is easier than you think! By taking a few simple steps, you can create a natural and effective solution to promote healthy plant growth and reduce your reliance on chemical-based products. In this article, we’ll show you how to make your own organic fertilizer using readily available ingredients like compost, manure, and kitchen scraps. We’ll cover the basics of what makes good fertilizer, how to mix it up, and tips for applying it to get the best results from your vegetable garden. By the end of this guide, you’ll be well on your way to growing healthier, more sustainable veggies with minimal environmental impact!
Understanding the Importance of Organic Fertilizers
Organic fertilizers are a game-changer for gardeners who want to grow healthy, chemical-free vegetables. In this next part, we’ll explore why they’re so essential for your gardening needs.
Benefits of Using Organic Fertilizers
Using organic fertilizers has numerous benefits that not only promote healthier plants but also contribute to a more sustainable environment. One of the significant advantages is its eco-friendly nature. Unlike synthetic fertilizers, which can pollute waterways and harm beneficial microorganisms, organic fertilizers are derived from natural sources such as animal manure, compost, or green waste.
These fertilizers improve soil health by increasing the water-holding capacity and aeration. This leads to better root growth and nutrient uptake for plants. For instance, a study found that using compost-based fertilizers resulted in a 30% increase in crop yields compared to chemical-based alternatives.
Moreover, organic fertilizers tend to release nutrients slowly over time, providing a steady supply of essential nutrients to plants. This reduces the need for frequent applications, thereby minimizing waste and environmental impact. By adopting organic fertilizers, you can create a balanced and thriving ecosystem in your garden.
The Risks of Synthetic Fertilizers
Using synthetic fertilizers may seem like an easy fix to boost your vegetable’s growth, but it can have severe consequences on the environment and the health of your soil. Water pollution is a major concern when using synthetic fertilizers, as excess nutrients like nitrogen and phosphorus can leach into nearby water sources, causing eutrophication and harming aquatic life.
Beneficial microorganisms in the soil are also negatively affected by synthetic fertilizers. These tiny organisms play a crucial role in breaking down organic matter, suppressing plant diseases, and fighting pests. When exposed to synthetic fertilizers, they can be killed or driven out of your soil, leading to a cycle of dependency on more fertilizer applications.
This is where making your own organic fertilizer comes into play. By using natural ingredients like compost, manure tea, or worm castings, you can create a nutrient-rich environment that supports the health and biodiversity of your soil. It’s not only better for the planet but also for your vegetables – they’ll grow stronger and more resilient without the harm caused by synthetic fertilizers.
Choosing the Right Materials for Organic Fertilizer
When selecting materials for your organic fertilizer, it’s essential to choose natural and non-toxic ingredients that will nourish your vegetables without harming them. This section will guide you through the best options to consider.
Composting 101: Turning Kitchen Scraps into Gold
Composting is a simple yet effective way to turn kitchen scraps into a nutrient-rich fertilizer for your vegetables. To get started, you’ll need to create a compost pile in a well-ventilated area of your yard. Choose a spot that’s easily accessible and has good drainage.
The ideal materials for composting are those high in nitrogen (green) and carbon (brown). Green materials include fruit and vegetable scraps, grass clippings, and manure from herbivores. Brown materials like leaves, straw, and shredded newspaper provide the necessary carbon content to balance out the nitrogen-rich green materials.
To maintain optimal conditions, ensure your compost pile is at least 3-4 feet wide and 5-6 feet long. Aim for a mix of 2/3 brown materials and 1/3 green materials. Add new materials in layers, starting with a 4-inch layer of brown material, followed by a 2-inch layer of green material. Repeat this process until your pile is full, finishing with a top layer of brown material.
Tips for maintaining optimal conditions include keeping the pile moist (like a damp sponge), turning it regularly to aerate, and monitoring temperature (it should reach 130-140°F).
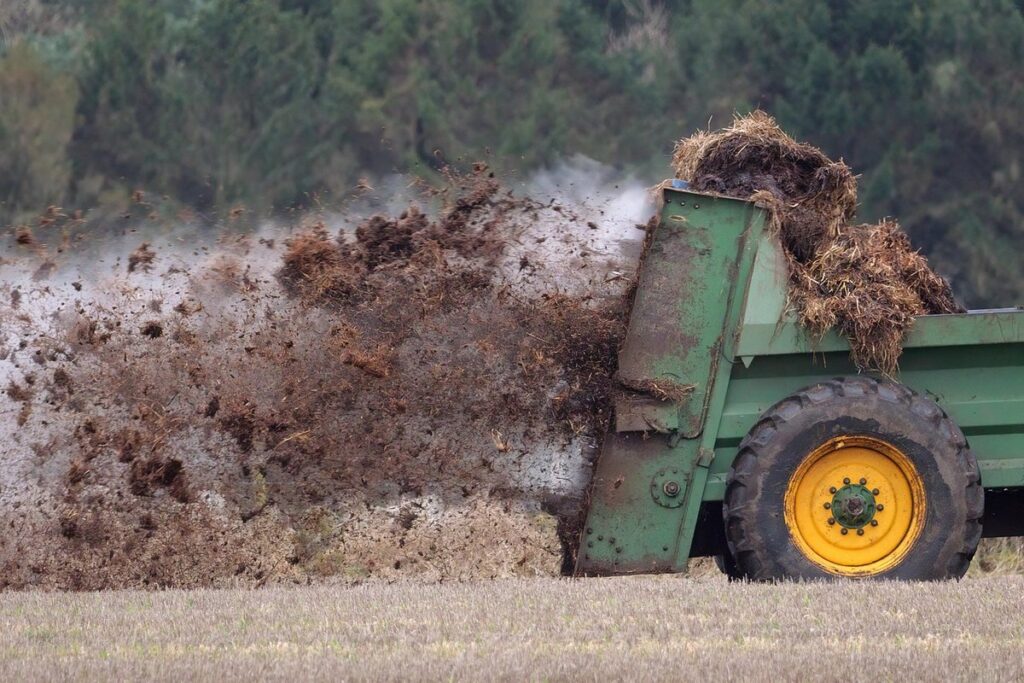
Using Manure as an Organic Fertilizer
Using animal manure as an organic fertilizer is a popular and effective method for feeding your vegetables. Manure from herbivores like cows, horses, and goats is rich in nutrients such as nitrogen, phosphorus, and potassium that promote healthy plant growth.
However, there are some challenges to consider when using manure as an organic fertilizer. For example, it can be smelly and attract pests if not handled properly. To avoid these issues, make sure to collect fresh manure from a trusted source, store it in a well-ventilated area, and let it age for several months to reduce its odor and pathogens.
Proper application techniques are also crucial when using manure as an organic fertilizer. Mix 10% manure with 90% water to create a liquid solution, or add it directly to the soil at a rate of 2-3 inches deep around your vegetable plants. Avoid overapplication, as this can lead to nutrient imbalances and harm your crops.
By following these guidelines, you can harness the power of animal manure to create a rich, natural fertilizer for your vegetables that promotes healthy growth and high yields.
Preparing Your Soil for Organic Fertilization
Before applying organic fertilizer, it’s essential to prepare your soil by testing its pH levels and adding amendments as needed to create a fertile environment. This step will determine the effectiveness of your fertilizer efforts.
Testing Your Soil pH Levels
Before applying any fertilizers to your soil, it’s crucial to test its pH levels. This may seem like a simple step, but it’s essential for several reasons. If your soil is too acidic or too alkaline, it can hinder the growth of vegetables and even render some nutrients unusable by plants.
To collect a soil sample, dig a small hole about 8-10 inches deep in various spots around your garden. Avoid areas with weeds or debris, as these can skew the results. Fill a clean bucket with about 1-2 cups of soil from each spot. Mix the samples well to create a composite sample that represents the entire area.
Send this sample to a lab for analysis, which will provide detailed information on your soil’s pH level, nutrient content, and other factors. You can also purchase a DIY testing kit or use a digital pH meter for more immediate results. Understanding your soil’s pH levels will help you choose the right organic fertilizers for your vegetables and ensure they get the nutrients they need to thrive.
Amending Your Soil with Organic Matter
When it comes to preparing your soil for organic fertilization, amending it with organic matter is one of the most essential steps. This process helps to improve soil structure, fertility, and overall health, making it an ideal medium for growing vegetables.
There are several methods you can use to add organic matter to your soil. One of the simplest ways is by mixing in compost. Compost is rich in nutrients and microorganisms that help to break down complex substances into simpler forms, making them available to plants. You can make your own compost at home using kitchen scraps, leaves, and other organic materials. Alternatively, you can purchase compost from a local supplier.
Another option is to use well-rotted manure. This adds a rich source of nutrients, including nitrogen, phosphorus, and potassium, which are essential for plant growth. To incorporate manure into your soil, simply mix it in at a rate of about 2-3 inches deep. You can also use other organic amendments like worm castings or green sand.
When using any of these methods, remember to maintain the right balance between organic matter and existing soil nutrients. Too much organic matter can lead to an overabundance of nitrogen, which can cause more harm than good.
Creating Different Types of Organic Fertilizer
Now that you have a basic understanding of how to make organic fertilizer, let’s dive into creating different types for your specific vegetable needs.
Liquid Compost Tea: A Concentrated Dose of Microorganisms
Making liquid compost tea is a simple process that can be done at home with minimal equipment. To start, you’ll need a bucket or container large enough to hold the compost and water. Add one part of high-quality compost to five parts of water, making sure the compost is fully submerged. Allow the mixture to steep for 24-48 hours in a shaded area, stirring occasionally.
The beneficial microbes that make up liquid compost tea are responsible for breaking down organic matter and releasing nutrients into the soil. Effective Microorganisms (EM) and Beneficial Bacteria Blend are two popular strains of microbes used in liquid compost tea. When using these products, follow the manufacturer’s instructions for the recommended application rate.
When applying liquid compost tea to your vegetable garden, start with a diluted solution of 1-2 tablespoons per gallon of water. This will provide a gentle introduction to the beneficial microbes and help prevent any potential shock to the plants’ root systems. You can adjust the concentration as needed based on the specific needs of your plants and soil conditions.
Worm Castings: The ‘Gold Dust’ of Organic Fertilizers
Worm castings are often referred to as the ‘gold dust’ of organic fertilizers due to their exceptional nutrient-rich properties. These nutrient-dense composts are produced through vermicomposting, also known as worm composting.
To set up a worm bin for vermicomposting, you’ll need a container with good airflow and drainage. Add 4-6 inches of bedding material such as coconut coir or shredded newspaper at the bottom. Next, add red wiggler worms to the bin – they’re specifically suited for this process due to their voracious appetite for decomposing organic matter.
To feed your worms, provide them with a balanced diet of ‘green’ and ‘brown’ materials. Green materials include food scraps like fruit and vegetable peels, while brown materials offer carbon-rich ingredients such as shredded cardboard or coconut coir. Aim for a 2:1 green to brown ratio in the bin at any given time.
Once your worms have broken down their food into nutrient-rich castings, it’s time to harvest them. Typically after 3-4 months of vermicomposting, the worm castings can be collected by carefully separating them from the remaining bedding material and worms.
Applying Your Organic Fertilizer Effectively
Now that you’ve made your organic fertilizer, it’s time to apply it effectively to give your vegetables a nutrient boost. This section will walk you through how to use it correctly.
Timing is Everything: When to Apply Your Fertilizer
Applying organic fertilizers at the right time is crucial for optimal plant growth and health. When you apply fertilizer during periods of stress or rapid growth, it can do more harm than good. For instance, if you apply high-nitrogen fertilizers when plants are under drought stress, they may not absorb the nutrients properly, leading to nutrient burn.
Before applying your homemade organic fertilizer, consider the soil temperature. Most vegetables grow best in temperatures between 60°F and 70°F (15°C to 21°C). If the soil is too cold or hot, adjust your fertilizer application schedule accordingly. Also, keep an eye on plant growth stages. For example, young seedlings require less fertilizer than mature plants.
Check the weather forecast before applying organic fertilizers. Avoid applying during heavy rainfall or when plants are under drought stress. Instead, apply after a gentle shower to ensure better absorption. In general, spring and fall are ideal seasons for fertilizing vegetable gardens. These periods often provide optimal growing conditions for vegetables, allowing them to absorb nutrients more efficiently.
Methods for Applicating Organic Fertilizers
Once you’ve made your organic fertilizer, it’s essential to apply it effectively for optimal results. There are several methods for doing so, each with its own benefits and applications.
Foliar spraying is a popular method that involves directly applying the fertilizer to the leaves of plants. This approach allows the fertilizer to be absorbed quickly into the plant, providing an immediate boost in nutrients. To foliar spray, mix 1-2 tablespoons of your organic fertilizer with 1 gallon of water and spray it on the leaves when the sun is not too intense.
Another method is side-dressing, where you apply the fertilizer directly to the soil alongside the plant’s roots. This approach allows for a more gradual release of nutrients into the soil. To side-dress, mix 1-2 cups of your organic fertilizer with 10 gallons of water and pour it around the base of the plants.
Some gardeners also prefer mixing their organic fertilizer with irrigation water, which provides a steady supply of nutrients to the plants over an extended period.
Monitoring Progress and Adjusting Your Approach
Now that you’ve started making your organic fertilizer, it’s time to monitor its progress and adjust your approach as needed to ensure optimal results for your vegetable garden. Regular monitoring is crucial to fine-tuning your recipe.
Measuring Soil Health through Testing and Observation
Monitoring soil health after applying organic fertilizers is crucial to ensure that your vegetables are receiving the necessary nutrients. Soil health can be affected by various factors such as pH levels, nutrient deficiencies, and microbial imbalances. To gauge your soil’s condition, you can use test kits or observe plant responses.
Test kits provide a quick and easy way to assess soil parameters like pH, nitrogen, phosphorus, and potassium (NPK) levels. These kits usually require a small soil sample, which is then analyzed using color-coded indicators or digital readers. For example, a pH test kit can give you an instant reading of your soil’s acidity level.
On the other hand, observing plant responses can also indicate soil health issues. Healthy plants with vibrant colors and rapid growth rates often suggest balanced nutrient levels. Conversely, stunted growth, yellowing leaves, or poor fruit production may signal nutrient deficiencies or other underlying problems. By regularly monitoring both test results and plant performance, you can adjust your organic fertilizer recipes to meet the specific needs of your vegetables, ultimately achieving optimal soil health and crop yields.
Iterating Your Organic Fertilization Strategy
As you begin to apply your new organic fertilizer recipes and methods, it’s essential to remember that continuous learning is key to optimizing their effectiveness. Regularly monitoring the progress of your plants will help you identify areas for improvement. This might involve refining your recipe or adjusting how you apply the fertilizer.
Pay attention to any changes in soil health, plant growth rates, and yields. If you notice a decline or stagnation, it may be time to revisit your approach. For instance, if you’re using compost tea, consider tweaking the brewing time or steeping ratio to achieve better results. Similarly, if you’re making worm casting, experiment with different ratios of worm manure to bedding.
Keep track of your observations and note any successes or setbacks. This information will help you refine your methods over time. Remember that organic fertilization is an iterative process – it’s not a one-time solution, but rather an ongoing effort to create the optimal environment for your plants. By staying flexible and open to adjustments, you’ll be able to fine-tune your approach and achieve better outcomes.
Frequently Asked Questions
What are the ideal conditions for making liquid compost tea?
Liquid compost tea is best made when the room temperature is between 68°F to 78°F (20°C to 25°C). Avoid temperatures above 80°F (27°C) as it may lead to fermentation issues.
How often should I reapply organic fertilizer to my vegetables?
Reapplication frequency depends on soil type, plant growth, and nutrient requirements. Typically, apply a balanced mix of organic fertilizer every 4-6 weeks during the growing season, adjusting as needed based on visual observations of your plants’ response.
Can I use compost tea with worm castings together in the same application?
Yes, combining compost tea with worm castings can provide an intense dose of microorganisms and nutrients. However, be cautious not to overdo it, as this might lead to over-fertilization. Start with a small batch to ensure your plants adapt well.
How do I store my homemade organic fertilizer after making it?
Once made, store your organic fertilizer in a cool, dark place (such as a basement or shaded area) to prevent degradation and maintain microbial activity. Consider transferring it into smaller containers for easier application and minimizing waste.
Can I use manure from non-organic sources, such as from pets or other animals not on my farm?
While it’s technically possible, using manure from non-organic sources might introduce unwanted contaminants or pathogens to your garden soil. Stick with natural sources like composted animal manure, if available, for the best results.
What are some common mistakes to avoid when making and applying organic fertilizer?
Some common pitfalls include over-mixing, which can kill beneficial microorganisms; using too much liquid compost tea at once, leading to burn; and failing to monitor pH levels in your soil. Regular testing and observation will help you adjust and optimize your approach.