Starting your own indoor garden can be an exciting venture, but getting seeds to germinate can be a challenge. Did you know that creating the perfect seed starter pot is easier than you think? By making your own seed starter pots at home, you’ll not only save money, but also reduce waste and have more control over the quality of soil for your seeds. Whether you’re an indoor gardening beginner or a seasoned expert, this simple process can help you grow healthy seedlings. In this article, we’ll show you how to make your own seed starter pots using everyday materials like eggshells, toilet paper rolls, and newspaper. We’ll walk you through the easy steps of preparing the materials, filling them with soil, and getting your seeds ready for transplanting.
Choosing the Right Materials
When selecting materials for your seed starter pots, you’ll want to choose items that are lightweight, durable, and easy to clean, as well as eco-friendly. Consider repurposing household items like plastic containers or yogurt cups.
Understanding Seed Starter Pot Options
When it comes to making seed starter pots, choosing the right material is crucial for your plants’ success. You can use a variety of materials, each with its own set of pros and cons.
Plastic cups are one popular option, as they’re widely available and inexpensive. They’re also easy to clean and reuse, which makes them a great choice for gardeners who want to minimize waste. However, plastic cups can retain heat, causing the soil inside to become too warm for sensitive seedlings. Plus, they may not degrade easily once they’ve fulfilled their purpose.
On the other hand, paper cups are biodegradable and compostable, making them an attractive option for eco-conscious gardeners. They’re also inexpensive and easy to use. However, paper cups can be prone to drying out, which can harm seedlings that rely on consistent moisture levels.
If you want a more sustainable approach, consider using biodegradable pots made from materials like bamboo or coconut coir. These pots are compostable and can help reduce waste in your garden. They may also provide better insulation for sensitive roots than traditional plastic or paper cups.
Selecting the Ideal Pot Size for Seedlings
When selecting the ideal pot size for seedlings, it’s essential to consider their root depth and growth habits. Different types of plants have unique requirements when it comes to space and nutrients. For example, herbs like basil and mint have shallow roots and can thrive in smaller pots (around 1-2 gallons), while vegetables like tomatoes and peppers require more room to grow and should be planted in larger containers (4-6 gallons).
As a general rule of thumb, choose a pot that is at least 1/4 to 1/3 the size of the mature plant’s root system. This will give the seedling enough room to develop its roots without becoming waterlogged or nutrient-starved. For most seedlings, a 2-3 gallon pot is an excellent starting point.
Consider the growth habits of your plants as well – some like lettuce and spinach can be direct-seeded in larger pots, while others like tomatoes need to be started in smaller containers and transplanted later. By choosing the right size pot for your seedlings, you’ll set them up for success and ensure a healthy start to their growing season.
Preparing the Materials and Workspace
Before we dive into making your seed starter pots, let’s take a moment to prepare everything you’ll need. This includes gathering materials and setting up a clean workspace.
Gathering Essential Tools and Equipment
To make seed starter pots, you’ll need to gather some essential tools and equipment. First and foremost, ensure that your workspace is clean and sanitized. This will prevent the spread of diseases and pests among your seeds. Set up a dedicated area with a table or countertop for mixing and working on your project.
In terms of specific tools, you’ll need a few basic items:
* A pair of sharp scissors or pruning shears for cutting seed starting mix and paper towels
* A small mixing bowl for blending the potting mix
* A watering can or cup for hydrating the mix
* A measuring spoon or cup for accurately dosing out fertilizers (if using)
* A clean sponge or cloth for wiping down surfaces
Properly preparing your workspace will also require some basic supplies, such as paper towels and a dust mask. This will help minimize mess and prevent the inhalation of fine particles during mixing and potting. Take a moment to review these requirements and make sure you have everything before starting your project.
Measuring and Cutting Materials with Precision
Measuring and cutting materials accurately is crucial when making seed starter pots. To avoid wasting materials or compromising pot quality, it’s essential to make precise cuts. Start by measuring the paper towel rolls or newspaper tubes you’ll be using as seed starters. You can use a ruler or measuring tape to ensure accuracy.
When cutting your chosen material, use a craft knife or scissors specifically designed for paper or cardboard. Apply gentle pressure and cut slowly to avoid applying too much pressure, which can cause tears or uneven cuts. If using a craft knife, consider using a cutting mat or other protective surface to prevent damage from stray cuts.
Cutting accuracy is also crucial when working with fabric or cloth covers for your seed starters. Use a straightedge or ruler to guide your scissors and maintain even cuts. Cutting accurately will help you achieve consistent sizes and shapes, making it easier to transplant seedlings into larger pots later on.
Mixing Seed Starting Mix and Filling Pots
Now that you have your seed starting mix ready, it’s time to fill those pots! Follow these steps to get your mix into the right pot at the perfect density.
Creating a Suitable Seed Starting Mix
When creating a seed starting mix, it’s essential to balance its pH level and texture for optimal seedling growth. A suitable mix should have good water-holding capacity, aeration, and drainage. You can achieve this by combining peat moss, vermiculite, and perlite in the right proportions.
A general ratio is 2/3 peat moss (or coconut coir) to 1/3 vermiculite and perlite combined. This mix provides the necessary water retention while allowing for sufficient air exchange. However, you can adjust this ratio based on your specific needs and climate conditions.
When mixing your seed starting mix, make sure to moisten it thoroughly before adding any other ingredients. This will help prevent lumps from forming during the filling process. It’s also crucial to check the pH level of your mix, which should be slightly acidic (around 6.0-7.0). You can use a soil testing kit or pH meter to ensure accuracy.
To further enhance drainage and aeration, you can add 10% perlite to your mix. This will help prevent waterlogged conditions that may lead to root rot.
Filling Pots with Precision and Efficiency
When it’s time to fill your pots with seed starting mix, precision and efficiency are key. You want to minimize waste and ensure an even distribution of the mix to give your seeds the best chance at success. Here are some strategies for optimizing pot-filling speed and accuracy:
As you pour the mix into each pot, try to hold it close to the container’s rim to prevent spills and make cleanup easier. If using a bag with a built-in spout or pouring mechanism, take advantage of this feature to reduce mess and save time.
To ensure even distribution, gently shake each pot as you fill it, allowing the mix to settle into the corners and against the sides of the container. This helps prevent compacting and promotes healthy root growth.
When filling multiple pots at once, consider using a scale or measuring cups to portion out the right amount of mix for each container. This will not only save time but also help you avoid overfilling – which can lead to washed-out soil when it’s time to transplant your seedlings.
By implementing these simple techniques into your pot-filling routine, you’ll be able to fill pots with precision and efficiency while minimizing waste.
Planting Seeds in Seed Starter Pots
Now that you’ve made your seed starter pots, it’s time to plant the seeds themselves. This is where things get really exciting as your tiny seeds begin to grow into healthy seedlings.
Preparing Seeds for Germination
When preparing seeds for germination, it’s essential to choose high-quality seeds that are suitable for your climate and the specific plant variety. Check the seed package for expiration dates and make sure they are stored properly to maintain their viability. For optimal results, select seeds that have been bred specifically for indoor growing or those that thrive in cooler temperatures.
Before planting, consider soaking seeds overnight to kickstart germination. This step is particularly beneficial for large seeds like beans, peas, and corn. Soaking the seeds will help soften the outer shell, allowing it to absorb water more easily. Simply place the seeds in a bowl of warm water and let them soak for 8-12 hours.
Another method to enhance seed viability is priming, which involves applying a concentrated solution of growth regulators to stimulate germination. This technique can increase the success rate of germination by up to 50%. To prime your seeds, mix a commercial priming solution with water according to the manufacturer’s instructions and then soak the seeds for an additional 24 hours.
By following these steps, you’ll be able to enhance seed viability and promote successful germination. Remember to handle the seeds gently to avoid damage, and store them in a cool, dark place until planting time.
Planting Seeds with Care and Precision
When planting seeds in seed starter pots, it’s essential to handle them with care and precision. Start by gently placing each seed into its designated pot, making sure not to press too hard on the soil. This can cause the seed to break or become compacted, hindering germination.
To avoid overcrowding, ensure there is adequate spacing between seeds. A general rule of thumb is to plant seeds about 1-2 inches apart, depending on their size and growth habits. For example, if you’re sowing tiny seeds like basil or lettuce, you can get away with planting them as close as 1 inch apart. Larger seeds like tomatoes or peppers should have at least 2-3 inches of space between each plant.
When sowing multiple seeds in the same pot, create a small indentation for each seed and fill the pot only about 50% full of soil. This allows you to easily separate the seedlings as they grow, reducing the risk of overcrowding and competition for resources. Remember to water gently but thoroughly after planting to keep the soil consistently moist during the germination process.
Transferring Seedlings to Larger Pots
Now that your seedlings have outgrown their starter pots, it’s time to transfer them to larger containers for continued growth and development. Learn how to do this safely and successfully in this essential step of the process.
Assessing Seedling Readiness for Transfer
As you nurture your seedlings in their starter pots, it’s essential to know when they’re ready for the next step: transfer to a larger pot. This is a critical moment in their development, and identifying the right time will ensure a smooth transition.
Start by inspecting the root growth of your seedling. If the roots have outgrown the container and are circling or pushing against the sides, it’s likely time for a bigger home. You can gently remove the seedling from its pot to check the root mass – if it’s beginning to fill the entire container, it’s ready to move up.
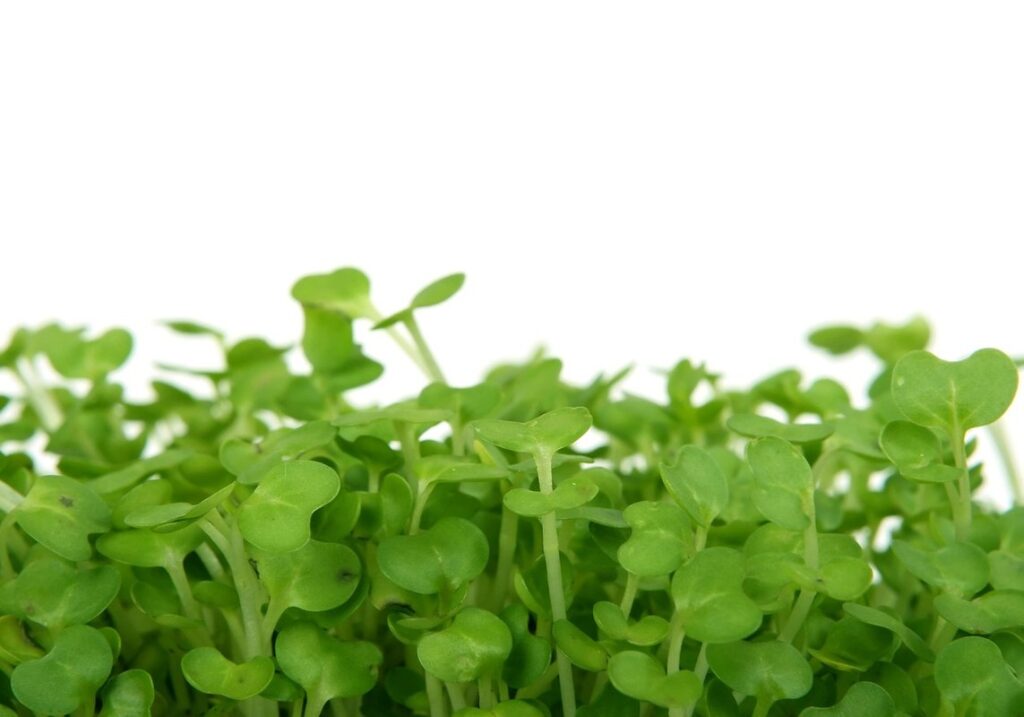
Another sign of readiness is leaf development. If your seedlings have produced multiple sets of leaves or are showing signs of overcrowding, they’ll benefit from more space to stretch out and photosynthesize. Keep an eye on their growth habits and transfer them when you notice these changes.
Gently Transferring Seedlings to Larger Pots
When it’s time to transfer seedlings from small pots to larger ones, it can be a delicate process. If not done correctly, it can cause stress on the young plants, leading to weakened growth and potentially even death. To minimize this risk, it’s essential to choose the right moment for transfer, typically when seedlings have 2-3 sets of leaves.
Begin by preparing the new pot with a well-draining mix, making sure not to pack it down too tightly. Gently remove the seedling from its small pot, taking care not to damage any roots that may have formed. If the seedling is stuck, run a gentle knife around the inside of the pot to loosen it.
To reduce shock and promote healthy growth, water the new pot before gently placing the seedling in, making sure the soil level remains consistent with its original position. Finally, firm the soil gently around the seedling’s base, and provide adequate moisture while allowing for good air circulation to prevent fungal diseases from taking hold.
Frequently Asked Questions
Can I reuse seed starter pots made from materials like eggshells or newspaper multiple times?
Yes, many of these materials can be reused for multiple growing seasons with proper care and cleaning. However, it’s essential to check the condition of your seed starter pots regularly for signs of wear and tear. When in doubt, err on the side of caution and use a new pot to ensure healthy seedling growth.
How do I prevent overwatering when using materials like eggshells or toilet paper rolls?
Overwatering is a common issue with seed starter pots. To avoid this problem, make sure to leave enough space at the top of your pots for proper drainage. You can also use a moisture meter to check the soil’s water levels and adjust accordingly.
Can I use seed starter pots made from materials like eggshells or newspaper outdoors?
While these materials are suitable for indoor gardening, they may not be ideal for outdoor conditions due to weathering and potential contamination risks. Consider using durable, water-resistant materials specifically designed for outdoor use if you plan to grow your seedlings in direct sunlight.
What’s the best way to handle seeds that don’t germinate?
If some of your seeds fail to germinate despite optimal conditions, it may be worth trying again with a fresh batch or adjusting your soil mix. Also, make sure to check the seed viability and storage conditions before replanting. Keep in mind that even experienced gardeners face setbacks – it’s all part of the learning process.
Can I use commercial seed starting mixes for indoor gardening?
Commercial seed starting mixes can be convenient options for indoor gardening. However, they often contain additives like fertilizers and wetting agents that might not be suitable for your specific growing conditions or plant types. Consider experimenting with DIY seed starting mix recipes to find the best fit for your needs.