Lavender is one of those gorgeous plants that add a touch of serenity to any garden. But did you know that regular pruning is key to unlocking its full potential? By pruning your lavender, you can encourage healthy growth, promote vibrant blooms, and even extend its lifespan. However, many gardeners struggle with knowing when and how to prune their lavender effectively.
In this article, we’ll take a closer look at the benefits of lavender pruning, including how it can help control shape, boost flowering, and prevent disease. We’ll also cover some essential techniques for pruning your lavender, from cutting back established plants to shaping young stems. Plus, we’ll explore what to do after pruning to ensure your lavender continues to thrive and flourish throughout the growing season. Whether you’re a seasoned gardener or just starting out, this guide will help you master the art of lavender pruning.
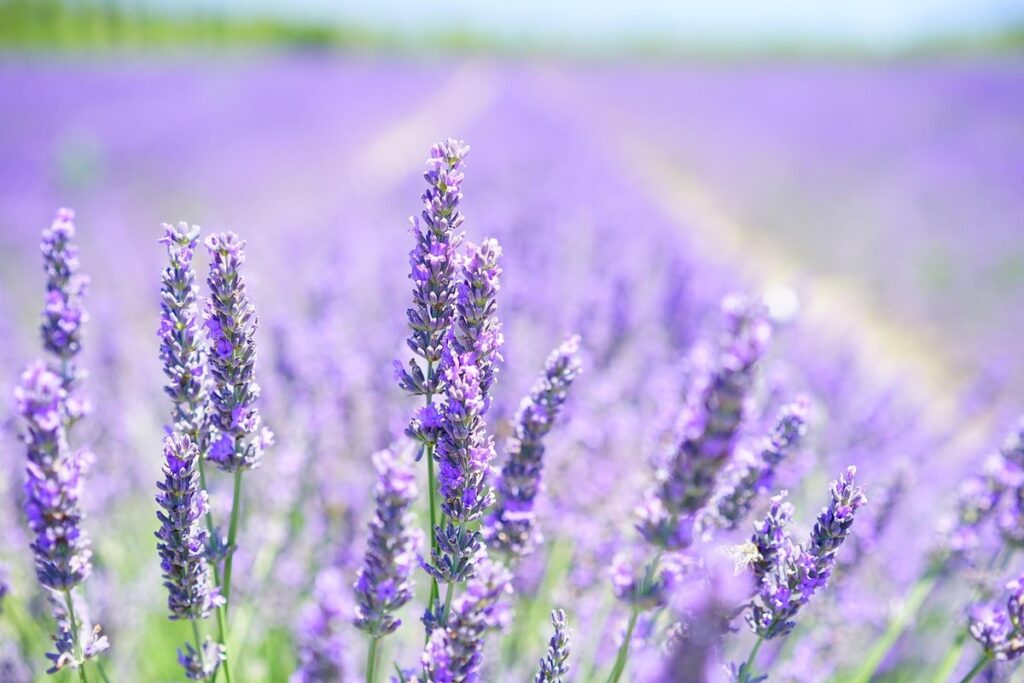
Benefits and Importance of Pruning Lavender
Pruning lavender may seem intimidating, but it offers numerous benefits that can enhance your plant’s health and appearance. Let’s explore these advantages in detail below.
Why Prune Lavender?
Pruning lavender is not just about maintaining its shape; it’s essential for the plant’s overall health and growth. When left unpruned, lavender can become leggy and woody, which can lead to a decrease in oil production – the very essence that makes lavender so desirable. Regular pruning encourages bushy growth, promoting more flowers and a higher concentration of essential oils.
Pruning also helps prevent disease and pests from taking hold. By removing dead or damaged stems, you’re eliminating potential entry points for fungi and insects. This is especially crucial in areas prone to frost, as weakened plants are more susceptible to damage. Pruning regularly can help your lavender plant bounce back quickly from harsh weather conditions.
In addition to its functional benefits, pruning can also enhance the plant’s appearance. By shaping the stems and promoting new growth, you’re creating a fuller, more visually appealing plant that will thrive in your garden or indoor space. Regular pruning is key to maintaining a healthy, vibrant lavender plant that will continue to bloom and provide its signature fragrance for years to come.
Types of Pruning Cuts for Lavender
When it comes to pruning lavender, understanding the different types of cuts is crucial for achieving specific goals and maintaining the plant’s overall health. There are three main types of pruning cuts: topping, thinning, and renewal.
Topping involves cutting back the tips of stems to control the plant’s height or promote bushy growth. This type of cut is best used for young plants that have become leggy or for plants grown for ornamental purposes. For example, if you’re looking to create a hedge out of lavender, topping can help keep it compact and uniform.
Thinning involves removing select stems entirely to improve air circulation and promote even growth. This technique is essential for mature lavender plants, as it helps prevent disease and encourages new growth from the base of the plant. Thinning should be done in late winter or early spring when the plant is dormant.
Renewal pruning, on the other hand, involves cutting back the entire stem to within a few inches of the ground. This type of cut is used to rejuvenate old plants that have become woody and unproductive. It’s best done in late winter or early spring when the plant is dormant, allowing it to focus its energy on producing new growth rather than producing flowers.
By understanding these different types of pruning cuts, you can achieve specific goals with your lavender pruning, from controlling height to rejuvenating old plants.
Pre-Pruning Checklist: Preparation is Key
Before you start pruning your lavender, take a few minutes to review our pre-pruning checklist and ensure you’re adequately prepared for the task at hand. A little prep goes a long way in achieving healthy results.
Choosing the Right Tools
When it comes to pruning lavender, having the right tools is crucial for achieving clean cuts and promoting healthy growth. To get started, you’ll need a few essential items in your toolkit.
First and foremost, invest in a good pair of pruning shears specifically designed for floral work. These should have sharp blades that can easily cut through thicker stems, as well as comfortable handles to prevent fatigue during extended use. For example, bypass pruners with a curved blade are ideal for lavender due to their ability to make precise cuts.
You’ll also want to have a pair of loppers on hand for cutting thicker branches or those that are out of reach. Look for loppers with long handles (around 20-30 inches) and sharp blades that can handle heavier pruning tasks.
A sharp saw or knife is another important tool to add to your collection. This will come in handy when dealing with more stubborn stems or older wood that requires a bit more force to cut through.
Make sure all of your tools are clean and well-maintained before each use, as this will help prevent the spread of disease and ensure you get the best results from your pruning efforts.
Timing of Pruning: Seasonal Considerations
When it comes to pruning lavender, timing is everything. The best time to prune lavender depends on your region and climate. In warmer climates with mild winters, such as Southern California or the Mediterranean, you can prune lavender year-round, except during the hottest summer months when new growth may be damaged by intense heat.
In cooler regions with cold winters, like the UK or Northern Europe, it’s best to prune lavender in late winter or early spring, around February or March. This allows the plant time to recover before new growth begins and reduces the risk of frost damage.
Consider your local climate when pruning lavender. If you live in an area with hot summers and mild winters, like Arizona or Texas, prune in the fall or early spring to promote healthy new growth. In areas with moderate temperatures and rainfall, such as the Pacific Northwest or Australia, prune in late winter or early spring for best results.
Keep in mind that pruning at the wrong time can lead to stress on the plant, making it more susceptible to disease and pests. Be sure to observe your lavender’s specific needs based on its hardiness zone and growing conditions.
Step-by-Step Pruning Instructions
Now that you know the basics of lavender pruning, it’s time to dive into the nitty-gritty with our step-by-step instructions on how to prune your lavender plants. Let’s get started!
Removing Dead or Damaged Wood
When pruning lavender, it’s essential to identify and remove dead or damaged wood to promote healthy growth and prevent the spread of disease. Dead stems are often brittle and can be easily snapped off by gently tugging on them. Damaged wood, on the other hand, may appear discolored or have rough patches.
To inspect your lavender plant, start at the base and work your way up, carefully examining each stem for signs of decay or damage. Look for stems that are shriveled, wilted, or have visible cracks in the bark. Cut off any dead or damaged wood using a sharp, sterile pruning tool, making clean cuts just above a growth node (the point where a leaf meets the stem). This will help the plant direct its energy towards healthy growth.
Remove no more than one-third of the stems at a time to avoid shocking the plant. Repeat this process as needed throughout the growing season to keep your lavender looking its best.
Thinning and Topping Techniques
Thinning and topping are essential techniques for maintaining healthy and visually appealing lavender plants. When done correctly, these methods can promote new growth, encourage blooming, and even extend the plant’s lifespan.
To thin your lavender, start by removing weak or spindly stems, allowing more space for the remaining branches to grow. Cut these stems at the base, just above a node (where a leaf meets the stem). This will prevent damage to the surrounding foliage and direct the plant’s energy towards stronger growth.
Topping involves pruning the tips of established stems to control height and encourage bushy growth. Cut back the top third to half of each stem, making clean cuts about 1/4 inch above a node. This will stimulate new shoots to emerge from the lower nodes, creating a fuller plant with more blooms. Be cautious not to over-prune, as this can stress the plant and reduce flowering.
By thinning and topping your lavender regularly, you’ll be rewarded with a robust, flowering shrub that’s easier to maintain and more resilient to disease and pests.
Tips for Post-Pruning Care
After pruning your lavender, it’s essential to provide proper care to promote healthy growth and prevent disease. This includes watering, fertilizing, and monitoring for pests and diseases that can thrive on newly cut plants.
Watering and Mulching After Pruning
After pruning your lavender plant, it’s essential to provide proper care to help it recover from stress and promote healthy growth. This is where post-pruning care comes into play. One of the most critical aspects of post-pruning care is watering.
When you prune lavender, you’re essentially causing minor wounds on the stem, which can make the plant more susceptible to disease and water loss. To combat this, it’s crucial to provide your lavender with plenty of water in the first few weeks after pruning. However, be careful not to overwater, as this can lead to root rot and other problems. Aim for about 1-2 inches of water per week, either from rain or irrigation.
Mulching is also a vital part of post-pruning care. By applying a thick layer (about 3-4 inches) of organic mulch around the base of your lavender plant, you’ll help retain moisture, suppress weeds, and regulate soil temperature. Some excellent options for mulch include wood chips, bark, or even straw.
As for fertilizing, it’s best to wait until the new growth appears before feeding your lavender with a balanced fertilizer. This will give the plant time to recover from pruning stress and promote healthy growth.
Common Mistakes to Avoid During Lavender Pruning
When pruning lavender, it’s easy to get caught up in the process and make mistakes that can harm the plant. One common error is over-pruning, which involves cutting back too much of the plant at once. This can lead to stress for the lavender, causing it to produce fewer flowers or even dieback. To avoid this, prune only what’s necessary – remove about one-third of the oldest growth to promote new growth and prevent woody stems from developing.
Under-pruning is another issue many gardeners face. This occurs when too little is removed, leaving the plant looking unkempt and shrubby. While it may seem safer to err on the side of caution, under-pruning can lead to reduced flowering and an increased risk of disease. A good rule of thumb is to prune about one-third of the lavender’s branches each year – a balanced approach that encourages healthy growth without sacrificing blooms.
It’s also worth noting that pruning too early or too late in the growing season can be detrimental to the plant’s well-being. Prune during the dormant season (winter or early spring) for best results, as this allows the plant to focus its energy on producing new growth rather than fighting off pests and diseases.
Troubleshooting Common Issues After Pruning
Now that you’ve pruned your lavender, what if you notice something isn’t quite right? Let’s troubleshoot common issues that may arise after pruning.
Dealing with Over-Pruned Plants
If you’ve accidentally over-pruned your lavender plant or damaged it during the process, don’t worry – mistakes can happen to anyone. However, acting quickly and with care is crucial to help the plant recover.
Firstly, assess the damage: take a close look at the affected areas of the plant to determine the extent of the harm caused. If you’ve only pruned off a small section, it might be possible to simply remove any damaged or dead wood and allow new growth to emerge from the remaining stem.
However, if you’ve severely over-pruned the plant, leaving only a few inches of stem intact, you’ll need to take more drastic measures. One approach is to cut back the entire plant by about one-third to one-half, making clean cuts just above a node (where a leaf meets the stem). This will help encourage new growth from the remaining buds.
In severe cases where the plant has been badly damaged or completely defoliated, it’s best to start over and propagate new lavender plants from cuttings.
Encouraging Healthy Growth Post-Pruning
After pruning your lavender plants, it’s essential to provide them with optimal growing conditions to encourage healthy growth and development. This is crucial for new growth to emerge from the cut stems. First, make sure your lavender is getting enough sunlight. Lavender typically requires at least six hours of direct sunlight per day. If you’re growing in a shaded area, consider pruning more frequently to maintain shape and promote new growth.
Also, ensure your soil is well-draining and has the right pH level for lavender (around 6.0-7.0). Fertilize lightly after pruning, as over-fertilization can lead to weak and leggy growth. Water your plants regularly, but avoid overwatering, which can cause root rot.
Monitor your plants closely in the first few weeks post-pruning, and provide additional support if necessary. With proper care and conditions, you should start seeing new growth emerge from the cut stems within 1-2 months. Keep an eye out for signs of nutrient deficiencies or pest/disease issues, and address them promptly to prevent damage to your plants.
Conclusion and Final Tips
Now that you’ve mastered the art of lavender pruning, let’s review what you’ve learned and provide a few final tips to keep your plants thriving all season long.
Recap of Key Pruning Principles
As you’ve learned throughout this comprehensive guide on lavender pruning, there are several key principles to keep in mind when it comes to maintaining your beautiful blooms. First and foremost, timing is everything – pruning at the right moment can make all the difference in promoting healthy growth and encouraging new flower production.
To recap, we discussed the importance of understanding your specific lavender variety’s needs, as some require more frequent pruning than others. This might involve trimming back tall stalks to encourage bushy growth or removing dead flowers (or spikes) to prevent seed production and direct energy towards new blooms. Don’t forget that regular maintenance tasks like fertilizing and watering play a crucial role in overall plant health.
In terms of specific pruning techniques, we covered how to properly cut stems using sharp tools at the correct angle, taking care not to damage the plant’s natural growth pattern. It’s also essential to remove any dead or damaged wood to prevent disease from spreading and maintain the plant’s structure.
To incorporate these principles into your own lavender care routine:
* Prune in late winter or early spring, allowing new growth to emerge before blooming season
* Use sharp, clean pruning tools to avoid spreading diseases and make cuts that are about one-quarter inch above a bud eye
* Remove any dead or damaged stems immediately, taking care not to over-prune and risk shocking the plant
By following these guidelines, you’ll be well on your way to cultivating stunning lavender blooms year after year. Remember to keep an eye out for signs of stress or disease, adjusting your pruning schedule as needed to ensure optimal health and production. With regular maintenance and attention, your beautiful lavender plants will thrive, bringing a touch of serenity to any garden space.
Frequently Asked Questions
What are the long-term benefits of regular lavender pruning?
Regular lavender pruning not only encourages healthy growth and promotes vibrant blooms but also extends its lifespan. By regularly pruning your lavender, you can expect to see a significant increase in the plant’s overall health, productivity, and longevity.
Can I prune my lavender at any time of the year, or are there specific seasonal considerations?
While it may be tempting to prune your lavender whenever you feel like it, there are indeed specific seasonal considerations. In general, it’s best to prune your lavender during its dormant season (winter or early spring) to minimize stress on the plant.
How often should I water my lavender after pruning, and what are some signs of overwatering?
After pruning, it’s essential to maintain a consistent watering schedule for your lavender. Overwatering can be detrimental to your plant’s health, so keep an eye out for signs such as yellowing leaves, droopy stems, or powdery mildew. Water your lavender when the top 1-2 inches of soil feels dry, and avoid getting water on the leaves to prevent fungal diseases.
What are some common mistakes to avoid during lavender pruning, and how can I troubleshoot issues after pruning?
Some common mistakes to avoid during lavender pruning include over-pruning (removing too much plant material), cutting back too late in the growing season, or using dull or dirty tools. If you notice any issues after pruning, such as dieback or pest infestations, don’t hesitate to address them promptly by adjusting your care routine or seeking advice from a gardening expert.
How can I promote healthy growth and encourage more blooms on my pruned lavender plant?
To promote healthy growth and encourage more blooms on your pruned lavender plant, focus on providing optimal growing conditions. This includes ensuring adequate sunlight (at least 4-6 hours of direct sun per day), using well-draining soil, and maintaining a consistent watering schedule. Fertilize lightly during the growing season to support blooming and overall health.