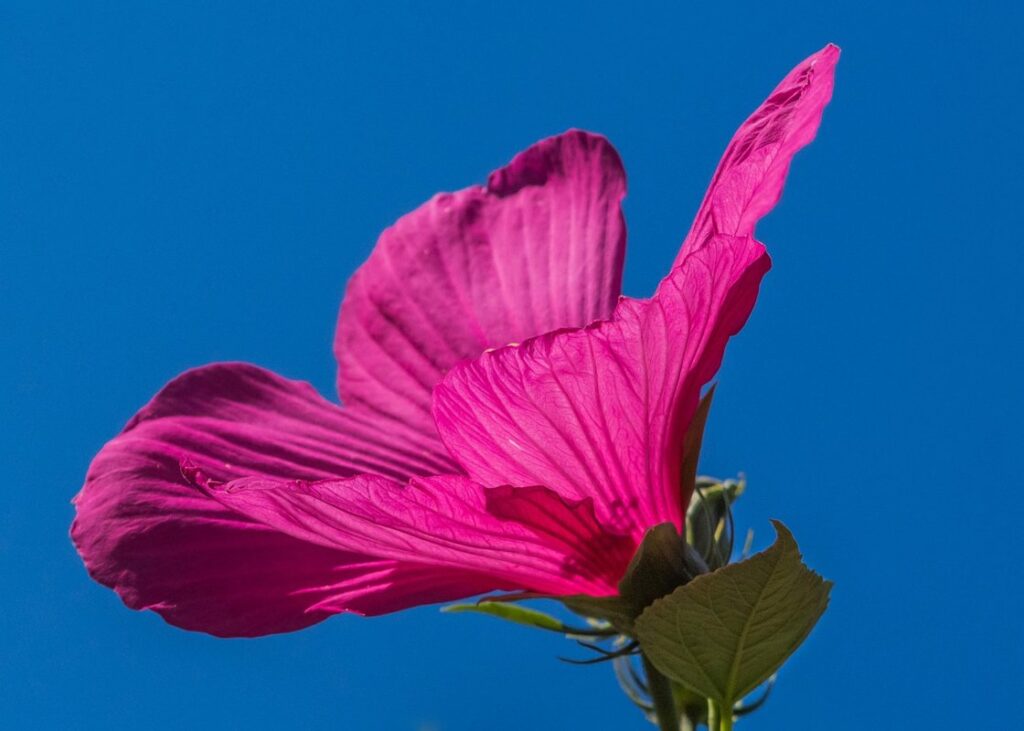
Are you tired of watching your beautiful hibiscus plants wither away, despite your best efforts? Keeping hibiscus alive can be a challenge, especially for beginners. But don’t worry, we’ve got you covered! In this comprehensive guide, we’ll walk you through the essential tips and tricks to keep your hibiscus thriving all year round.
From choosing the perfect location and lighting to watering, soil preparation, fertilization, pruning, and pest control, we’ll cover it all. We’ll also share our expertise on troubleshooting common issues that might be plaguing your plants. By following this guide, you’ll learn how to keep your hibiscus alive and healthy, even in the most demanding conditions. So, whether you’re a seasoned gardener or just starting out, get ready to unlock the secrets of growing vibrant and resilient hibiscus plants that will be the envy of all your friends!
Choosing the Right Location and Lighting Conditions
When it comes to keeping your hibiscus alive, selecting the right location and lighting conditions is crucial. A spot with bright, indirect light can make all the difference in their growth and blooming process.
Selecting a Suitable Location for Your Hibiscus
When selecting a location for your hibiscus, it’s essential to consider the plant’s specific needs. Hibiscus thrives in full sun, so choose a spot that receives direct sunlight for at least 6 hours a day. Avoid placing your hibiscus near trees or buildings that may cast shade, especially during peak summer months when the sun is high.
Temperature is another critical factor to consider. Most hibiscus varieties prefer daytime temperatures between 65°F and 90°F (18°C and 32°C), with nighttime temperatures around 55°F to 65°F (13°C and 18°C). If you live in an area with hot summers, choose a location that provides some respite from the heat, such as a shaded patio or under an awning.
Humidity is also crucial for hibiscus growth. These plants prefer a humid environment, typically above 50%. You can increase humidity around your hibiscus by placing it near a water feature or using a humidifier. When selecting a location, think about the microclimate in your yard and choose a spot that provides optimal conditions for your hibiscus to thrive.
In terms of wind protection, consider placing your hibiscus in an area sheltered from strong winds, which can cause damage to leaves and flowers. A west- or east-facing wall is ideal, as it receives gentle morning sun and some afternoon shade.
Optimizing Lighting for Healthy Growth
When it comes to growing healthy hibiscus plants, proper lighting is crucial. There are three main types of light: direct, indirect, and filtered. Direct light is exactly what it sounds like – unobstructed sunlight that can be intense. This type of light is ideal for young hibiscus plants, but as they mature, it’s essential to provide some shade to prevent burning.
Indirect light, on the other hand, is diffused through a sheer curtain or umbrella-shaped plant canopy. This type of lighting promotes even growth and prevents scorching. It’s perfect for older plants that need a bit less intensity.
Filtered light is another option, which uses specialized equipment like grow lights or shade cloth to soften direct sunlight. This method is great for indoor growers who can’t provide natural light.
To adjust lighting conditions for healthy growth, start by observing your plant during different times of day. Move it to a spot that receives indirect or filtered light if you notice scorching or uneven growth. Additionally, prune your hibiscus regularly to maintain its shape and promote air circulation, which helps prevent fungal diseases that thrive in intense sunlight.
Watering Your Hibiscus: The Right Balance
To keep your hibiscus thriving, it’s crucial to strike the perfect balance between watering and allowing the soil to dry out slightly. Proper watering techniques will be revealed in this section.
Understanding Hibiscus Water Requirements
Maintaining the right balance of water quality, frequency, and quantity is crucial for a healthy hibiscus plant. As a responsible hibiscus parent, you need to ensure that your plant receives enough water without drowning its roots.
When it comes to water quality, choose a potting mix specifically designed for tropical plants like hibiscus. This type of mix will help retain moisture while preventing waterlogged soil. Avoid using tap water, which can contain high levels of chlorine and fluoride that may harm your hibiscus. Instead, use filtered or rainwater for the best results.
The frequency of watering depends on factors such as climate, humidity, and pot size. In general, allow the top inch of soil to dry out between waterings. Overwatering can lead to root rot and other diseases, so it’s better to err on the side of caution. For example, if you’re in a hot and dry region, you may need to water your hibiscus daily.
As for quantity, don’t assume that more is better. Hibiscus plants prefer moist soil but hate soggy conditions. Water your plant thoroughly until you see excess moisture draining out of the pot’s drainage holes. This will ensure that the roots receive enough hydration without becoming waterlogged.
By paying attention to these factors, you’ll be well on your way to maintaining a happy and thriving hibiscus plant. Remember, consistency is key when it comes to watering – establish a routine and stick to it to keep your plant healthy and strong.
Avoiding Overwatering and Underwatering
Hibiscus plants are notoriously sensitive to watering schedules, and getting it wrong can be detrimental to their health. Overwatering is one of the most common mistakes that can lead to root rot, yellowing leaves, and even plant death. When the soil is consistently waterlogged, oxygen doesn’t reach the roots, causing them to suffocate.
On the other hand, underwatering can also cause harm by stressing the plant, leading to wilted leaves and reduced flower production. A hibiscus plant needs about 1-2 inches of water per week, either from rain or irrigation. To avoid both overwatering and underwatering, it’s essential to monitor soil moisture levels regularly.
Check the soil daily by sticking your finger into the soil up to the first knuckle. If the soil feels dry, it’s time for a drink. Water thoroughly until you see water coming out of the drainage holes. You can also use a moisture meter to get an accurate reading. Adjust your watering schedule according to the weather – more frequent watering during hot spells and less during cooler periods.
Soil and Fertilization: Nourishing Your Hibiscus
To keep your hibiscus thriving, it’s essential to understand how to properly care for its roots through soil selection and fertilization techniques that cater to their specific needs. We’ll explore these crucial steps together in this section.
Selecting the Right Potting Mix for Your Hibiscus
When it comes to growing hibiscus in pots, selecting the right potting mix is crucial. Hibiscus plants are prone to root rot, a condition caused by excess moisture that can be fatal if left unchecked. A well-draining potting mix is essential to prevent this issue and promote healthy growth.
Look for mixes specifically designed for tropical plants or those with high organic matter content. These mixes will help to break up clay particles and improve drainage. Avoid using regular potting soil, as it may contain perlite or vermiculite that can retain water and exacerbate root rot.
Some key characteristics of a good potting mix for hibiscus include: pH balance between 6.0 and 7.0, high organic matter content (at least 30%), and sufficient drainage capacity to prevent waterlogging. By using the right potting mix, you’ll be creating an environment that allows your hibiscus to thrive and grow strong roots.
As a general rule of thumb, repot your hibiscus every 1-2 years in the spring or summer when it’s actively growing. This will give you the opportunity to refresh the soil and ensure it remains well-draining and nutrient-rich.
Fertilizing Your Hibiscus: Organic and Synthetic Options
When it comes to fertilizing your hibiscus, you have two main options: organic and synthetic fertilizers. Both types have their benefits and drawbacks that are essential to consider.
Organic fertilizers are made from natural sources such as compost, manure, or bone meal. They release nutrients slowly into the soil, providing a steady supply of nourishment for your hibiscus plant. Organic options are also environmentally friendly, as they break down naturally in the soil and don’t contribute to water pollution. However, organic fertilizers can be more expensive than synthetic alternatives and may not provide an immediate boost to your plant’s growth.
Synthetic fertilizers, on the other hand, are made from chemical compounds that release nutrients quickly into the soil. They can provide a rapid increase in growth and blooming, but they also carry potential risks, such as over-fertilization and water pollution. It’s crucial to use synthetic fertilizers sparingly and follow the manufacturer’s instructions carefully.
To get the most out of your fertilizer, it’s essential to know when to apply it. Hibiscus plants require regular fertilization throughout their growing season, which typically spans from spring to fall. Feed your plant with a balanced fertilizer (10-10-10 NPK) once a month during this period. For optimal results, also fertilize your hibiscus after pruning and repotting.
Pruning and Training: Maintaining Shape and Promoting Growth
To keep your hibiscus looking its best, you’ll want to learn how to prune and train it properly, which is where this section comes in. Pruning techniques will help control its shape.
Understanding the Importance of Pruning in Hibiscus Care
Pruning is an essential aspect of hibiscus care that often gets overlooked. However, it plays a vital role in maintaining the shape and promoting growth of your plant. Regular pruning encourages blooming by removing old flowers and directing energy towards new ones.
When done correctly, pruning can be incredibly beneficial for your hibiscus. By cutting back branches, you’re encouraging bushy growth and preventing legginess. This not only maintains the plant’s compact shape but also allows sunlight to reach all parts of the plant, promoting healthy growth. Pruning also helps control pests and diseases by removing weak or damaged stems that can be susceptible to infection.
To prune your hibiscus effectively, remove any dead or dying flowers as soon as they drop off. Cut back leggy stems by about one-third to encourage branching and promote a fuller plant shape. For more mature plants, consider reducing the height by about half to maintain a compact shape and direct energy towards new growth.
Remember, pruning is not just about cutting away; it’s also about shaping your hibiscus into a beautiful, thriving specimen.
Techniques for Pruning and Shaping Your Hibiscus
When it comes to pruning and shaping your hibiscus, there are several techniques you can use to promote healthy growth and maintain a desired shape. One of the most important tasks is deadheading, which involves removing spent flowers from the plant. This encourages the hibiscus to focus its energy on producing new blooms rather than seed production.
To deadhead your hibiscus, simply snip off the wilted flower at the base of the stem using a pair of clean pruning scissors or clippers. Make the cut just above a leaf node, as this will help the plant direct its energy towards producing new growth.
Another technique is pinching, which involves gently removing the top sets of leaves from the main stem to encourage branching and promote a fuller shape. To pinch your hibiscus, use your thumb and index finger to carefully remove the top set of leaves, working your way down the stem.
Shaping your hibiscus requires more frequent pruning to maintain its desired form. Start by removing any dead or damaged branches, then trim back overgrown stems to the required length.
Pest Control and Disease Management: Protecting Your Hibiscus
When it comes to keeping your hibiscus thriving, protecting it from pests and diseases is crucial. Let’s dive into the essential tips for preventing these common issues.
Common Pests Affecting Hibiscus Plants
Aphids, whiteflies, and spider mites are some of the most common pests that can affect hibiscus plants. These tiny insects feed on the plant’s sap, causing curled or distorted leaves, stunted growth, and a weakened immune system.
Aphids, in particular, can multiply quickly, producing live young within two weeks. They’re usually found on new growth, and their presence is often accompanied by sticky honeydew droplets that attract ants and promote fungal growth. To control aphid populations, spray your hibiscus with a strong jet of water to dislodge them, followed by a neem oil or insecticidal soap solution.
Whiteflies, on the other hand, are delicate insects that can be blown around by breezes. They feed on plant sap and excrete sticky honeydew, which promotes fungal growth. To manage whitefly infestations, use yellow traps to attract them away from your hibiscus or spray with neem oil or insecticidal soap.
Spider mites are small, spider-like insects that weave fine webs between the leaves of your hibiscus. They feed on plant sap, causing bronzing or stippling on the leaves. To control spider mite populations, increase humidity around your hibiscus and spray with water daily to dislodge them.
Controlling Pests with Organic Methods
When it comes to controlling pests on your hibiscus plants using organic methods, there are several effective techniques you can try. One popular option is neem oil, a natural pesticide derived from the seeds of the neem tree. Mix neem oil with water according to the label instructions and spray it on your plants to repel aphids, whiteflies, and other pests.
Insecticidal soap is another organic pest control method that works by suffocating soft-bodied insects like mealybugs and spider mites. It’s safe for use on a variety of plants, including hibiscus, and can be applied directly to the affected areas or sprayed as a preventative measure.
Another approach to controlling pests is introducing beneficial insects, such as ladybugs or lacewings, which prey on common hibiscus pests like aphids and scale. You can purchase these insects online or from local nurseries and release them onto your plants.
When using any of these organic pest control methods, be sure to read the labels carefully and follow the instructions for use. It’s also a good idea to combine multiple methods for optimal results, as this can help prevent pests from developing resistance. By taking a multi-faceted approach to pest control, you’ll be better equipped to protect your hibiscus plants from damage.
Troubleshooting: Common Issues and Solutions
Even the most careful hibiscus enthusiasts can encounter problems, which is why we’ve compiled a list of common issues and their solutions to help you get back on track. Let’s tackle those pesky problems together!
Identifying Signs of Stress or Disease in Hibiscus Plants
When you notice your hibiscus plant struggling, it’s essential to identify the signs of stress or disease early on to take corrective action. Hibiscus plants are generally easy to care for, but they can be susceptible to certain issues that might cause concern.
One common sign of stress is yellowing leaves. If you notice your hibiscus leaves turning yellow, it could be due to overwatering, underwatering, or a lack of nutrients. Check the soil moisture by sticking your finger into the soil up to the first knuckle. If the soil feels dry, it’s time for watering. On the other hand, if you notice black spots on the leaves, it might be a sign of fungal diseases like leaf spot or root rot.
Droopy stems are another indication that something is amiss. This could be due to inadequate light, high temperatures, or low humidity. Inspect your plant’s environment and make adjustments accordingly. For example, if you live in an area with intense sunlight, consider providing some shade for your hibiscus during the hottest part of the day.
Look out for other signs like white powdery patches (fungal infections), leaf curling or twisting (nutrient deficiencies), or a general decline in plant health. Addressing these issues promptly will help prevent further damage and ensure your hibiscus thrives.
Resolving Common Problems with Hibiscus Care
When it comes to keeping your hibiscus plant thriving, it’s not uncommon to encounter some common problems along the way. One of the most frustrating issues is when your hibiscus refuses to bloom or produces wilted flowers. To troubleshoot this problem, start by checking the pH level of your soil. Hibiscus plants prefer a slightly acidic to neutral soil pH (around 6.0-7.0). If your soil is too alkaline, it can cause nutrient deficiencies and hinder blooming.
Another issue you might face is fungal diseases such as powdery mildew or leaf spot. To prevent these problems, make sure to provide good air circulation around your plant by keeping it at least 6-8 inches away from any walls or other plants. Regularly inspect your leaves for any signs of disease and treat promptly with a fungicide if needed.
If you’re experiencing root rot due to overwatering, take action quickly by repotting the plant in fresh, well-draining soil. Allow the top 1-2 inches of soil to dry out between waterings to prevent further damage.
Frequently Asked Questions
Can I grow hibiscus plants indoors, or do they require full sun?
Yes, while hibiscus plants thrive in full sun, you can still grow them indoors with the right lighting conditions. Place your plant near a south-facing window that receives direct sunlight for at least 4-6 hours a day. Alternatively, consider using LED grow lights to supplement natural light.
How often should I repot my hibiscus plants, and when is the best time?
Repot your hibiscus plants every 1-2 years in the spring when they become pot-bound or require more space for growth. This will give them fresh soil and a larger container to expand their roots.
Can I use regular potting mix for my hibiscus, or do I need specialized mixes?
No, regular potting mixes may not provide the necessary nutrients and acidity levels that hibiscus plants prefer. Opt for a well-draining potting mix specifically designed for acid-loving plants like hibiscus.
How can I protect my hibiscus from frost damage during winter?
To protect your hibiscus from frost damage, bring potted plants indoors or move them to a protected location before the first frost. For outdoor plants, apply a layer of mulch around the base to insulate the roots and keep the soil temperature stable.
What are some common pests that target hibiscus plants, and how can I control them?
Some common pests that affect hibiscus plants include aphids, whiteflies, and spider mites. To control these pests, use neem oil or insecticidal soap to spray the leaves and stems, and remove any infested areas to prevent further damage.
Can I fertilize my hibiscus with compost tea, or do I need synthetic fertilizers?
Yes, compost tea is a great organic option for fertilizing your hibiscus plants. It provides beneficial microbes that promote healthy growth and can help reduce the risk of pests and diseases.