Are you ready to unlock the secrets to making your kalanchoe thrive? With its vibrant blooms and low-maintenance requirements, this succulent has become a favorite among gardeners. However, like all plants, it requires regular pruning to stay healthy and continue producing stunning flowers. In this article, we’ll guide you through the art of kalanchoe pruning, covering everything from timing and techniques to tools and tips for promoting lush growth.
We’ll start by discussing when to prune your kalanchoe, whether it’s during its dormant or active phase, and why timing is crucial for maintaining its shape and encouraging new blooms. Then, we’ll delve into the different methods of pruning, including how to use the right tools to avoid damaging your plant.
Understanding Kalanchoe Pruning Basics
Pruning kalanchoes can seem daunting, but it’s actually quite simple once you understand the basics. In this next part of our guide, we’ll cover the fundamentals of kalache pruning techniques to get you started.
Why Prune Kalanchoes?
Pruning kalanchoes is an essential part of their care routine that often gets overlooked. However, regular pruning not only enhances their appearance but also promotes a healthier plant. By shaping and maintaining the size of your kalanchoe, you prevent it from becoming leggy or overgrown, which can lead to reduced flowering and potentially weakened roots.
Pruning also stimulates new growth, encouraging your kalanchoe to produce more vibrant flowers and maintain its bushy shape. Think of it as giving your plant a haircut – by removing dead or damaged leaves, you allow fresh energy to focus on producing healthy foliage and blooms. This, in turn, can boost flower production and extend the blooming period.
Furthermore, pruning kalanchoes helps prevent disease from taking hold. When old growth is removed, any potential fungal infections are also cut away, reducing the risk of plant illness and promoting a healthier environment for your kalanchoe to thrive in.
Benefits of Regular Pruning
Regular pruning of your kalanchoe plant has numerous benefits that go beyond just maintaining its shape. One of the most significant advantages is increased flowering. When you prune your kalanchoe regularly, it encourages the plant to produce more blooms. This is because pruning stimulates the production of growth hormones, which in turn promote flower development.
Pruning also improves plant vigor by removing weak and damaged branches, making way for healthier ones to grow. This not only enhances the overall appearance of the plant but also helps prevent disease and pest issues. By regularly pruning your kalanchoe, you’ll notice a significant difference in its growth pattern and flowering performance.
In addition to these benefits, regular pruning can also help maintain the plant’s overall shape and size. By controlling the growth of new stems and branches, you can keep your kalanchoe looking neat and tidy, even as it continues to produce an abundance of colorful blooms. With regular pruning, you’ll enjoy a more vibrant and robust kalanchoe plant that adds beauty and life to any room or outdoor space.
Determining the Right Time to Prune
When it comes to pruning kalanchoes, timing is crucial. The right moment to prune can make all the difference between promoting healthy growth and triggering stress for the plant.
First and foremost, consider the season. In most regions, spring and early summer are ideal times to prune kalanchoes. This allows the plant to direct its energy towards new growth during the warmer months. Conversely, pruning in late summer or fall can cause stress as the plant prepares for winter dormancy. In areas with mild winters, such as Mediterranean climates, you may be able to prune year-round.
Another important factor is climate. For example, if you live in a region with intense sunlight, it’s best to prune kalanchoes in the morning or late afternoon when the sun isn’t at its strongest. This reduces stress caused by sudden changes in light exposure.
Consider the specific variety of kalanchoe as well. Some varieties are more sensitive to pruning than others. Research your plant’s specific needs and adjust your pruning schedule accordingly.
Prune during the right time, and you’ll be rewarded with vibrant blooms and a healthy, thriving kalanchoe.
Preparing for Kalanchoe Pruning
Before you start pruning your Kalanchoe, make sure you have all the necessary tools and a clear plan to avoid damaging the plant. Gather your pruning shears, gloves, and a container for water first.
Gathering Necessary Tools and Equipment
To ensure you’re properly equipped for kalachoe pruning, gather these essential tools and materials:
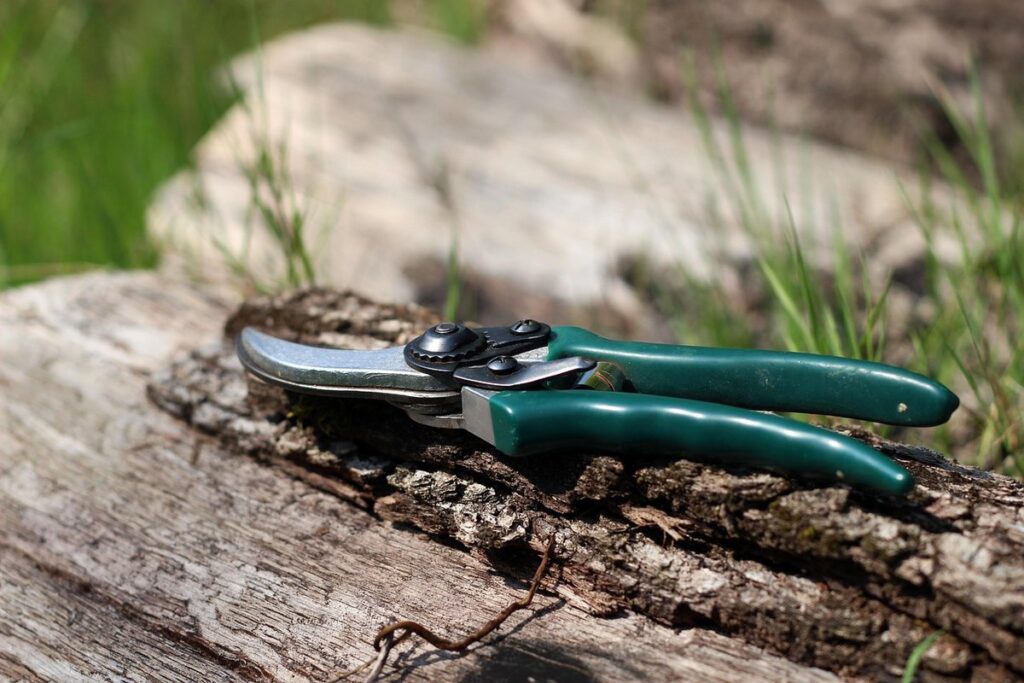
Start with a good pair of pruning shears specifically designed for plant trimming. Look for ones with sharp blades that can cut through thicker stems without causing damage. You’ll also want to wear a pair of gardening gloves to protect your hands from thorns and sap. A pair of scissors or a small handheld pruner is also handy for reaching tight spaces or making precise cuts.
In addition, have a pot or tray nearby to catch any leaves or debris that fall off during pruning. This will keep your workspace clean and prevent accidents. If you’re planning to propagate new plants from cuttings, make sure you have some potting mix on hand as well.
Identifying Healthy vs. Unhealthy Plant Material
When it comes to pruning kalanchoes, it’s essential to distinguish between healthy and unhealthy plant material. This is crucial for maintaining the overall health of your plant and preventing the spread of disease. To identify healthy vs. unhealthy plant material, look out for signs of disease, pests, or damage.
Healthy plant material will be firm, pliable, and have a vibrant color. Leaves should be free from yellowing, browning, or blackening, which can indicate nutrient deficiencies or overwatering. Check for any visible signs of pests like mealybugs, spider mites, or scale, which can cause damage to the plant’s leaves and stems.
On the other hand, unhealthy plant material will often exhibit wilted or droopy leaves, soft spots, or blackened areas. These can be indicative of root rot, fungal diseases, or physical damage caused by over-pruning or accidental damage. Be sure to remove any diseased or damaged sections immediately to prevent further harm to your kalanchoe.
When pruning, always cut back to a healthy node (where a leaf meets the stem), and make clean cuts just above a growth node using sterile scissors or pruning shears. This will help promote new growth and prevent the spread of disease.
Preparing the Pruning Site
Before you begin pruning your kalanchoe, it’s essential to prepare the area around the plant. This may seem like a minor detail, but trust us, it makes all the difference in ensuring a safe and successful pruning process.
First things first, clear away any debris or dead leaves that may be accumulating on the soil surface. Not only does this help prevent the spread of disease, but it also gives you an unobstructed view of your plant’s growth patterns. Take a moment to inspect the surrounding area and remove any weeds or overgrown plants that might be competing with your kalanchoe for nutrients.
If you have nearby plants or branches that are within reach, consider trimming them back slightly to prevent accidental damage during pruning. This is especially important if you’re working with long-handled pruning tools or in a confined space.
Finally, take steps to protect any surrounding surfaces from potential damage. Cover your furniture, rugs, and other delicate items with drop cloths or old sheets to prevent any stray cuttings or spills. With the area prepared, you’ll be well on your way to a successful and stress-free pruning experience.
Basic Kalanchoe Pruning Techniques
When it comes to pruning kalanchoes, having the right techniques up your sleeve can make all the difference in keeping these beautiful plants thriving. In this section, we’ll dive into the basics of kalnachoe pruning.
Removing Dead or Damaged Leaves and Stems
Removing dead or damaged leaves and stems is an essential part of kalanchoe pruning. This step helps maintain the plant’s appearance and promotes healthy growth. To remove dead or damaged leaves and stems safely and effectively, start by inspecting the plant carefully. Identify which parts are beyond repair and use a clean pair of scissors or pruning shears to cut them off just above a leaf node.
When removing damaged stems, make sure to cut at an angle to prevent water from collecting on the cut surface and causing further damage. For dead leaves, simply snip them off as close to the stem as possible, taking care not to damage any surrounding tissue.
Regularly removing dead or damaged parts will encourage new growth and help your kalanchoe thrive. Be sure to disinfect your pruning tools between cuts to prevent spreading disease from one part of the plant to another. By following these simple steps, you can keep your kalanchoe looking its best and ensure it continues to bloom and flourish throughout the growing season.
Trimming Back Leggy Growth
When your kalanchoe starts growing leggy, it’s essential to trim back the stems to maintain its natural shape and encourage healthy new growth. This technique not only enhances the plant’s visual appeal but also promotes air circulation and light penetration, reducing the risk of disease.
To trim back leggy growth, identify the longest stem or two on your kalanchoe and cut them back by about one-third to half their length. This will help control the plant’s height and direct its energy towards producing new growth from the remaining stems. Make clean cuts just above a node – where a leaf meets the stem – using a pair of sharp, sterile pruning scissors.
As you trim, consider the overall shape you want your kalanchoe to maintain. Remove any weak or spindly growth that’s competing with healthier stems for resources. Be gentle, as kalanchoes can be sensitive to over-pruning. With regular maintenance and careful trimming, your plant will continue to thrive and produce vibrant blooms throughout the growing season.
Pinching or Cutting Back Tips
When it comes to maintaining the shape and encouraging healthy growth of your kalanchoe plant, pinching or cutting back the tips of its stems is a crucial technique to master. By removing the terminal buds, you’re essentially giving your plant a signal to focus energy on producing lateral shoots and branches instead of extending itself further.
To pinch or cut back the tips effectively, start by identifying the longest stem on your kalanchoe plant. Using a pair of clean scissors or pruning shears, snip off about one-third to one-half of the stem’s length, just above a node (where a leaf meets the stem). This will encourage new growth from the remaining nodes and help prevent the plant from becoming leggy.
By doing this regularly, you’ll not only achieve a more balanced appearance but also promote air circulation within the plant. This is especially important for kalanchoe varieties that are prone to root rot or fungal diseases. With consistent pinching or cutting back, you can maintain your kalanchoe’s shape and encourage it to thrive in its container.
Advanced Kalanchoe Pruning Techniques
For more experienced gardeners, we’ll delve into advanced pruning techniques that will help you refine your kalanchoe’s shape and promote healthy growth. This includes layering and tip pruning methods.
Grafting and Air Layering
Grafting involves joining a piece of stem from one Kalanchoe plant to the root system of another. This technique is particularly useful for propagating rare varieties or achieving a specific leaf shape and color combination. The benefits of grafting include increased plant vigor, improved resistance to pests and diseases, and faster growth rates.
However, grafting can be challenging due to its precise nature and the risk of rejection by the root system. To succeed in grafting Kalanchoe plants, you’ll need a sharp, sterile grafting knife or scalpel, a rooting hormone, and a clean environment for graft union healing.
Air layering is another advanced technique that involves creating a new plant from an existing one without damaging its main stem. This method is ideal for propagating tall varieties of Kalanchoe. To initiate air-layering, make a small incision on the lower portion of the stem and apply a rooting hormone to stimulate root growth.
Once roots have developed, carefully cut the stem below the node, taking care not to damage them. Plant the new cutting in a well-draining potting mix and maintain a humid environment until it’s fully established.
Topiary and Shaping
When it comes to advanced kalanchoe pruning techniques, shaping your plants into decorative forms is an art that requires patience and precision. To create stunning topiaries or other ornamental designs, you’ll need to employ a combination of regular pruning and careful planning.
Start by visualizing the final shape you want to achieve – whether it’s a spherical, cylindrical, or abstract form. Consider the plant’s natural growth habits and how they can be manipulated through pruning. For example, kalanchoes with long stems are ideal for creating topiaries, as their flexible branches can be trained into desired shapes.
To begin shaping your kalanchoe, start by removing any weak or damaged growth to prevent disease and encourage healthy new growth. Use sharp, clean tools to make precise cuts just above a leaf node, where the leaf meets the stem. As the plant grows, regularly prune back the tips of stems to maintain shape and promote branching.
Prune in stages, allowing the plant time to recover between sessions. This will help prevent shock and encourage the plant to grow into its new form. With regular care and attention, your kalanchoe topiary will thrive and provide a beautiful focal point for your garden or indoor space.
Propagation through Pruning
Propagating new plants using pruning techniques is an excellent way to multiply kalanchoe species and share them with friends and family. By leveraging cuttings and division methods, you can successfully create new plants that are genetically identical to the parent plant.
When it comes to taking cuttings, make sure to choose healthy stems with at least two nodes (the joints where leaves meet the stem). Remove lower leaves, leaving only a few sets of leaves at the top. Dip the cut end in rooting hormone powder or liquid and insert it into a well-draining potting mix. Water thoroughly and provide bright, indirect light.
Another method is division, which involves carefully separating the plant’s roots to create new individual plants. For this, choose a mature kalanchoe with visible growth patterns and gently lift it out of its pot. Gently tease apart the roots, being careful not to damage them, and separate them into sections containing at least one growing point each.
It’s essential to keep the newly propagated plants in a shaded area for a few weeks before transferring them to their final location, where they’ll receive bright indirect light and moderate watering. With proper care, your new kalanchoe plants will thrive and bring joy to anyone who receives them.
Common Mistakes to Avoid When Pruning Kalanchoes
When pruning kalanchoes, it’s easy to make mistakes that can harm your plants. Let’s look at some common errors to avoid for healthy and thriving blooms.
Over-Pruning
When pruning kalanchoes, it’s easy to get carried away with cutting back too much of the plant. However, over-pruning can have severe consequences that may not be immediately apparent.
One of the most significant risks of over-pruning is damage to the plant’s structure. Kalanchoes have a unique growth habit, with thick, fleshy leaves and stems that store water. If you cut too much of the plant back, you risk removing these vital storage areas, leaving your kalanchoe vulnerable to disease and pest infestations.
Another effect of over-pruning is decreased flowering. Kalanchoes are known for their vibrant blooms, which are often triggered by pruning. However, if you prune too aggressively, you may remove the buds or tips of the stems where new flowers would develop. This can lead to a lackluster display of flowers and even prevent the plant from producing flowers at all.
To avoid over-pruning, take a step back and assess the health of your kalanchoe before cutting. Remove any dead or damaged leaves or stems, but avoid taking off more than one-third of the plant’s foliage at once. This will help you maintain the plant’s structure while still promoting healthy growth and flowering.
Under-Pruning
Under-pruning can be just as detrimental to your Kalanchoe’s health as over-pruning. When you don’t remove enough of the plant’s old growth, it can lead to a number of issues. For one, under-pruning can create an environment that fosters pest and disease problems. Dead or damaged leaves provide a haven for pests like spider mites and mealybugs, while diseases like root rot thrive in damp conditions.
By not removing enough of the old growth, you’re also failing to maintain your Kalanchoe’s healthy shape. The plant may become leggy and unbalanced, with weak stems that are more prone to breaking. This can be particularly problematic if you’re growing a Kalanchoe in a container, where the risk of toppling is higher.
To avoid under-pruning, it’s essential to regularly inspect your Kalanchoe for areas of dead or damaged growth. Remove these sections as soon as possible, and make sure to disinfect your pruning tools between cuts to prevent the spread of disease. By being proactive in removing old growth, you can help keep your Kalanchoe healthy and thriving.
Inadequate Preparation
Proper preparation is often overlooked when it comes to pruning Kalanchoes, but trust us, it’s a crucial step that sets you up for success. Before you even pick up those pruning shears, take some time to clear the area around your plant. Remove any nearby debris, dead leaves, or flowers, as these can harbor pests and diseases that might infect your Kalanchoe.
Next, make sure you’re equipped with the right tools for the job. Use a pair of sharp, sterile pruning shears specifically designed for pruning succulents. Dull blades can cause more harm than good, tearing the plant’s tissue rather than making clean cuts. If you’re unsure whether your shears are suitable, invest in a new pair – it’ll be worth it in the long run.
Clearing the area and using the right tools might seem like small details, but they play a significant role in preventing damage to your Kalanchoe and ensuring healthy growth after pruning.
Maintaining Healthy Kalanchoes After Pruning
Now that you’ve pruned your kalanchoe, it’s essential to provide the right conditions for healthy growth and prevent further damage. This section shares expert advice on nurturing your kalanchoes post-pruning.
Caring for Wounds
After pruning your kalanchoes, it’s essential to care for the wounds to prevent infection and promote healthy growth. This is a critical step, as kalanchoes are prone to fungal infections, which can be detrimental to their health.
When treating wounds, consider applying a fungicide specifically designed for houseplants. These products contain active ingredients that inhibit the growth of fungi and bacteria, reducing the risk of infection. Look for products containing ingredients like chlorothalonil or copper oxychloride. For example, you can use products from brands like Safer Soap or Neem Oil.
Alternatively, you can apply an anti-transpirant to prevent water loss through the wound area. This will help your plant conserve energy and resources, promoting healthy healing. Examples of anti-transpirants include Wilt-Pruf or PlantStik. When using either fungicides or anti-transpirants, be sure to follow the product instructions carefully and apply a thin layer to avoid suffocating the plant.
Regularly inspect the wound area for signs of infection, such as black spots or powdery mildew, and take prompt action if you notice any issues.
Monitoring Plant Health
Monitoring kalanchoe health after pruning is crucial to ensure the plant recovers quickly and remains healthy. After pruning, keep a close eye on your kalachoe for signs of stress, disease, or pest issues.
Some common signs of stress include yellowing leaves, droopy stems, or a decrease in leaf growth rate. These can be caused by factors such as over-pruning, inadequate watering, or extreme temperatures. If you notice any of these symptoms, adjust your care routine accordingly.
Diseases like root rot, leaf spot, or powdery mildew can also affect kalanchoes after pruning. Be on the lookout for black spots on leaves, soft or mushy stems, or a white, powdery coating on leaves. To prevent disease, ensure good air circulation around your plant and avoid overwatering.
Pest issues like mealybugs, spider mites, or scale can also arise after pruning. Check for fine webbing, sticky substance on leaves, or actual pests crawling on the plant. Isolate infected plants to prevent pest spread and use insecticidal soap or neem oil as needed.
Regularly inspect your kalanchoe for any of these issues, and take prompt action if you notice any problems. With proper monitoring and care, your pruned kalanchoe will recover quickly and thrive.
Scheduling Regular Maintenance
Scheduling regular maintenance sessions is essential to ensure that your kalanchoe continues to thrive after pruning. By incorporating maintenance into your routine, you can prevent the growth of unwanted pests and diseases, promote healthy root development, and maintain the appearance of your plant.
To schedule regular maintenance, start by setting aside a specific time each month or every 6-8 weeks to inspect your kalanchoe. This allows you to catch any potential issues before they become serious problems. During these sessions, inspect your plant for signs of pests, diseases, or nutrient deficiencies. Check the soil moisture and adjust watering accordingly.
Some key tasks to include in your maintenance routine are repotting, fertilizing, and pruning (although this will be done as needed). Repotting should occur every 1-2 years to refresh the soil and provide a larger pot if necessary. Fertilize during the growing season with a balanced fertilizer, following the instructions on the label carefully.
By incorporating regular maintenance into your kalanchoe care routine, you can ensure that your plant remains healthy and continues to bloom beautifully for years to come.
Frequently Asked Questions
What are some common mistakes to avoid when pruning my kalanchoe for the first time?
When starting with kalanchoe pruning, be cautious not to over-prune or under-prune your plant. Remove no more than one-third of the foliage at a time to prevent shock. Also, ensure you’re using sharp, clean tools to avoid spreading diseases.
How often should I prune my kalanchoe after it’s established its shape?
For optimal health and flowering, prune your established kalanchoe every 4-6 weeks during the growing season (spring-fall). This will maintain its size, encourage new blooms, and prevent overgrowth. Monitor your plant’s response to pruning and adjust frequency as needed.
Can I propagate my kalanchoe using only pruning techniques?
Yes! Propagation through pruning is a simple and effective method for kalache reproduction. By pinching or cutting back tips, you can stimulate branching and encourage new growth. To increase the chances of successful propagation, follow our guide on grafting and air layering techniques.
What are some signs that my kalanchoe needs urgent pruning?
Monitor your plant’s foliage density and flower production for signs it needs attention. Remove dead or damaged leaves and stems immediately to prevent the spread of disease. Also, watch out for leggy growth, which can be addressed by trimming back the longest stems.
How do I care for wounds on my kalanchoe after pruning?
To promote healthy healing and minimize the risk of infection, apply a small amount of rooting hormone or a thin layer of wax to protect cuts. Keep your plant away from direct sunlight and maintain consistent moisture levels until the wound has fully healed.