If you’re like many gardeners, you’ve fallen in love with the stunning beauty of iris flowers. These gorgeous blooms are a staple in many gardens, but caring for them can be a bit tricky. With their unique needs and specific requirements, it’s easy to get overwhelmed by the task of keeping your irises healthy and thriving.
But don’t worry, we’ve got you covered! Our comprehensive guide on iris care will walk you through everything from planting and watering tips to fertilizing and pest management strategies tailored to different climates. Whether you’re a seasoned gardener or just starting out, this article will provide you with the expert advice you need to grow stunning irises that bring joy and beauty to your garden for years to come.
Choosing the Right Iris Variety
When selecting an iris variety, it’s essential to consider factors such as climate, soil type, and desired bloom color. This will help you choose irises that thrive in your garden conditions.
Understanding Different Types of Irises
When it comes to choosing an iris variety for your garden, understanding the different types available is crucial. With over 300 species of irises, each with its unique characteristics and growth habits, selecting the right one can be overwhelming. In this section, we’ll break down the most popular types of irises: Bearded Irises, Siberian Irises, Japanese Irises, and others.
Bearded Irises, also known as German Irises, are one of the oldest and most popular iris varieties. They have a distinctive beard-like growth on the lower petals and come in a wide range of colors. These irises prefer well-drained soil and full sun to partial shade.
Siberian Irises, on the other hand, have slender stems and smaller flowers compared to Bearded Irises. They thrive in moist environments and are perfect for adding a splash of color to boggy areas or water features.
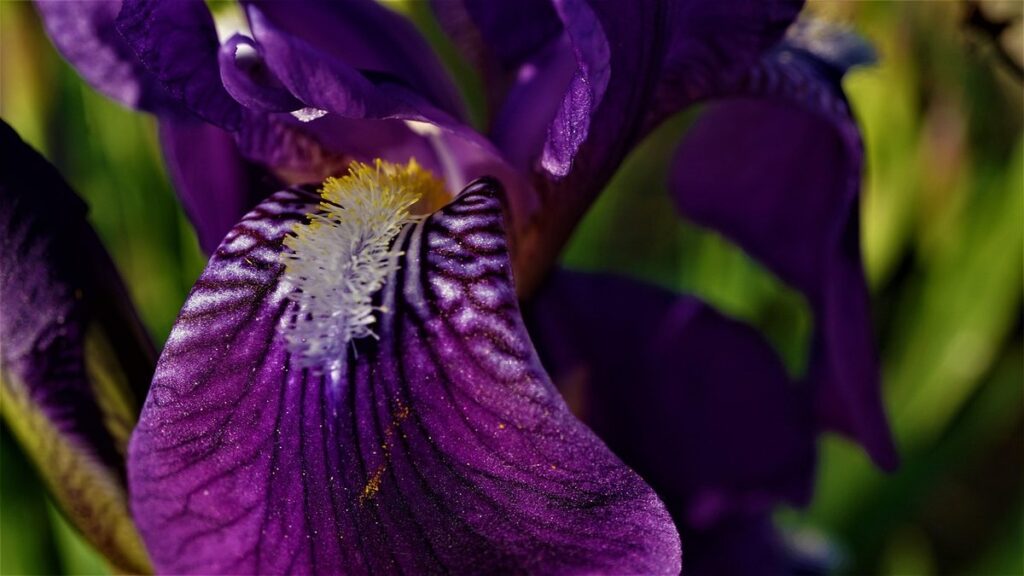
Japanese Irises, also known as Japanese Water Irises, have beautiful, exotic-looking blooms that thrive in shallow water or wet soils. These irises come in various shades of purple, blue, and white.
When choosing an iris variety, consider the specific growing conditions in your garden, including soil type, sunlight, and moisture levels. This will help you select a type that thrives in its environment, ensuring beautiful blooms year after year.
Factors to Consider When Selecting an Iris Variety
When selecting an iris variety, it’s essential to consider several factors that impact their growth and performance. One of the primary considerations is climate. Irises can thrive in a range of temperatures but generally prefer cool winters and warm summers. If you live in an area with extreme heat or cold, choose varieties that are specifically bred for those conditions.
Another crucial factor is soil type. Irises prefer well-draining soil, which can be challenging to replicate in areas with heavy clay or sandy soils. Look for varieties that are tolerant of your specific soil type, and consider amending the soil with organic matter like compost to improve drainage.
Moisture levels also play a significant role in iris growth. Irises generally require consistent moisture, especially during their first year after planting. However, overwatering can lead to rot and other problems. Choose varieties that are adapted to your local rainfall patterns or irrigation needs.
In areas with poor soil quality, consider growing irises in containers filled with a well-draining potting mix. This will allow you to control the soil type and moisture levels more easily. By considering these factors, you can choose iris varieties that will thrive in your specific environment and bring beauty and joy to your garden for years to come.
Planting Irises for Success
When planting irises, it’s essential to choose a location that provides the right balance of sunlight and water to promote healthy growth. Select a spot with well-draining soil for optimal results.
Preparing the Soil for Iris Planting
Before planting irises, it’s essential to prepare the soil for optimal growth. This involves checking and adjusting the pH balance, adding necessary fertilizers, and ensuring proper drainage. Iris flowers prefer slightly acidic to neutral soil, with a pH between 6.0 and 7.0. To check your soil’s pH level, purchase a DIY testing kit or collect a sample from your garden and send it to a lab for analysis.
Once you’ve determined your soil’s pH level, make adjustments as needed. If your soil is too acidic (below 6.0), add limestone or dolomitic lime to raise the pH. For alkaline soil (above 7.0), mix in elemental sulfur or aluminum sulfate to lower the pH. When it comes to fertilizers, use a balanced, slow-release fertilizer that provides nitrogen, phosphorus, and potassium (NPK) for healthy growth.
Drainage is also crucial for irises, which hate wet feet. If your soil tends to waterlog, create raised beds or add organic matter like compost or well-rotted manure to improve drainage.
Planting Iris Bulbs at the Right Depth and Spacing
When planting iris bulbs, it’s essential to get the depth and spacing just right. If you plant them too shallow, the bulbs will be exposed to extreme temperatures and moisture fluctuations, leading to rot and poor growth. On the other hand, planting them too deep can cause the rhizomes (the thick, underground stems that produce new leaves and flowers) to become waterlogged.
As a general rule of thumb, plant iris bulbs with their rhizomes 3-4 inches below the soil surface. This allows for about an inch of the bulb itself to be exposed above ground. For proper spacing, plant irises 6-8 inches apart in a triangular or diagonal pattern. This will give each plant enough room to grow without competing for resources.
It’s also crucial to choose a location with well-draining soil and full sun to partial shade. If your soil is heavy clay or prone to waterlogging, consider raising the bed by a few inches to improve drainage. By following these guidelines, you’ll be able to provide your irises with optimal growing conditions and enjoy a thriving display of beautiful flowers come springtime.
Watering and Irrigation Techniques
To keep your irises healthy, it’s crucial to master watering and irrigation techniques that prevent overwatering and underwatering, which can be detrimental to these beautiful flowers. Proper hydration is key to blooming success.
Understanding the Importance of Proper Hydration
Proper hydration is one of the most critical factors in iris care. When it comes to watering your irises, it’s essential to strike a balance between overwatering and underwatering. Overwatering can lead to root rot, which can be fatal for these beautiful flowers. This happens when water accumulates around the roots, creating an ideal environment for fungal growth. On the other hand, underwatering can cause stress, leading to weak and spindly stems.
To avoid these problems, make sure to check the soil moisture before watering your irises. Stick your finger into the soil up to the first knuckle; if it feels dry, it’s time to water. Water them thoroughly, but allow the top inch of soil to dry out between waterings. Aim for about 1-2 inches of water per week during the growing season. You can also mulch around the base of your irises to retain moisture and regulate soil temperature.
Remember that different types of irises have varying watering needs, so research specific requirements for your variety.
Best Practices for Watering Irises in Different Climates
When it comes to watering irises, the climate plays a crucial role in determining the right amount of moisture for these beautiful flowers. Irises are native to temperate regions with moderate temperatures and rainfall, but they can thrive in various climates with proper care.
In hot and dry climates, such as those found in the southwestern United States or Mediterranean countries, irises require more frequent watering. Water them deeply once or twice a week during the growing season, depending on soil moisture. It’s essential to water them early in the morning to prevent evaporation and scorching of the leaves.
In humid climates like those found in the southeastern United States or tropical regions, irises prefer well-draining soil and should be watered less frequently. Water them every 10-14 days during the growing season, making sure not to overwater, which can lead to root rot.
Consider rainfall when watering your irises. In areas with moderate rainfall, you may only need to supplement with irrigation during dry spells or in extreme heat waves. Remember, irises are drought-tolerant, so it’s better to err on the side of caution and underwater than overwater.
Fertilizing and Feeding Your Irises
When it comes to keeping your irises healthy and thriving, proper fertilization and feeding are essential. In this next part of our guide, we’ll share tips for nourishing your iris blooms.
Understanding the Nutritional Needs of Irises
Irises require a balanced diet of essential nutrients to produce vibrant flowers and strong foliage. To understand their nutritional needs, let’s break down the key elements: nitrogen (N), phosphorus (P), and potassium (K). These macronutrients are crucial for irises’ growth and development.
Nitrogen promotes leaf growth and green color, so it’s essential to provide enough N-rich fertilizers during the growing season. A balanced fertilizer with a 10-10-10 ratio of N-P-K is a good starting point. For example, if you’re using Miracle-Gro, follow the instructions for a general-purpose fertilizer.
Phosphorus supports root development and flower production, making it vital for irises’ reproductive cycles. Look for fertilizers containing phosphorus as the second number in the ratio (e.g., 10-20-10). Apply these at planting time to encourage strong root growth and subsequent blooms.
Potassium helps regulate water balance and overall plant health, which is especially important during hot summer months when irises are most vulnerable. Include potassium-rich fertilizers in your routine, following the recommended application rates.
Organic vs. Synthetic Fertilizers: What’s Best for Irises?
When it comes to fertilizing irises, one of the most common debates among gardeners is whether to use organic or synthetic fertilizers. While both types have their benefits and drawbacks, understanding the differences can help you make an informed decision for your iris care.
Organic fertilizers are derived from natural sources such as animal waste, compost, or green manure. They release nutrients slowly over time, promoting healthy root development and encouraging beneficial microbial growth in the soil. For irises, a balanced organic fertilizer (e.g., 5-3-4 NPK) is ideal for maintaining vigor and flower production.
Synthetic fertilizers, on the other hand, are made from chemical compounds that quickly release nutrients to plants. While they may provide a rapid boost, overuse can lead to soil imbalances and harm beneficial microorganisms. In moderation, however, synthetic fertilizers can be effective in correcting nutrient deficiencies or promoting flowering.
When deciding between organic and synthetic fertilizers for your irises, consider the following: If you prioritize long-term soil health and want to minimize environmental impact, choose an organic fertilizer. However, if you need a quick fix to correct severe nutrient imbalances or are dealing with challenging growing conditions, a balanced synthetic fertilizer may be necessary.
Pests and Diseases That Affect Irises
Irises are susceptible to various pests and diseases that can impact their health and beauty, so it’s essential to know how to identify and manage these issues. Here, we’ll cover common problems that can affect your irises.
Common Iris Pests and How to Manage Them
Irises are susceptible to various pests that can cause damage to their foliage and flowers. Among the most common iris pests are aphids, slugs, and snails.
Aphids are small, soft-bodied insects that feed on the sap of iris plants, causing curled or distorted leaves. To manage an aphid infestation, inspect your irises regularly for signs of aphids, such as sticky honeydew droplets or ants crawling around the plant. Use neem oil or insecticidal soap to control aphid populations.
Slugs and snails are nocturnal pests that feed on iris foliage and flowers at night. They leave behind silvery trails of slime and can cause significant damage if left unchecked. To deter these pests, use copper tape around the base of the plant or crushed eggshells nearby to prevent them from crawling up. You can also hand-pick slugs and snails at night or set traps using beer or yeast.
Regularly inspecting your irises for signs of pest infestation and taking proactive measures to control populations will help maintain their health and vibrancy throughout the growing season.
Preventing and Treating Iris Diseases
Iris diseases can be devastating for flower enthusiasts. Root rot, leaf spot, and rust are common issues that can arise from poor growing conditions or inadequate care. To prevent these problems, make sure to plant irises in well-draining soil with full sun to partial shade. Avoid overwatering, as this is a major contributor to root rot.
Root rot typically occurs when the roots sit in waterlogged soil for extended periods. If you notice yellowing leaves or soft, mushy stems, inspect the roots immediately. Remove any affected areas and repot the iris in fresh soil with improved drainage.
Leaf spot and rust often result from fungal infections that thrive in humid environments. Apply fungicides according to the product’s instructions to prevent further spread. For severe cases, consider pruning infected areas to promote new growth.
To maintain healthy irises, inspect your plants regularly for signs of disease. Regular watering and fertilization schedules can also help prevent issues before they arise.
Frequently Asked Questions
What’s the ideal time to divide and replant iris bulbs?
Yes, spring and fall are the best times to divide and replant iris bulbs. Spring division allows you to enjoy blooms in the same growing season, while fall division promotes healthy root growth for next year’s blooms.
How can I identify common pests affecting my irises?
Common pests like aphids, slugs, and snails can be identified by inspecting your plants regularly for signs of damage or eggs. Use neem oil or insecticidal soap to control infestations and maintain a clean garden environment.
Can I grow irises in containers, and if so, what are the key considerations?
Yes, you can grow irises in containers, but ensure they have good drainage holes to prevent waterlogged soil. Choose a container that’s at least 6-8 inches deep and well-draining potting mix specifically designed for bulbs.
How often should I fertilize my irises, and what type of fertilizer is best?
Fertilize your irises in early spring with a balanced, slow-release fertilizer. For optimal growth, repeat the application in mid-to-late summer, following the manufacturer’s instructions to avoid over-fertilization.
What are some organic alternatives to synthetic pesticides for managing iris pests?
Use neem oil, diatomaceous earth, or horticultural soap as effective and environmentally friendly alternatives to control pests like aphids, whiteflies, and spider mites. Always follow label instructions and take necessary precautions when using these products.