Are you an iris enthusiast looking to add some vibrant blooms to your garden? Or perhaps you’re new to growing these stunning flowers and want to ensure they thrive under your care? Whatever your level, taking good care of iris flower bulbs is crucial for those gorgeous blooms. But with so many types of irises out there – bearded, crested, and more – it can be overwhelming to know where to start.
In this ultimate guide, we’ll walk you through the essentials of iris flower bulb care. We’ll cover everything from planting and watering techniques to fertilizing and pest control methods. By the end of this article, you’ll have a solid understanding of how to coax your irises into full bloom and enjoy those spectacular flowers all season long.
Choosing the Right Iris Bulbs
When selecting iris bulbs for planting, it’s essential to choose varieties that suit your climate and desired bloom colors, ensuring a vibrant display in your garden. Consider factors like hardiness zones and bulb size to make an informed decision.
Types of Iris Bulbs to Grow
When it comes to choosing the right iris bulbs for your garden, understanding the different types available is crucial. There are three main categories of iris bulbs: bearded, non-bearded, and species irises.
Bearded irises (Iris germanica) are one of the most popular varieties, known for their showy flowers with distinctive ‘beards’ or hairy strands on the falls (lower petals). They bloom in a wide range of colors and come in various sizes. Bearded irises prefer full sun to partial shade and well-draining soil.
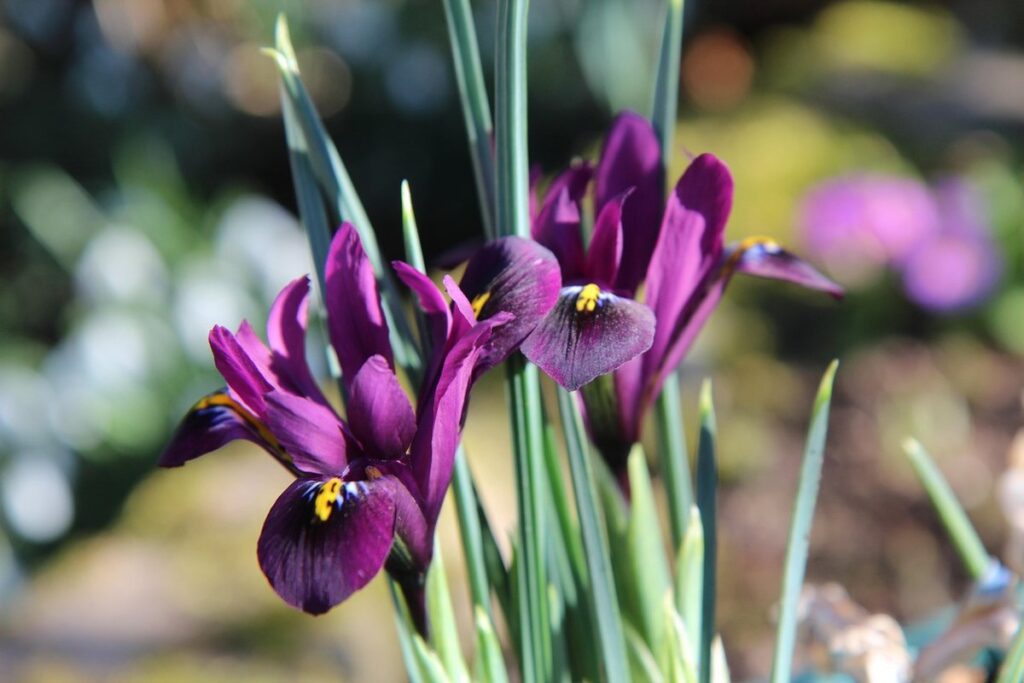
Non-bearded irises (Iris reticulata), also known as reticulated irises, are smaller and more delicate than bearded varieties. They have smaller flowers with no ‘beards’ and often bloom earlier in the season. Non-bearded irises thrive in full sun to partial shade and prefer moist soil.
Species irises (Iris species) are a diverse group that encompasses over 300 different types, each with its unique characteristics and growth habits. Some popular species include Japanese irises (Iris ensata), Louisiana irises (Iris versicolor), and Siberian irises (Iris siberica). They often require specific growing conditions and care.
When selecting iris bulbs for your garden, consider the space you have available, soil type, and desired bloom time. By choosing a variety that suits your needs, you’ll be well on your way to enjoying these beautiful flowers in your own garden.
Factors to Consider When Selecting Iris Bulbs
When selecting iris bulbs, there are several factors to consider to ensure you choose varieties that will thrive in your garden. First and foremost, think about the climate where you live. Some irises prefer cooler temperatures, while others can tolerate heat. If you reside in a region with harsh winters or extreme summers, look for irises bred specifically for those conditions. For example, ‘Baroness Orange’ is a popular choice for warmer climates.
Another crucial consideration is the soil type in your garden. Irises generally prefer well-draining soil rich in organic matter. Avoid planting them in areas where water tends to collect, as this can lead to rot and other problems. If your soil is heavy clay or sandy, consider adding compost or other amendments to improve its structure.
Consider the intended use for the irises in your garden. Are you looking to attract pollinators, add a splash of color to a border, or create a fragrant display? Different varieties offer unique benefits, so research and choose bulbs that fit your goals. By taking these factors into account, you can select iris bulbs that will bloom beautifully and thrive year after year.
Planting Iris Bulbs
To ensure a healthy start, let’s dive into the steps for planting iris bulbs: choose a spot with well-draining soil and plant them at the right depth.
Preparing the Soil
When preparing the soil for planting iris bulbs, it’s essential to create a nutrient-rich environment that promotes healthy growth and blooming. Start by digging the area where you’ll be planting the bulbs, loosening the soil to a depth of about 8-10 inches. This will allow the bulbs’ roots to spread out freely.
Next, incorporate a balanced fertilizer into the soil, following the manufacturer’s instructions for application rates. You can also add a layer of compost or well-rotted manure to enrich the soil with organic matter. This step is crucial as iris bulbs draw nutrients from the soil to produce beautiful blooms.
To give your bulbs an extra boost, consider incorporating other beneficial amendments like bone meal or alfalfa meal into the soil. These will provide essential micronutrients that promote strong root growth and healthy foliage development. As you prepare the soil, make sure it’s not too dense or soggy – iris bulbs prefer well-draining conditions to prevent rot and disease.
Planting Depth and Spacing
When planting iris bulbs, it’s essential to get the depth and spacing just right. This will ensure that your bulbs have enough room to establish a strong root system and produce healthy flowers.
A general rule of thumb is to plant iris bulbs 3-4 inches deep, with the “eyes” (small buds on the top of the bulb) facing upwards. However, this can vary depending on the size of the bulb and its growth habits. For example, smaller bearded irises typically require shallower planting depths (around 2-3 inches), while larger species like Japanese iris may need to be planted as deep as 6 inches.
When it comes to spacing, most iris varieties prefer to be planted about 12-18 inches apart. This allows for good air circulation and prevents overcrowding, which can lead to disease and pests. For example, in a bed with 20 bulbs, plant them in a staggered pattern to create a balanced and visually appealing arrangement. By getting the depth and spacing right, you’ll be well on your way to growing healthy, thriving iris plants that bring joy and beauty to your garden for years to come.
Care After Planting
Now that you’ve planted your iris bulbs, it’s essential to provide them with the right care after planting to ensure they thrive and bloom beautifully in your garden. This section covers the crucial steps for successful post-planting care.
Watering Iris Bulbs
When newly planting iris bulbs, it’s essential to establish a proper watering schedule. The key is to strike a balance between keeping the soil consistently moist and avoiding waterlogged conditions that can lead to root rot.
Check the soil moisture by inserting your finger into the soil up to the first knuckle. If the soil feels dry, it’s time to water. Typically, you’ll want to water every 4-7 days during the spring growth period. However, this frequency may need to be adjusted based on rainfall patterns and local climate conditions.
In areas with moderate temperatures (60-70°F) and moderate humidity, you can water your iris bulbs once a week. But in regions with high temperatures (above 80°F), it’s crucial to check the soil moisture daily, as drying out can occur quickly.
Remember that newly planted irises require consistent moisture during the first growing season. Water them thoroughly after planting and continue this routine for about 4-6 weeks until new growth appears.
Fertilizing Iris Bulbs
Fertilizing iris bulbs is an essential part of maintaining their health and promoting blooming. The best time to fertilize iris bulbs is in the fall, about 6-8 weeks after the blooming period has ended. This allows the bulb to store up nutrients for next year’s growth.
Choose a balanced fertilizer with a ratio of 10-10-10 (nitrogen-phosphorus-potassium). You can also opt for a slow-release fertilizer that provides nutrients over an extended period. Avoid using high-nitrogen fertilizers, as they can promote leaf growth at the expense of blooming.
For best results, apply fertilizer according to the manufacturer’s instructions. A general rule of thumb is to sprinkle 1-2 inches of fertilizer around the base of each plant, taking care not to touch the rhizomes. Water well after application and keep the soil consistently moist throughout the fall and winter months. This will help the bulb absorb the necessary nutrients for a strong bloom in the following spring.
It’s also important to note that over-fertilization can be detrimental to iris bulbs. So, be cautious not to overdo it, and monitor your plants’ response to fertilization.
Pest and Disease Management
As you care for your iris flowers, it’s essential to keep a watchful eye out for pests and diseases that can harm these beautiful bulbs. We’ll cover common issues and share effective management strategies to maintain their health.
Common Pests Affecting Iris Bulbs
When it comes to iris bulb care, pests can be a significant threat to their health and survival. Rodents, such as mice and voles, are common culprits that feed on iris bulbs, causing damage to the plant. These rodents often burrow into the soil, making them difficult to detect until the damage is done.
Aphids are another type of pest that target iris bulbs, feeding on their sap and transmitting diseases like impatiens necrotic spot virus (INSV). These tiny insects can multiply quickly, causing widespread infestations. To control aphid populations, use insecticidal soap or neem oil to spray the affected areas.
Deer are also known to feed on iris bulbs, especially in regions where they are abundant. If you live in an area with high deer activity, consider using repellents or fencing to protect your iris plants.
To prevent pest damage, make sure to plant iris bulbs at a depth that allows for good root growth and adequate soil coverage. This will help deter rodents from burrowing into the soil. Additionally, keep your garden clean by removing weeds and debris, which can attract pests.
Common Diseases Affecting Iris Bulbs
As iris flower bulb enthusiasts, it’s essential to be aware of common diseases that can affect our precious bulbs. Fungal infections such as rhizome rot and leaf spot are some of the most prevalent issues you might encounter. These types of infections typically start as small lesions on the leaves or stems but can quickly spread if not addressed.
Bacterial spot is another common disease that affects iris bulbs, causing small, reddish-brown spots to appear on the leaves. This infection often enters through wounds or cuts in the plant tissue and can be spread by water splashing from infected plants.
To treat fungal infections, make sure to remove any affected areas of the bulb and sterilize your tools before handling the remaining healthy tissues. For bacterial spot, a copper-based fungicide can help control the spread of the infection. Prevention is key – maintain good air circulation around your irises, avoid overhead watering, and ensure proper spacing between plants to reduce the risk of disease.
Regularly inspecting your bulbs for signs of disease and taking prompt action when issues arise will help keep your iris garden healthy and thriving.
Tips for Success
Now that you’ve learned the basics of iris flower bulb care, let’s dive into some practical tips to ensure your irises thrive and bring beauty to your garden. Follow these expert tips for success!
Dividing and Transplanting Iris Bulbs
Dividing and transplanting iris bulbs is an essential step to maintain their health, encourage new growth, and increase flower production. As iris clumps mature, the center of the plant can become congested, leading to a decrease in flowering performance.
To divide and replant iris bulbs, start by digging carefully around the base of the plant, making sure not to damage any of the rhizomes or roots. Gently lift the entire clump out of the ground and wash off as much excess soil as possible. Next, separate the individual fans of foliage, taking care not to damage any of the delicate rhizome tissue.
Use a fork or garden knife to gently tease apart the divided sections, making sure each section has at least one “eye” (the small white bud on the end of the rhizome) and some roots. Replant the divided sections immediately, making sure the eyes are facing upwards and the soil is firm but not compacted. Water well after planting to settle the soil.
Propagating Iris Bulbs Through Division
Propagating iris bulbs through division is a simple and effective way to multiply your favorite varieties. This process involves carefully separating the rhizomes into sections, each with at least one “eye” (a small bud that will produce a new plant). To divide an iris bulb, dig up the entire clump in the spring or fall when the foliage has died back, making sure to gently wash away any excess dirt. Use a garden fork to separate the rhizomes into sections, taking care not to damage the delicate roots.
Each division should have at least one “eye” and preferably two or three, as this will ensure healthy growth. Considerations when dividing iris bulbs include choosing a time that minimizes disturbance to the plant (spring or fall are ideal), handling the rhizomes carefully to avoid damaging the roots, and replanting immediately after division. By following these steps and tips, you can successfully multiply your iris collection and enjoy more vibrant blooms in your garden.
Common Mistakes to Avoid
When caring for iris flower bulbs, it’s easy to fall into common pitfalls that can harm your plants. To avoid these mistakes and ensure a thriving garden, pay attention to the following key blunders.
Inadequate Soil Preparation
When planting iris bulbs, it’s easy to overlook one of the most critical aspects of their care: soil preparation. However, inadequate soil preparation can lead to a range of problems, from poor growth and low yields to increased susceptibility to pests and diseases.
One common mistake gardeners make is failing to loosen the soil sufficiently before planting. Iris bulbs need well-draining, loose soil to allow their roots to expand freely. If the soil is compacted or heavy clay, it can restrict root growth and cause the bulb to rot.
To avoid this issue, dig a bed that’s at least 12 inches deep, loosening the soil as you go. Add organic matter like compost or well-rotted manure to improve drainage and fertility. A mix of one-third organic matter and two-thirds soil provides an ideal balance for iris bulbs.
Gardeners also often neglect to consider the pH level of their soil. Iris bulbs prefer a slightly acidic to neutral soil pH, ranging from 6.0 to 7.0. If your soil is too alkaline or acidic, it can affect nutrient uptake and overall plant health.
Overwatering or Underwatering Iris Bulbs
When it comes to iris bulb care, few mistakes are as detrimental as overwatering and underwatering. Both of these issues can lead to poor blooming performance, weak stalks, and even the death of your beloved bulbs.
Overwatering causes iris bulbs to rot from the inside out, leading to a weakened immune system that makes them more susceptible to pests and diseases. On the other hand, underwatering stresses the bulb, causing it to go dormant prematurely. This can result in delayed or missed blooms.
To achieve a balanced watering schedule, start by allowing the soil to dry slightly between waterings. A good rule of thumb is to water when the top 1-2 inches of soil feel dry to the touch. Avoid getting water on the leaves and flowers to prevent fungal diseases.
Keep an eye on your local climate and adjust your watering schedule accordingly. For example, in areas with high humidity or frequent rain, you may need to water less frequently to avoid overwatering. Conversely, in regions with low rainfall, be sure to provide adequate moisture for your bulbs during dry spells.
Frequently Asked Questions
How often should I check for signs of pests or diseases on my iris bulbs?
Regularly inspect your irises during the growing season, ideally every 7-10 days, to catch any potential issues early. Be aware of common pests like aphids, slugs, and snails, as well as diseases such as root rot and leaf spot.
Can I plant iris bulbs in containers or do they require a specific type of soil?
Yes, you can plant iris bulbs in containers with good drainage, but ensure the potting mix is specifically designed for bulbous plants. Avoid using regular garden soil, as it may not provide enough support for the bulbs’ growth.
How deep should I plant iris bulbs, and what’s the ideal spacing between them?
Plant iris bulbs 3-4 times their height below the surface, usually around 2-3 inches (5-7.5 cm) deep. Space bearded irises 12-18 inches (30-45 cm) apart, non-bearded irises 6-8 inches (15-20 cm), and species irises 12-24 inches (30-60 cm).
What’s the best time to divide and replant iris bulbs?
The ideal time for division is when the plant starts to decline in growth or becomes congested, usually every 3-5 years. Spring or early fall are the best times for dividing and replanting iris bulbs.
How can I protect my irises from frost damage during harsh winters?
Yes, apply a layer of mulch (2-3 inches/5-7.5 cm) around the base of your irises in late fall to protect them from frost damage. Alternatively, you can also use burlap or landscape fabric for added protection.