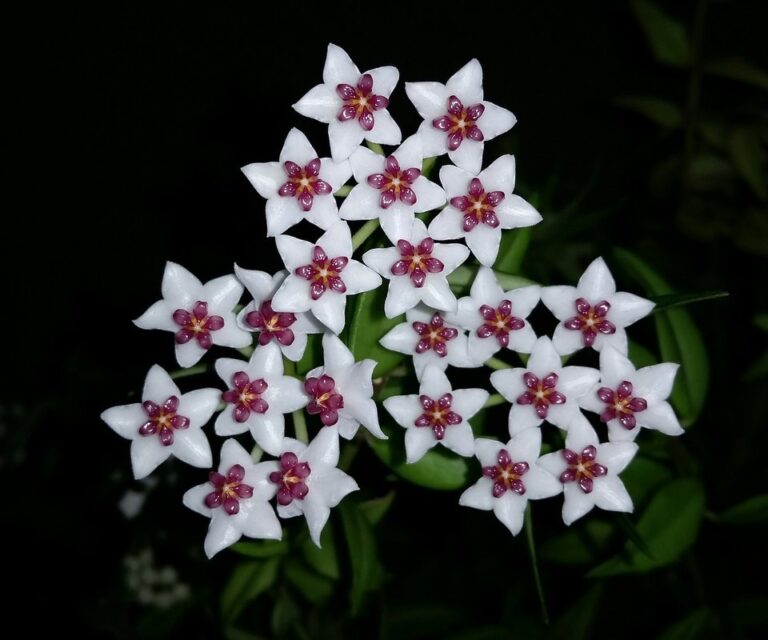
If you’re one of the many plant enthusiasts who have fallen in love with Hoya plants, you know how stunning their blooms can be. But let’s face it – these lovely plants require some TLC to thrive. With the right care, your Hoya will reward you with gorgeous white, pink, or red flowers that’ll make your space feel like a tropical paradise. However, neglecting their needs can lead to unhappy and unhealthy plants. That’s where our comprehensive guide to Hoya plant care comes in – covering everything from lighting and watering to fertilization and pruning. In this article, we’ll break down the essential tips and tricks for growing a happy and thriving Hoya, so you can enjoy its beauty all year round.
Understanding Your Hoya Plant
To truly thrive, you need to understand your hoya plant’s unique needs and characteristics, which can vary depending on its specific type and environment. Let’s dive in and explore what makes your hoya tick!
Choosing the Right Variety
With over 500 species to choose from, selecting the right Hoya plant variety can be overwhelming. However, understanding their unique characteristics will help you make an informed decision.
First and foremost, consider the space where you plan to place your Hoya plant. Some varieties, like Hoya kerrii, are compact and perfect for small spaces or containers, while others, such as Hoya carnosa, can grow quite large and require more room to spread out.
Next, think about the level of maintenance you’re willing to commit to. Hoya plants come in a range of levels of sensitivity, from low-maintenance varieties like Hoya compacta that thrive on neglect, to more finicky species like Hoya bella that demand regular watering and pruning.
You should also consider the aesthetic appeal of your plant. Some Hoyas have beautiful variegated leaves or fragrant flowers, while others are more subtle in their appearance. Think about how you want your plant to fit into your decor and choose a variety that complements your style.
Ultimately, research different varieties online or visit a local nursery to get hands-on experience with the plants before making a decision.
Preparing Your Hoya’s Environment
Creating an ideal environment for your Hoya plant involves striking a balance between light, temperature, and humidity. Lighting is one of the most critical factors to consider, as Hoyas prefer bright, indirect light but can tolerate low light conditions. If you’re placing your Hoya near a window, ensure it’s east- or west-facing to prevent scorching from direct sunlight.
Temperature fluctuations can also impact your plant’s health. Most Hoya species thrive in temperatures between 65°F and 75°F (18°C and 24°C), but some varieties can tolerate warmer conditions up to 85°F (29°C). Monitor the temperature in your home and adjust it accordingly, especially during winter months when indoor temperatures tend to drop.
Humidity is another essential aspect of Hoya care. These plants prefer a relatively low humidity environment, around 40-50%. To maintain optimal humidity levels, you can place the pot on a tray filled with water and pebbles or use a humidifier nearby. By adjusting these environmental factors based on your plant’s specific needs, you’ll create an ideal space for your Hoya to flourish.
Watering and Humidity
Now that you know how to choose the right potting mix for your hoya, let’s dive into how to keep it consistently watered and humid. Proper watering and humidity levels are crucial to prevent root rot.
The Right Amount of Water
When it comes to watering your Hoya plant, getting it just right is crucial. Overwatering and underwatering are both common mistakes that can be detrimental to your plant’s health. So, how often should you water your Hoya? The general rule of thumb is to allow the soil to dry slightly between waterings.
A good starting point is to check the soil moisture by sticking your finger into the soil up to the first knuckle. If the soil feels dry, it’s time for a drink. But if it’s still moist, wait another day or two before checking again. Be careful not to overwater, as this can lead to root rot and other problems. On the other hand, underwatering can cause your Hoya to drop its leaves.
To avoid these issues, make sure to water your Hoya when the top 1-2 inches of soil feels dry to the touch. Water thoroughly, making sure the pot drains well to prevent waterlogged soil. It’s also essential to adjust your watering schedule depending on the season and environment. During the hot summer months, you may need to water more frequently, while in the cooler winter months, less frequent watering is usually sufficient.
Maintaining Optimal Humidity
Maintaining optimal humidity around your Hoya plant is crucial for its overall health and well-being. One of the primary reasons for maintaining a humid microclimate is to prevent pests and diseases from taking hold. High humidity creates an environment that’s less conducive to infestations, as most pests prefer dry conditions. For instance, spider mites, mealybugs, and scale insects thrive in low-humidity environments.
To maintain optimal humidity levels around your Hoya plant, you can use a humidifier. These devices release moisture into the air, helping to create a more hospitable environment for your plant. You can also group plants together to achieve a similar effect. As plants transpire, they release moisture into the air, increasing the surrounding humidity. By placing multiple plants in close proximity, you can create a microclimate that’s ideal for your Hoya.
It’s essential to monitor your plant’s surroundings and adjust as needed. For example, if you live in an arid climate or have dry heating vents in your home, you may need to use both a humidifier and group multiple plants together to achieve the right balance.
Soil and Fertilization
When it comes to Hoya plant care, understanding how to prepare a suitable growing medium is crucial for its health and vigor. We’ll discuss the ideal soil mix and fertilization needs for your Hoya plants in this section.
The Best Soil Mix for Your Hoya
When it comes to growing healthy and thriving Hoya plants, the right soil mix is essential. Hoyas prefer a well-draining potting mix that prevents waterlogged conditions, which can lead to root rot and other problems. To achieve this, look for mixes containing perlite, vermiculite, or sand as primary ingredients.
Perlite is an excellent addition, as it helps prevent water from accumulating in the soil while also retaining moisture when needed. Vermiculite, on the other hand, provides aeration and retains nutrients, making it another popular choice. Sand can also be effective but ensure it’s not too coarse, which might cause the roots to dry out.
If you prefer to create your own mix, combine equal parts peat moss or coconut coir, perlite, and vermiculite. Avoid using regular garden soil as it tends to compact and hinder drainage. Instead, opt for a pre-mixed blend specifically designed for tropical plants like Hoyas. Some reputable brands offer high-quality mixes that cater to the unique needs of these epiphytes. Look for them at your local nurseries or online retailers to ensure you’re giving your Hoya plant the best chance at success.
Fertilizing for Maximum Growth
Fertilizing your Hoya plant is crucial for promoting healthy growth and vibrant blooms. When it comes to fertilization, you want to provide your plant with the right nutrients at the right time. A balanced fertilizer that contains equal amounts of nitrogen (N), phosphorus (P), and potassium (K) will suffice as a general-purpose fertilizer.
For blooming Hoya plants, however, you’ll want to use a bloom-boosting fertilizer that is higher in phosphorus. This type of fertilizer promotes the production of flowers and can be applied when your plant is actively producing blooms. It’s essential to follow the instructions on the fertilizer package for application rates and frequency.
Typically, it’s recommended to fertilize your Hoya plant during the growing season (spring-fall) once a month. Dilute the fertilizer to half the recommended strength to avoid burning your plant’s roots. You can also repot your Hoya in the spring with fresh potting mix that contains added nutrients for extra fertility. Regular fertilization will encourage healthy growth, prevent nutrient deficiencies, and promote those beautiful blooms you’re looking for.
Pruning and Training
Now that you’ve got your Hoya plant growing, it’s time to focus on its shape and size through pruning and training techniques that bring out its natural beauty. Regular maintenance will keep it thriving and looking its best.
When to Prune Your Hoya
Pruning is an essential part of Hoya plant care that’s often misunderstood. Many people think pruning will harm their plants, but it’s actually a necessary step to maintain a healthy and thriving Hoya. When to prune your Hoya depends on the reasons behind the pruning.
Firstly, let’s address the elephant in the room: removing dead or diseased stems. This is one of the most critical times to prune your Hoya. If you notice any blackened or wilted stems, snip them off immediately to prevent the spread of disease and encourage new growth. Cut just above a node (where a leaf meets the stem), making a 45-degree angle cut to promote healthy growth.
Pruning also encourages blooming in Hoyas. By cutting back overgrown tips and encouraging lateral growth, you’ll stimulate your Hoya to produce more flowers. This is especially important for Hoyas that have become leggy or top-heavy. Prune them regularly to maintain their shape and encourage a bushy habit.
Regular pruning will promote new growth, remove dead weight, and encourage blooming – all essential aspects of maintaining a healthy Hoya plant.
Techniques for Pruning and Training
When it comes to pruning and training your Hoya plant, timing is everything. Prune your Hoya during its dormant season, which usually falls between December and February for most varieties. This will help prevent the spread of disease and promote healthy growth.
To start, inspect your plant carefully and remove any dead or damaged leaves or stems. Use clean, sharp pruning tools to avoid spreading diseases. Cut just above a node (the point where a leaf meets the stem) using a 45-degree angle cut. This helps the plant heal quickly and reduces the risk of water collecting on the cut.
For stem cutting, select healthy stems with at least two nodes between cuts. Cut a section about 4-6 inches long, just above a node. Remove lower leaves to prevent them from getting wet and developing root rot. Allow these cuttings to dry for a few days before planting them in well-draining soil. Train your Hoya vines by providing a trellis or other support for the plant to climb on. You can also prune back long vines to encourage branching and promote a fuller shape.
For training, gently twine the stems around the support, working from the base of the plant upwards. Secure with soft ties like twine or clips. To control trailing growth, prune back the longest vines by one-third to encourage branching. This will help create a bushy appearance and prevent legginess.
Pest and Disease Management
To keep your hoya plant thriving, it’s essential to recognize and address potential pests and diseases that can cause harm. Let’s explore common issues and effective management techniques together.
Common Pests Affecting Hoya Plants
Hoya plants are susceptible to various pests that can cause damage and even kill the plant if left untreated. Regular inspection is key to catching infestations early on. Look for signs of pest activity such as white, cottony patches (mealybugs), fine webbing (spider mites), or small, immobile dots (scale).
Some common pests affecting Hoya plants include mealybugs, spider mites, and scale. Mealybugs are usually found in large numbers on the undersides of leaves and stems, while spider mites create a fine webbing that can cover parts of the plant. Scale insects, on the other hand, appear as small, immobile dots that can secrete honeydew.
To inspect your Hoya plant regularly, gently turn over each leaf and examine the undersides for any signs of pests. Look for eggs, nymphs, or adult stages of these pests. If you notice any pest activity, isolate the plant immediately to prevent infestation from spreading to other plants. Use neem oil or insecticidal soap to treat the affected areas, following the product’s instructions carefully.
It’s essential to monitor your Hoya plant regularly for signs of pest activity and take action promptly if you notice anything unusual.
Recognizing and Treating Diseases
As a Hoya plant parent, it’s essential to be aware of the potential diseases that can affect your beloved plant. Root rot, leaf spot, and powdery mildew are three of the most common issues you may encounter.
Root rot is often caused by overwatering, which creates an ideal environment for fungal growth. To prevent root rot, ensure your pot has good drainage holes and avoid watering your Hoya when the soil is already moist. If you notice yellowing leaves or a soft stem, it’s likely that your plant is struggling with root rot.
Leaf spot can be caused by various factors, including high humidity, poor air circulation, and excessive moisture on the leaves. Regularly inspect your Hoya for any signs of black spots or patches, and remove affected areas to prevent further spread.
Powdery mildew is a common issue that appears as a white, powdery coating on the leaves. To treat this condition, you can use a fungicide specifically designed for houseplants. Alternatively, try implementing organic disease management strategies such as improving air circulation, reducing watering frequency, and using neem oil to repel fungal spores.
Prompt treatment is crucial in preventing further damage to your Hoya plant. Monitor your plant regularly, and act quickly if you notice any signs of disease. By taking preventative measures and addressing issues promptly, you can keep your Hoya healthy and thriving for years to come.
Propagation and Repotting
When it comes time to expand your hoya collection, you’ll need to know how to properly propagate and repot these beautiful plants. This section will guide you through both processes.
Propagating Your Hoya Through Stem Cuttings
Taking stem cuttings from your mature Hoya plant is a great way to propagate new plants. To do this successfully, you’ll need to select healthy stems with nodes, which are the small white bumps on the stem where leaves meet. Look for stems that have at least two sets of nodes and are around 4-6 inches long.
To prepare your cutting, cut just above a node using a sharp, clean knife or pruning tool. Make sure each cutting has at least one set of leaves to allow it to photosynthesize while roots develop. Remove any lower leaves that will be submerged in water or soil to prevent rot and promote healthy root growth.
Once prepared, place the cutting in a glass of water or a propagation tray filled with a well-draining potting mix. Keep the water level topped up or ensure the soil remains consistently moist but not waterlogged. Provide bright, indirect light and maintain temperatures between 65-75°F (18-24°C) to promote rooting. Roots should develop within 2-4 weeks, at which point you can transfer the new plant into a pot filled with a well-draining potting mix.
When to Repot Your Hoya Plant
When it comes to Hoya plant care, repotting is an essential task that can make all the difference between a healthy, thriving plant and one that’s struggling. One of the most obvious signs that your Hoya needs a new home is root congestion – if you notice roots growing out of the drainage holes or circling around the inside of the pot, it’s time to repot.
Another indication that your Hoya needs fresh soil is when its current potting mix starts to break down. This can be recognized by a change in color, texture, or consistency of the soil. If you notice any of these changes, it’s likely due for a soil refresh.
When choosing a new pot, select one with good drainage holes to prevent waterlogged soil. A pot that’s only slightly larger than the previous one will also help minimize transplant shock. To repot your Hoya, gently remove it from its old pot and inspect the roots. Trim any dead or damaged roots before transferring the plant into its new home.
Gently add fresh potting mix around the roots, making sure not to compact it too much. Water thoroughly after repotting to help the plant settle in.
Frequently Asked Questions
How often should I check the soil moisture of my Hoya plant, especially during the dry winter months?
Regularly checking soil moisture is crucial for Hoya plants, as they can be sensitive to overwatering. During the dry winter months, it’s recommended to check the soil moisture at least once a week. Use your finger or a moisture meter to determine if the soil feels dry to the touch. If it does, it’s time to water your Hoya plant.
Can I propagate my Hoya plant using leaf cuttings, and what are the chances of success?
While stem cuttings are the most common method for propagating Hoya plants, you can also try rooting leaf cuttings. However, the success rate is lower compared to stem cuttings. To increase your chances, make sure to use healthy leaves with a long petiole, and root them in a well-draining mix with high humidity.
How do I identify and treat scale insects on my Hoya plant?
Scale insects can be challenging to detect but are often visible as small, white, or brown spots on the leaves. To control infestations, use neem oil or insecticidal soap according to the product’s instructions. Regularly inspect your plants for signs of pests and maintain optimal humidity levels to prevent infestations.
Can I grow a Hoya plant outdoors year-round in a region with mild winters?
While some Hoya varieties can tolerate outdoor conditions year-round, they still require protection from extreme temperatures, frost, or intense sunlight. In regions with mild winters, you can grow your Hoya plant outdoors during the warmer months but bring it indoors before the first frost to ensure its survival.
How do I repot my Hoya plant when it has outgrown its container?
When repotting a mature Hoya plant, choose a pot that is only slightly larger than the previous one. Gently remove the plant from its container and inspect the roots for circling or tangling. Trim any damaged roots with sterile scissors before replanting your Hoya in fresh, well-draining potting mix. Water thoroughly after repotting to minimize transplant shock.