If you’re growing your own dill plants, chances are you’ve noticed that they can quickly grow too tall or even start producing flowers. This isn’t necessarily a bad thing, but it’s often at the expense of leaf production, which is what we really want from our dill plants! To promote bushy growth and keep those lovely leaves coming, regular trimming is essential. But when to trim your dill plant, and how to do it effectively, can be a bit tricky. In this article, we’ll show you the best techniques for trimming dill at different stages of growth, including tips on using the right tools and aftercare advice to keep your plants healthy and thriving. By following these simple steps, you’ll be able to enjoy a continuous supply of fresh dill leaves all season long!
Understanding Dill Plants and Pruning Needs
To grow dill plants successfully, you need to understand their pruning needs, which involve regular trimming to encourage healthy growth and prevent flowering.
Benefits of Trimming Dill Plants
Trimming dill plants offers numerous benefits that can enhance their overall health and productivity. One of the primary advantages is promoting bushy growth. When you trim back the plant’s stem to about one-third, it encourages the remaining stems to grow thicker and fuller, resulting in a more robust and compact plant.
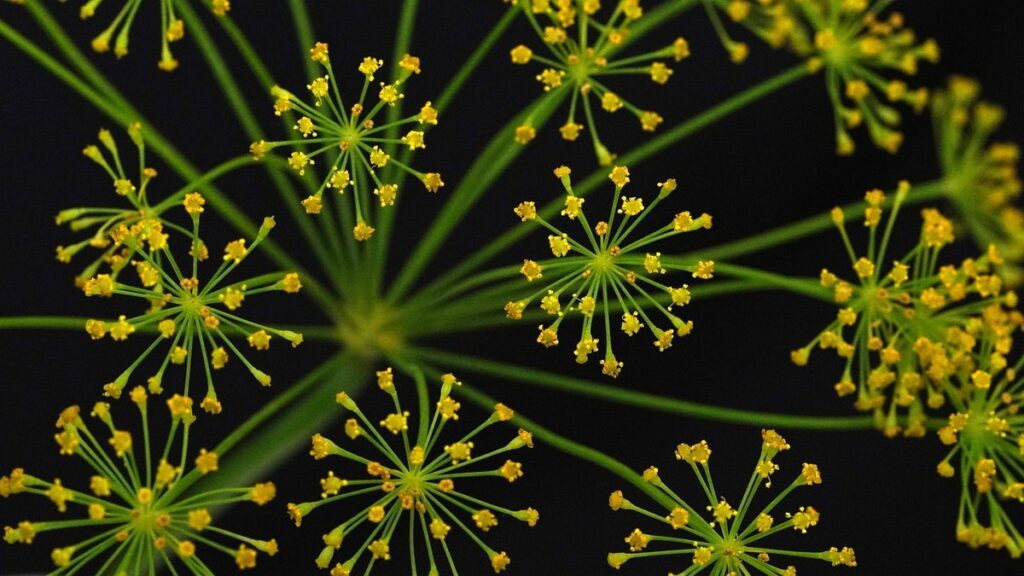
Another benefit of trimming dill plants is preventing flowering. Dill plants have a tendency to focus their energy on producing flowers instead of leaves when they reach maturity. By pruning off flower buds regularly, you can direct the plant’s energy towards leaf production, ensuring a continuous supply of fresh leaves for cooking.
Trimming also encourages new leaf production. As dill plants grow, they tend to produce older leaves that turn yellow and wilt. Regular trimming helps to remove these old leaves, making way for new growth and maintaining the plant’s vigor. This process not only keeps your dill plant looking healthy but also promotes its overall well-being.
By incorporating regular trimming into your dill care routine, you can enjoy a bountiful harvest of fresh leaves while keeping your plants thriving and productive.
Identifying the Right Time for Trimming
Dill plants are prone to overgrowth if not trimmed regularly. One of the most noticeable signs is when the stems start to flower. This usually occurs around 70-80 days after sowing and indicates that the plant has reached its natural life cycle.
However, not all dill plants need to be allowed to go through this process. If you want to continue harvesting fresh dill leaves for cooking or use them as a garnish, it’s essential to trim your plant before flowering occurs.
You can determine when a dill plant needs trimming by inspecting its overall health and appearance. Check if the stems are becoming too leggy, which can lead to reduced leaf growth and lower yields.
Some common signs that indicate a dill plant requires trimming include:
* Overcrowding: When multiple stems grow out of control, making it difficult for air and light to reach all parts of the plant.
* Pests: Infestations from aphids, whiteflies, or spider mites can weaken the plant and make it more susceptible to disease.
Regular pruning helps maintain a bushy shape, promotes healthy growth, and encourages new leaf production.
Preparing Your Dilling Tools
Preparing your dilling tools is an essential step before trimming your dill plant. You’ll need a few basic gardening tools to get the job done efficiently. Start by gathering clean and sharp pruning scissors or clippers specifically designed for cutting herbs. These will help you make precise cuts without damaging the stems.
Next, choose a clean and dry workspace where you can lay out your dill plant without contamination. Ensure your hands are also clean before handling the plant to prevent any unwanted transfer of bacteria or pests.
It’s also crucial to prepare your dilling tools by cleaning them with mild soap and water before use. This will help eliminate any dirt, debris, or previous herb residue that may interfere with your trimming task.
As you work on your dill plant, keep your scissors or clippers sharp by occasionally cleaning and sharpening them during the pruning process. Regular maintenance of your gardening tools will not only make trimming easier but also promote healthy growth in your plant.
Trimming Techniques for Different Stages of Growth
As you progress through your dill plant’s growth stages, it’s essential to know when and how to trim for optimal flavor, texture, and fragrance. We’ll walk you through the techniques for each stage.
Trimming Young Dill Plants (0-6 Weeks)
When it comes to trimming young dill plants (0-6 weeks), the goal is to promote strong growth and prevent flowering. At this stage, dill plants are sensitive to pruning, so it’s essential to use gentle techniques.
Use sharp, clean scissors or pinch off individual leaves with your fingers to avoid damaging the stem. Avoid using garden shears or clippers, as they can cause unnecessary stress to the plant.
Remove any weak or spindly growth to encourage a bushy shape and prevent legginess. This will also help direct the plant’s energy towards producing robust foliage rather than flowering.
Cut back the central stem by about one-third to one-half, making clean cuts just above a node (where a leaf meets the stem). This will stimulate the plant to produce new growth and prevent it from becoming too leggy.
By using these techniques, you’ll be able to promote healthy growth in your young dill plants and set them up for success as they mature. Remember to trim them regularly to encourage bushy growth and prevent flowering, which can be done every 1-2 weeks.
Trimming Mature Dill Plants (6+ Weeks)
When your dill plant reaches maturity, typically after six weeks of growth, it will start to develop flowers. This is a natural process, but it can be detrimental to the plant’s productivity if not managed correctly. As you trim your mature dill plants, keep an eye out for signs that they’ve become leggy or are focusing their energy on producing seeds instead of foliage.
At this stage, it’s essential to rejuvenate your plant by trimming back its flower spikes and encouraging new growth. Use a pair of clean scissors to snip off the spent flowers, making sure to leave the base intact. This will redirect the plant’s energy towards producing more leaves and stems.
To control leggy growth, remove any weak or spindly branches from the lower parts of the stem. Cut them back about an inch above a leaf node to encourage branching and prevent the plant from becoming too top-heavy. This simple pruning technique will help promote healthy growth and maintain your dill plant’s productivity throughout its mature phase.
Tools and Equipment Needed for Trimming
To trim a dill plant effectively, you’ll need the right tools and equipment, which we’ll outline below to ensure a smooth trimming process. Gather these essentials before getting started!
Hand Pruning Tools
When it comes to trimming dill plants, having the right hand pruning tools can make all the difference. You’ll want to focus on a few essential items that will help you get the job done efficiently and effectively.
First and foremost, you’ll need a good pair of secateurs (also known as pruning shears). These are ideal for cutting smaller stems and branches, typically up to 1 inch in diameter. Choose a model with sharp blades that can easily cut through woody stalks without crushing or tearing the plant material. For larger stems, loppers come in handy. They’re longer than secateurs and have more force behind them, making it easier to make clean cuts.
Pruning shears are another essential tool for trimming dill plants. These are specifically designed for cutting thicker stems, typically up to 2 inches in diameter. They usually have long handles that allow you to generate more force, making it easier to cut through tougher stalks.
When choosing your hand pruning tools, make sure they’re clean and well-maintained. A dull blade can damage the plant and lead to infection, so keep your tools sharp and store them properly when not in use. Additionally, consider investing in a small pair of scissors for delicate tasks, such as trimming individual leaves or harvesting fresh dill.
Alternative Trimming Methods (e.g., Hedge Clippers)
When working with larger dill plants or those with thick stems, traditional pruning techniques may not be effective. In such cases, alternative trimming methods come into play. One popular option is using hedge clippers, specifically designed for thicker branches and foliage.
Hedge clippers are ideal for dill plants with robust growth, as they allow for a more aggressive cut without causing damage to the plant’s structure. To use hedge clippers effectively, start by removing any dead or damaged leaves from the affected area. This will prevent the spread of disease and promote healthy growth.
Another method is using loppers or pruning saws, particularly useful for thicker stems that are difficult to reach with regular scissors or pruning shears. These tools offer more leverage and control, making it easier to cut through thicker branches without causing damage to the plant’s internal structure.
Remember to always clean your trimming tools between cuts to prevent the spread of disease and maintain a healthy environment for your dill plant. Regular cleaning will also help extend the life of your equipment.
Common Mistakes to Avoid When Trimming Dill
When trimming your dill plant, it’s easy to make mistakes that can harm the plant or reduce its flavor and aroma potential. Be mindful of these common pitfalls when cutting back your dill.
Over-Pruning
Over-pruning dill plants can have severe consequences on their productivity and overall health. When you remove too much of the plant’s foliage, you inadvertently damage the leafy greens that are responsible for photosynthesis. This process is essential for the plant to grow and produce new leaves. By over-pruning, you’re essentially cutting off the plant’s ability to sustain itself.
Not only does this lead to reduced plant productivity, but it also creates an opening for pests and diseases to attack the weakened plant. Furthermore, excessive pruning can stimulate the production of side shoots, which can make the plant appear bushy but ultimately leads to a decrease in its overall health.
To avoid over-pruning, it’s crucial to understand that dill plants have a unique growth pattern. They typically produce new leaves and stems from the base of the plant, rather than from the tips. This means that you should focus on trimming off spent flowers or mature foliage at the base, leaving some leaves intact to continue photosynthesis. By doing so, you’ll maintain a healthy balance between promoting new growth and preventing damage to your dill plant.
Under-Pruning
While over-pruning is a common mistake when trimming dill plants, under-pruning can also have negative effects on plant health and growth patterns. Failing to prune dill regularly can lead to an abundance of weak and leggy stems that may eventually collapse under their own weight.
In addition, under-pruning prevents the plant from directing its energy towards producing new growth and leaves. This results in a less productive harvest and potentially affects the quality of the herbs. For instance, if you’re growing dill for its delicate flowers or seeds, under-pruning can cause them to become sparse and unevenly distributed.
Furthermore, unpruned dill plants are more susceptible to pests and diseases, such as aphids and powdery mildew, which thrive in dense foliage. Pruning the plant regularly encourages air circulation and helps maintain a healthy balance between stems and leaves.
To avoid under-pruning, aim to trim your dill plants every 1-2 weeks during the growing season. This will encourage bushy growth, promote new stem development, and prevent legginess.
Best Practices for Aftercare and Maintenance
To keep your dill plant thriving, it’s essential to follow proper aftercare techniques and regular maintenance routines to prevent overgrowth and ensure continued harvests.
Watering and Fertilization Post-Trimmings
After trimming your dill plant, it’s essential to provide optimal care to encourage healthy growth and prevent disease. When it comes to watering, be cautious not to overwater, as this can lead to root rot. Water your dill plant thoroughly after trimming, allowing the soil to dry slightly between waterings. Aim for about 1-2 inches of water per week, either from rainfall or irrigation.
As for fertilization, dill plants benefit from regular feeding during the growing season. You can use a balanced, water-soluble fertilizer (10-10-10 NPK) at half the recommended strength to avoid burning your plant’s roots. Apply fertilizer once a month, diluting it in water according to the manufacturer’s instructions.
Consider using compost tea or fish emulsion as an alternative to synthetic fertilizers. These natural options promote beneficial microbes and add essential nutrients without harming the environment. By following these watering and fertilization guidelines, you’ll help your dill plant thrive after trimming and maximize its flavor and aroma potential.
Monitoring for Pests and Diseases
Monitoring for Pests and Diseases is crucial to ensure the health and longevity of your dill plant. After trimming your dill plant, it’s essential to keep an eye out for signs of pest infestations or diseases that may arise.
Common pests that target dill plants include aphids, spider mites, and whiteflies. These tiny insects can cause significant damage by sucking sap from the leaves, causing them to wilt and turn yellow. To prevent infestations, inspect your plant regularly, looking for sticky honeydew droplets or actual pests on the leaves.
Diseases such as powdery mildew, downy mildew, and root rot can also affect dill plants after trimming. These diseases often result from overwatering, poor air circulation, or high humidity. To prevent disease, ensure good air circulation around your plant, water it sparingly, and avoid getting water on the leaves to prevent fungal growth.
Some signs of disease include yellowing or browning leaves, black spots, or a white powdery coating on the leaves. If you notice any of these symptoms, treat your plant with fungicides or insecticidal soap according to the product’s instructions.
Frequently Asked Questions
How often should I water my dill plants after trimming?
Yes, it’s essential to maintain consistent moisture levels for your dill plants after trimming. Water them thoroughly once a week, but make sure the soil isn’t waterlogged. Check the top 1-2 inches of soil daily to ensure it’s not too dry or wet.
Can I use hedge clippers on mature dill plants?
Yes, you can use hedge clippers for larger dill plants that have reached maturity (6+ weeks). However, be cautious not to cut too much foliage at once. Start with small sections and gradually work your way around the plant to maintain a balanced shape.
How do I prevent over-pruning my young dill plants?
To avoid over-pruning, inspect your young dill plants (0-6 weeks) regularly for new growth. Prune only what’s necessary to encourage bushy growth, leaving about one-third of the stem intact. This will help maintain a balanced and healthy plant.
Can I trim my dill plants in direct sunlight?
No, it’s best to trim your dill plants during partial shade or early morning when the sun isn’t too intense. Direct sunlight can cause stress on newly trimmed areas, potentially leading to scorching or drying out of the plant.
What if I notice pests or diseases after trimming my dill plants?
If you spot any pests or diseases after trimming your dill plants, take action promptly! Monitor affected areas closely and treat accordingly using organic methods whenever possible. Regularly inspect your plants for signs of infestation or disease to prevent further damage.