Trimming your cedar hedge can be a daunting task, especially if you’re new to gardening. However, with the right tools and techniques, you can achieve a healthy and beautiful hedge that adds value to your property. A well-maintained cedar hedge not only looks stunning but also provides excellent shade and privacy. But where do you start? In this article, we’ll take you through everything you need to know about trimming your cedar hedge like a pro. We’ll cover the essential tools you’ll need, step-by-step techniques for pruning and shaping, and valuable tips to ensure your hedge remains healthy and robust all year round. Whether you’re a seasoned gardener or just starting out, our comprehensive guide will have you trimming like a pro in no time!
Preparing Your Tools and Equipment
Before you start trimming, make sure you have all the necessary tools and equipment within arm’s reach to avoid any interruptions or accidents during the process. This includes a sharp pair of pruning shears or loppers.
Choosing the Right Trimmer
When it comes to trimming cedar hedges, choosing the right trimmer is crucial for getting the job done efficiently and safely. You have two primary options: electric and manual trimmers.
Electric trimmers are a popular choice for their ease of use and speed. They’re perfect for larger hedges or those with thick foliage. Cordless models offer greater flexibility and convenience, but be mindful of battery life and charging times. Some popular features to consider include adjustable handles, variable speed settings, and rotating cutting heads.
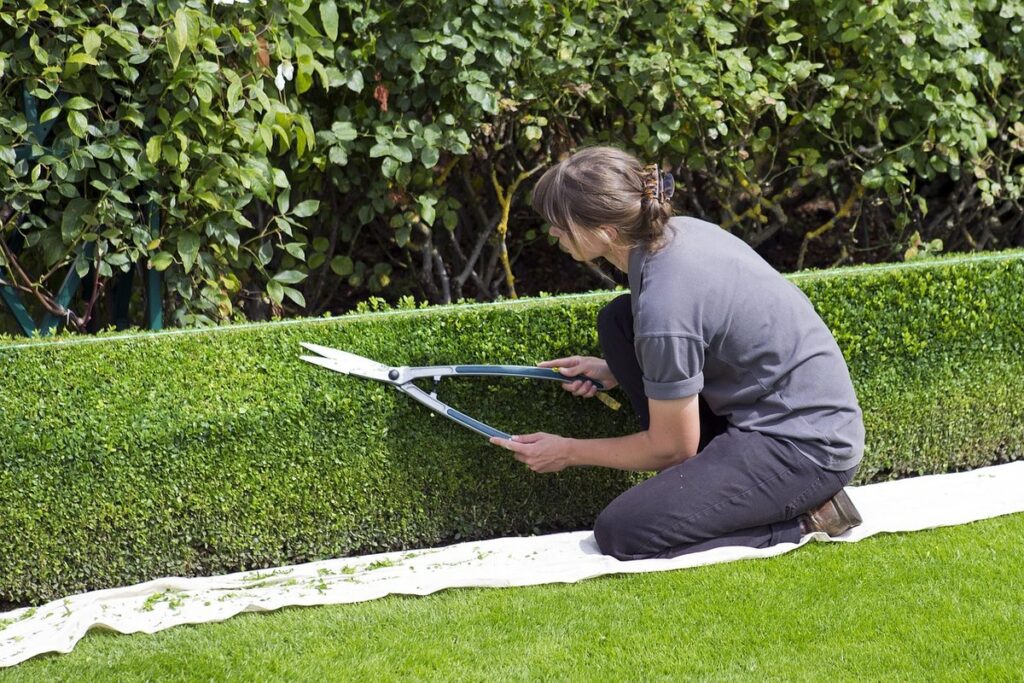
On the other hand, manual trimmers are ideal for smaller hedges, delicate plant growth, or precision work. They’re often more affordable and require minimal maintenance. Pruning shears, loppers, and hedge clippers are all great options. When selecting a manual trimmer, look for durable materials, ergonomic design, and high-quality blades.
Consider your specific needs and preferences when deciding between electric and manual trimmers. If you prioritize speed and ease of use, electric might be the way to go. However, if you value precision and control, manual is often the better choice.
Sharpening and Maintaining Your Trimmer Blades
Keeping your trimmer blades sharp is crucial when working with cedar hedge. Dull blades can cause more damage to the plant than necessary, leading to a higher risk of disease and pest infestations. Additionally, dull blades require more effort to cut through branches, increasing fatigue and reducing efficiency.
To maintain sharp trimmer blades:
* Regularly clean your trimmers after use to prevent debris from accumulating on the blades.
* Store your trimmers in a dry place when not in use to prevent rust or corrosion.
* Inspect your blades regularly for signs of wear or damage. Replace them if necessary.
* Use a blade sharpener specifically designed for outdoor power equipment. Follow the manufacturer’s instructions for correct usage.
Sharpening your blades every 5-7 uses can significantly improve cutting performance and reduce maintenance costs. A dull blade may require up to twice as much effort to cut through, which can lead to more frequent replacements. Regular sharpening is a simple yet effective way to maintain your trimmers and achieve professional results when trimming cedar hedge.
Step-by-Step Instructions for Trimming a Cedar Hedge
Now that you’ve learned the basics of pruning and preparing your cedar hedge, it’s time to get hands-on with these step-by-step instructions. Follow along carefully to achieve a perfectly trimmed hedge every time.
Preparing the Hedge for Trimming
Before you can start trimming your cedar hedge, it’s essential to prepare the area around it. Clearing away any debris or obstructions will not only make the trimming process easier but also help prevent accidents.
Begin by removing any branches or leaves that have fallen onto the lawn and are close to the hedge. Use a rake or a leaf blower to collect these, and dispose of them in a compost bin or yard waste bag. Next, inspect the area around the hedge for any obstructions such as garden furniture, toys, or other items that could get in the way of your trimming tools.
Make sure to clear an area at least 2-3 feet wide around the entire length of the hedge to give you enough space to maneuver. If there are any stubborn weeds or roots, consider using a weeding fork or a gardening knife to carefully remove them. With the area cleared and free from obstructions, your cedar hedge is now ready for trimming.
Trimming Techniques for Different Shapes and Sizes of Hedges
When trimming a cedar hedge, one size doesn’t fit all. Cedar hedges come in various shapes and sizes, from straight edges to curved lines, and irregular shapes that require extra care. To trim these different types of hedges effectively, you’ll need to tailor your technique.
For straight-edged hedges, use a pair of long-handled pruning shears or loppers to maintain the clean line. Cut just above a growth node, about one-third of the way through the stem, to encourage new growth and prevent the hedge from becoming leggy. For curved lines, you can use a combination of shearing and trimming techniques. Use a hedging shear to shape the curve, then follow up with a pair of pruning shears to tidy up any stray branches.
Irregular shapes require patience and attention to detail. Start by removing any dead or damaged branches, then work on shaping the hedge to create a more balanced look. Don’t be afraid to use your imagination – sometimes, an irregular shape can become a unique feature of your garden’s design.
Safety Considerations When Working with Power Tools
When working with power tools near water or in areas with high foot traffic, safety should be your top priority. Before you start trimming that cedar hedge, make sure you’re aware of the potential hazards involved.
Using a trimmer near water can be particularly hazardous, as electricity and water don’t mix well. If you must work near a body of water, ensure that your equipment is at least 10 feet away from any standing water to prevent electrical shock. This may require using an extension cord or relocating the area where you’ll be working.
In areas with high foot traffic, such as public spaces or family homes with young children and pets, it’s essential to take extra precautions. Use a trimmer with a guard or shield to contain any flying debris, and wear protective eyewear to prevent accidental injury from stray branches. Always keep your work area clear of obstacles and tripping hazards to avoid accidents while working near water or high-traffic areas. Regularly inspect your equipment for damage or wear to ensure it continues to function safely.
Tips for Maintaining a Healthy Cedar Hedge
To keep your cedar hedge looking its best, it’s essential to maintain regular trimming and pruning practices, as outlined below. Proper care ensures a lush, healthy appearance.
Watering and Irrigation
When it comes to trimming your cedar hedge, proper watering and irrigation techniques are crucial to prevent damage to your beautiful foliage. Cedar hedges can be quite resilient, but they still require adequate moisture to thrive. In fact, a study by the American Nursery and Landscape Association found that water stress is one of the most common causes of tree death.
To ensure you’re not inadvertently causing harm to your cedar hedge while trimming, make sure to water thoroughly before and after pruning. Aim to provide about 1 inch of water per week, either through rainfall or irrigation. Use a drip irrigation system to deliver water directly to the roots, reducing evaporation and runoff.
Avoid overwatering, which can lead to root rot and other issues. Check the soil moisture by inserting your finger into the soil up to the knuckle; if it feels dry, it’s time for more water. Mulch around the base of your hedge to retain moisture and suppress weeds, further reducing the need for frequent watering. By keeping your cedar hedge well-watered, you’ll be able to trim with confidence, knowing your plant will bounce back quickly from any cuts.
Fertilization and Pruning Schedule
To ensure your cedar hedge remains healthy and visually appealing, it’s essential to establish a fertilization and pruning schedule. Fertilizing your hedge at the right time can provide essential nutrients for growth, while pruning helps maintain shape and promotes new growth.
Fertilize your cedar hedge in early spring, when new growth begins, using a balanced fertilizer (10-10-10 NPK). Avoid over-fertilizing, as this can lead to weak growth and make your hedge more susceptible to pests. For optimal results, also fertilize in late summer or early fall.
Pruning is crucial for maintaining the shape and promoting healthy growth of your cedar hedge. Prune in late winter or early spring, removing any dead, diseased, or damaged branches. Cut back no more than one-third of new growth each year to prevent shocking the plant. Consider pruning every 2-3 years to maintain a neat appearance.
Regular fertilization and pruning will help keep your cedar hedge thriving and looking its best.
Dealing with Common Pests and Diseases
When it comes to maintaining a healthy cedar hedge, identifying and treating common pests and diseases is crucial. These issues can be detrimental to the overall health and appearance of your hedge.
Cedar hedges are susceptible to various pests like aphids, spider mites, and scale insects. These tiny creatures feed on the sap of the cedar trees, causing damage and discoloration. To manage an infestation, start by inspecting your hedge regularly for any signs of pests. If you notice aphids or spider mites, use a strong jet of water to wash them off. For more severe cases, consider using insecticidal soap or neem oil.
Some common diseases affecting cedar hedges include root rot and canker. Root rot occurs when the roots are consistently saturated with water, causing the tree’s base to decay. To prevent this, ensure proper drainage around your hedge and avoid overwatering. Canker is a fungal disease that causes lesions on the bark of the trees. Treat canker by pruning affected branches and applying fungicides.
Regular maintenance and monitoring can help you catch these issues early on, preventing them from becoming major problems.
Troubleshooting Common Trimming Issues
Even experienced gardeners can encounter problems when trimming a cedar hedge, and that’s why we’re going to tackle some of the most common issues you might face. From ragged edges to uneven growth, we’ve got solutions to get your hedge looking its best.
Overgrowth and Branching Issues
When tackling overgrown or misshapen branches in your cedar hedge, it’s essential to address these issues before they become a significant problem. Overgrowth can lead to an uneven shape, reduced sunlight penetration, and increased risk of disease. To tackle this issue, start by identifying the root cause: is it due to inadequate pruning, excessive watering, or underlying structural problems? Once you’ve identified the cause, take a step back to assess the overall structure of your hedge.
Cut back any branches that are growing beyond their intended boundaries or obstructing sunlight penetration. Use clean, sharp pruning shears to make precise cuts just above a growth node, and avoid tearing the bark. If necessary, use loppers or a pruning saw for thicker branches. When dealing with multiple issues, prioritize the most critical areas first – it’s better to tackle one problem at a time to prevent further complications. Consider pruning in sections, working from the bottom up to maintain stability throughout the process.
Cutting or Damaging the Wrong Branches
Cutting into the wrong branch can be disastrous when trimming a cedar hedge. To avoid this common mistake, inspect the hedge before you start pruning. Look for signs of new growth and identify the direction you want the hedge to grow. This will help you determine which branches to remove.
When cutting, always trim in small increments, working from the outside inwards. Start with the longer branches and gradually move towards the smaller ones. Use a pruning technique called “tip-cutting” where you cut just above a growth node (the point where two leaves meet). This will promote healthy new growth and prevent the branch from becoming too leggy.
However, if you do accidentally cut into the wrong branch or remove too much foliage, don’t panic! Simply re-grow the hedge by allowing it to put out new shoots. Be patient, as this process can take time. Also, be sure to trim any dead or damaged branches as soon as possible to prevent disease and pests from taking hold. Regular maintenance will help your cedar hedge stay healthy and look its best.
Best Practices for Trimming Cedar Hedges Near Water
When working with cedar hedges near water, there are several best practices to keep in mind to avoid any damage or safety hazards. Let’s take a closer look at these essential guidelines.
Special Considerations for Wetland Areas
When trimming cedar hedges near wetland areas, it’s essential to take extra precautions to prevent damage to both the environment and your property. Wetlands play a vital role in filtering stormwater runoff, preventing erosion, and supporting local wildlife. However, when heavy rainfall occurs, excess water can accumulate, making these areas particularly susceptible to flooding.
To mitigate potential risks, consider the following: always inspect the area for any signs of standing water or saturated soil before starting your trimming project. If you notice excessive moisture, delay your project until conditions improve. When working in wetland areas, use a pruning saw or loppers instead of power equipment to minimize erosion and prevent mud from being stirred up into nearby waterways.
Additionally, be mindful of stormwater runoff by creating a buffer zone between the trimmed area and nearby water bodies. This can be achieved by planting native vegetation or installing a rain garden that captures excess water before it reaches nearby wetlands. By taking these precautions, you’ll not only protect your property but also help preserve the delicate ecosystem of your local wetland areas.
Ensuring Proper Drainage and Erosion Control
When trimming cedar hedges near water sources, it’s essential to prioritize proper drainage and erosion control measures to prevent damage to the surrounding environment. To achieve this, start by identifying areas where water tends to accumulate after heavy rainfall or irrigation. Check for low-lying spots, uneven terrain, or saturated soil conditions that could lead to erosion.
Install a French drain system if necessary, which involves digging a shallow trench and laying a perforated pipe to direct excess water away from the hedge area. This will not only prevent erosion but also reduce the risk of root rot due to waterlogged soil.
Additionally, trim the hedge in a way that allows for good air circulation, promoting healthy growth while minimizing moisture retention. Use mulch or other groundcovers to maintain soil stability and prevent wash-away during heavy rainfall events. Regularly inspect the site after trimming to ensure no signs of erosion or drainage issues have arisen. By taking these preventative measures, you can enjoy your cedar hedge’s beauty while protecting the surrounding ecosystem.
Frequently Asked Questions
Can I trim my cedar hedge during any time of the year?
No, it’s best to trim your cedar hedge during its dormant season (usually winter or early spring) to minimize stress on the plant and promote healthy growth.
How often should I water my cedar hedge after trimming?
Watering is crucial in the first few weeks after trimming. Keep the soil consistently moist but not waterlogged, especially during hot weather. Aim for about 1 inch of water per week, either from rainfall or irrigation.
What if I accidentally cut a dead branch that’s diseased? Should I leave it?
Yes, leaving dead branches intact can help prevent the spread of disease and encourage new growth in surrounding areas. Remove only healthy branches to minimize damage to your cedar hedge.
Can I trim my cedar hedge with regular pruning shears or loppers for small sections?
Yes, but be mindful that these tools may not provide enough power or leverage for thicker branches. Invest in high-quality trimming equipment specifically designed for heavy-duty use on larger hedges.
How do I prevent overgrowth and branching issues after trimming?
Regularly inspect your cedar hedge for any signs of stress, pests, or diseases, and address them promptly. Maintain a consistent pruning schedule to promote even growth and encourage new branches in the desired directions.