If you’re like many gardeners, you probably want to enjoy your beautiful mum plants every year without having to replant them from scratch. To make that happen, you need to learn how to plant mums correctly and prepare them for dormancy. By doing so, you can ensure that your lovely flowers come back healthy and strong the following season. But what’s the secret to successfully overwintering mum plants? It all starts with proper care during the blooming period, followed by a well-planned approach to dormancy. In this comprehensive guide, we’ll walk you through the essential steps of caring for mums, from planting to preparing them for next year’s bloom. By the end of this article, you’ll be equipped with the knowledge to enjoy your gorgeous mum plants every autumn and spring for years to come.
Understanding Mum Care and Dormancy
To ensure those beautiful mums come back next year, it’s essential you understand their care requirements during dormancy. Properly caring for them during this period is crucial for successful regrowth.
Choosing the Right Variety
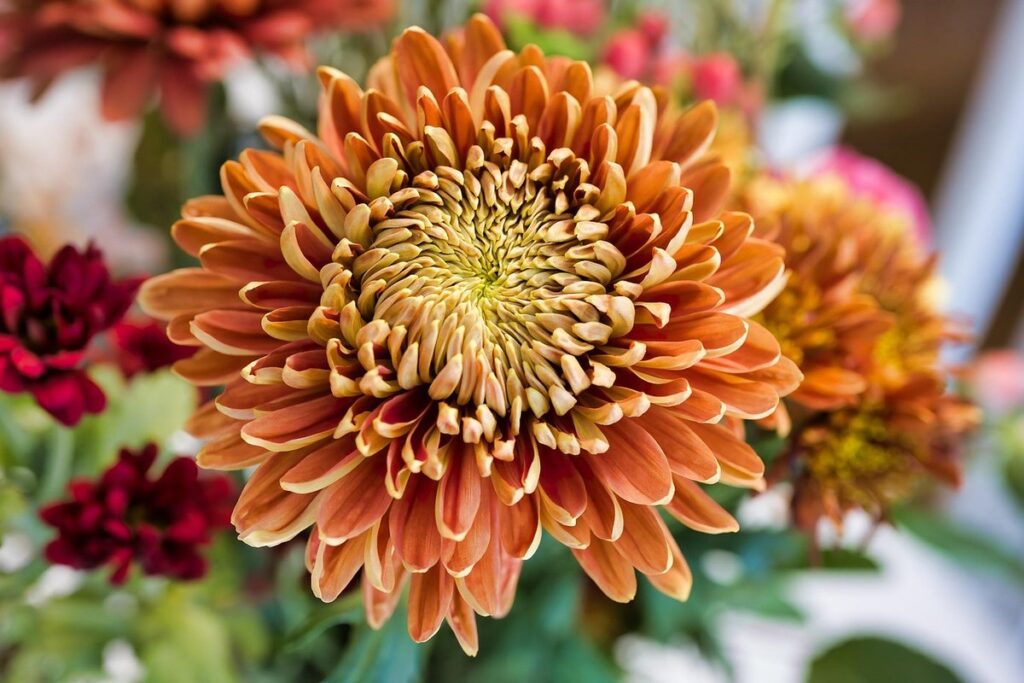
When it comes to choosing the right mum variety for your garden, understanding the differences between hardy, annual, and perennial mums is crucial. Let’s break down each type:
Hardy Mums: These varieties are ideal for cold climates and can survive harsh winters. They typically bloom in late summer or early fall and come back year after year without needing to be replanted. If you live in an area with freezing temperatures, hardy mums are a great choice.
Annual Mums: As the name suggests, these mums complete their life cycle within a year. They’re perfect for warmer climates where winters are mild or for gardeners who want to change up their mum display each season. Annuals require replanting every spring and typically bloom in late summer or early fall.
Perennial Mums: These varieties come back year after year but may need some care during dormancy periods. Perennials often require division every 3-4 years to maintain their health and vigor. If you want a mum that will return year after year with minimal maintenance, perennials are a good option.
Preparing Mums for Winter
Winter dormancy is an essential period for mums to rejuvenate and prepare themselves for the next growing season. As we’ve discussed earlier, mums need a break from the harsh conditions of winter to store energy and recover from the stresses of blooming. To prepare your mum plants for this critical phase, it’s crucial to take care of them during the cold months.
Cutting back is the first step in preparing your mums for winter. After the foliage has died off and the plant has stopped producing new growth, use pruning shears or loppers to cut the stems back to about 3-4 inches from the ground. This helps conserve energy and reduces the risk of disease. Next, apply a layer of organic mulch around the base of the plant to retain moisture, suppress weeds, and regulate soil temperature.
Protecting your mums from frost is also vital during winter. If you live in an area with frequent frosts, bring potted mums indoors or move them to a protected location away from wind exposure. For garden-grown mums, apply a layer of straw or burlap to insulate the soil and prevent damage from freezing temperatures.
By taking these simple steps, you’ll be giving your mum plants the best chance to thrive come springtime.
When to Plant Mums for Next Year’s Bloom
To ensure your mums come back year after year, timing is crucial when planting them for next year’s bloom. Learn how to plant at the right moment for optimal results.
Timing for Different Regions
When planting mums for next year’s bloom, timing is crucial and varies depending on your location within the country. The USDA has designated 11 zones, each with distinct climate conditions that impact when to plant. To ensure your mums come back healthy and strong, it’s essential to consider these regional factors.
In Zone 3-5, where winters are harsh and frosts common, wait until late spring or early summer (around June) to plant mums. This allows the soil to warm up, making it ideal for new growth. In contrast, zones 6-8 experience a more moderate climate. Here, you can plant in late spring to early summer (May-June), giving your mums enough time to establish before the first frost.
In warmer climates like Zone 9-11, where winters are mild and frosts rare, you can plant mums almost year-round, except during the hottest summer months (July-August). For zones with unpredictable weather or a shorter growing season, consider planting mums in containers that can be moved indoors when necessary.
Overwintering Techniques
When it comes to overwintering mums, there are several techniques you can use to ensure they come back next year. One popular method is containerizing, which involves digging up the mum’s root system and replanting it in a container that can be brought indoors or placed in a protected area outside.
This technique is ideal for small spaces or areas with harsh winters, as it allows you to control the environment around your mums. However, it requires more effort and attention than other methods, as you’ll need to ensure the soil remains moist but not waterlogged during the winter months.
Another option is to bring your mums indoors, either in a sunny windowsill or under grow lights. This method provides protection from harsh weather conditions and allows for control over temperature and humidity levels. However, it can be challenging to provide enough light for optimal growth, especially if you live in an area with limited natural light.
Using a cold frame or greenhouse is also a viable option, as it provides protection from extreme temperatures and moisture fluctuations. These structures allow you to create a microclimate that’s perfect for mums, but they can be expensive and require significant maintenance.
Planting Mums in the Spring
When planting mums in the spring, timing is crucial to ensure they thrive and come back next year. Here’s how to get it right.
Soil Preparation
Before planting mums, it’s essential to prepare the soil to give them the best chance of coming back next year. One crucial step is to test the pH levels of your soil. Mums prefer well-draining soil with a slightly acidic to neutral pH (around 6.0-7.0). You can purchase a DIY soil testing kit or send a sample to a lab for analysis.
If your soil’s pH is too high, you’ll need to add organic matter to lower it. Mix in compost or well-rotted manure to improve the soil‘s structure and fertility. On the other hand, if your soil’s pH is too low, you can add lime to raise it. Remove any debris, weeds, or rocks from the planting area to prevent competition for water and nutrients.
Aim to till the soil to a depth of 8-10 inches to loosen and aerate it. This will help mums establish a strong root system, which is essential for their survival over winter. If your soil is heavy clay or sandy, you may need to mix in some organic matter to improve its water-holding capacity.
Planting Techniques
When planting mums for them to come back next year, it’s essential to get the technique right. Start by choosing a spot with well-draining soil and plenty of sunlight – at least six hours of direct sun per day is ideal.
Plant the mum 12-18 inches apart, depending on their mature size. This will give them room to spread out and allow for proper air circulation, which is crucial in preventing disease.
Dig a hole that’s about twice as wide and just as deep as the root ball. Gently remove the mum from its container and place it in the hole. Make sure the crown (where the stem meets the roots) is level with the soil surface. Backfill with soil, tamping it down gently as you go to prevent air pockets.
Water thoroughly after planting, but avoid overwatering, which can lead to root rot. To encourage healthy growth and propagation, consider dividing your mums every 2-3 years or sharing them with friends – a process known as “mum propagation.”
Caring for Mums During the Growing Season
To ensure your mums thrive and come back strong next year, proper care during the growing season is essential to promote healthy root development and robust blooms. Regular watering and fertilization are key.
Watering and Fertilization
As mums continue to grow and thrive during their active season, it’s essential to provide them with adequate watering and fertilization. This will encourage healthy foliage, vibrant blooms, and ultimately, a robust plant that’s ready for dormancy.
When it comes to watering, check the soil moisture daily by sticking your finger into the soil up to the first knuckle. If the soil feels dry, it’s time to water. However, overwatering is just as detrimental as underwatering, so avoid soaking the soil excessively. Water deeply once or twice a week, depending on weather conditions.
Regarding fertilization, you can opt for either organic or synthetic products. Organic options like compost tea or fish emulsion promote balanced nutrient uptake without harming beneficial microorganisms in the soil. Synthetic fertilizers, such as 5-10-10 NPK, provide a quick dose of nitrogen, phosphorus, and potassium but may require repeated applications to maintain effectiveness.
For optimal growth, feed your mums with a balanced fertilizer once a month during their growing season. This will encourage leafy growth, promote blooming, and enhance overall plant health.
Pruning and Deadheading
Regular pruning and deadheading are crucial tasks to maintain your mum’s health and encourage blooming throughout the growing season. Pruning involves cutting back stems after they’ve finished blooming, which helps control the plant’s size and encourages new growth. This process also promotes bushy growth, making your mum look fuller and more vibrant.
When it comes to deadheading, remove spent flowers as soon as possible to encourage your mum to produce more blooms. Deadheading not only keeps your mum looking tidy but also directs energy towards producing new flowers rather than seed production. By removing the faded flowers, you’re essentially telling your mum to keep producing new growth and blooms.
To prune and deadhead effectively, start by cutting back stems to about one-third of their original length after they’ve finished blooming. Remove any weak or damaged growth to maintain the plant’s overall health. Regularly inspect your mum for spent flowers and remove them as soon as possible to encourage continuous blooming.
Common Challenges and Solutions
As you embark on creating a mum garden that comes back year after year, you may encounter some common challenges that can be easily addressed. Let’s tackle these issues together.
Pests and Diseases
When it comes to growing mums, one of the most common challenges you’ll face is dealing with pests and diseases. These can be devastating to your plants, but don’t worry – we’ve got some practical advice on how to prevent, treat, and manage them.
Aphids and whiteflies are two common pests that love to feed on mum foliage and flowers. To keep these pesky insects at bay, make sure to inspect your plants regularly for signs of infestation. If you do find any, use a gentle insecticidal soap or neem oil to control the population.
Powdery mildew and root rot are two common diseases that can affect mums. Powdery mildew is caused by excess moisture and high humidity, while root rot is often due to overwatering. To prevent these issues, make sure your plants have good air circulation and avoid watering them when the top inch of soil feels dry.
If you do encounter either of these diseases, there are some treatments you can try. For powdery mildew, use a fungicide specifically designed for this type of disease. For root rot, gently remove any affected roots and repot the mum in fresh, well-draining soil.
Environmental Factors
When planting mums for next year’s return, it’s essential to consider the environmental factors that can impact their growth. Extreme temperatures, wind, and shade are common challenges many gardeners face when nurturing these beautiful flowers.
Temperatures, both hot and cold, can be detrimental to mum growth. In areas with frost, wait until spring to plant mums outside. If you’re in a warmer climate, ensure your mums receive some afternoon shade during the hottest months to prevent scorched petals. Similarly, if you live in an area prone to wind, consider providing support for your mum plants using stakes or a trellis to keep them upright and reduce damage.
Shade can also hinder mum growth. If planting in a shaded area, choose varieties that are more tolerant of shade, such as ‘Kanaria’ or ‘Snowtopia’. In addition to selecting the right variety, prune your mums regularly to maintain their shape and promote healthy growth. By taking these simple steps, you’ll be well on your way to enjoying blooming mums year after year.
Conclusion: Tips for a Successful Mum Comeback
Now that you’ve successfully planted your mums, it’s time to think ahead to next year’s bloom. With these final tips, you’ll be well on your way to a thriving mum garden.
Recap of Key Takeaways
To ensure that you successfully plant mums to come back next year, let’s recap the essential points covered in this article. First and foremost, it’s crucial to choose a variety of mum that is known for its ability to come back year after year. This typically involves selecting varieties with hardy stems and robust root systems.
When preparing the soil, remember to dig deeply to loosen compacted soil and add organic matter to improve drainage and fertility. Planting at the right time is also critical – in most regions, this occurs in late spring or early summer, when the danger of frost has passed.
In addition to selecting the right variety and preparing the soil, proper planting techniques are essential for a successful comeback. This includes digging a hole that’s about twice as wide and just as deep as the root ball, gently removing the mum from its container, and placing it in the hole with the crown at soil level.
By following these key takeaways, you’ll be well on your way to successfully planting mums that will come back next year.
Additional Resources and Next Steps
Now that you’ve successfully planted mums for a comeback next year, it’s time to take your mum-growing skills to the next level. If you’re eager to learn more about these beautiful flowers and want to stay updated on the latest tips and techniques, here are some additional resources to explore.
For those who enjoy reading books, “The New Seed Starter’s Handbook” by Nancy Bubel is an excellent resource for learning about seed starting and propagation. Online courses like “Gardening 101” on Udemy offer a comprehensive introduction to gardening basics, including mum care.
Joining online communities like GardenWeb or Reddit’s r/Gardening can connect you with fellow gardeners who share their expertise and experiences. Local nurseries and gardening stores often host workshops and seminars on specific topics, such as pruning and fertilizing mums.
Additionally, don’t forget to bookmark reputable websites like the National Gardening Association or Gardener’s Supply Company for valuable advice and resources. By continuing to learn and explore new techniques, you’ll be well-equipped to tackle any mum-growing challenges that come your way and enjoy a bountiful harvest year after year.
Frequently Asked Questions
Can I Overwinter Mums Outdoors in a Container?
Yes, you can overwinter mums outdoors in containers, but make sure to choose a container that is at least 6-8 inches deep and has good drainage holes. Also, bring the container indoors during extreme weather conditions or when temperatures drop below 40°F (4°C). This will help protect your mum plants from harsh winter conditions.
How Do I Know if My Mums Need Protection During Extreme Weather?
Monitor your mum plants closely during extreme weather conditions such as heavy rainfall, strong winds, or prolonged periods of frost. If you notice any signs of damage or stress, consider providing additional protection using row covers, mulch, or bringing potted mums indoors.
What’s the Best Way to Store Mums During Dormancy?
To store mums during dormancy, cut back the foliage to about 3-4 inches from the base of the plant. Then, dig up the entire plant and trim the roots by about one-third. Place the mum in a breathable container or bag with some dry peat moss to maintain humidity. Store it in a cool, dark place at around 40°F (4°C) until spring.
Can I Divide and Replant Mums Every Year for Fresh Growth?
Yes, you can divide and replant mums every year for fresh growth. However, this approach may not be the most cost-effective or time-efficient method. Hardiness will vary depending on how well you care for your mum plants after division and replanting.
What Are Some Common Mistakes to Avoid When Preparing Mums for Winter?
Some common mistakes to avoid when preparing mums for winter include neglecting to cut back the foliage, failing to trim the roots, or not providing enough protection from extreme weather conditions. These oversights can lead to weakened plants and reduced chances of successful regrowth in the following year.