As the last warm days of summer fade away, it’s time to think about bringing some vibrant color back into your garden. Planting mums in October is a great way to add a pop of color and extend the blooming season well into the fall. But with so many factors to consider – from choosing the right location and soil to selecting healthy mum plants – it can be overwhelming for even the most seasoned gardener. Don’t worry, we’ve got you covered! In this article, we’ll walk you through a step-by-step guide on how to plant mums in October, including expert tips on caring for them after planting. By following our advice, you’ll be enjoying a stunning fall display in no time.
Choosing the Right Location and Soil
When planting mums in October, selecting a suitable location and soil is crucial for their success. You’ll want to choose a spot that receives the right amount of sunlight and has the correct type of soil.
Preparing the Garden Bed for Mum Plants
Before you can plant your mums, it’s essential to prepare the garden bed. This step may seem mundane, but trust us, it makes a huge difference in the long run. To start, select a location that receives at least four hours of direct sunlight a day. Mums love sunlight, so choose an area that gets plenty of warmth and light.
Next, ensure the spot has good drainage. You don’t want your mums sitting in waterlogged soil, as this can lead to root rot. If you have heavy clay or sandy soil, consider raising the bed by adding a layer of organic matter like compost or well-rotted manure.
Now it’s time to loosen the soil. Use a garden fork to dig about 12 inches deep and break up any clods or compacted areas. This will give your mums’ roots plenty of room to grow. Remove any debris, weeds, or obstructions from the bed, making sure it’s smooth and even.
By taking these simple steps, you’ll create an ideal environment for your mums to thrive in, setting them up for a stunning display come fall.
Understanding the Importance of Well-Draining Soil
When it comes to planting mums in October, choosing the right location and soil is crucial for their success. One essential aspect of this decision is understanding the importance of well-draining soil. If you’re planning to plant mums, it’s vital to ensure that your soil can handle excess moisture without waterlogging.
Heavy clay or waterlogged soil can be detrimental to mum plants, as they are susceptible to root rot and other issues. When roots sit in water for too long, they begin to decay, leading to a range of problems including reduced growth, yellowing leaves, and even plant death. To test the drainage capacity of your soil, try the following: dig a small hole about 12 inches deep and fill it with water. If the water drains within an hour or two, your soil is likely fine for mums. However, if the water remains in the hole for more than 24 hours, you may need to take corrective action to improve drainage, such as adding organic matter like compost or perlite to increase aeration and water penetration.
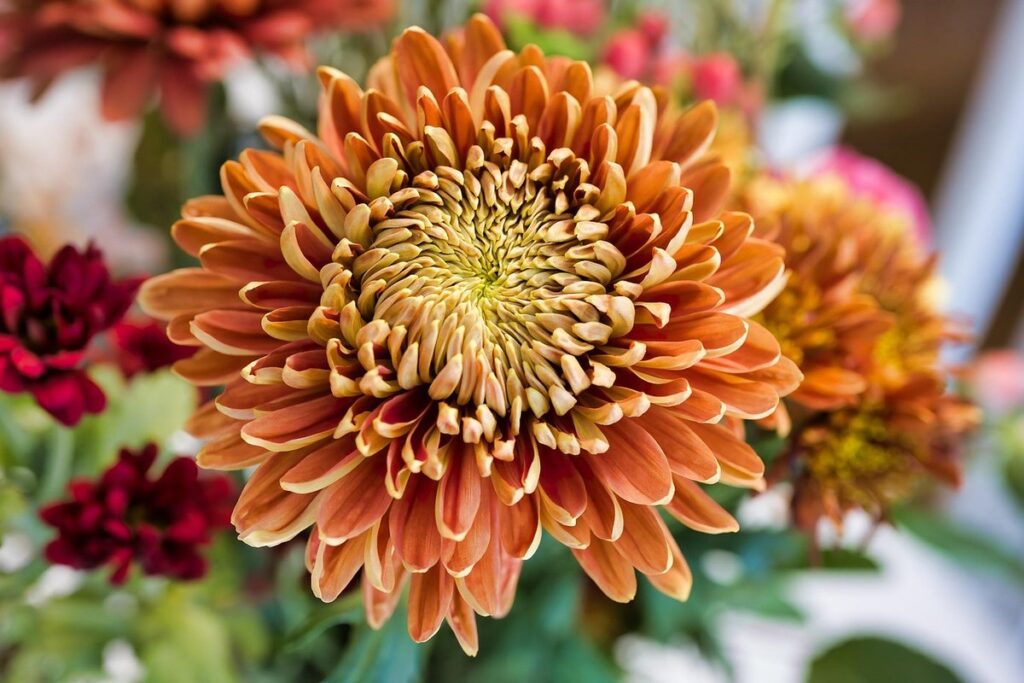
Selecting Healthy Mum Plants
When selecting healthy mum plants for fall planting, look for ones that are robust and free of pests, as these will give you the best chance at a vibrant display. Choose mums with plenty of buds.
Tips for Choosing Good-Quality Mums from a Nursery or Garden Center
When selecting mums from a nursery or garden center, it’s essential to choose plants that are healthy and vibrant. Start by looking for compact growth – mum plants with sturdy stems and dense foliage will provide the best results. Avoid plants with weak or leggy growth, as they may not thrive in your garden.
Check the buds on the plant; look for plenty of them, and ensure they’re firm to the touch. A healthy mum should have an abundance of flowers, so inspect the plant carefully. Also, check for any signs of pests or diseases, such as aphids, whiteflies, or powdery mildew.
If possible, opt for plants that are already flowering – this will give you a better idea of what to expect from your mum plants in terms of color and bloom time. Avoid plants with yellow or wilted leaves, as these can be signs of root bound or nutrient deficiencies.
By selecting high-quality mums with vibrant foliage and plenty of buds, you’ll set yourself up for success when planting them in October. This will ensure a beautiful display of flowers throughout the fall season.
Common Pests and Diseases to Watch Out For When Selecting Mums
When selecting healthy mum plants for planting in October, it’s essential to inspect them carefully for signs of pests and diseases. Two common culprits that can damage mums are aphids and whiteflies. These tiny insects feed on the plant’s sap, causing curled or distorted leaves and stunted growth. Whiteflies, in particular, can spread viral diseases like tomato spotted wilt virus.
Another issue to watch out for is powdery mildew, a fungal disease that appears as a whitish-gray powder on leaves. Inspect your plants regularly by gently shaking them over a white sheet of paper. If you notice tiny insects flying away or falling off the plant, it’s likely infested with aphids or whiteflies.
To prevent pests and diseases from taking hold, choose mum varieties known for their natural resistance to certain problems. For example, some compact mum varieties have built-in resistance to powdery mildew. When planting, make sure to provide good air circulation by spacing mums at least 12-18 inches apart.
Regularly inspect your plants during the growing season and treat any issues promptly with insecticidal soap or neem oil. This proactive approach will help ensure your mum plants remain healthy and thrive throughout the fall season.
Planting Mum Chrysanthemum Cuttings in the Fall
If you’ve collected mum cuttings over the summer, fall is a great time to plant them, and with these tips, you’ll be well on your way to enjoying vibrant blooms. We’ll walk through the process of planting your mums in the fall.
Understanding the Benefits of Planting Mums from Cuttings
Plucking mums from cuttings is an excellent way to go about it, and for good reason. Not only is this method cost-effective, but it’s also remarkably low-maintenance. To begin with, you’ll want to obtain some healthy cuttings from a mature mum plant that’s been thriving all summer long.
The first step in creating your new mums from cuttings is to select a section of the stem with plenty of nodes – these are the small, swollen areas just above a leaf joint where roots will eventually develop. Cut this section at a 45-degree angle using a sharp, clean knife or pruning shears. Remove any lower leaves that will be below soil level, as these can rot and cause problems.
Next, prepare your cuttings for planting by making sure the stem is fresh and not dry out too much – you want it to stay moist but not waterlogged. For optimal results, dip the end of each cutting into a rooting hormone powder or liquid before placing them in their new pots filled with a good quality potting mix.
Tips for Planting Mum Cuttings in Late October or Early November
When planting mum cuttings in late October or early November, it’s essential to choose a suitable location with well-draining soil. Dig holes that are about 12-18 inches deep and wide, making sure the surrounding area is free of debris. Add organic matter like compost to improve soil fertility and structure.
As you prepare the hole, gently loosen the cutting’s roots by soaking them in water for a few hours. This will help prevent shock when transplanting. Once the hole is ready, place a small amount of compost at the bottom, followed by a layer of soil. Gently place the mum cutting into its new home, making sure the crown (where the stem meets the roots) is level with the surrounding soil.
Water thoroughly after planting to settle the soil and provide enough moisture for establishment. Mulch around the base to retain moisture and suppress weeds. With proper care, your mum cuttings should establish quickly and thrive throughout the winter months.
Caring for Mums After Planting: Watering, Fertilizing, and Pruning
Now that your mums are planted, it’s essential to provide them with proper care. This includes regular watering, fertilization, and pruning to keep them thriving throughout the fall season.
Establishing a Regular Watering Schedule for Mum Plants
When it comes to establishing a regular watering schedule for your mum plants, it’s essential to strike the right balance between keeping them hydrated and preventing overwatering. Start by checking the soil moisture daily, especially during the first few weeks after planting. You can do this by gently inserting your finger into the soil up to the knuckle. If the soil feels dry, it’s time for a drink.
To avoid drowning your mums, water them only when the top 1-2 inches of soil feel dry. Water thoroughly until you see water coming out of the drainage holes in the pot. This will ensure that the roots receive enough moisture without leaving excess water on the leaves or crown. Mulching around the base of your mum plants can also help retain moisture, reduce evaporation, and regulate soil temperature.
A 2-3 inch layer of organic mulch such as bark chips, straw, or pine needles is ideal for retaining moisture and suppressing weeds. Be sure to keep the mulch a few inches away from the plant’s crown to prevent rot and other diseases. By following this simple watering schedule and incorporating mulch into your care routine, you’ll be well on your way to enjoying beautiful blooms throughout the fall season.
Fertilizing Mums in the Fall: When, How Much, and What Type of Fertilizer
As we continue to care for our mum plants after planting, fertilizing becomes a crucial step in ensuring their continued health and vibrancy during the fall season. Mums require a nutrient boost to produce an abundance of flowers and maintain their foliage, making autumn the ideal time to fertilize.
When it comes to fertilizing mums in the fall, timing is everything. Apply a balanced fertilizer (such as 10-10-10 NPK) once a month, starting from late September or early October, and continue until the first frost. This will give your mum plants the necessary nutrients to produce an extensive display of flowers.
The amount of fertilizer to apply depends on the type of soil you have. If your soil is heavy clay or sandy, start with half the recommended dosage and adjust as needed. For example, if a bag of fertilizer recommends 1 tablespoon per plant, begin with 1/2 teaspoon for each mum. It’s better to err on the side of caution, as over-fertilization can harm your plants.
As for what type of fertilizer to use, look for one specifically formulated for blooming plants or those containing phosphorus (P), which promotes flower production. Some popular options include slow-release fertilizers, bone meal, and compost tea. Remember to always follow the manufacturer’s instructions and take into account any local regulations regarding fertilizer usage.
Overwintering Mum Plants: Tips for Protecting from Harsh Weather Conditions
Now that you’ve planted your mums, let’s talk about how to protect them from harsh winter weather conditions and keep them thriving until spring. This is where overwintering comes in!
Preparing Mums for Frost and Freezing Temperatures
As the weather starts to cool down and frosts become more frequent, it’s essential to prepare your mum plants for the harsh winter conditions. Mums are sensitive to frost and freezing temperatures, which can cause damage to the leaves, stems, and even kill the plant.
One of the simplest ways to protect your mums from frost is by using mulch. Apply a layer of 2-3 inches of organic mulch such as straw or bark chips around the base of the plants. This will help insulate the soil and keep it warm, reducing the risk of damage from frost. You can also use row covers to cover the plants, which will allow light and water to reach them while keeping frost out.
If you live in an area with extremely cold winters, consider bringing your mums indoors. Choose a bright and sunny spot, but not directly in front of heating vents or fireplaces, as this can cause temperature fluctuations that may harm the plant. Water your mum thoroughly before bringing it inside to prevent drying out during the indoor transition.
Using Anti-Desiccant Sprays to Prevent Winter Damage
As we approach winter, mum plants are vulnerable to desiccation and damage from cold temperatures. To prevent this from happening, many gardeners turn to anti-desiccant sprays as a protective measure. These sprays work by forming a barrier on the leaves that prevents moisture loss, keeping your mum plants hydrated and healthy throughout the cold months.
When to apply these sprays is crucial – it’s best to do so in late fall or early winter, when the threat of frost is imminent. This allows the spray to have maximum effect before the plant goes dormant. Look for a product that contains a blend of waxes, oils, and silicones, as these provide long-lasting protection against desiccation.
When choosing an anti-desiccant spray, be sure to read the label carefully and select a product specifically designed for outdoor use on plants like mum. Some popular options include those containing beeswax or plant-based waxes that are environmentally friendly. Always follow the manufacturer’s instructions for application rates and timing to ensure maximum protection for your overwintering mum plants.
Common Problems with Mums in October: Troubleshooting Tips and Tricks
As you plant your mums, you might encounter some unexpected issues – don’t worry, we’ve got you covered. This section addresses common problems that can arise in October and shares troubleshooting tips to get your blooms back on track.
Identifying Common Issues Like Wilting, Yellowing Leaves, or Pests
When it comes to maintaining your mums in October, you might encounter some common issues that can be caused by various factors. One of the most noticeable problems is wilting leaves. This could be due to overwatering, underwatering, or even root bound conditions. To diagnose this issue, inspect the roots and soil moisture levels carefully.
Another problem you may face is yellowing leaves. This could be a sign of nutrient deficiency, particularly nitrogen, potassium, or magnesium. Ensure that your mums are receiving sufficient nutrients through balanced fertilizers. Pests can also cause significant damage to your plants. Common pests include aphids, whiteflies, and spider mites.
To resolve these issues, start by checking the soil moisture levels regularly. Avoid overwatering, which can lead to root rot and other problems. For yellowing leaves, use a balanced fertilizer to provide essential nutrients. If you suspect pest infestations, isolate your plants and treat them with insecticidal soap or neem oil.
Monitor your plants closely for any signs of stress or disease. Early detection will help prevent further damage and ensure healthy growth. Regularly inspect the soil, leaves, and stems for any abnormalities.
Dealing with Unseasonal Weather Patterns: Strategies for Success in October Planting
Dealing with unseasonal weather patterns can be challenging when planting mums in October. Extreme temperatures, rain, and wind can all impact the health of your plants. When faced with such conditions, it’s essential to adapt your care routine accordingly.
For instance, if a heatwave hits during this period, make sure to provide sufficient water for your mums. However, be cautious not to overwater, as this can lead to root rot and other problems. Mulching around the base of the plants will also help retain moisture in the soil. In cases where the weather is unusually cool or wet, reduce watering to prevent waterlogged soil.
When dealing with strong winds, consider using stakes or other forms of support to keep your mums upright. Additionally, trim any weak or damaged branches to prevent further damage. Regularly check your plants for signs of stress and take prompt action if necessary. By being proactive and flexible in your care routine, you can help your mums thrive despite unseasonable weather patterns.
Conclusion: Tips for a Successful October Mum Planting Experience
As you’ve made it through this step-by-step guide on planting mums in October, you’re likely eager to get started and enjoy your beautiful fall blooms. To ensure a successful experience, remember that timing is everything – wait until the soil has cooled down slightly from the heat of summer. Choose a spot with plenty of sunlight, as mums thrive in full sun, but be mindful not to scorch their delicate petals. Also, don’t forget to water them regularly, but avoid overwatering, which can lead to root rot.
To make the most out of your October mum planting experience, keep an eye on the weather forecast and mulch around the base of the plants to retain moisture and suppress weeds. With proper care and attention, your mums will provide a vibrant splash of color to your garden well into November. By following these simple tips, you’ll be able to enjoy the full beauty and charm of mum plants in October.
Frequently Asked Questions
Can I plant mums in containers instead of directly in the ground?
You can definitely plant mums in containers, which is a great option if you have limited space or poor soil conditions. Make sure to choose a container that’s at least 6-8 inches deep and has good drainage holes. Use a well-draining potting mix and follow the same care instructions as for plants in the ground.
How do I prevent mums from becoming too leggy after planting?
To prevent mums from becoming leggy, make sure to provide them with enough support by staking or tying them up to a trellis. You can also prune them regularly to encourage bushy growth and promote more blooming. This will help maintain their shape and keep them looking their best.
What if I notice my mums are getting too much water? How do I fix it?
If you notice your mums are getting too much water, stop watering them immediately and check the drainage of the soil. You can also consider raising the bed or adding organic matter to improve drainage. If the problem persists, try repotting the mums in a well-draining mix.
How often should I fertilize my mums after planting?
Fertilizing your mums regularly will help promote healthy growth and blooming. Feed them with a balanced fertilizer (10-10-10) once a month during the growing season. You can also use a slow-release fertilizer for convenience.
Can I plant mums in areas with poor soil, or do they require well-draining soil?
While mums prefer well-draining soil, you can still plant them in areas with poor soil by improving drainage and adding organic matter like compost. However, if your soil is consistently waterlogged or has low oxygen levels, consider repotting the mums in a better-draining mix to prevent root rot.