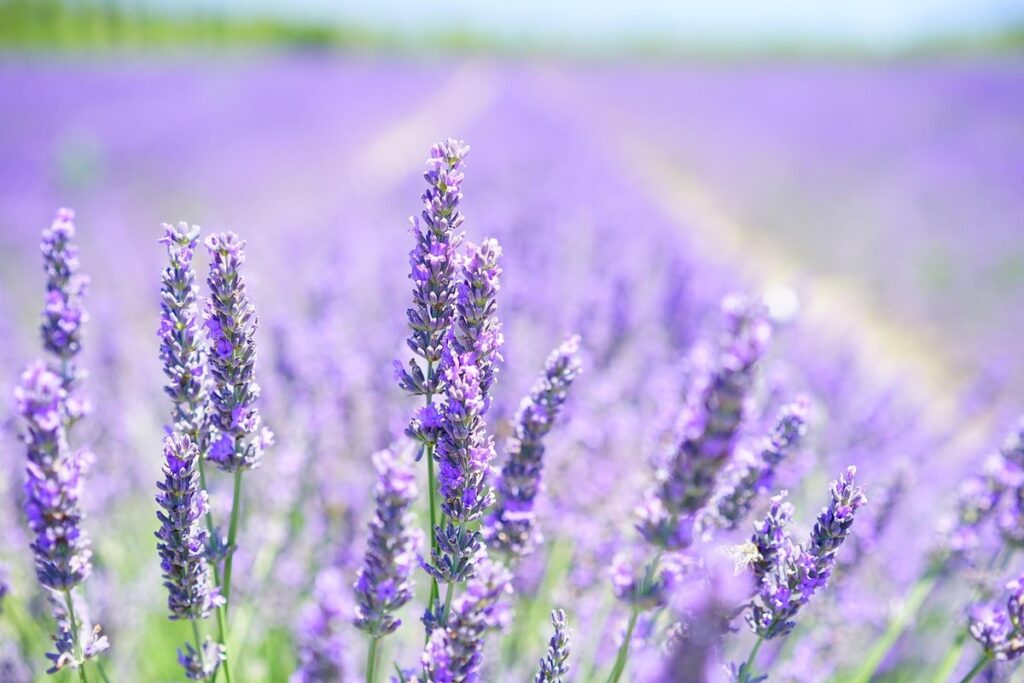
Planting lavender can be a bit daunting for beginners, but with the right guidance, you’ll be growing these beautiful blooms in no time. Not only are they gorgeous additions to any garden, but lavender is also known for its calming effects and versatility in cooking and crafts. To get started, you need to choose the perfect spot – full sun and well-draining soil are essential for healthy growth. But that’s not all; selecting the right variety, preparing your soil, and knowing how to care for it after planting are equally important steps in achieving those gorgeous purple flowers. In this article, we’ll take a closer look at how to plant lavender effectively, covering everything from ideal location and variety selection to ongoing maintenance, so you can enjoy the beauty of these lovely plants all season long.
Choosing the Right Location and Climate
When it comes to planting lavender, selecting a location that suits your plant’s needs is crucial, so let’s dive into choosing the right spot for optimal growth.
Understanding Lavender’s Requirements
To successfully plant lavender, it’s essential to understand its requirements for optimal growth. Lavender thrives in well-drained soil with a pH between 6 and 7. Avoid planting in areas with heavy clay or waterlogged soil, as this can lead to root rot.
When it comes to sunlight, lavender loves full sun but will tolerate partial shade. Aim to provide at least six hours of direct sunlight per day for the best results. Be aware that too little sunlight may cause your lavender plants to become leggy and lose their natural compact shape.
In terms of climate, lavender is a Mediterranean plant native to dry regions with hot summers and cold winters. It prefers temperatures between 65°F (18°C) and 75°F (24°C), making it an ideal choice for gardeners in USDA Hardiness Zones 5-9. When choosing a location, ensure it receives good air circulation to prevent fungal diseases.
By understanding these basic requirements, you’ll be well on your way to creating the perfect environment for your lavender plants to flourish.
Assessing Your Yard for Lavender
Before planting lavender in your yard, it’s essential to assess its conditions to ensure the best possible growth and survival. Start by observing the wind direction in your yard. Lavender loves sunlight, but strong winds can dry out the soil and cause stress on the plants. Ideally, choose a spot that receives morning sun and afternoon shade, or plant lavender in a location with a windbreak like a fence or a row of trees.
Next, evaluate the drainage in your yard. Lavender doesn’t tolerate standing water, so make sure the area drains well and isn’t prone to flooding. Check if the soil slopes towards a drainage pathway or has proper grading to prevent water accumulation. Also, take note of any existing plant growth that might compete with lavender for resources like light, water, and nutrients.
Consider areas in your yard with shallow soil or those with heavy clay or sand content, as these conditions can affect lavender’s root growth. Look for a spot with well-draining, fertile soil with a pH between 6.0 and 7.0, which is ideal for most lavender varieties.
Preparing Your Soil for Lavender
When it comes to planting lavender, one of the most crucial factors is having well-draining soil. Lavender detests standing water and root rot, which can be fatal for these lovely plants. So, how do you know if your soil needs some TLC? Simply dig a small hole and fill it with water. If the water drains quickly, you’re good to go! However, if it takes more than 24 hours to drain, you’ll need to amend your soil.
To improve drainage, you can mix in compost or perlite, which will help break up clay particles and allow excess water to escape. You can also try mixing in some sand or grit, but be cautious not to overdo it, as this can make the soil too dry. A good rule of thumb is to aim for a mix that’s 10-20% organic matter, such as compost or manure.
If you live in an area with heavy clay soils, consider creating raised beds specifically designed for lavender. This will give your plants a chance to thrive and avoid waterlogged conditions.
Selecting the Perfect Lavender Variety
With so many beautiful lavender varieties to choose from, it can be overwhelming to select the perfect one for your garden. Let’s explore the different types of lavender that thrive in various conditions.
Types of Lavender Plants
When it comes to selecting the perfect lavender variety for your garden, understanding the different types of lavender plants is crucial. There are several species of lavender, each with its unique characteristics, growth habits, and uses.
English Lavender (Lavandula angustifolia) is one of the most popular varieties, known for its compact growth and delicate purple flowers. It’s ideal for hedging, borders, and containers. French Lavender (Lavandula stoechas), on the other hand, has a more sprawling habit and produces bright purple flowers with a distinctive “rabbit ear” shape.
Spike Lavender (Lavandula latifolia) is known for its tall spikes of blue-gray flowers and is often used in dried arrangements. Italian Lavender (Lavandula stoechas subsp. pedunculata) has a more compact growth habit and produces bright purple flowers with a sweet fragrance. When selecting a lavender variety, consider factors such as your climate, soil type, and intended use for the plant.
Some lavender varieties are also bred for specific purposes, such as ‘Hidcote’ which is known for its intense blue-purple color and ‘Munstead’ which has large, fragrant flowers. Researching these different types can help you choose a variety that will thrive in your garden and meet your needs.
Factors to Consider When Choosing a Variety
When selecting a lavender variety for your garden, there are several factors to consider. Fragrance is one of the most important considerations, as different varieties have varying levels and types of scent. For example, English Lavender (Lavandula angustifolia) has a light, sweet fragrance, while Spanish Lavender (Lavandula stoechas) has a more robust, pungent aroma.
Hardiness zone is another crucial factor to consider. Check your USDA hardiness zone to ensure the variety you choose can thrive in your climate. For instance, if you live in a cooler region, a variety like ‘Hidcote’ or ‘Munstead’ might be suitable, while warmer regions may require more heat-tolerant varieties like ‘Grosso’ or ‘Phenomenal’.
Size is also an essential consideration. Lavender plants can range from compact shrubs to towering spikes, so make sure you have enough space for the variety you choose. For example, dwarf varieties like ‘Ellagance’ or ‘Mini Blue’ are perfect for small gardens or containers, while larger varieties like ‘Impress Purple’ or ‘Grosso’ are better suited for sprawling borders.
Keep in mind that these factors can impact not only the appearance but also the overall health and growth of your lavender plants. By choosing a variety that suits your climate, fragrance preferences, and space constraints, you’ll be well on your way to creating a stunning and fragrant lavender display in your garden.
Popular Lavender Varieties for Beginners
When it comes to planting lavender for the first time, choosing the right variety can be overwhelming. There are over 40 different species of lavender, each with its own unique characteristics and growing conditions. As a beginner, you’ll want to focus on varieties that are easy to grow and adaptable to your local climate.
Some popular lavender varieties for beginners include English Lavender (Lavandula angustifolia), which thrives in cooler temperatures and well-drained soil. This variety is perfect for gardeners who live in areas with mild winters and moderate summers. Another beginner-friendly option is Sweet Lavender (Lavandula latifolia), which tolerates a range of soils and requires minimal maintenance.
If you’re looking to grow lavender in a hot and dry climate, consider planting French Lavender (Lavandula stoechas). This variety can withstand intense heat and drought conditions, making it an excellent choice for gardeners who live in arid regions. Remember to plant your lavender in well-drained soil and full sun to ensure optimal growth and fragrance. With a little care and attention, you’ll be enjoying the beauty and benefits of these gorgeous plants in no time!
Preparing the Planting Site
Before you start planting, it’s crucial to prepare a site that will provide your lavender with well-draining soil and plenty of sunlight. Choose an area that gets at least six hours of direct sun per day.
Marking Out the Bed or Border
To ensure that your lavender plants receive the right amount of sunlight and air circulation, it’s essential to mark out the planting site correctly. Start by measuring the area where you plan to plant the lavender. A general rule of thumb is to allow about 12-18 inches between each plant. However, this spacing can be adjusted depending on the specific variety of lavender you’re growing.
To calculate the correct spacing for your lavender bed or border, take into account the mature size of the plants and the space needed for air circulation. A good way to do this is by creating a sketch or drawing of your planting site with the lavender plants marked out at their mature size. This will give you an idea of how much space you need to allow between each plant.
Once you have your measurements, use a garden hose or string to mark out the area where you’ll be planting the lavender. If you’re creating a border, you can also use a level and a measuring tape to ensure that your lines are straight and evenly spaced.
Digging the Planting Hole
When digging the planting hole for lavender, it’s essential to consider the optimal depth and width for healthy root growth. A general rule of thumb is to dig a hole about 1-2 times deeper than the plant’s root ball. For lavender, which has a relatively shallow root system, aim for a hole that’s around 8-12 inches deep.
As you dig, make sure to loosen the soil at the bottom of the hole to prevent compacting it and hindering drainage. This is particularly important for lavender, as it prefers well-draining soil to thrive. A good way to test the drainage is by filling a small container with water – if it drains quickly, you’re on the right track.
The width of the hole should be about 1-2 times the diameter of the plant’s root ball. This will give the roots room to spread out and establish themselves without becoming too crowded. Be careful not to over-tighten the soil around the roots, as this can cause damage and affect the plant’s ability to absorb nutrients.
Remember, it’s better to err on the side of caution when digging the hole – you can always add more soil or mulch later if needed.
Adding Organic Matter to the Soil
When it comes to preparing the soil for your lavender plants, adding organic matter is an essential step. This process not only enriches the soil but also helps to improve its structure and fertility. By incorporating compost, manure, or peat moss into the soil, you’ll be creating a nutrient-rich environment that will promote healthy root growth and encourage your lavender plants to thrive.
Compost, in particular, is an excellent choice for adding organic matter to the soil. Made from decomposed plant materials, it’s packed with nutrients that are essential for lavender growth. Simply mix 2-3 inches of compost into the top 6-8 inches of soil before planting. This will not only provide a boost of nitrogen, phosphorus, and potassium but also help to improve the soil’s water-holding capacity.
Manure from herbivores like cows or goats is another excellent option for adding organic matter to the soil. It’s rich in nutrients and can be mixed into the soil at a rate of 1-2 pounds per square foot. Peat moss, on the other hand, helps to improve drainage and retain moisture in the soil. Mix 1-2 inches of peat moss into the top 6-8 inches of soil before planting for optimal results.
Remember, incorporating organic matter into the soil is an ongoing process that requires regular maintenance. Aim to add fresh compost or manure to the soil annually, working it into the top 6-8 inches as you go. This will ensure your lavender plants continue to receive the nutrients they need to thrive throughout their growing season.
Planting Lavender
When planting lavender, it’s essential to choose a location with full sun and well-draining soil to ensure your new plants thrive. This section covers the key steps for successful planting.
Handling and Planting the Roots
When handling lavender roots, it’s essential to be gentle and avoid damaging them. This can be achieved by gently loosening the roots with a fork before planting. Make sure not to pull or tug on the roots, as this can cause significant damage and potentially lead to poor establishment.
To minimize root disturbance, plant the roots at the correct depth. A good rule of thumb is to plant the crown (where the stem meets the roots) just above the soil surface. This will allow for easy growth and prevent water from collecting in the crown, which can lead to rot.
It’s also crucial to ensure that the roots have enough room to spread out. Planting too close together can cause competition for resources like water and nutrients, leading to weak plants. A general guideline is to plant lavender 12-18 inches apart. This will give each plant sufficient space to develop a robust root system.
Watering After Planting
When it comes to watering newly planted lavender, getting the balance just right is crucial for its establishment and long-term health. Overwatering can be detrimental, causing root rot and other issues that’ll weaken the plant’s defenses against pests and diseases.
A good rule of thumb is to water your lavender plants when the top 1-2 inches of soil feels dry to the touch. This usually means watering them once or twice a week during their first growing season, depending on weather conditions. Avoid getting water directly on the leaves or flowers, as this can lead to fungal diseases and other problems.
As your lavender plants establish themselves over time, you’ll notice they become more drought-tolerant and require less frequent watering. Aim to reduce watering frequency once every 7-10 days during the growing season (spring-fall). During periods of extended dryness or high temperatures, however, be prepared to water them a bit more often.
Keep in mind that young lavender plants need consistent moisture to develop deep roots, but older, established plants can tolerate some neglect and still thrive. By paying attention to soil moisture levels and adjusting your watering schedule accordingly, you’ll give your newly planted lavender the best chance at thriving in its new home.
Mulching Around the Plants
Mulching around lavender plants is an essential step in creating a healthy and thriving environment for your blooms. One of the primary benefits of mulching is weed suppression – by covering the soil with a layer of organic material, you prevent weeds from sprouting and competing with your lavender for water and nutrients. This not only saves you time and effort in the long run but also reduces the need for herbicides and other chemical treatments.
Another advantage of mulching around lavender plants is moisture retention. Mulch acts as an insulator, keeping the soil cool in the summer and warm in the winter, which helps to retain moisture and reduce evaporation. This means you’ll need to water your lavender less frequently, making it a low-maintenance option for busy gardeners.
To get started with mulching around your lavender plants, choose a high-quality organic mulch like wood chips or bark that’s free of weed seeds. Apply a 2-3 inch layer around the base of each plant, leaving a small gap around the stem to prevent rot and moisture buildup.
Caring for Newly Planted Lavender
To ensure your newly planted lavender thrives, it’s essential to provide the right care and attention in its first few weeks of growth. This includes regular watering, pruning, and mulching to establish a strong foundation.
Initial Care and Maintenance
When it comes to caring for newly planted lavender, proper initial care sets the stage for a thriving and fragrant plant. Watering is crucial during this period, as the soil needs to be consistently moist but not waterlogged. Check the soil daily, and water only when the top inch of soil feels dry to the touch. Aim for about 1-2 inches of water per week, either from rainfall or irrigation.
Pruning is another essential aspect of lavender care. Cut back any leggy stems by about one-third after planting, and trim off any dead or damaged flowers to encourage healthy growth. This initial pruning helps the plant establish a strong root system and promotes bushy growth. As for fertilizing, it’s best to wait until the first growing season is over, as lavender prefers well-draining soil with minimal fertilizer input.
Remember that lavender is a drought-tolerant plant, so avoid overwatering, which can lead to root rot and other problems. Stick to a regular watering schedule, and your newly planted lavender will be off to a great start.
Long-Term Care Tips
As you enjoy the fragrant blooms and soothing presence of your newly planted lavender, remember that proper ongoing care is crucial to maintain its health and longevity. One of the most important tasks in long-term care is deadheading, which involves removing spent flowers to encourage more blooming. This process not only keeps your plant looking neat but also directs energy towards producing new growth.
Divide your lavender every 3-4 years to prevent overcrowding and promote healthy root development. When dividing, make sure each section has at least one stem with a few buds to ensure the new plant will bloom quickly. To divide, carefully dig up the entire root system, separate the sections, and replant them in well-draining soil.
Pest management is also crucial for long-term lavender care. Regularly inspect your plants for signs of pests like spider mites, mealybugs, or aphids. If you notice any issues, treat them promptly with insecticidal soap or neem oil to prevent damage and maintain the plant’s overall health.
Encouraging Healthy Growth and Blooming
To encourage healthy growth and blooming in your newly planted lavender, it’s essential to provide the right conditions. Lavender loves full sun, so make sure to plant it in a spot that receives at least 6 hours of direct sunlight per day. This will not only promote vigorous growth but also stimulate flowering.
Watering is another critical factor to consider. Lavender prefers well-draining soil and can be susceptible to root rot if the soil is too moist. Water your lavender plants deeply once or twice a week, depending on weather conditions, to encourage deep root development. Avoid getting water on the leaves or crown of the plant to prevent fungal diseases.
Fertilization is also crucial for promoting healthy growth and blooming in lavender. Feed your plants with a balanced, slow-release fertilizer in early spring, following the manufacturer’s instructions. This will provide them with the necessary nutrients for optimal growth and flowering.
Frequently Asked Questions
Can I grow lavender in containers?
You can grow lavender in containers, but ensure the pot has good drainage holes to prevent waterlogged soil. Choose a container that’s at least 6-8 inches deep and has a wide mouth for easy access. Use a well-draining potting mix specifically designed for herbs or succulents.
How often should I water my newly planted lavender?
Water your newly planted lavender regularly during its first growing season, but avoid overwatering. Water every 7-10 days in hot weather and every 4-6 weeks in cooler weather. Check the soil moisture by sticking your finger into the soil up to the knuckle.
Can I propagate my existing lavender plants?
Yes, you can propagate your existing lavender plants through division or cuttings. Divide established clumps of lavender in spring or fall, making sure each section has at least three shoots. For cuttings, take 3-4 inch stem sections and plant them in well-draining soil.
How do I prevent pests from damaging my lavender?
To prevent pests like aphids and whiteflies from damaging your lavender, use neem oil or insecticidal soap to repel them. Regularly inspect your plants for signs of infestation, and remove any affected parts immediately. Keep your garden area clean, removing weeds and debris that can attract pests.
What is the best time to prune my lavender?
The best time to prune your lavender depends on your climate and region. In areas with mild winters, you can prune in late winter or early spring before new growth begins. For cooler regions, wait until after flowering has finished in summer. Prune your lavender regularly to maintain its shape and promote healthy growth.